How to create custom Windows 11 desktop icons
Make custom Windows 11 desktop icons with our easy to follow step by step guide

Creating custom Windows 11 desktop icons is quite straightforward, and changing your shortcuts can make your desktop experience feel more personal.
The good news is it’s fairly easy to create custom desktop shortcuts for not only the best PC games, but for more or less any app or program that uses an executable file.
In the past, I’ve had success creating custom desktop icons through ICO Convert. While there are obviously other sites that will let you create custom ICO files, I’ve found this free one to be the easiest and most reliable to use.
Below, I’ll guide you through how to create custom Windows 11 desktop icons.
How to create custom Windows 11 desktop icons
- Select an image you want to use as your new desktop icon
- Visit ICO Convert, then upload your image
- Crop your image with the click and drag tool
- Select a style for your icon
- Choose a format and size for the icon
- Convert the ICO file, then download it
- Return to your desktop icon and replace it with the new ICO file
Read on to see full illustrated instructions for each step.
1. Select an image you want to use as your new desktop icon

While you could use pre-made custom icons (provided they’ve been labelled for free and fair usage), for this guide I’m using a photo of my dog, as I’d like a very specific image for my new desktop icon. To ensure the image is compatible with ICO Convert, save it as either a PNG, JPG or BMP file.
2. Visit ICO Convert, then upload your image
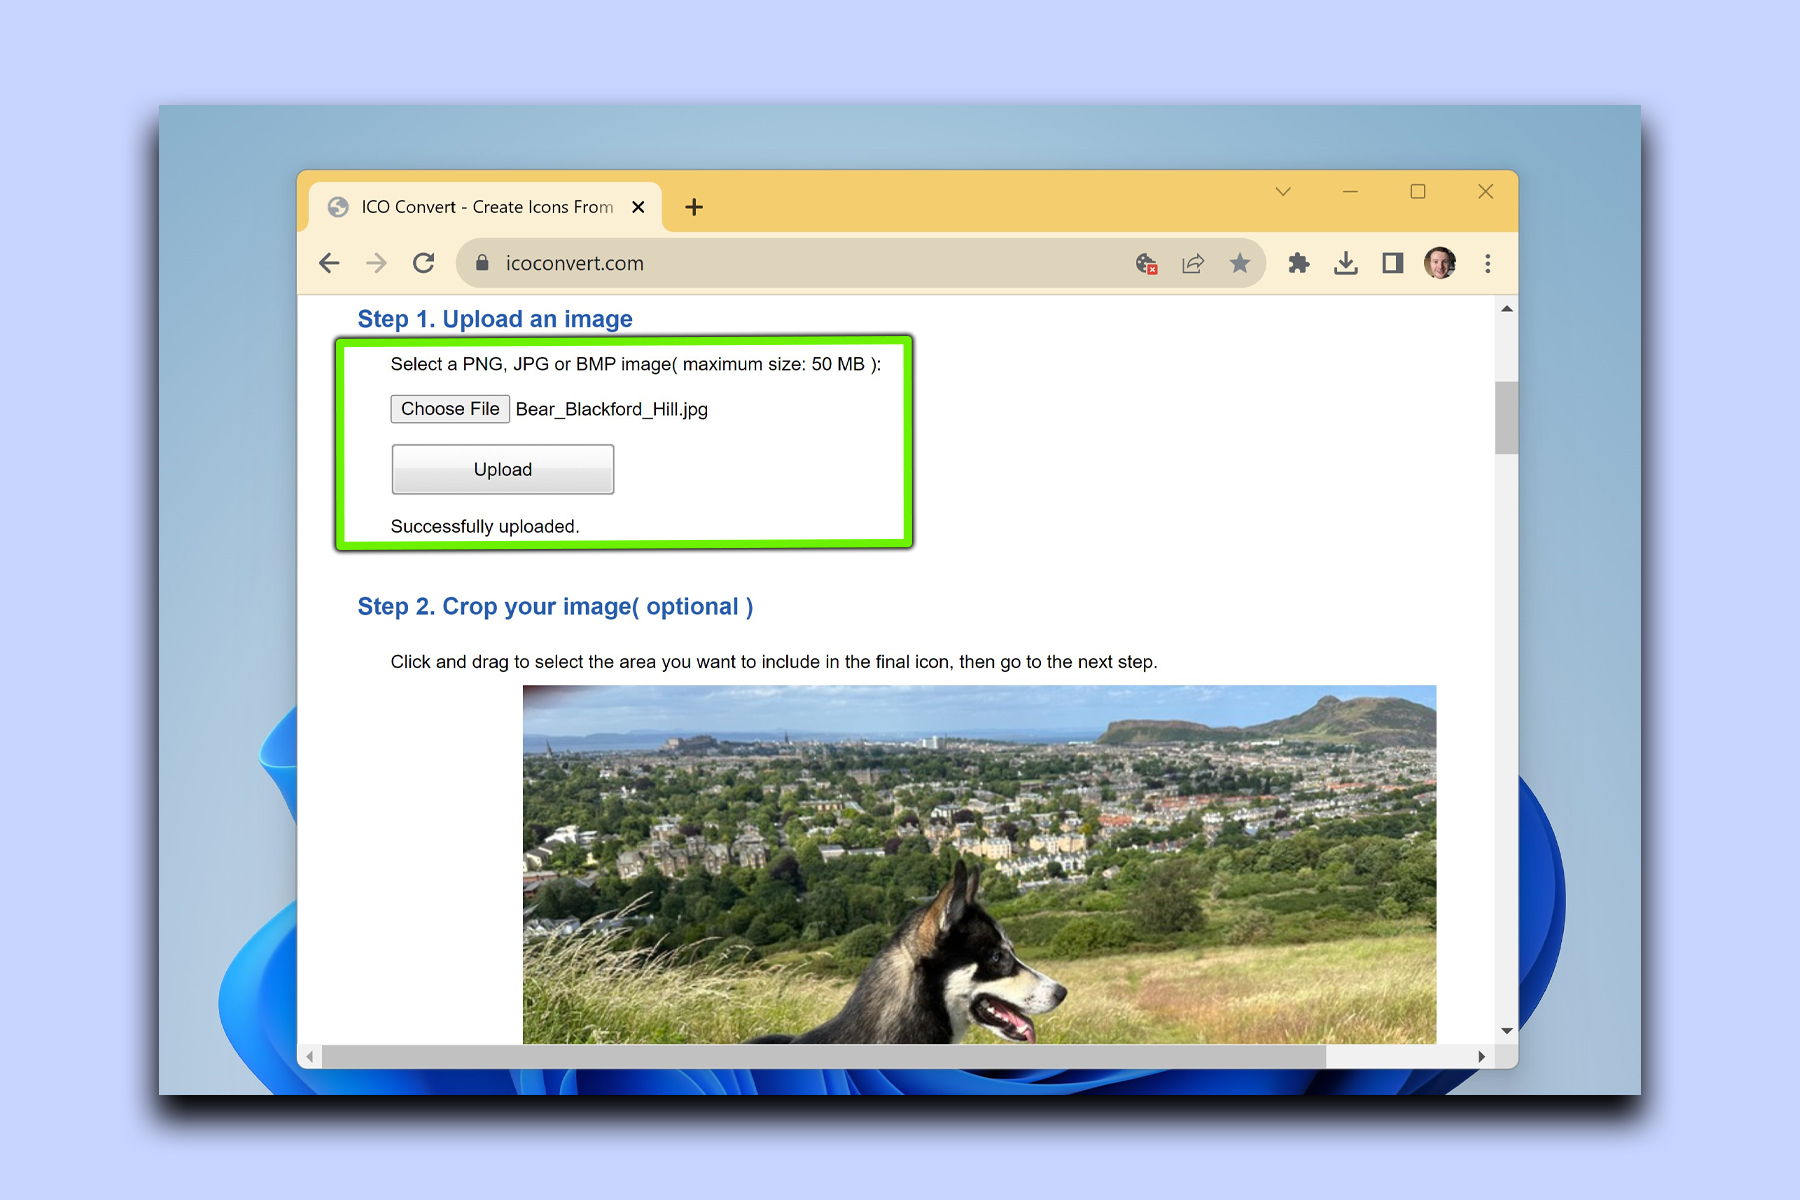
Once you’ve saved your image, head to ICO Convert — this is the site we’re going to use to convert your image into an ICO file. Once there, select Choose File button and upload the image.
3. Crop your image with the click and drag tool
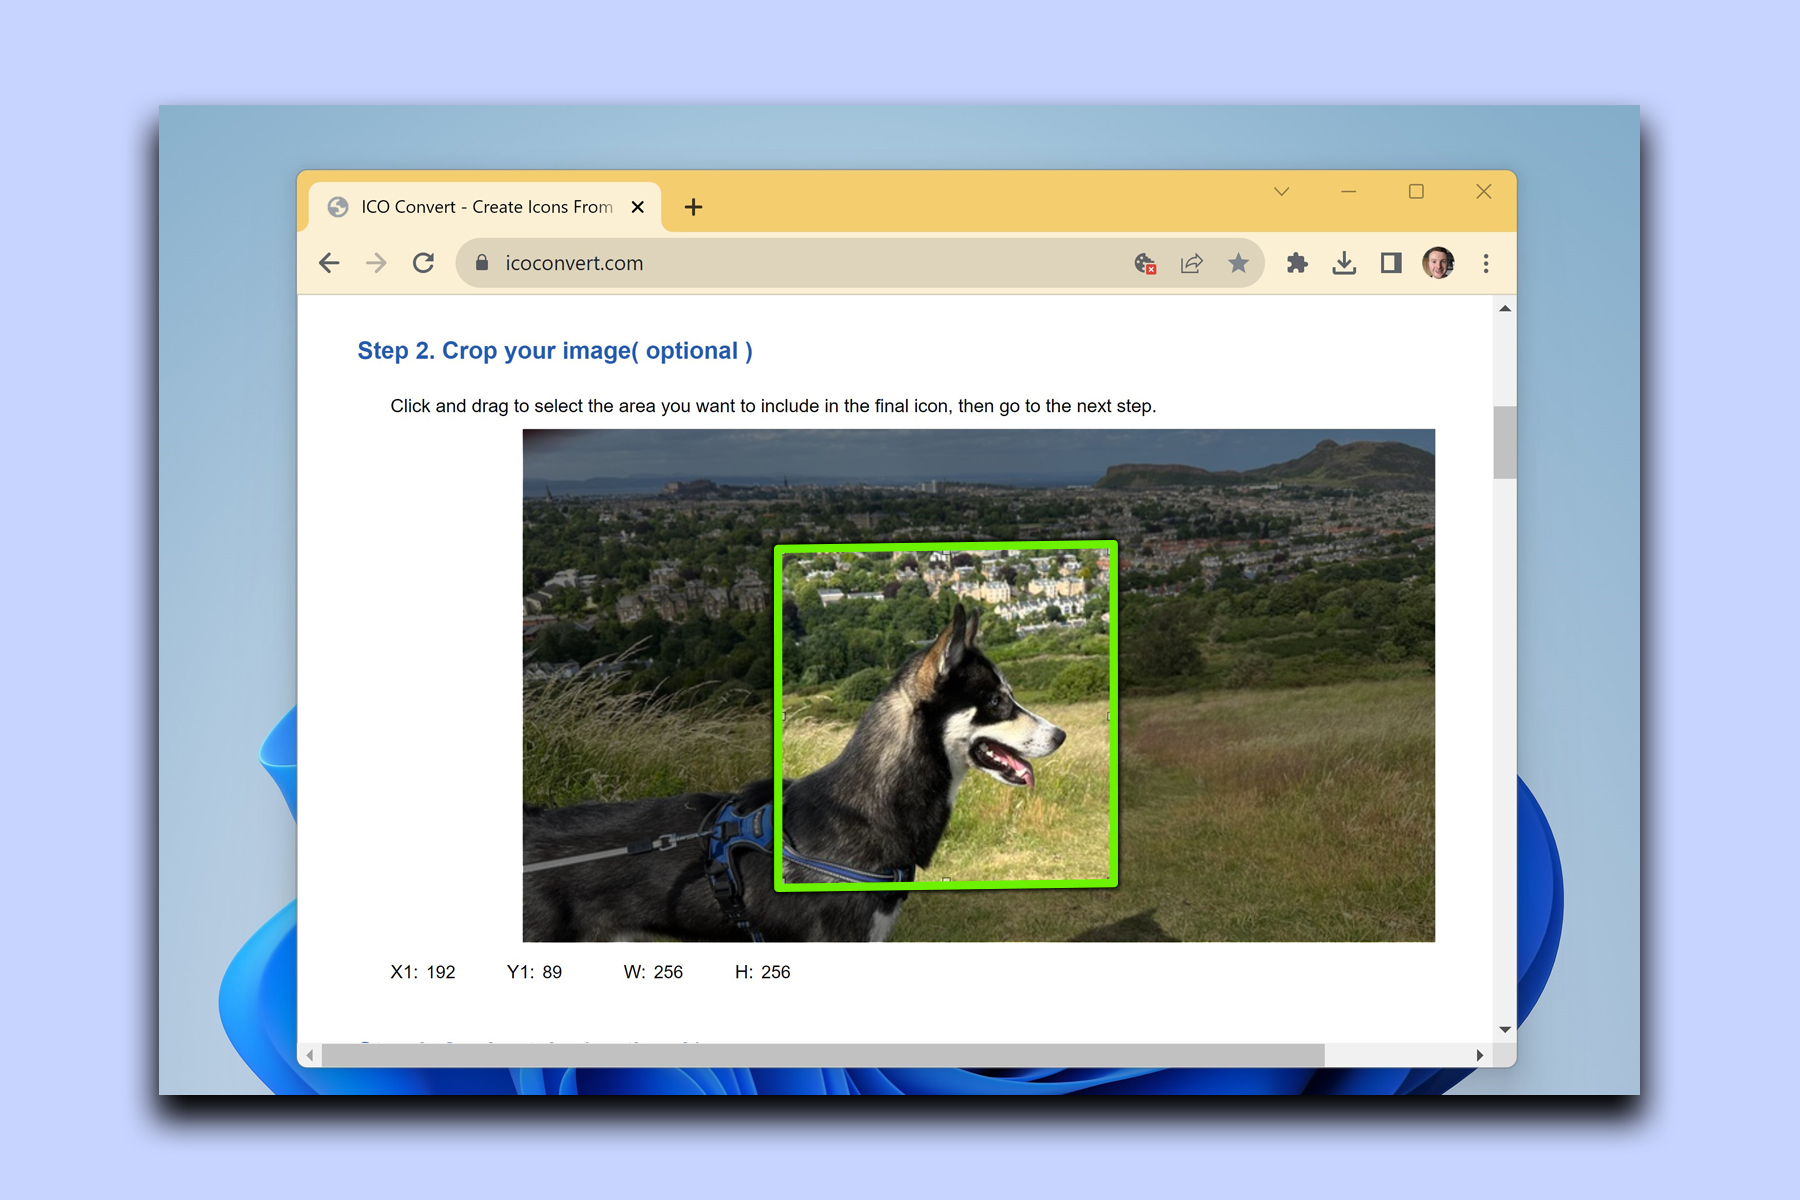
Use the site’s click and drag tool to crop to the section of the image that you want the final icon to be. Ideally, measure out to 256 x 256 in pixels — ICO Convert's built-in tool handily tells you the precise size of your selected area as you tweak the crop.
4. Select a style for your icon
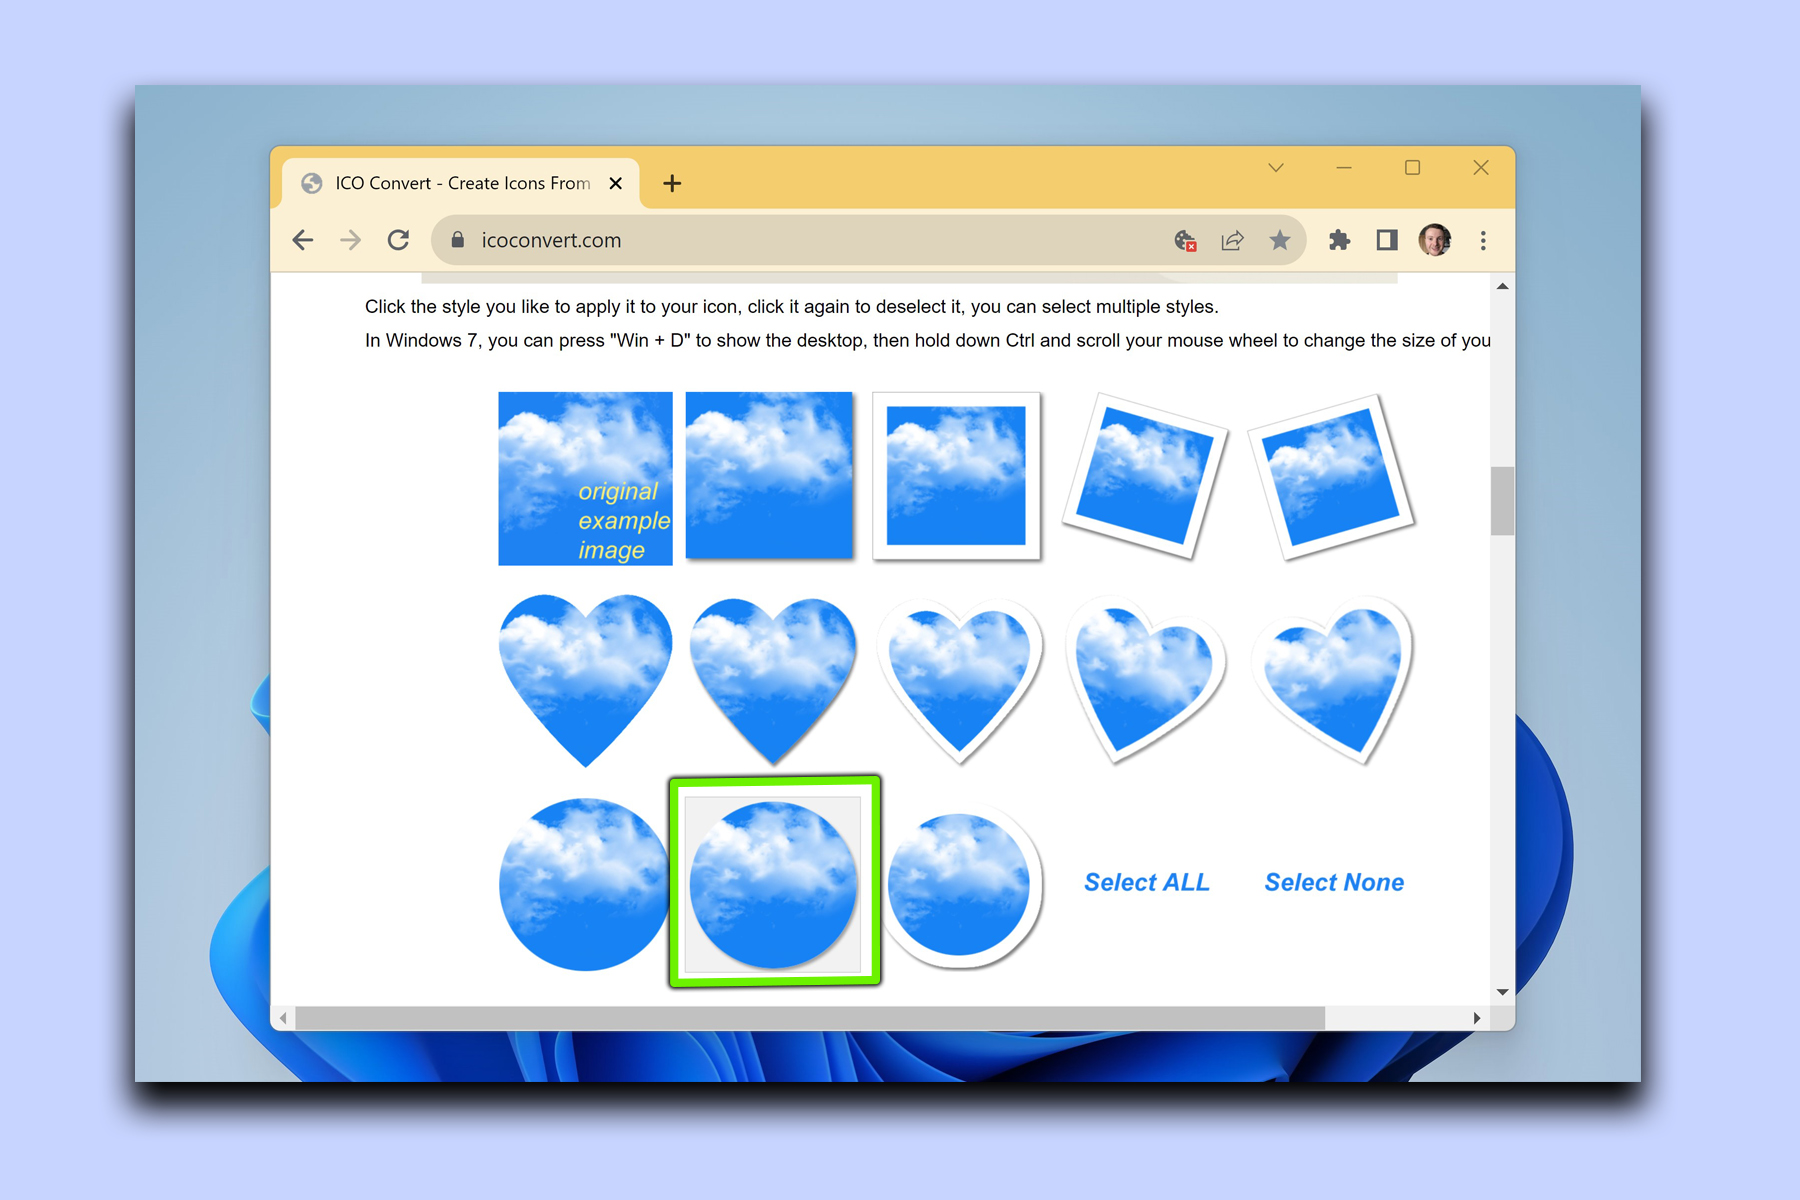
ICO Convert gives you the option of applying various styles to your desktop icon. Scroll to the Apply styles section and choose a design you like. You could choose a traditional square icon design, but I’m going for a circular icon with a drop shadow for this guide.
5. Choose a format and size for the icon
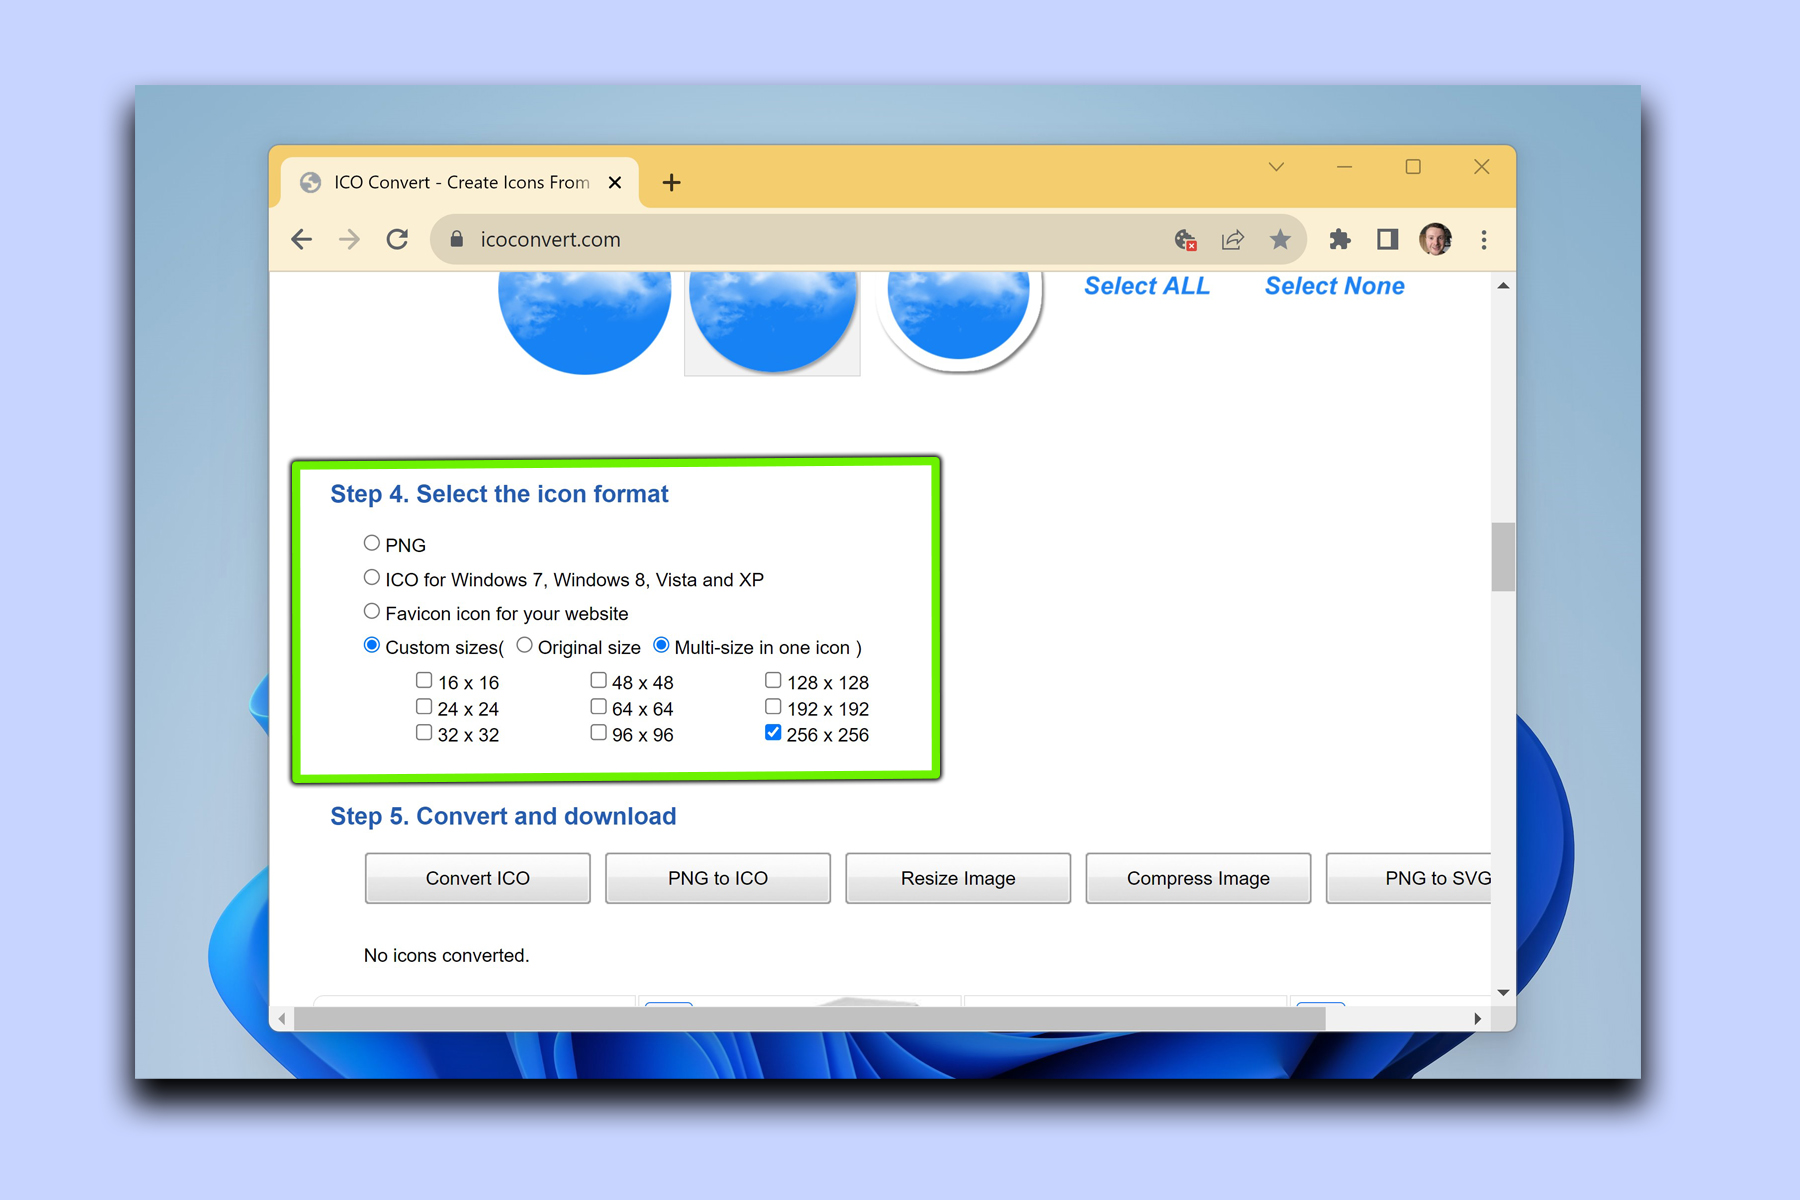
Next, scroll down to Select the icon format and check the Custom sizes and Multi-size in one icon fields, then select the 256 x 256 box.
6. Convert the ICO file, then download it
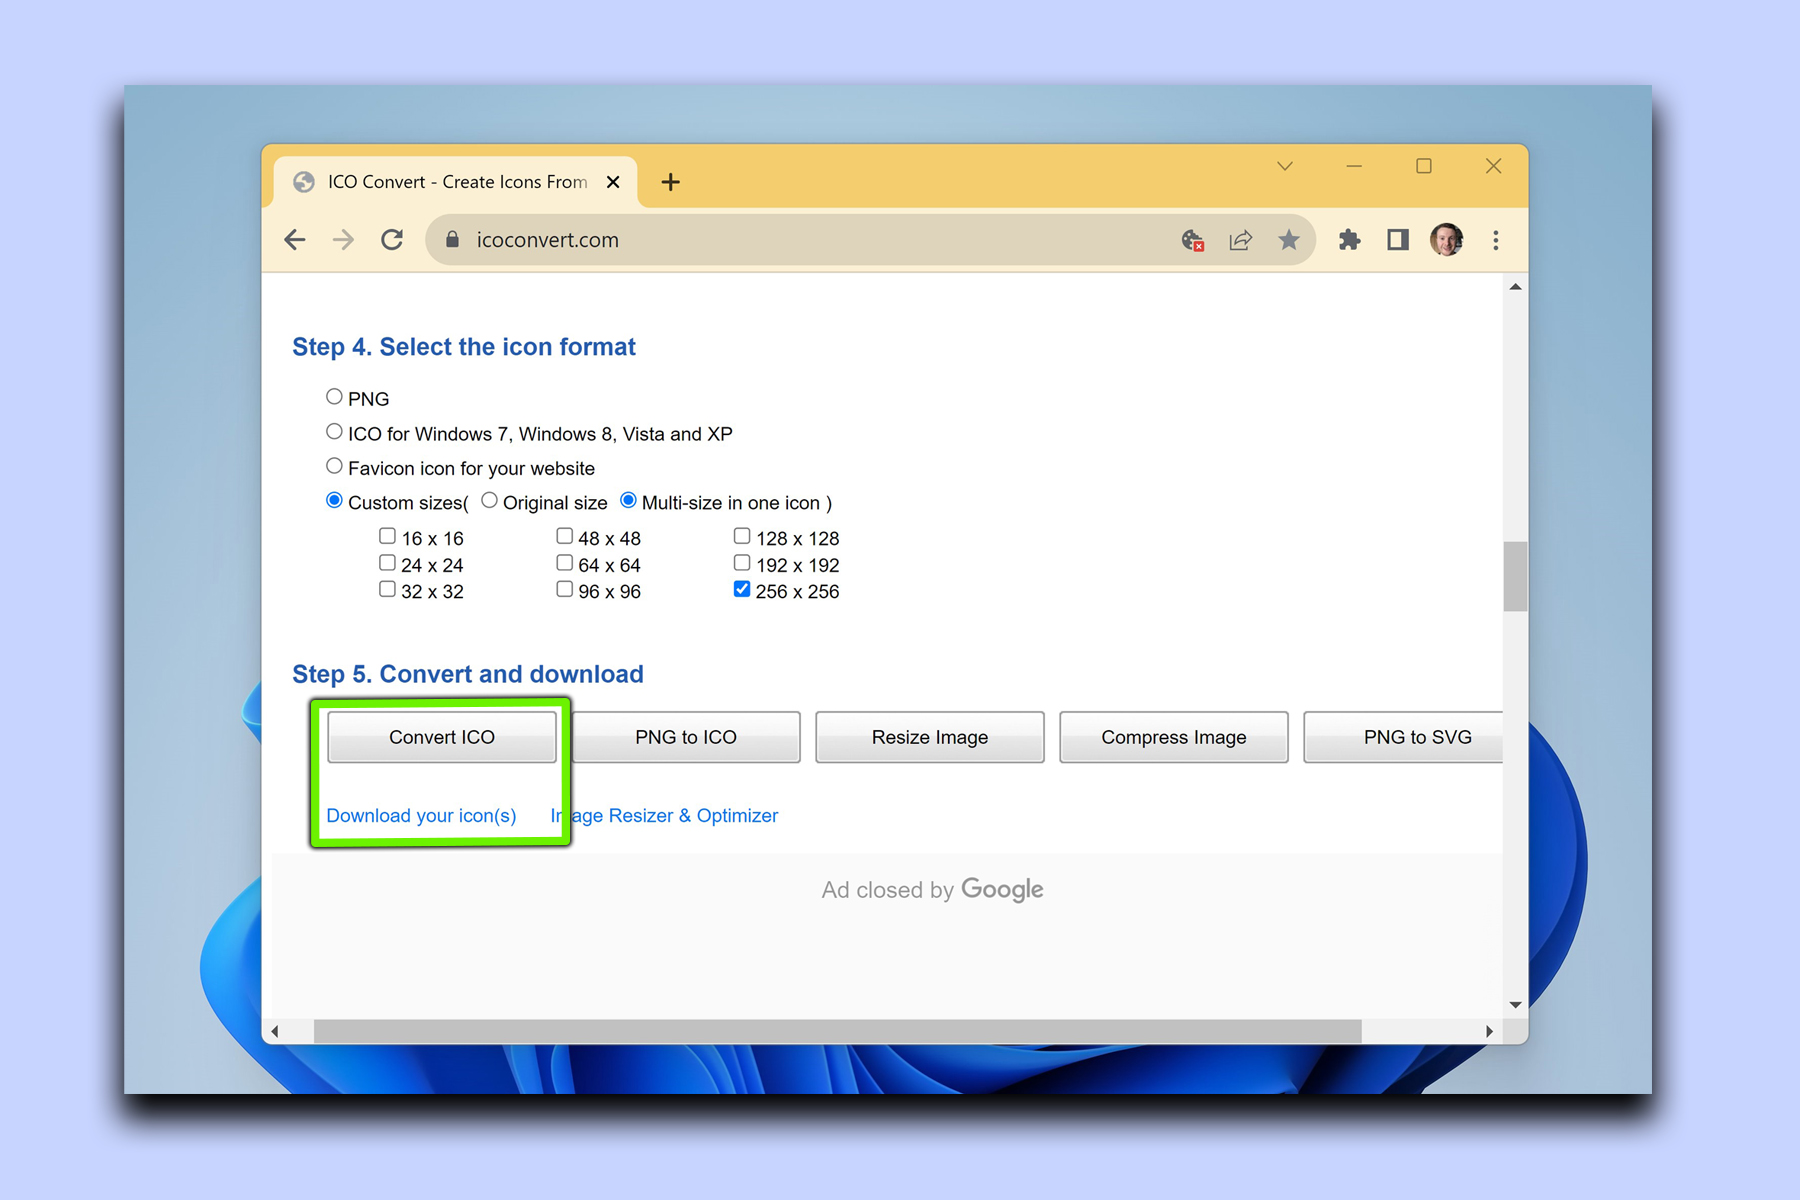
Now that you've set the precise dimensions of your image it’s finally time to convert it into an ICO file. Scroll down and click Convert ICO. After a few seconds click the download link that appears, then save your ICO file in a folder that’s easy to find on your PC or laptop.
7. Return to your desktop and change the icon
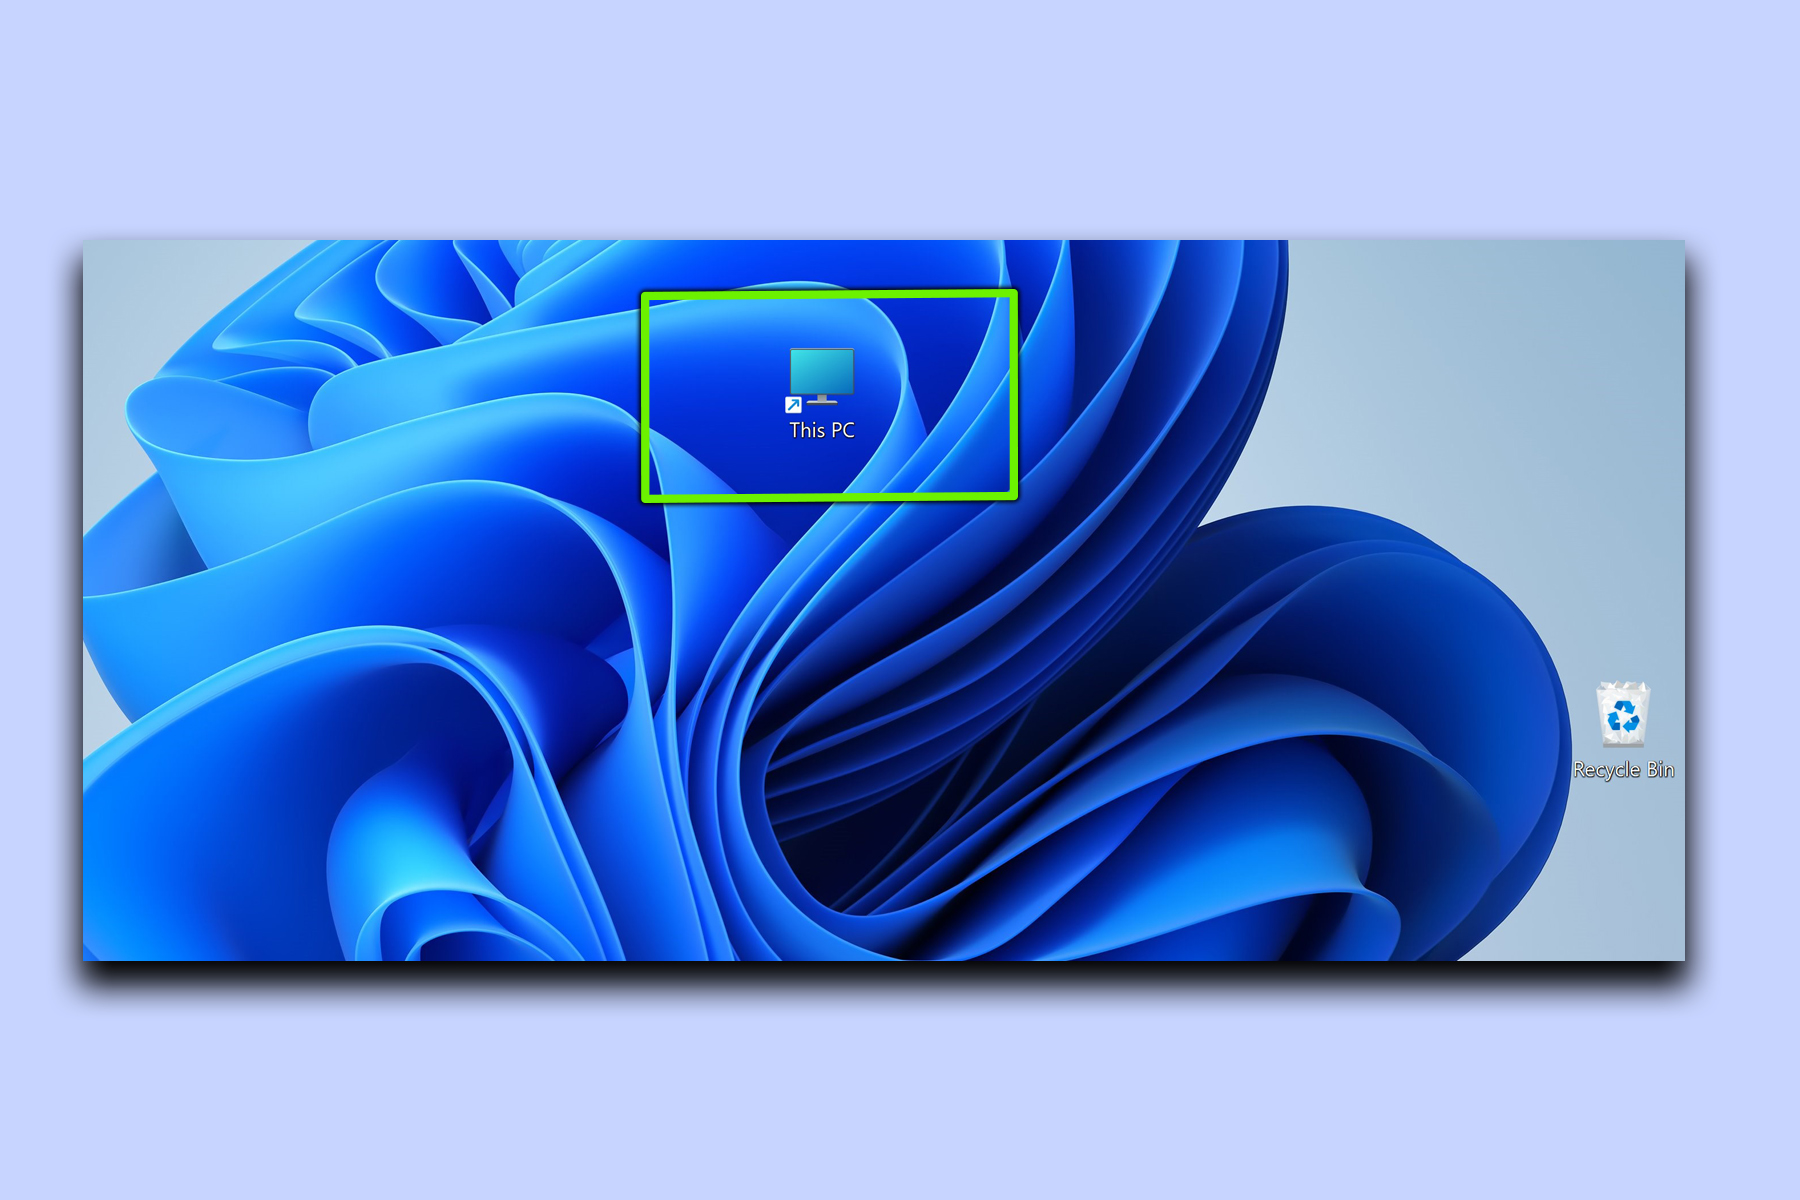
Go back to your desktop, right click on the desktop icon you want to change, then select Change Icon.
Now click Browse and find your saved ICO file, then select it and hit Open.
You’ll now be back at the Change Icon tab, so click OK on your chosen file and hit Apply in the bottom right corner.
Your new custom desktop icon will appear on your desktop.
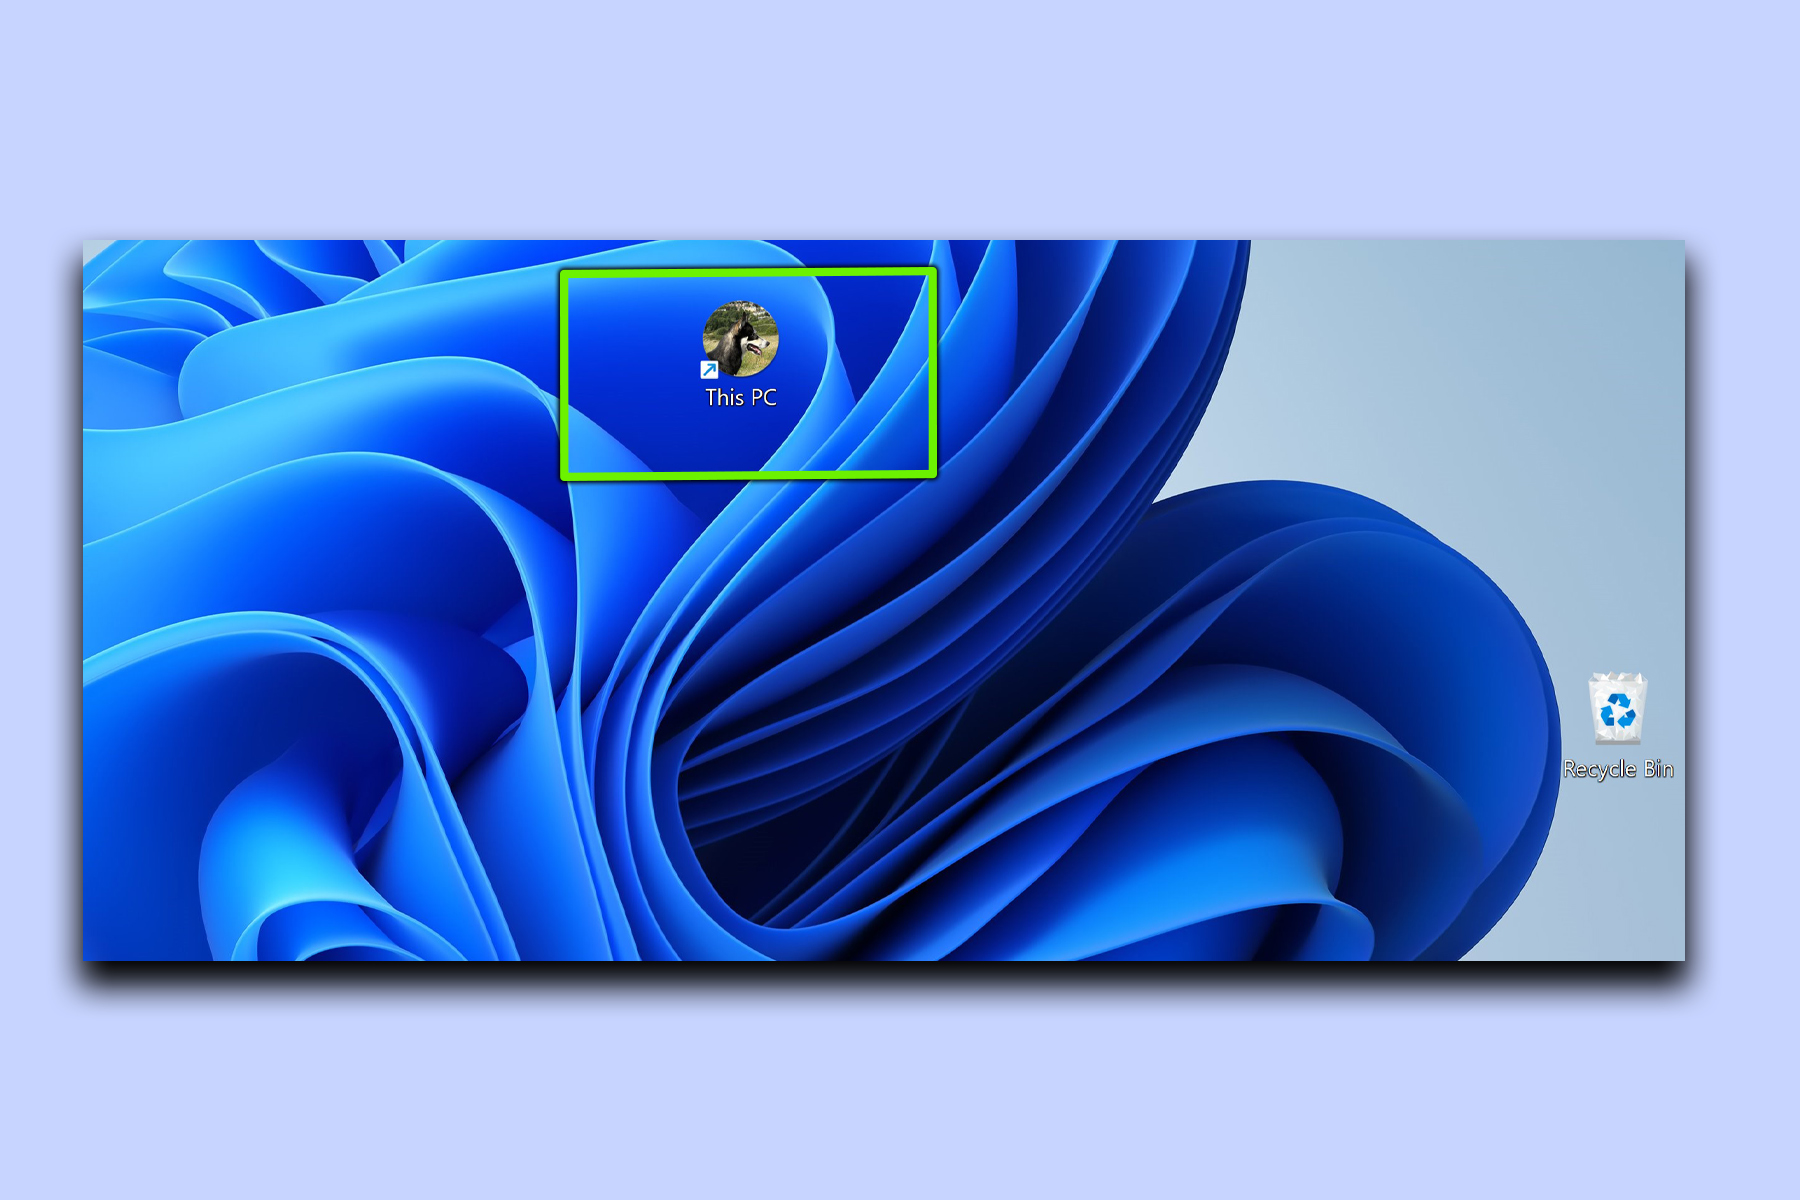
That was pretty easy, wasn't it?
I've used the above example of changing the icon for my 'This PC' shortcut, but you can change icons for most desktop shortcuts; be it your recycle bin or a shortcut for one of best Steam games. Now that you know how to make custom Windows 11 desktop icons, you can get as creative as you like.
Sign up to get the BEST of Tom's Guide direct to your inbox.
Get instant access to breaking news, the hottest reviews, great deals and helpful tips.
If you need more Windows 11 help, learn how to restart Windows 11, how to take screenshots in Windows 11 and how to move the taskbar in Windows 11.

Dave is a computing editor at Tom’s Guide and covers everything from cutting edge laptops to ultrawide monitors. When he’s not worrying about dead pixels, Dave enjoys regularly rebuilding his PC for absolutely no reason at all. In a previous life, he worked as a video game journalist for 15 years, with bylines across GamesRadar+, PC Gamer and TechRadar. Despite owning a graphics card that costs roughly the same as your average used car, he still enjoys gaming on the go and is regularly glued to his Switch. Away from tech, most of Dave’s time is taken up by walking his husky, buying new TVs at an embarrassing rate and obsessing over his beloved Arsenal.
