How to create and change a signature in Gmail
When you know how to create and change a signature in Gmail, you can add contact details or have fun
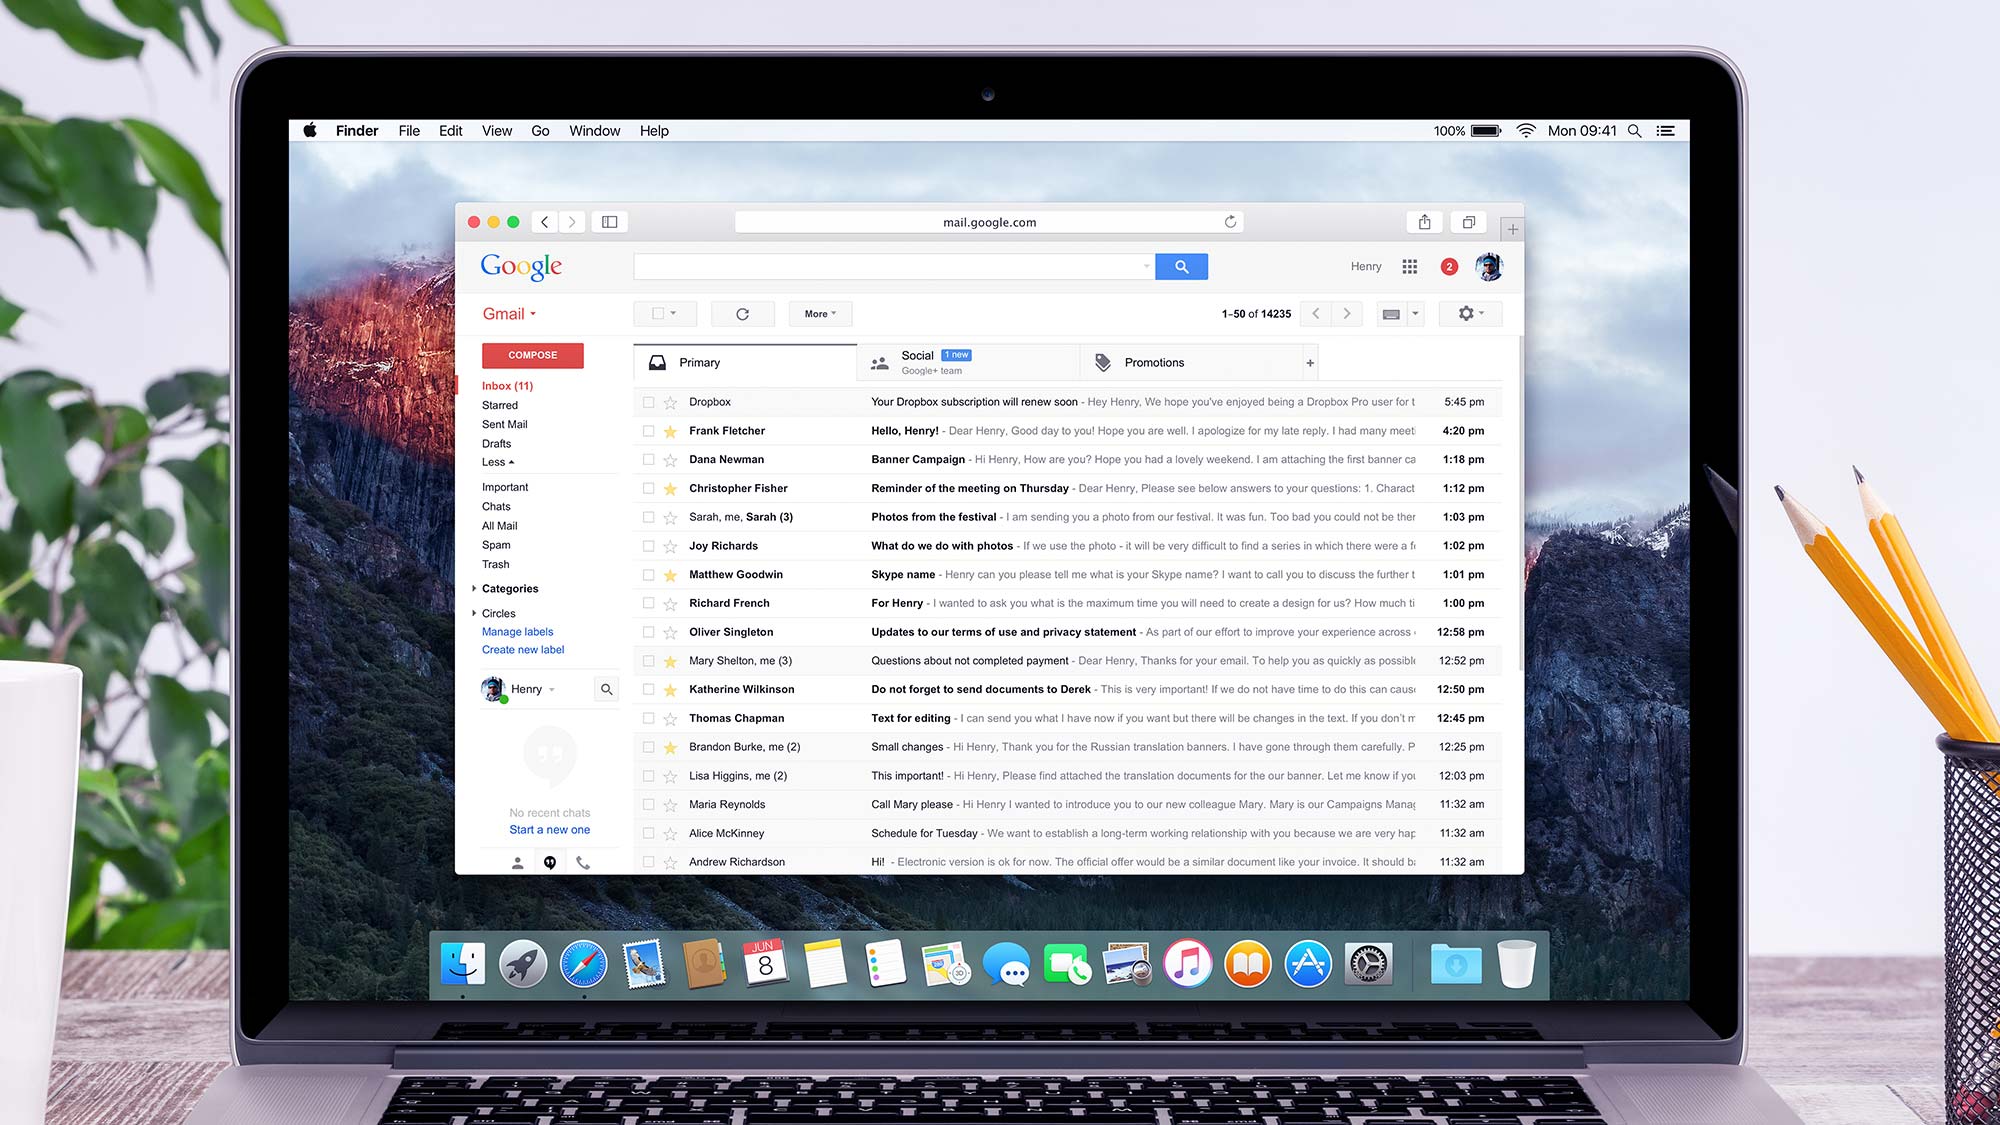
For a more professional touch to your emails, it’s worth learning how to create and change a signature in Gmail. A signature can be used to share important contact information such as a telephone number or it can be used to divulge details about your general availability. A signature can also be used to confirm your work title or place of employment. And, of course, a signature can be frivolous: you can add a quote, a joke, anything; it’s your signature, after all.
In this guide, we’re going to show you how to get set up. The same process can be used to change a signature you’ve already created. There are three ways to proceed. You can create and change a signature in Gmail on a computer, an Apple device (iPhone or iPad) or via Android. For more control, a PC or Mac is the best method but you can use the other ones to speed things up if you’re looking to create a signature on-the-fly.
How to create and change a signature in Gmail on a computer
You can set up signatures on a PC or Mac.
1. See all settings
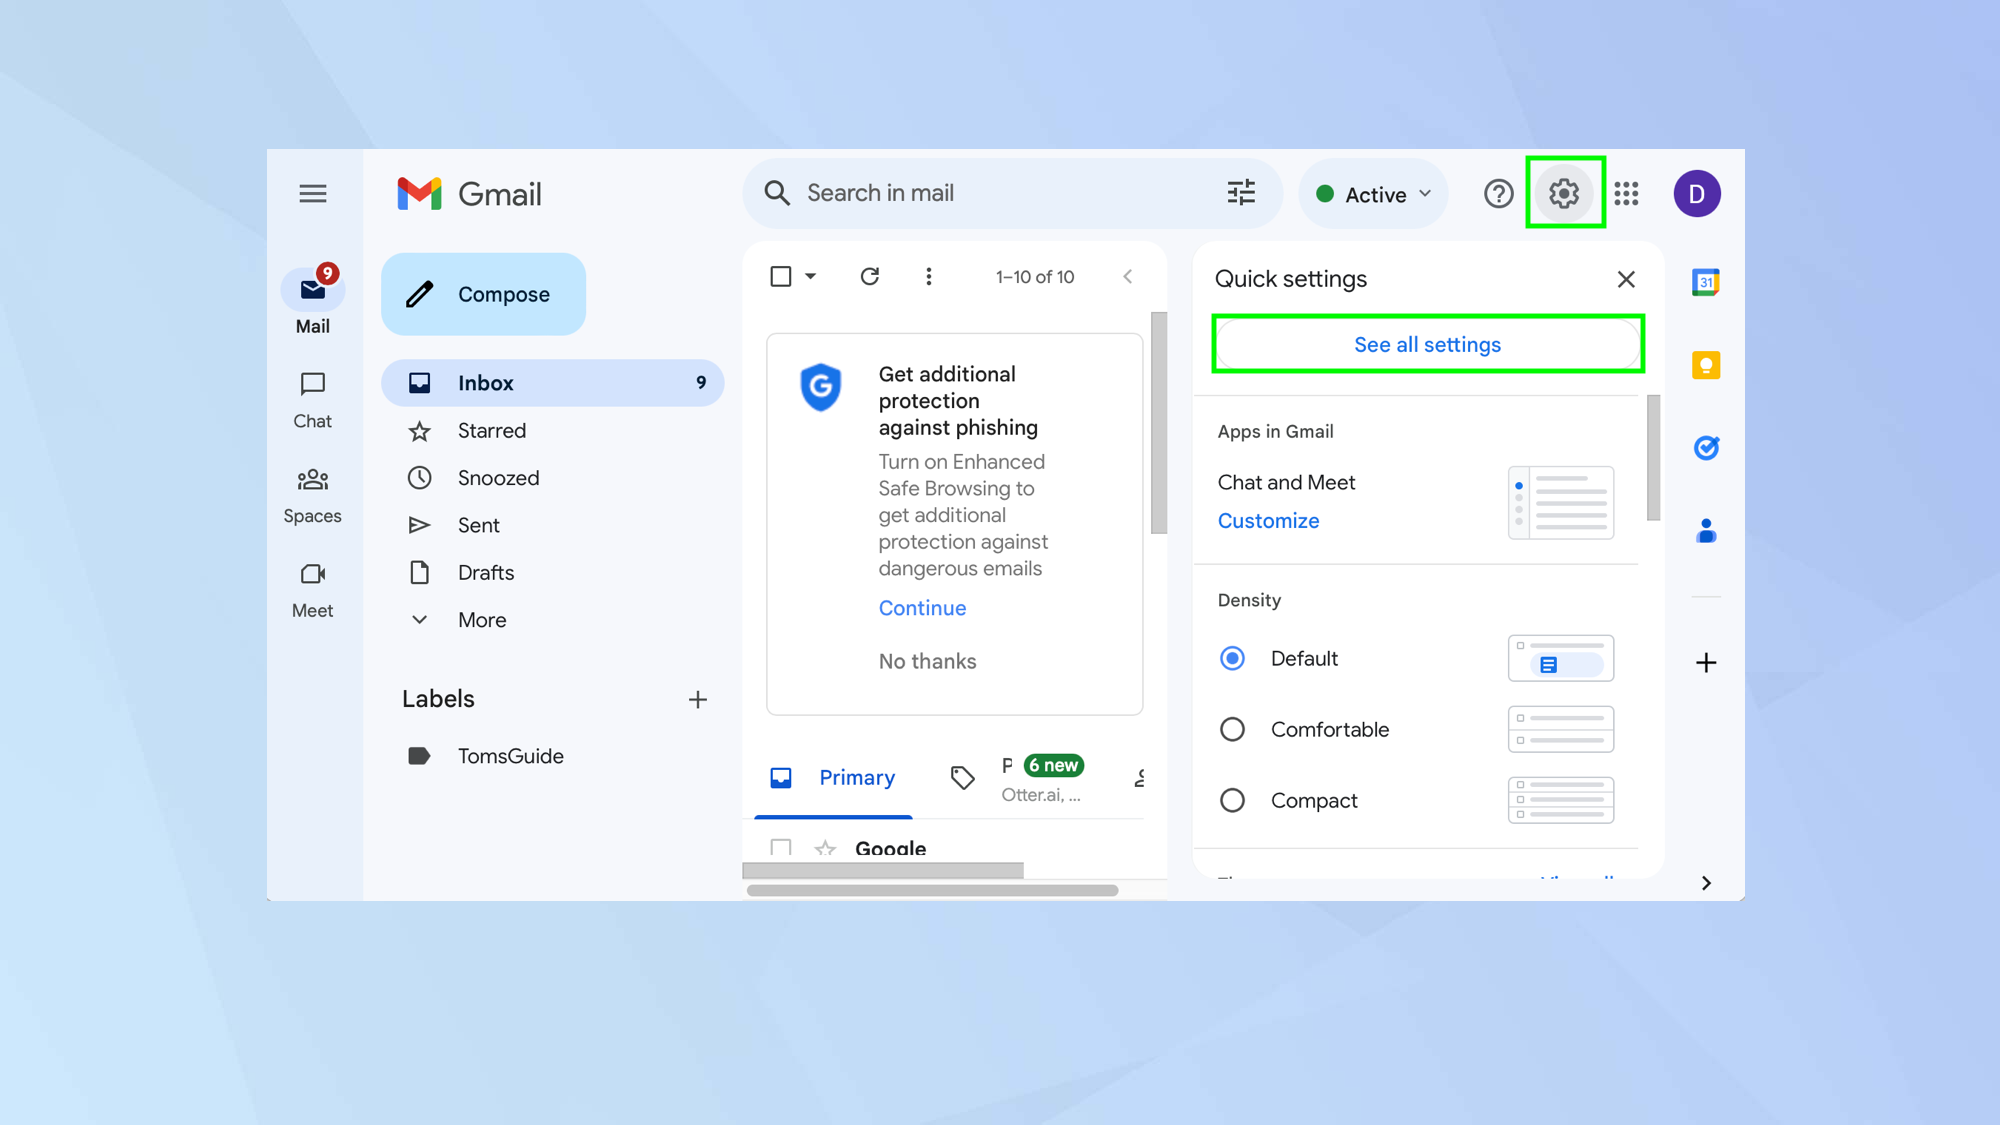
Launch a web browser and go to https://mail.google.com/ then select the Settings icon at the top of the screen. It looks like a cog. Next, select See all Settings.
2. Create new signature
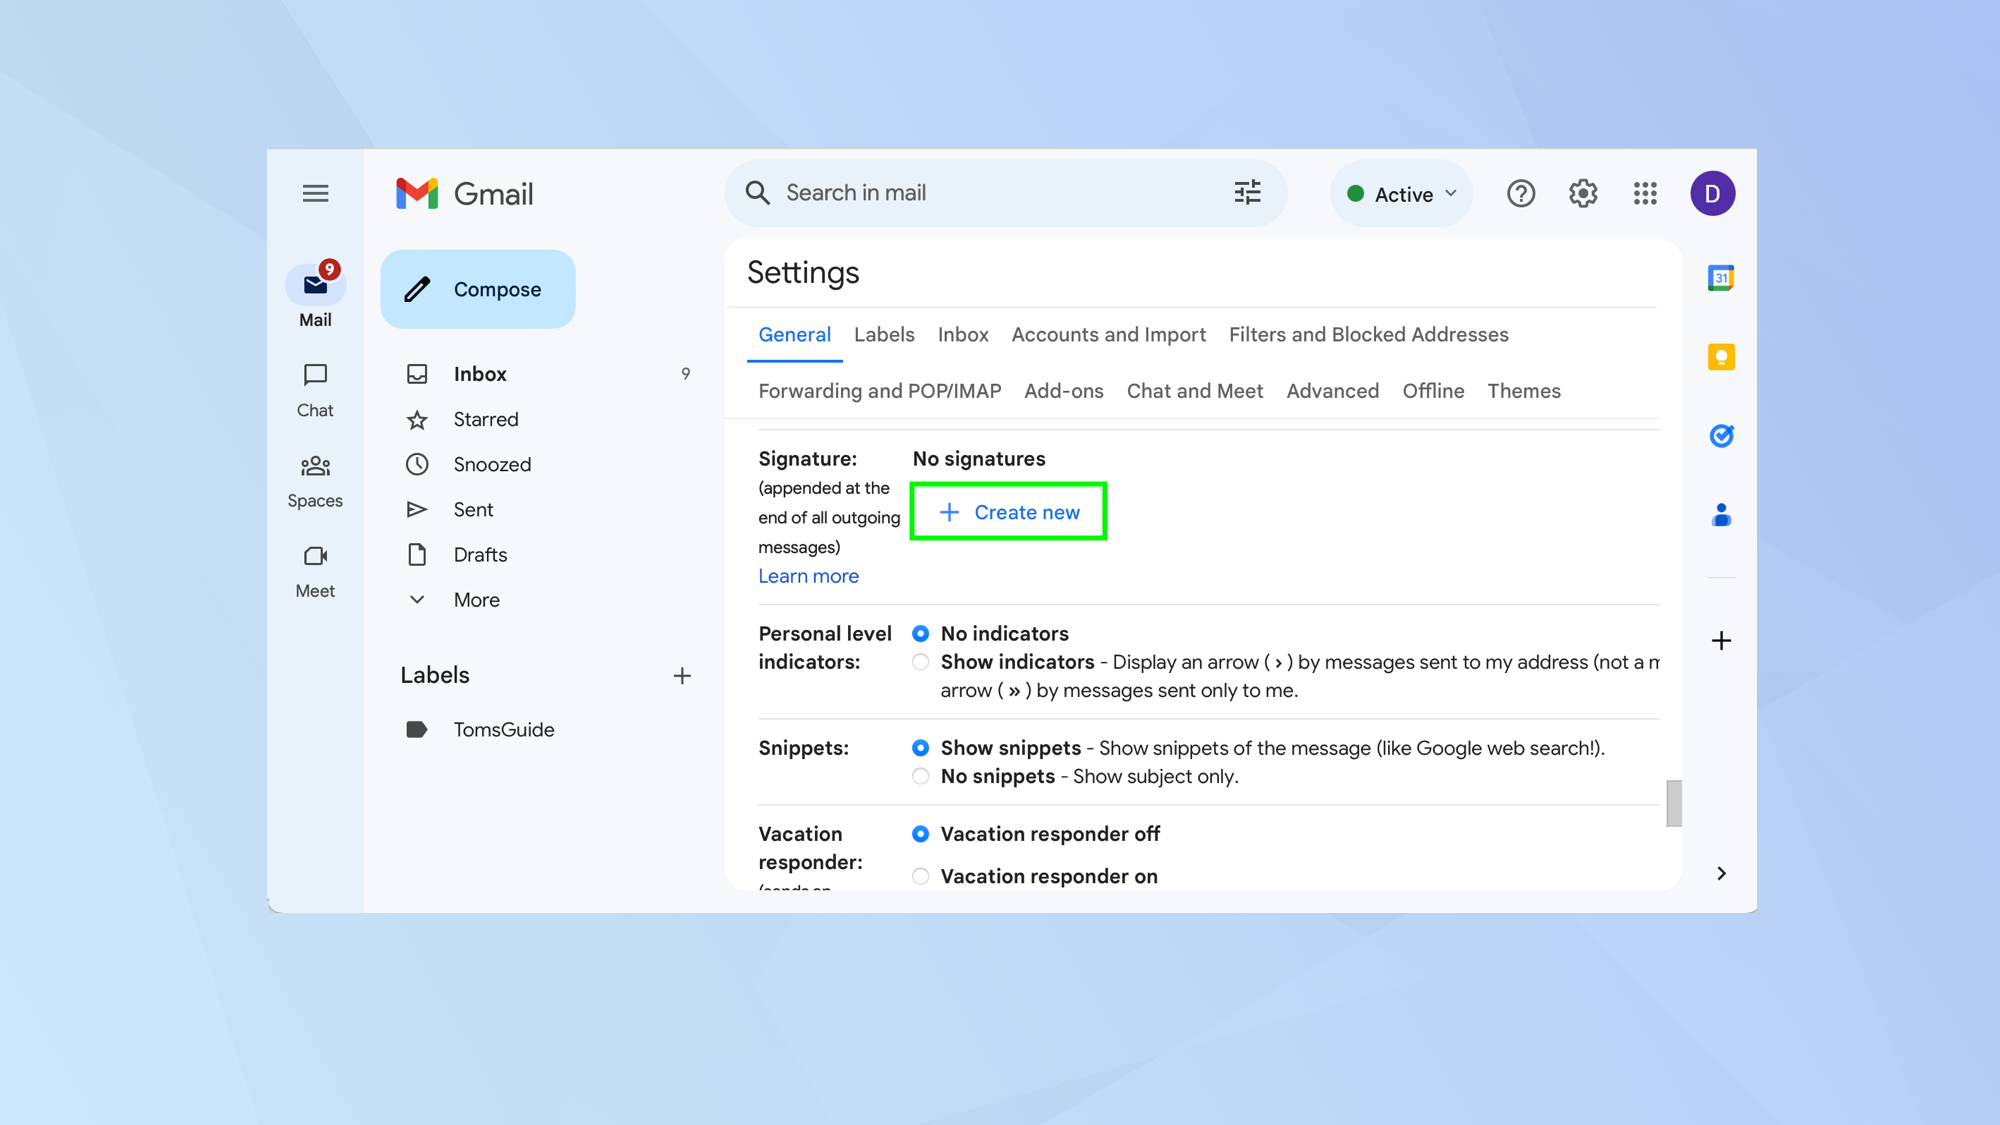
Scroll down the screen until you find the Signature section. Then click Create new.
3. Enter a name
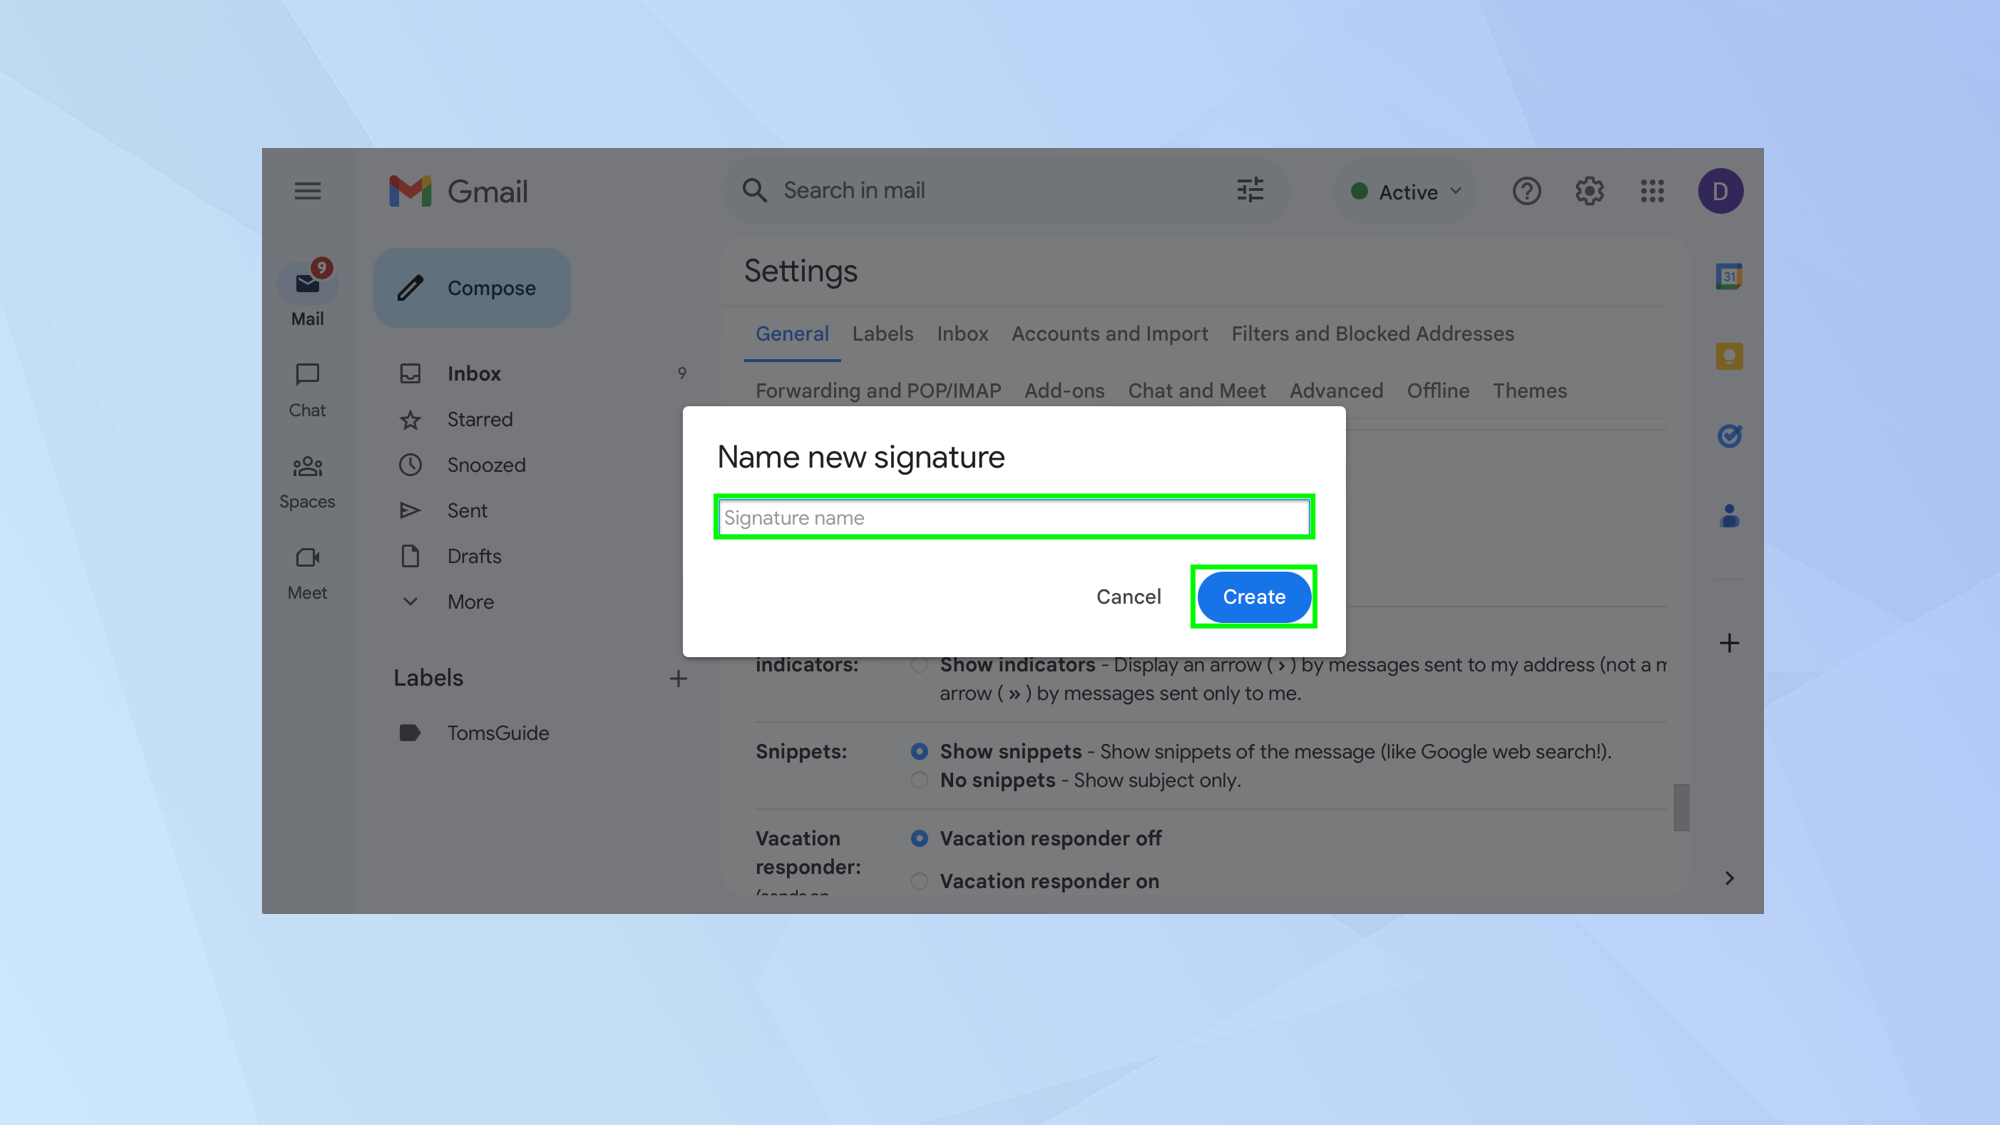
Input a name for your signature. You can have more than one signature so this will help you to identify each one. Click Create.
4. Write a signature
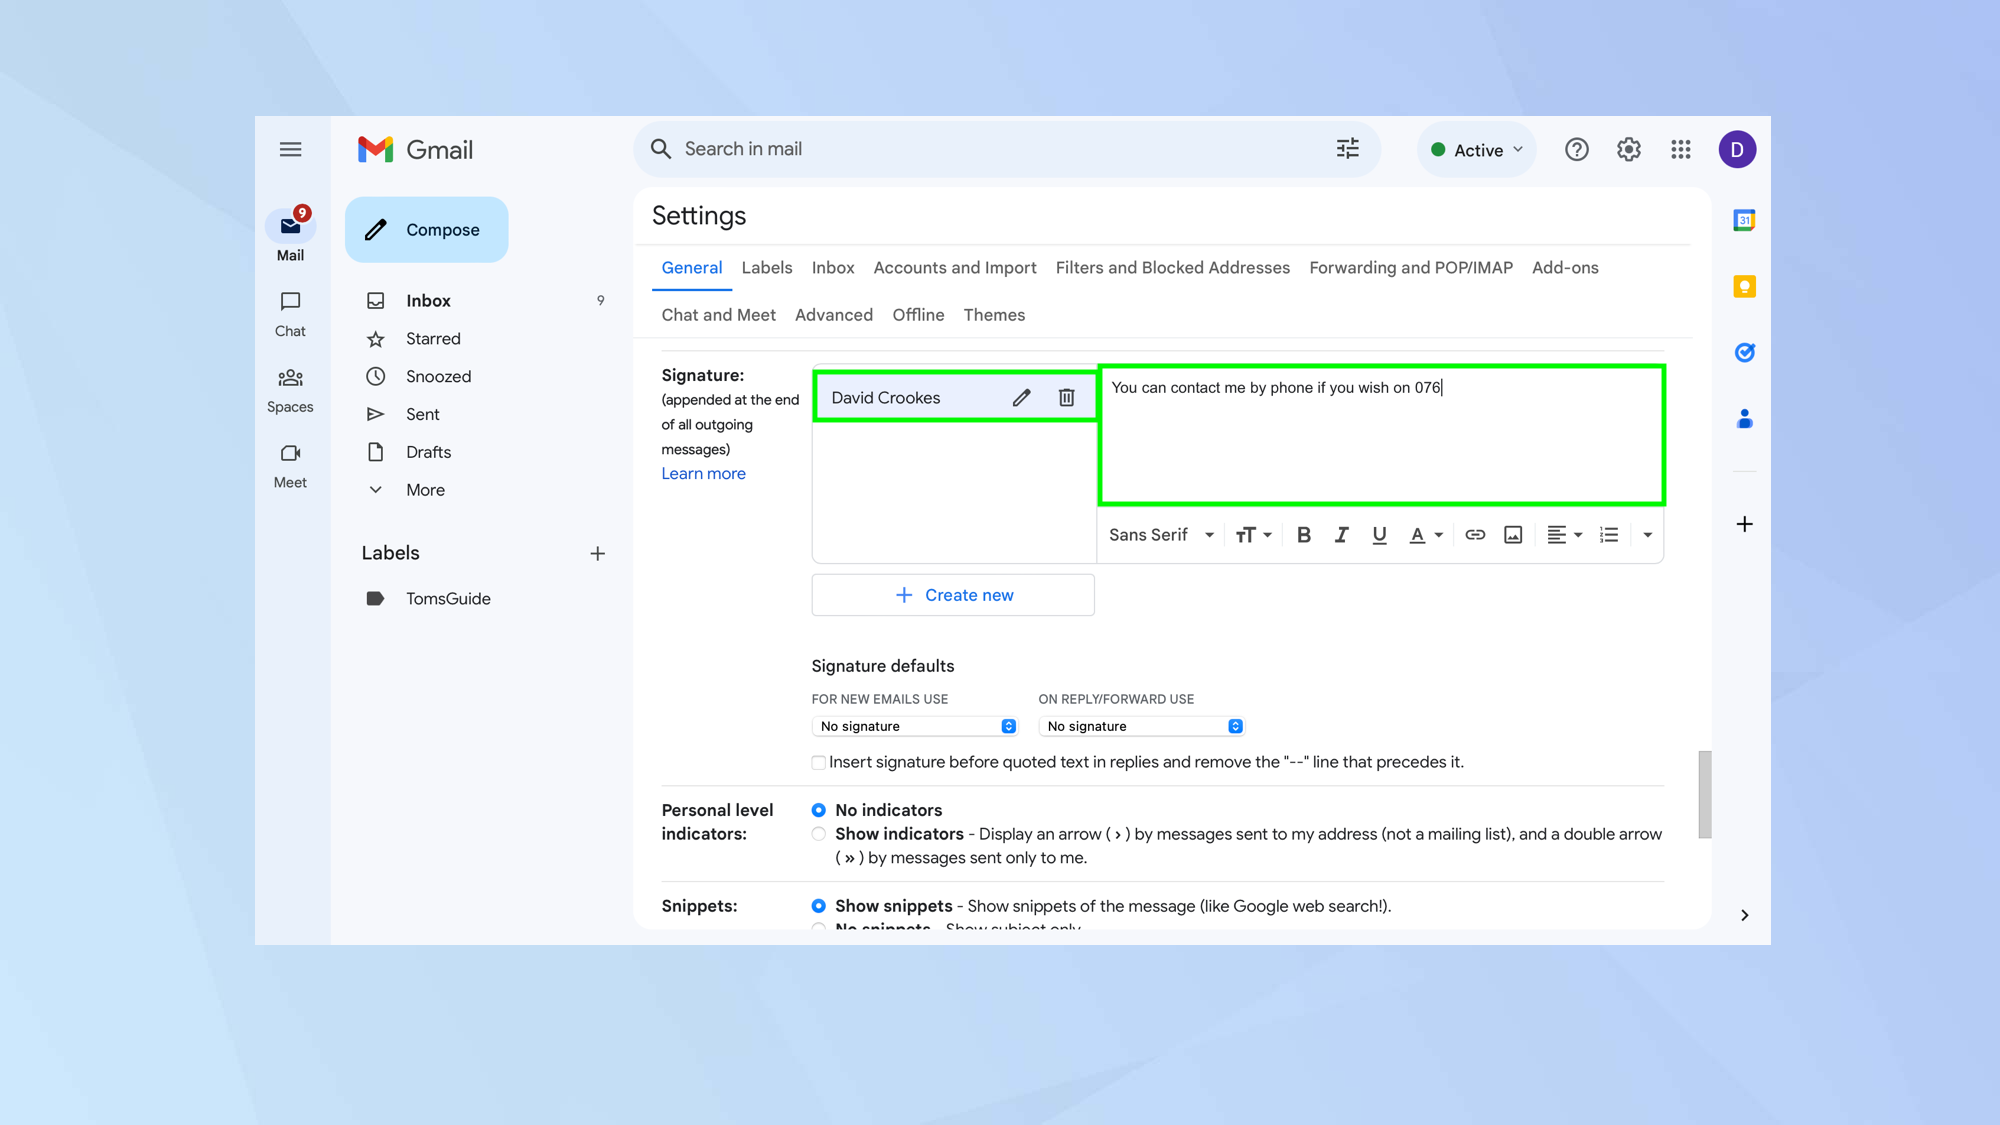
Now select the name of the signature you’ve created and enter words in the box to the right. Here you can click icons to stylize the text or add a link, photo, quotes and formatting. Images count towards the character limit.
5. Select the signature
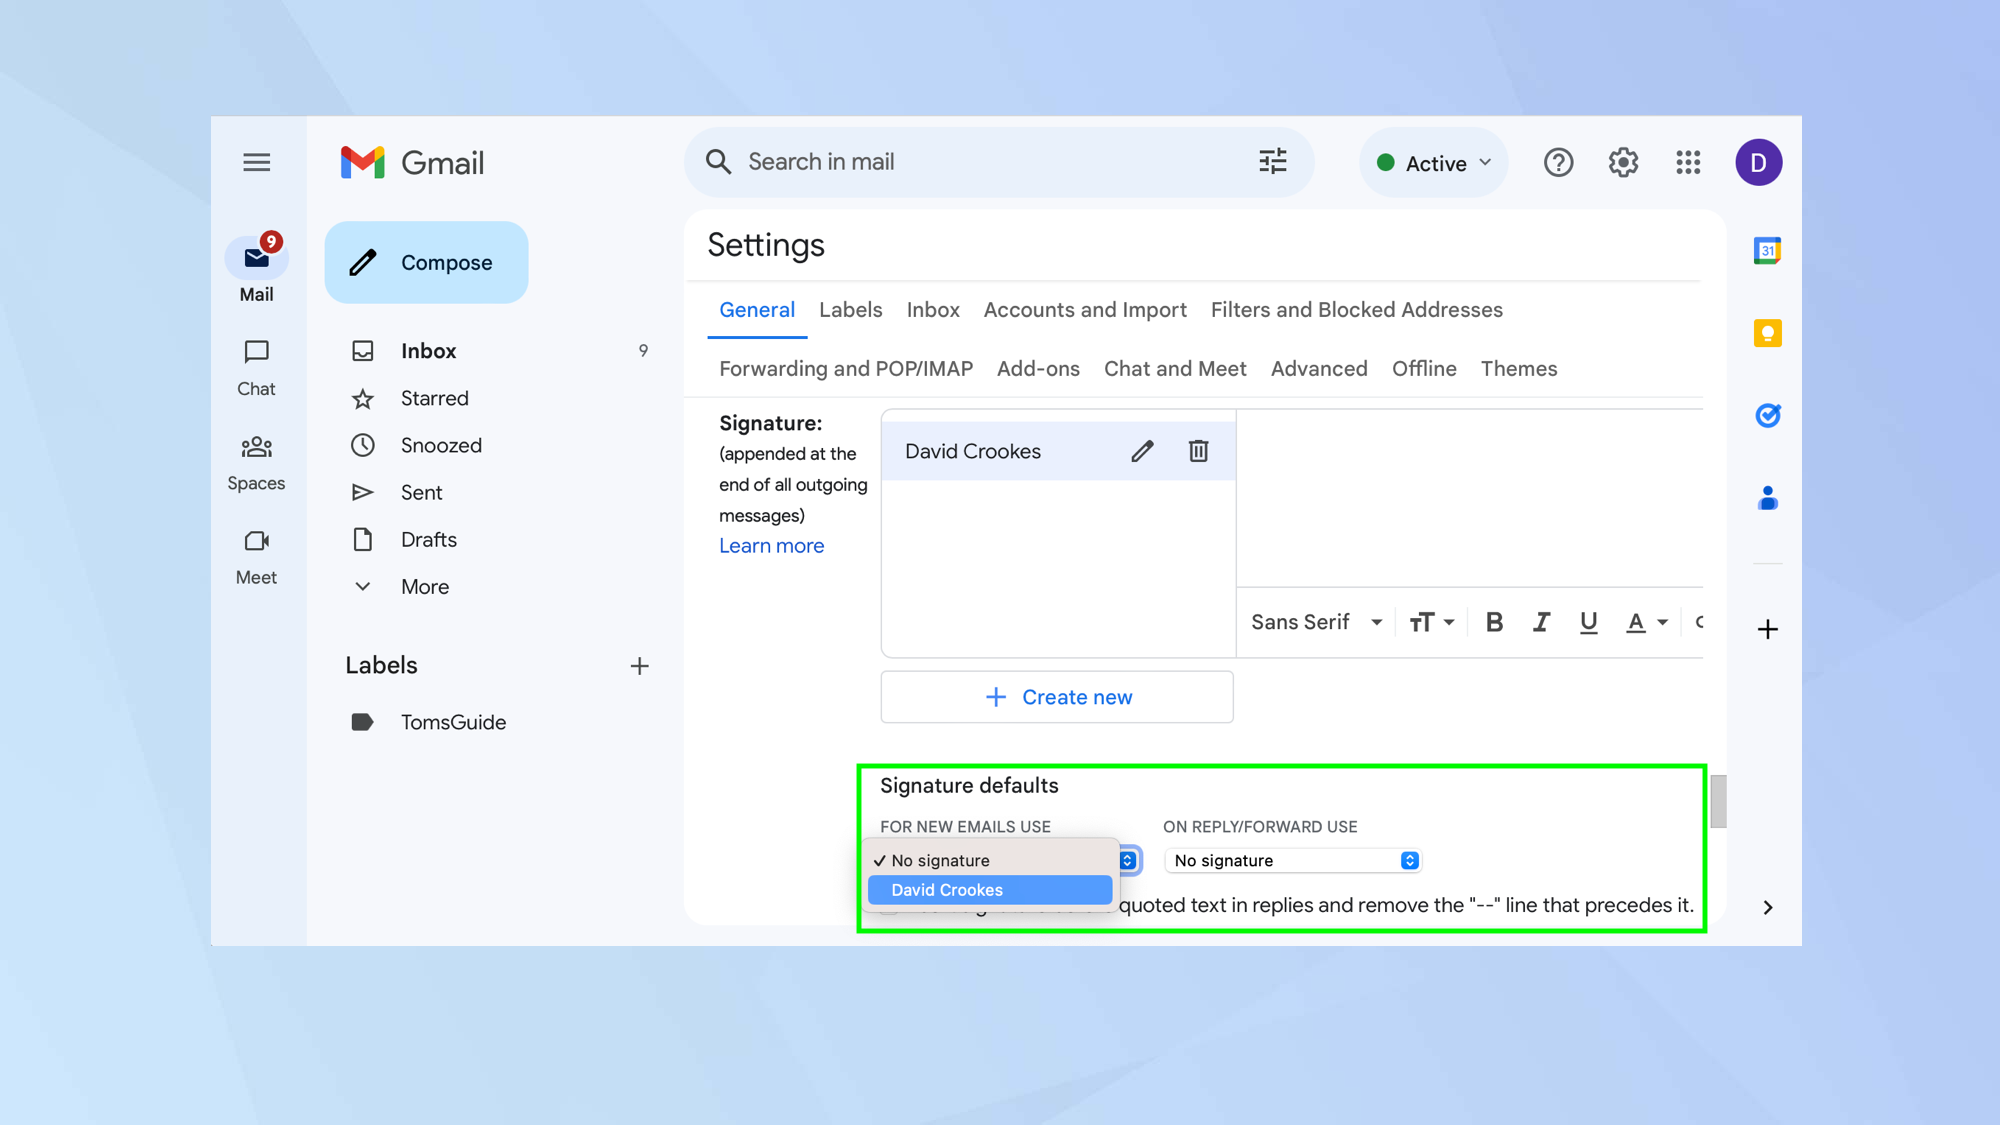
Now use the drop down boxes in the Signature Defaults section to choose the signature you want to use for new emails and for emails you reply to or forward. You can also tick the box if you want the signature to appear before any quoted text in an email.
6. Save changes
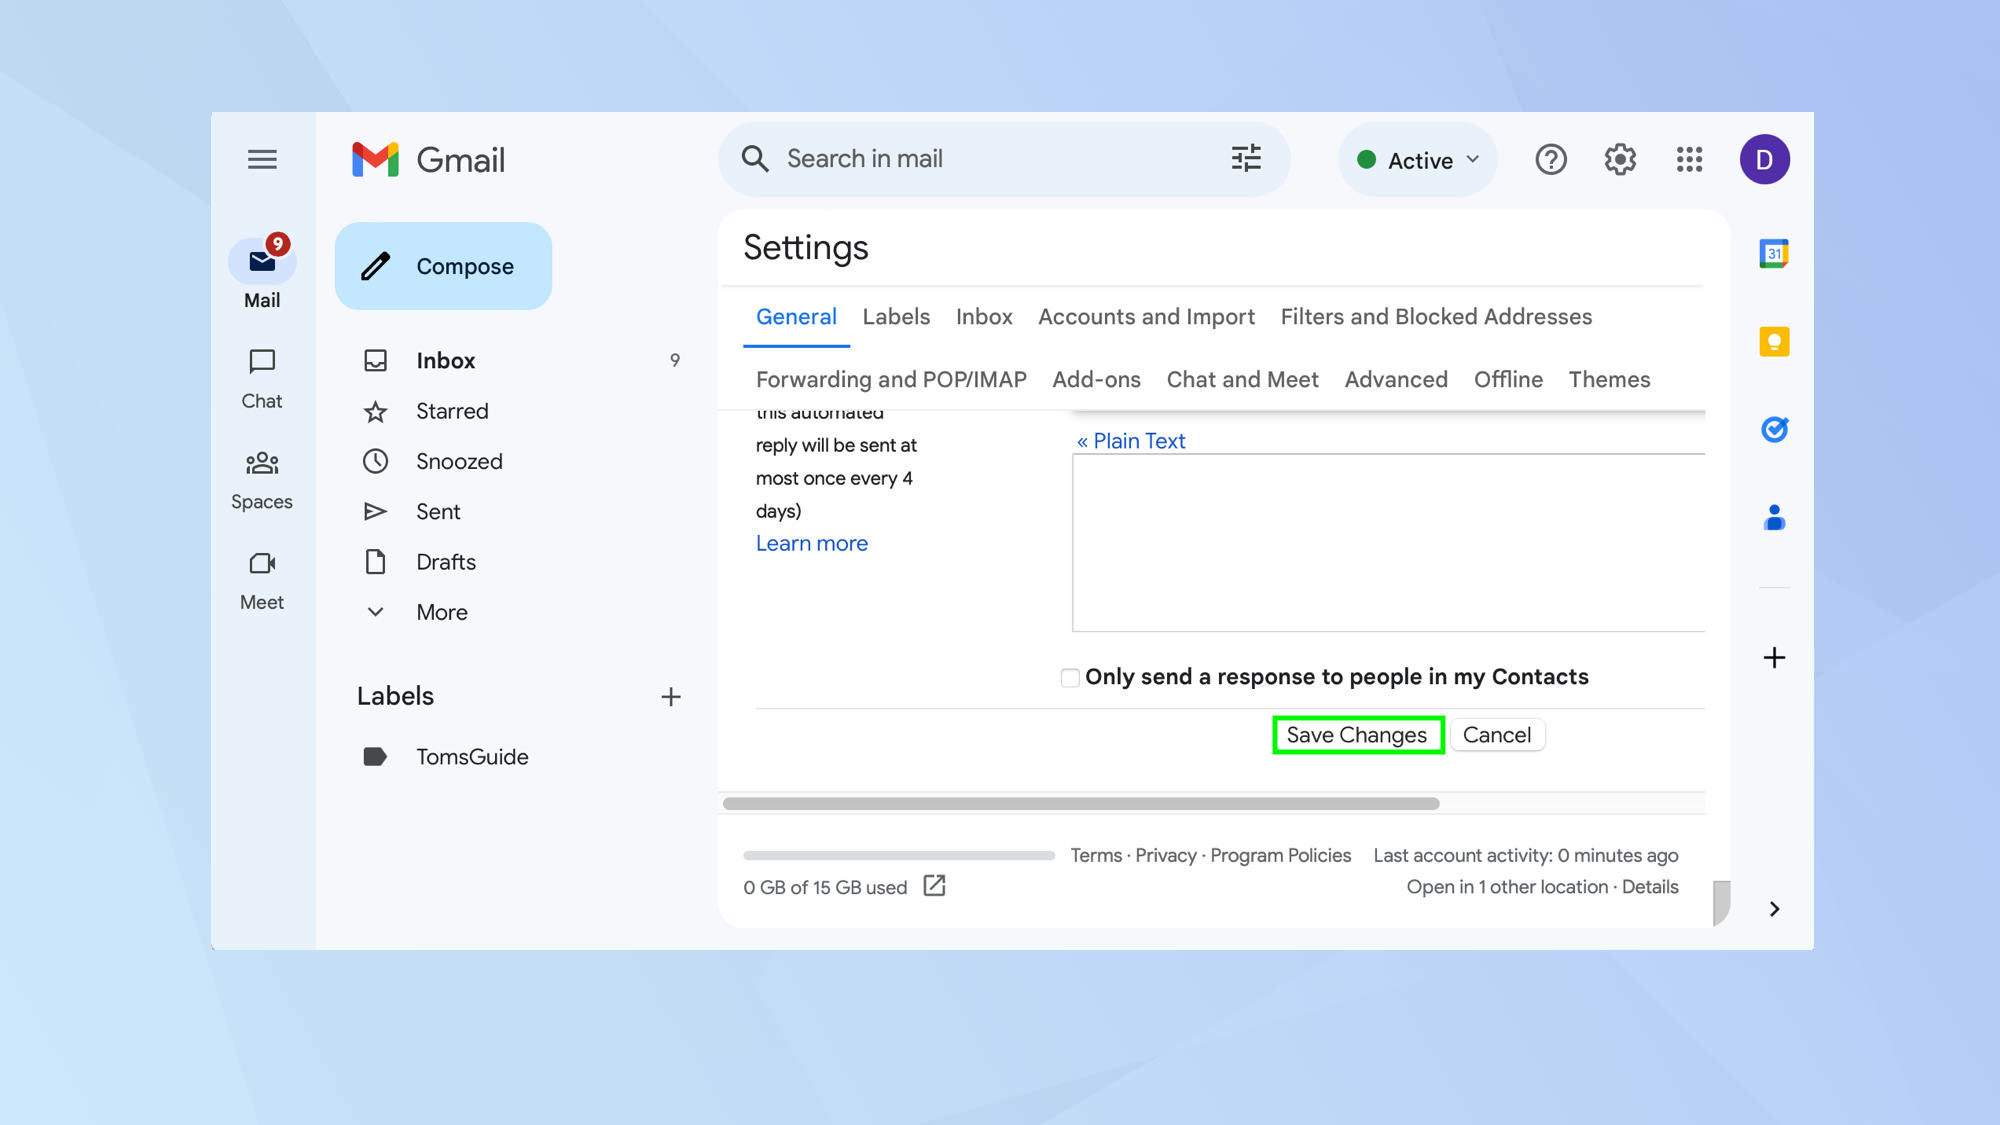
Scroll to the bottom of the screen and click Save changes.
How to create and change a signature in Gmail on an iPhone/iPad
You can set up signatures on an iPhone or iPad via the Gmail app
1. Open the settings
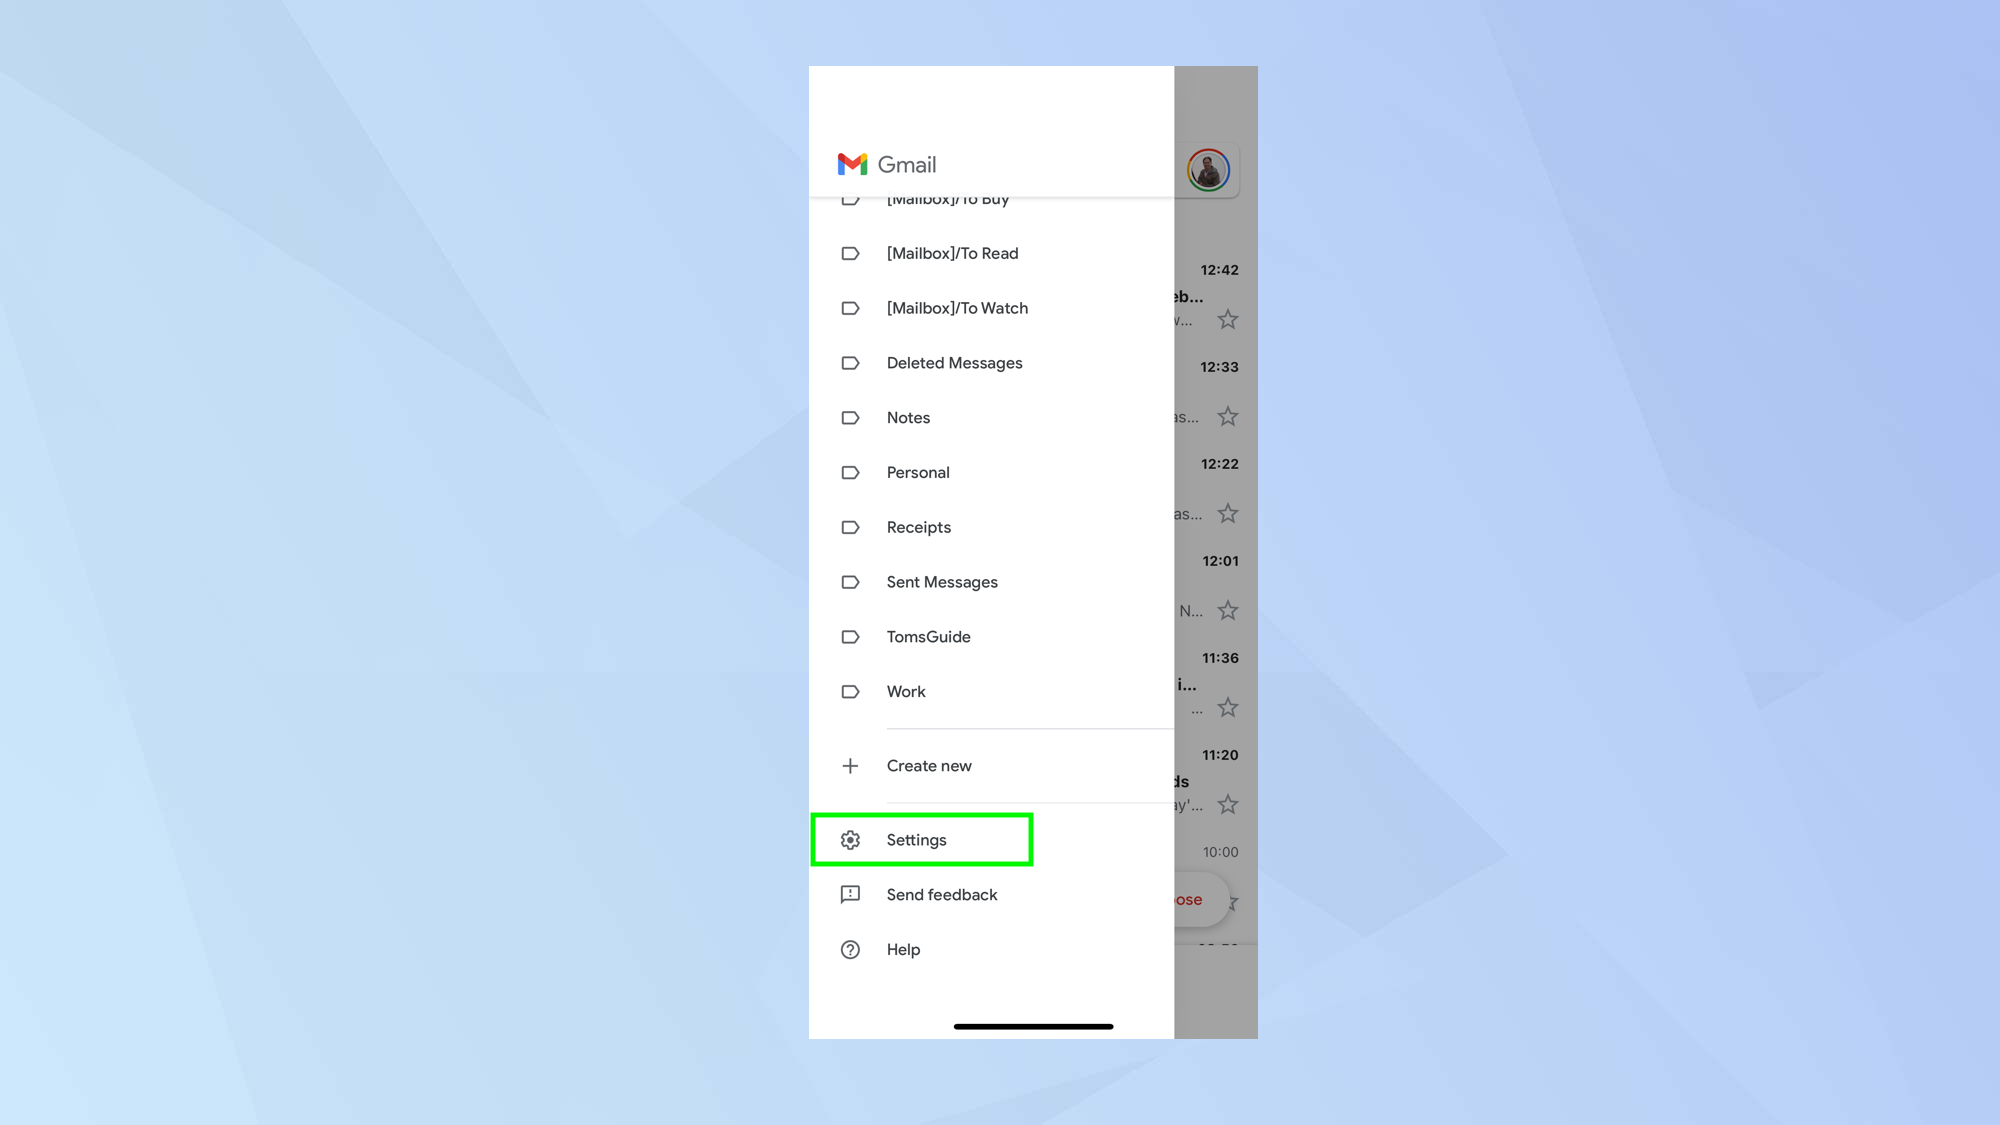
Launch the Gmail app and tap the three-bar menu in the top-left corner. Then select Settings.
2. Select Signature settings
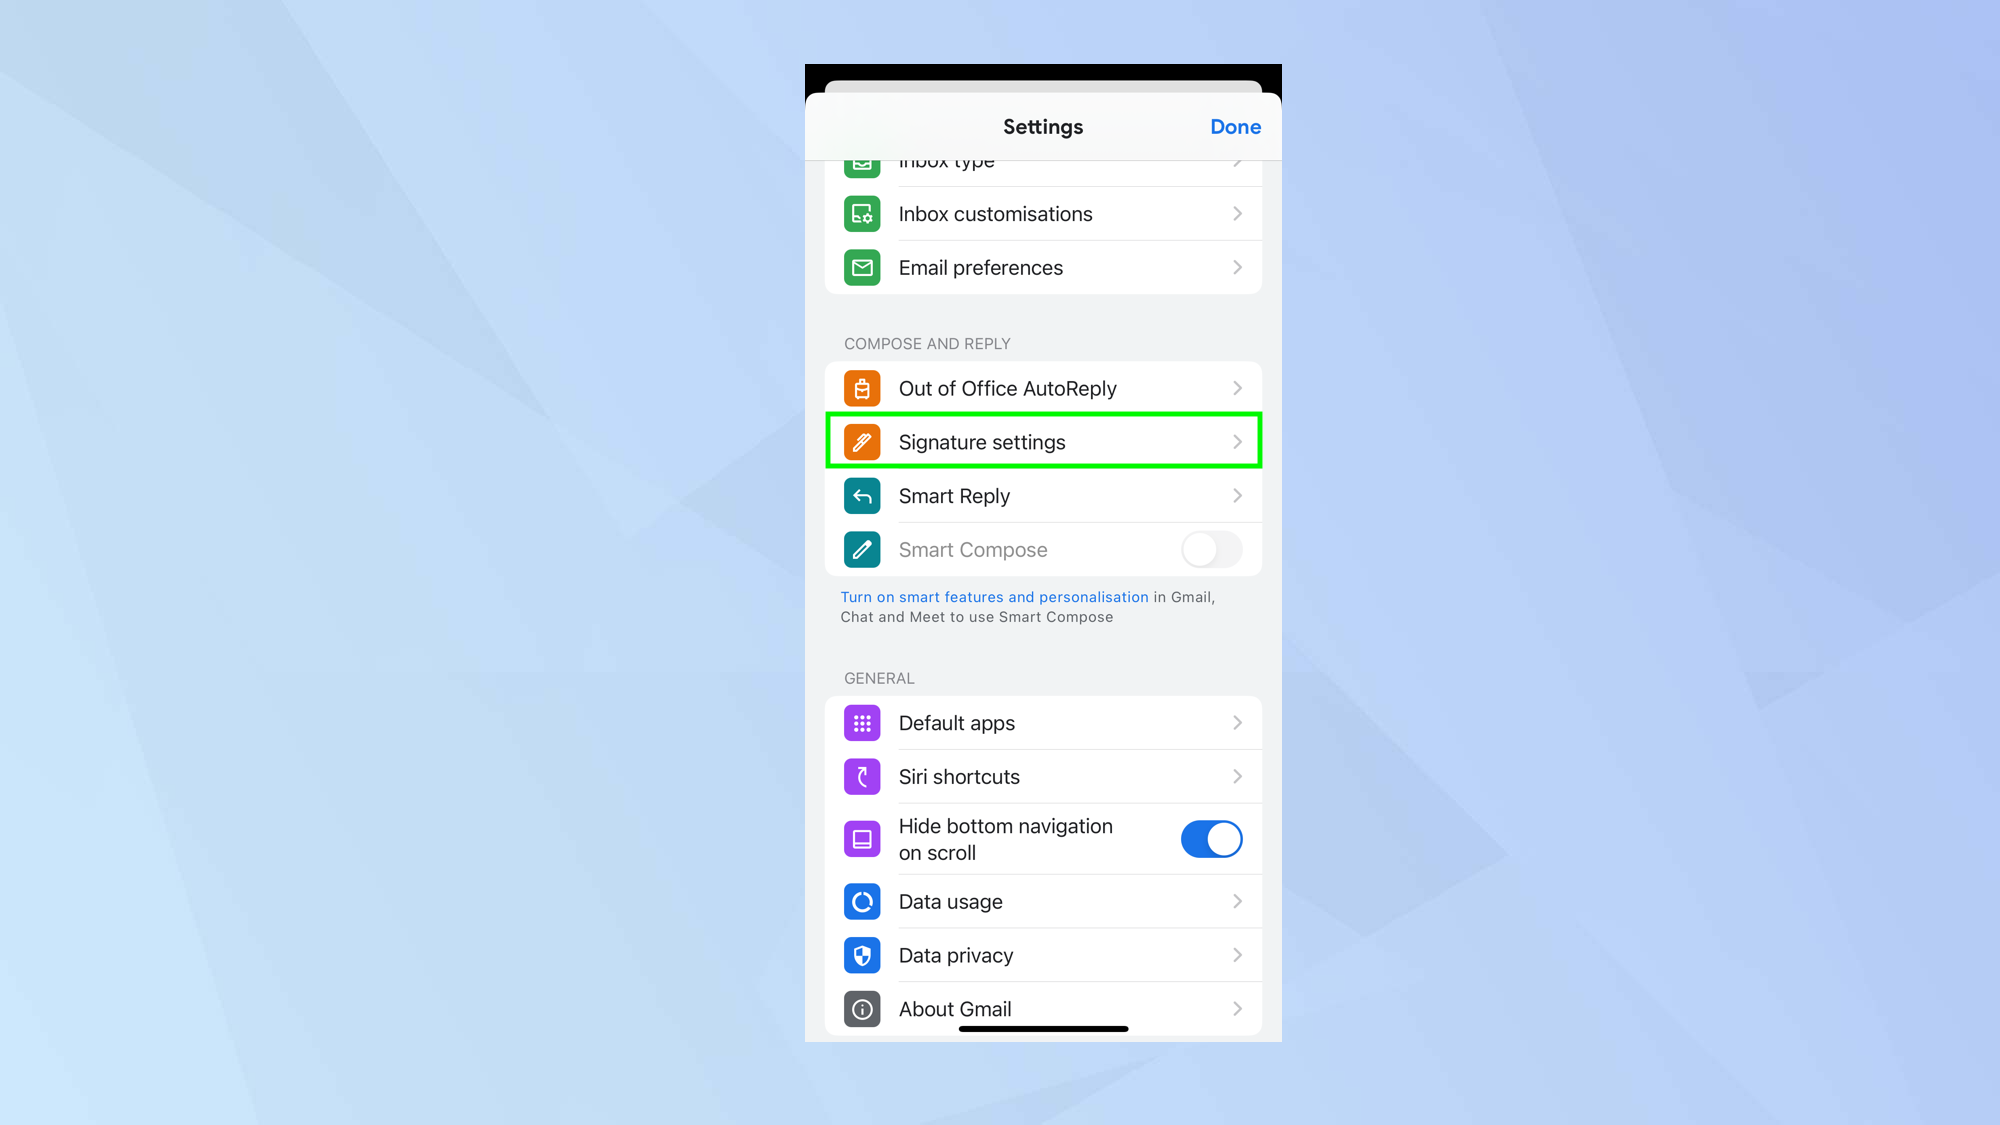
Now scroll down the screen and tap Signature settings in the Compose and Reply section.
3. Turn on Mobile signature
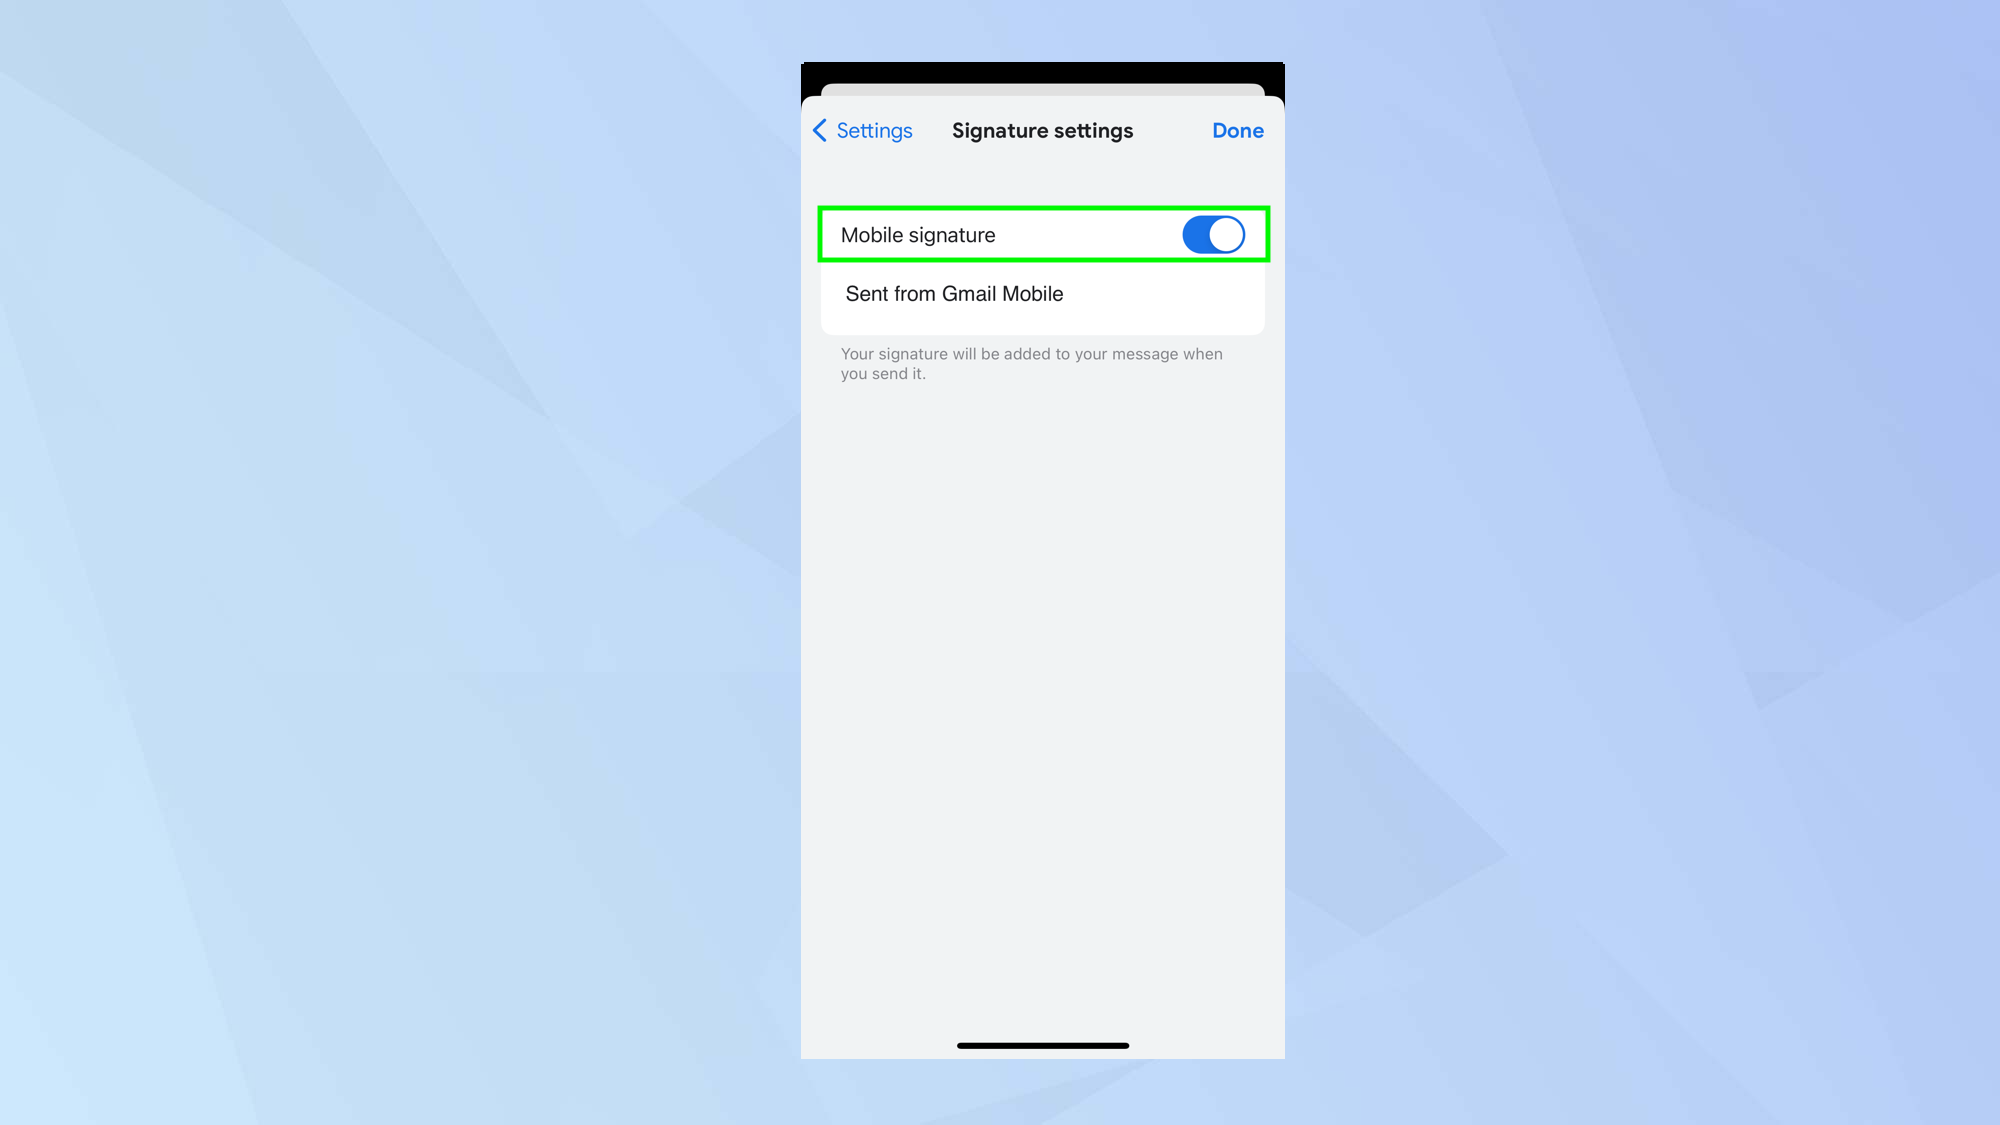
Use the slider to turn on Mobile signature. As you do so, the default signature (Sent from Gmail Mobile) will appear.
4. Write your signature
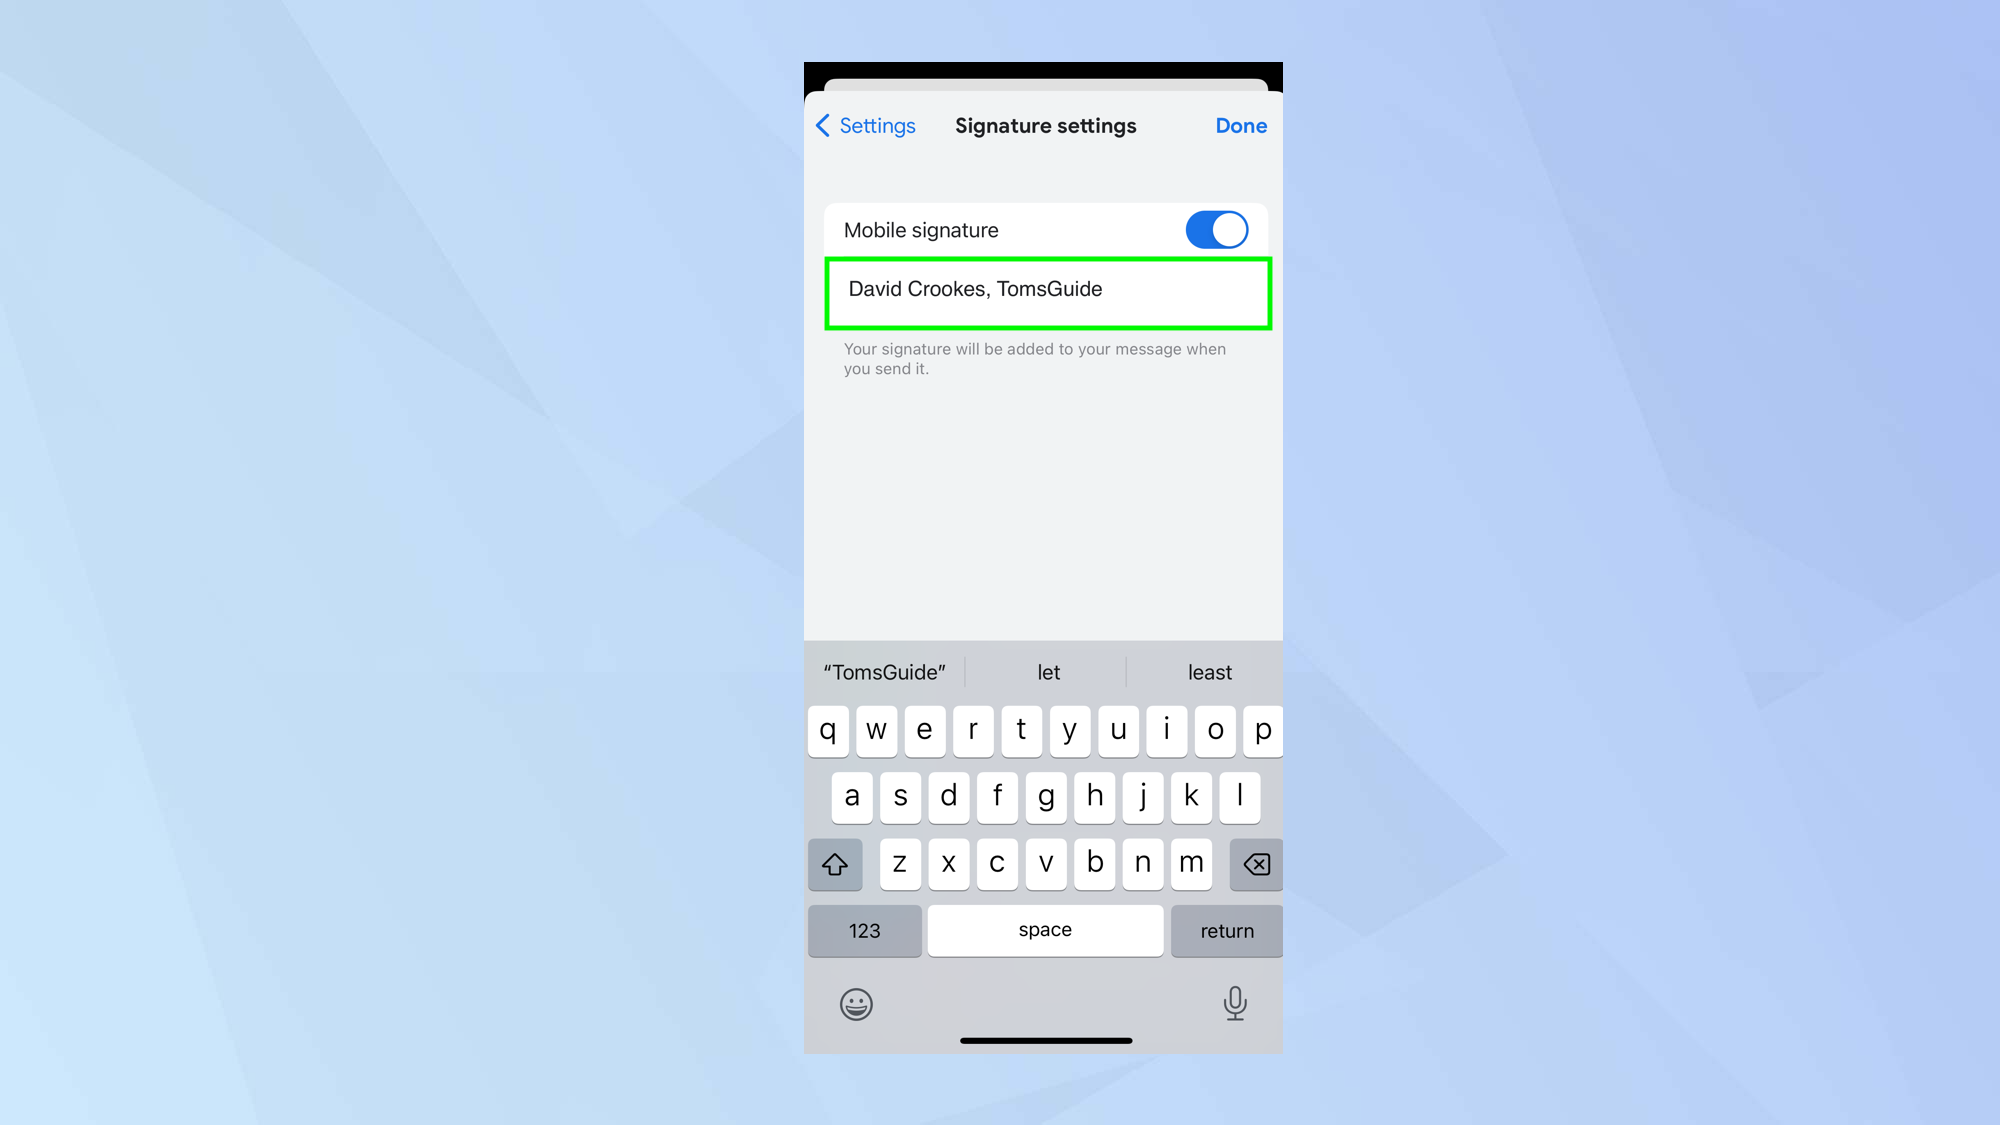
Delete the Mobile signature and write your own. Then tap Done.
How to create and change a signature in Gmail in Android
You can set up signatures on an Android device via the Gmail app
1. Open the settings
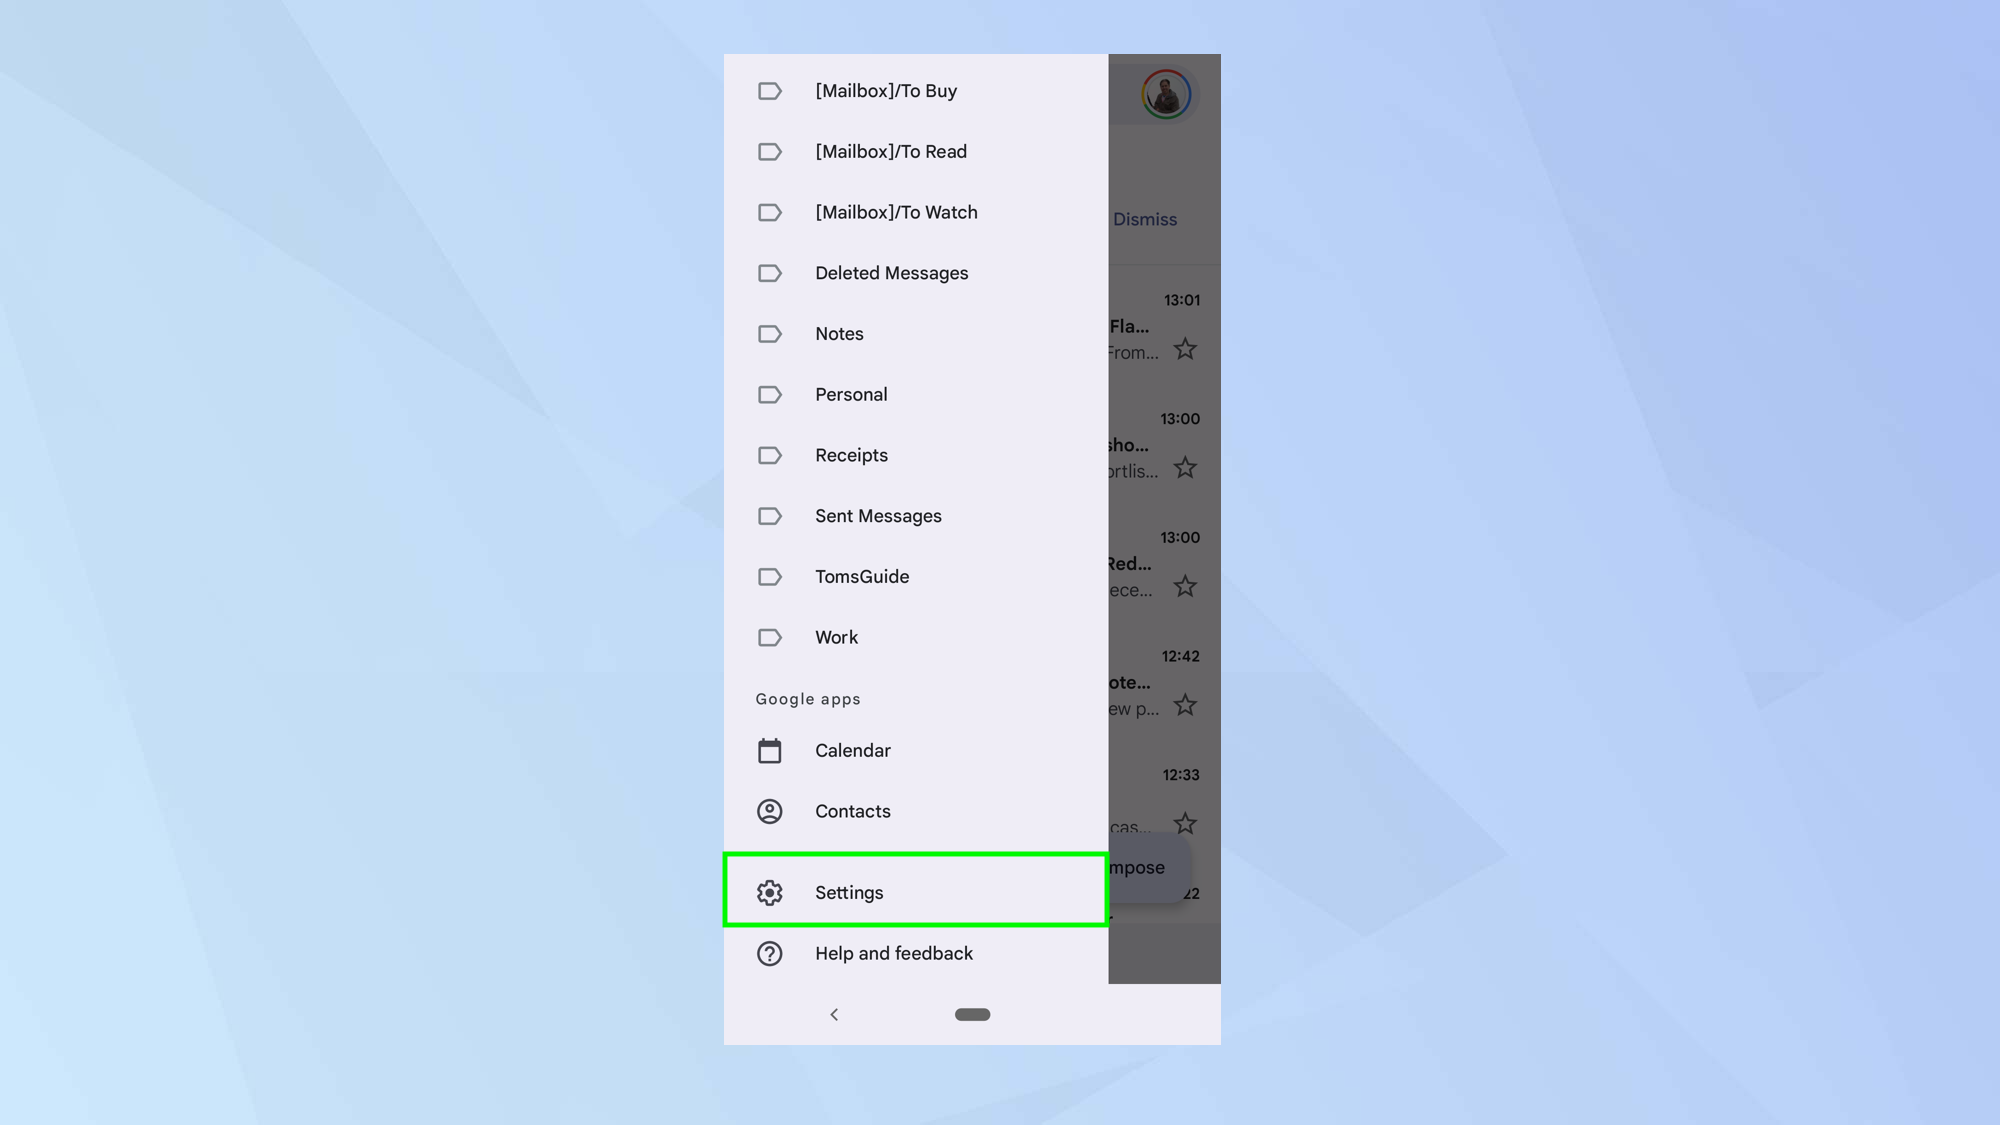
Launch the Gmail app and tap the three-bar menu in the top-left corner. Then select Settings.
2. Select Google Account
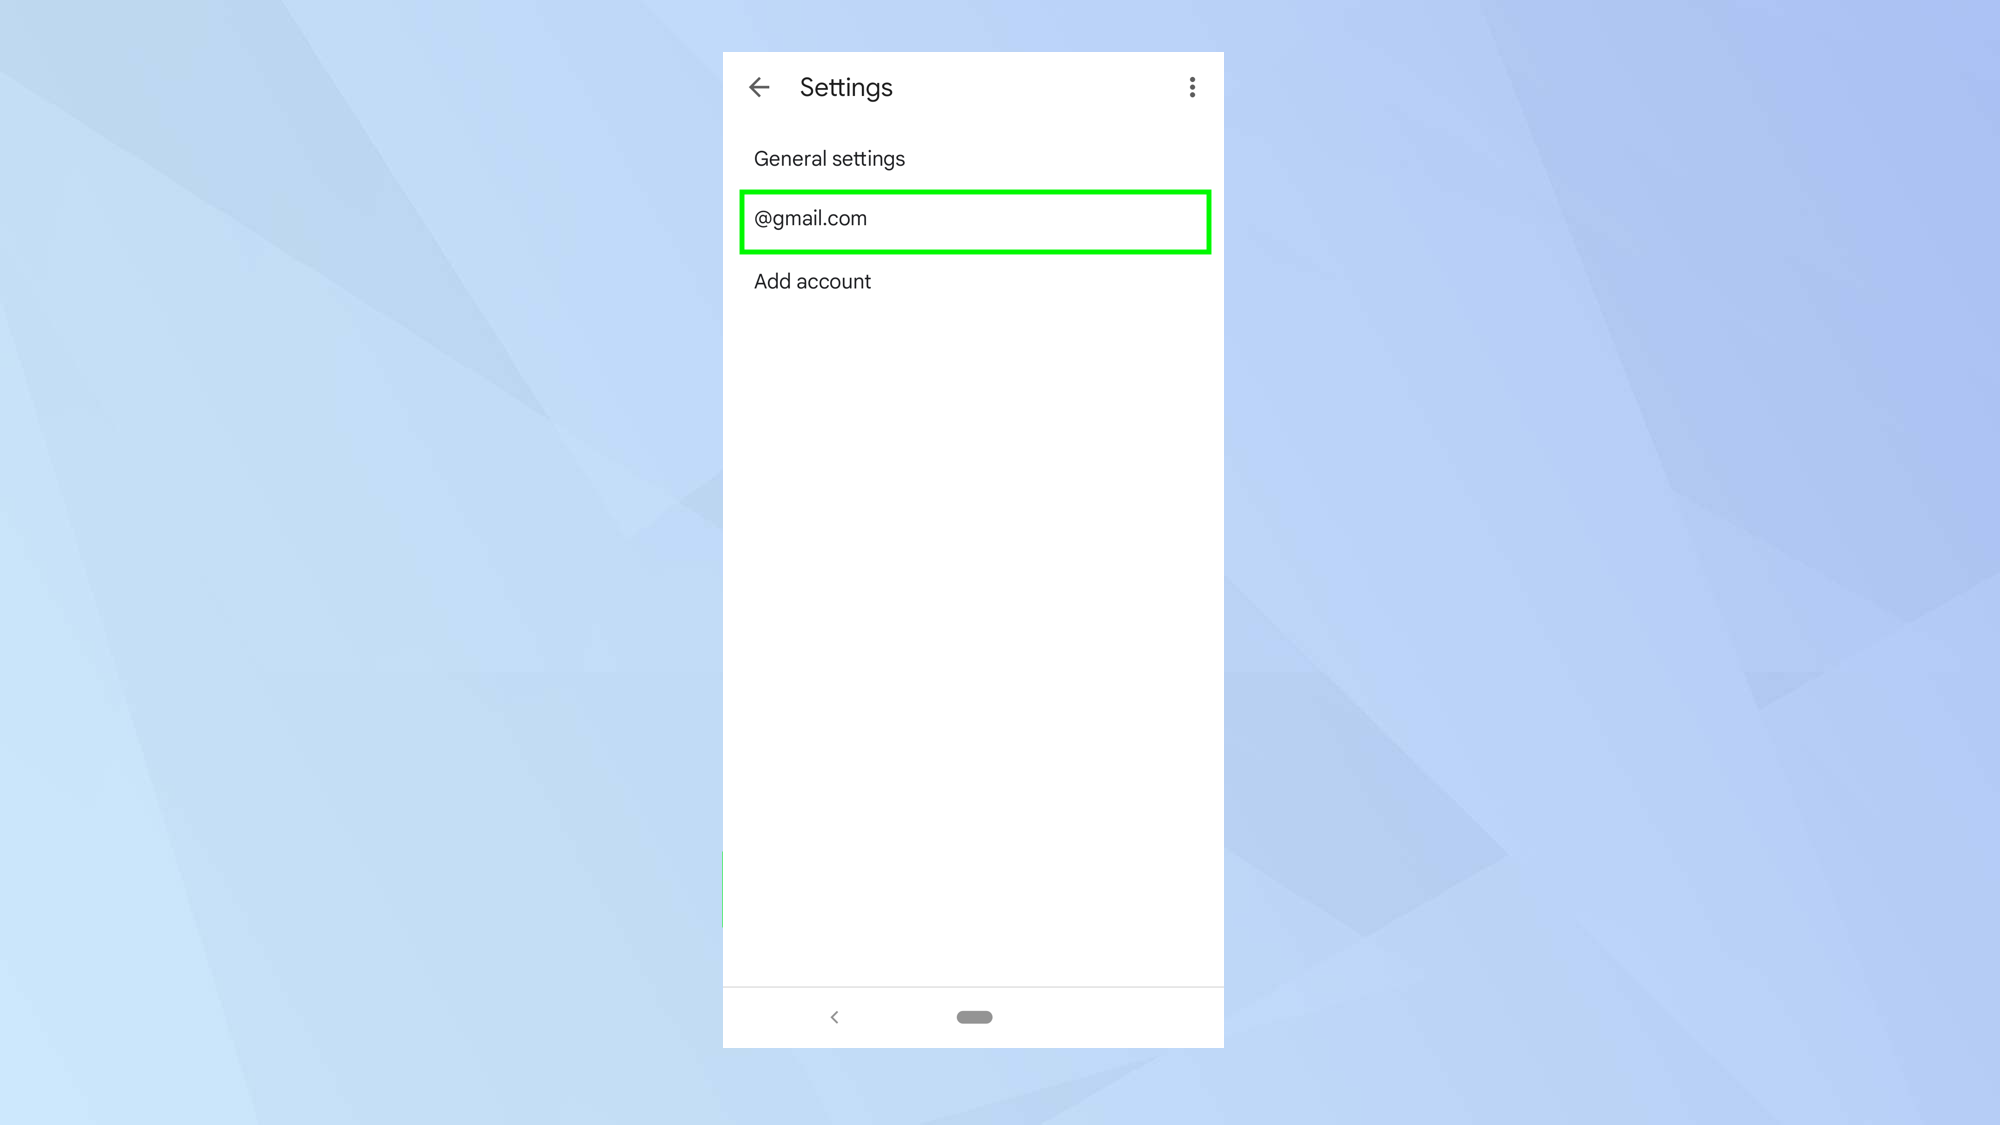
Select the Google Account you want to use.
3. Tap Mobile signature
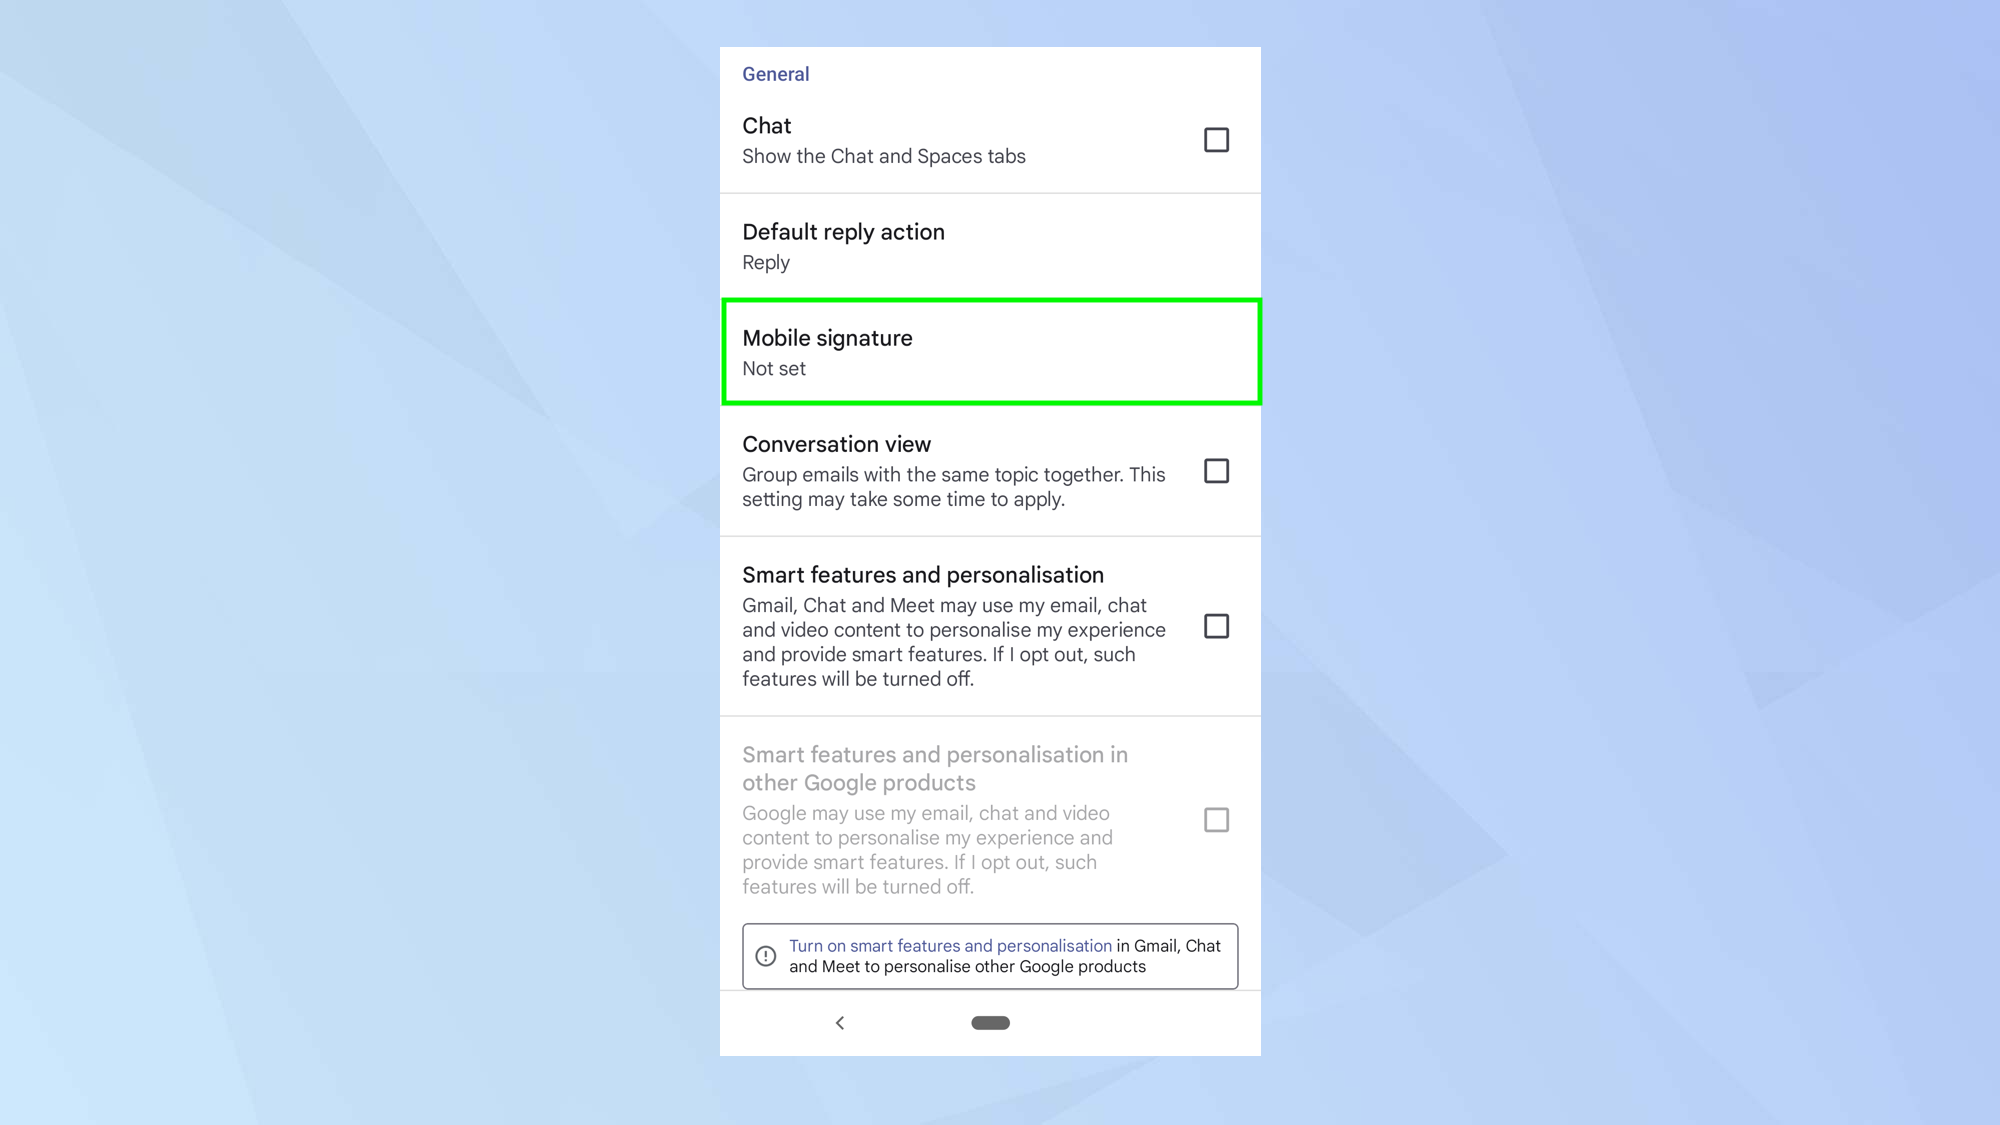
Now scroll down and tap Mobile Signature.
4. Write your signature
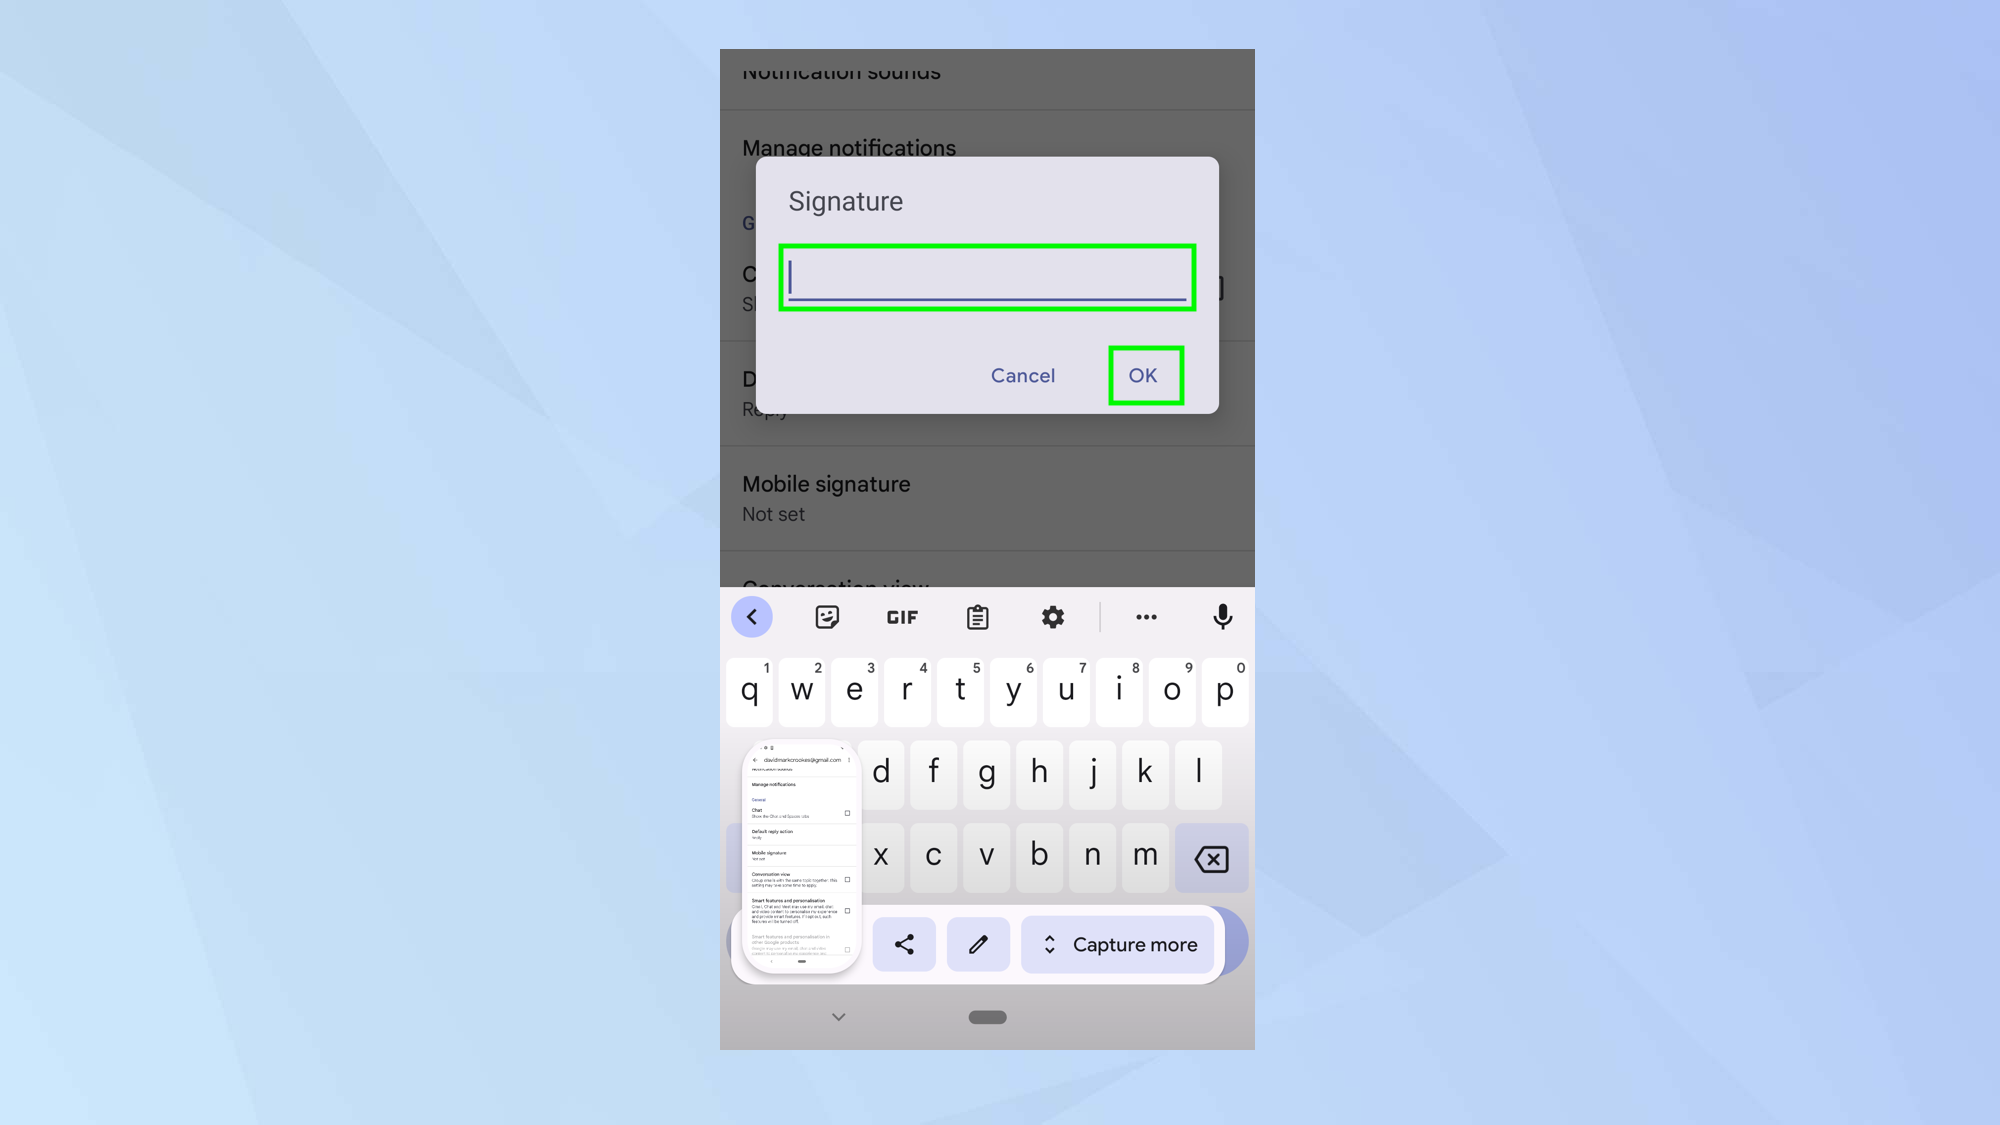
Enter your signature and tap Ok
And there you go. You now know how to create and change a signature in Gmail. Why not learn how to archive email in Gmail or how to delete all emails in Gmail. You can also discover how to turn on Gmail's two-factor authentication on your desktop and how to set up Gmail two-factor authentication (2FA) on your phone. Why not head over to our Gmail hub for more?
Sign up to get the BEST of Tom's Guide direct to your inbox.
Get instant access to breaking news, the hottest reviews, great deals and helpful tips.

David Crookes is a freelance writer, reporter, editor and author. He has written for technology and gaming magazines including Retro Gamer, Web User, Micro Mart, MagPi, Android, iCreate, Total PC Gaming, T3 and Macworld. He has also covered crime, history, politics, education, health, sport, film, music and more, and been a producer for BBC Radio 5 Live.
