How to create a double exposure in Photoshop
Achieve an artistic effect by creating a double exposure in Photoshop
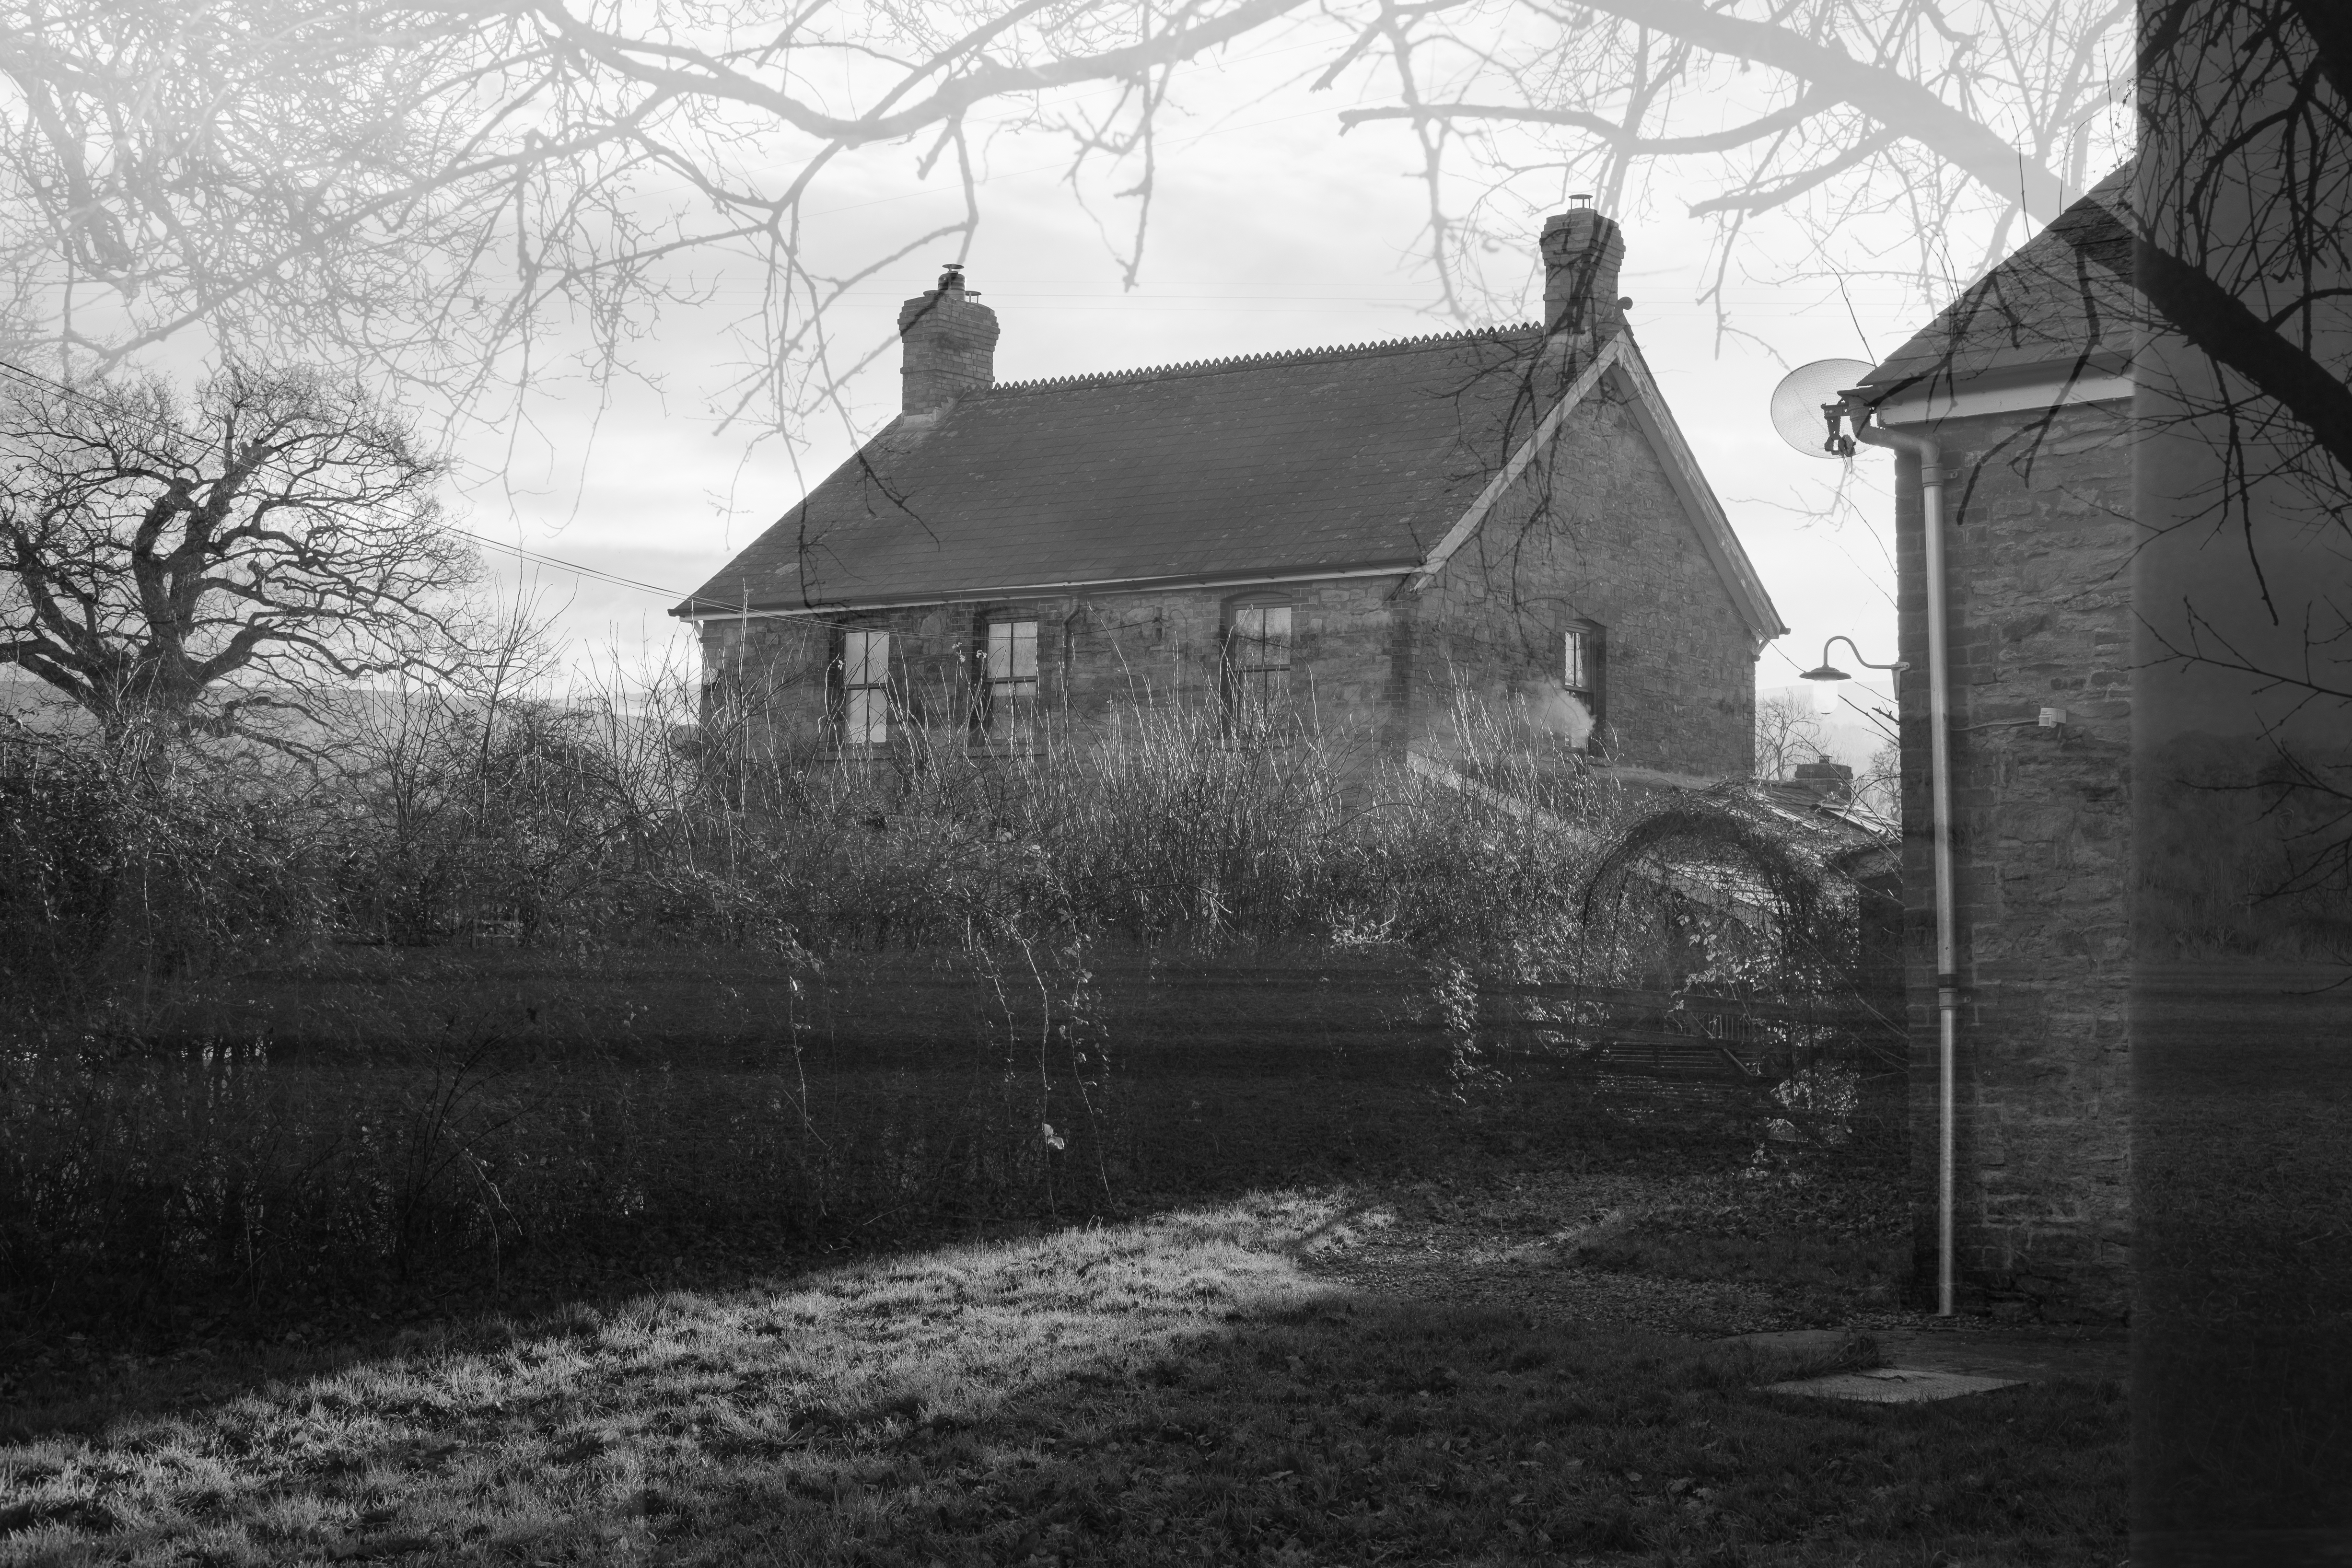
If you wan't to make a double exposure in Photoshop, we've got good news for you: it's really easy! Gone are the days of film where creating double exposures was a difficult, manual job, which came with the risk of ruining your film shots. Now, all you need is a subscription to one of the best photo editing software applications and about 5 minutes of your time.
Double exposures are an awesome way of adding depth, atmosphere or an artistic edge to your photos. They can be a great way to convey the essence of two images in one. For instance, you can overlay two images from the same shoot, scene or area in one, to convey more of what you saw in the moment. Heck, if we're being cynical, double exposures can also serve as a foolproof way of adding a little more spice to somewhat boring images.
Simply put, creating a double exposure in Photoshop boils down to getting the two (or more) images you want to overlay into the same image canvas as separate layers, then adjusting the opacity of the top one. There are a few ways to do this: you can load them straight from Lightroom as layers, or you can load them in Photoshop as a stack.
We're going to do it a third, simpler way, though, which assumes you only have access to Photoshop (so we won't be covering how to load from Lightroom). And we won't be loading images into a stack (I'll point out why in the steps below). Once you've got the images into the same canvas though, all methods end the same way by using the opacity slider, so there isn't a huge amount of difference. You can use the steps below to create multiple exposures too — two isn't the limit!
Here's how to create a double exposure in Photoshop.
How to create a double exposure in Photoshop
In this guide, we're using the full Adobe Photoshop CC program, rather than Photoshop Elements — you'll need an Adobe CC subscription to use this software.
1. Open your images as separate canvases in Photoshop
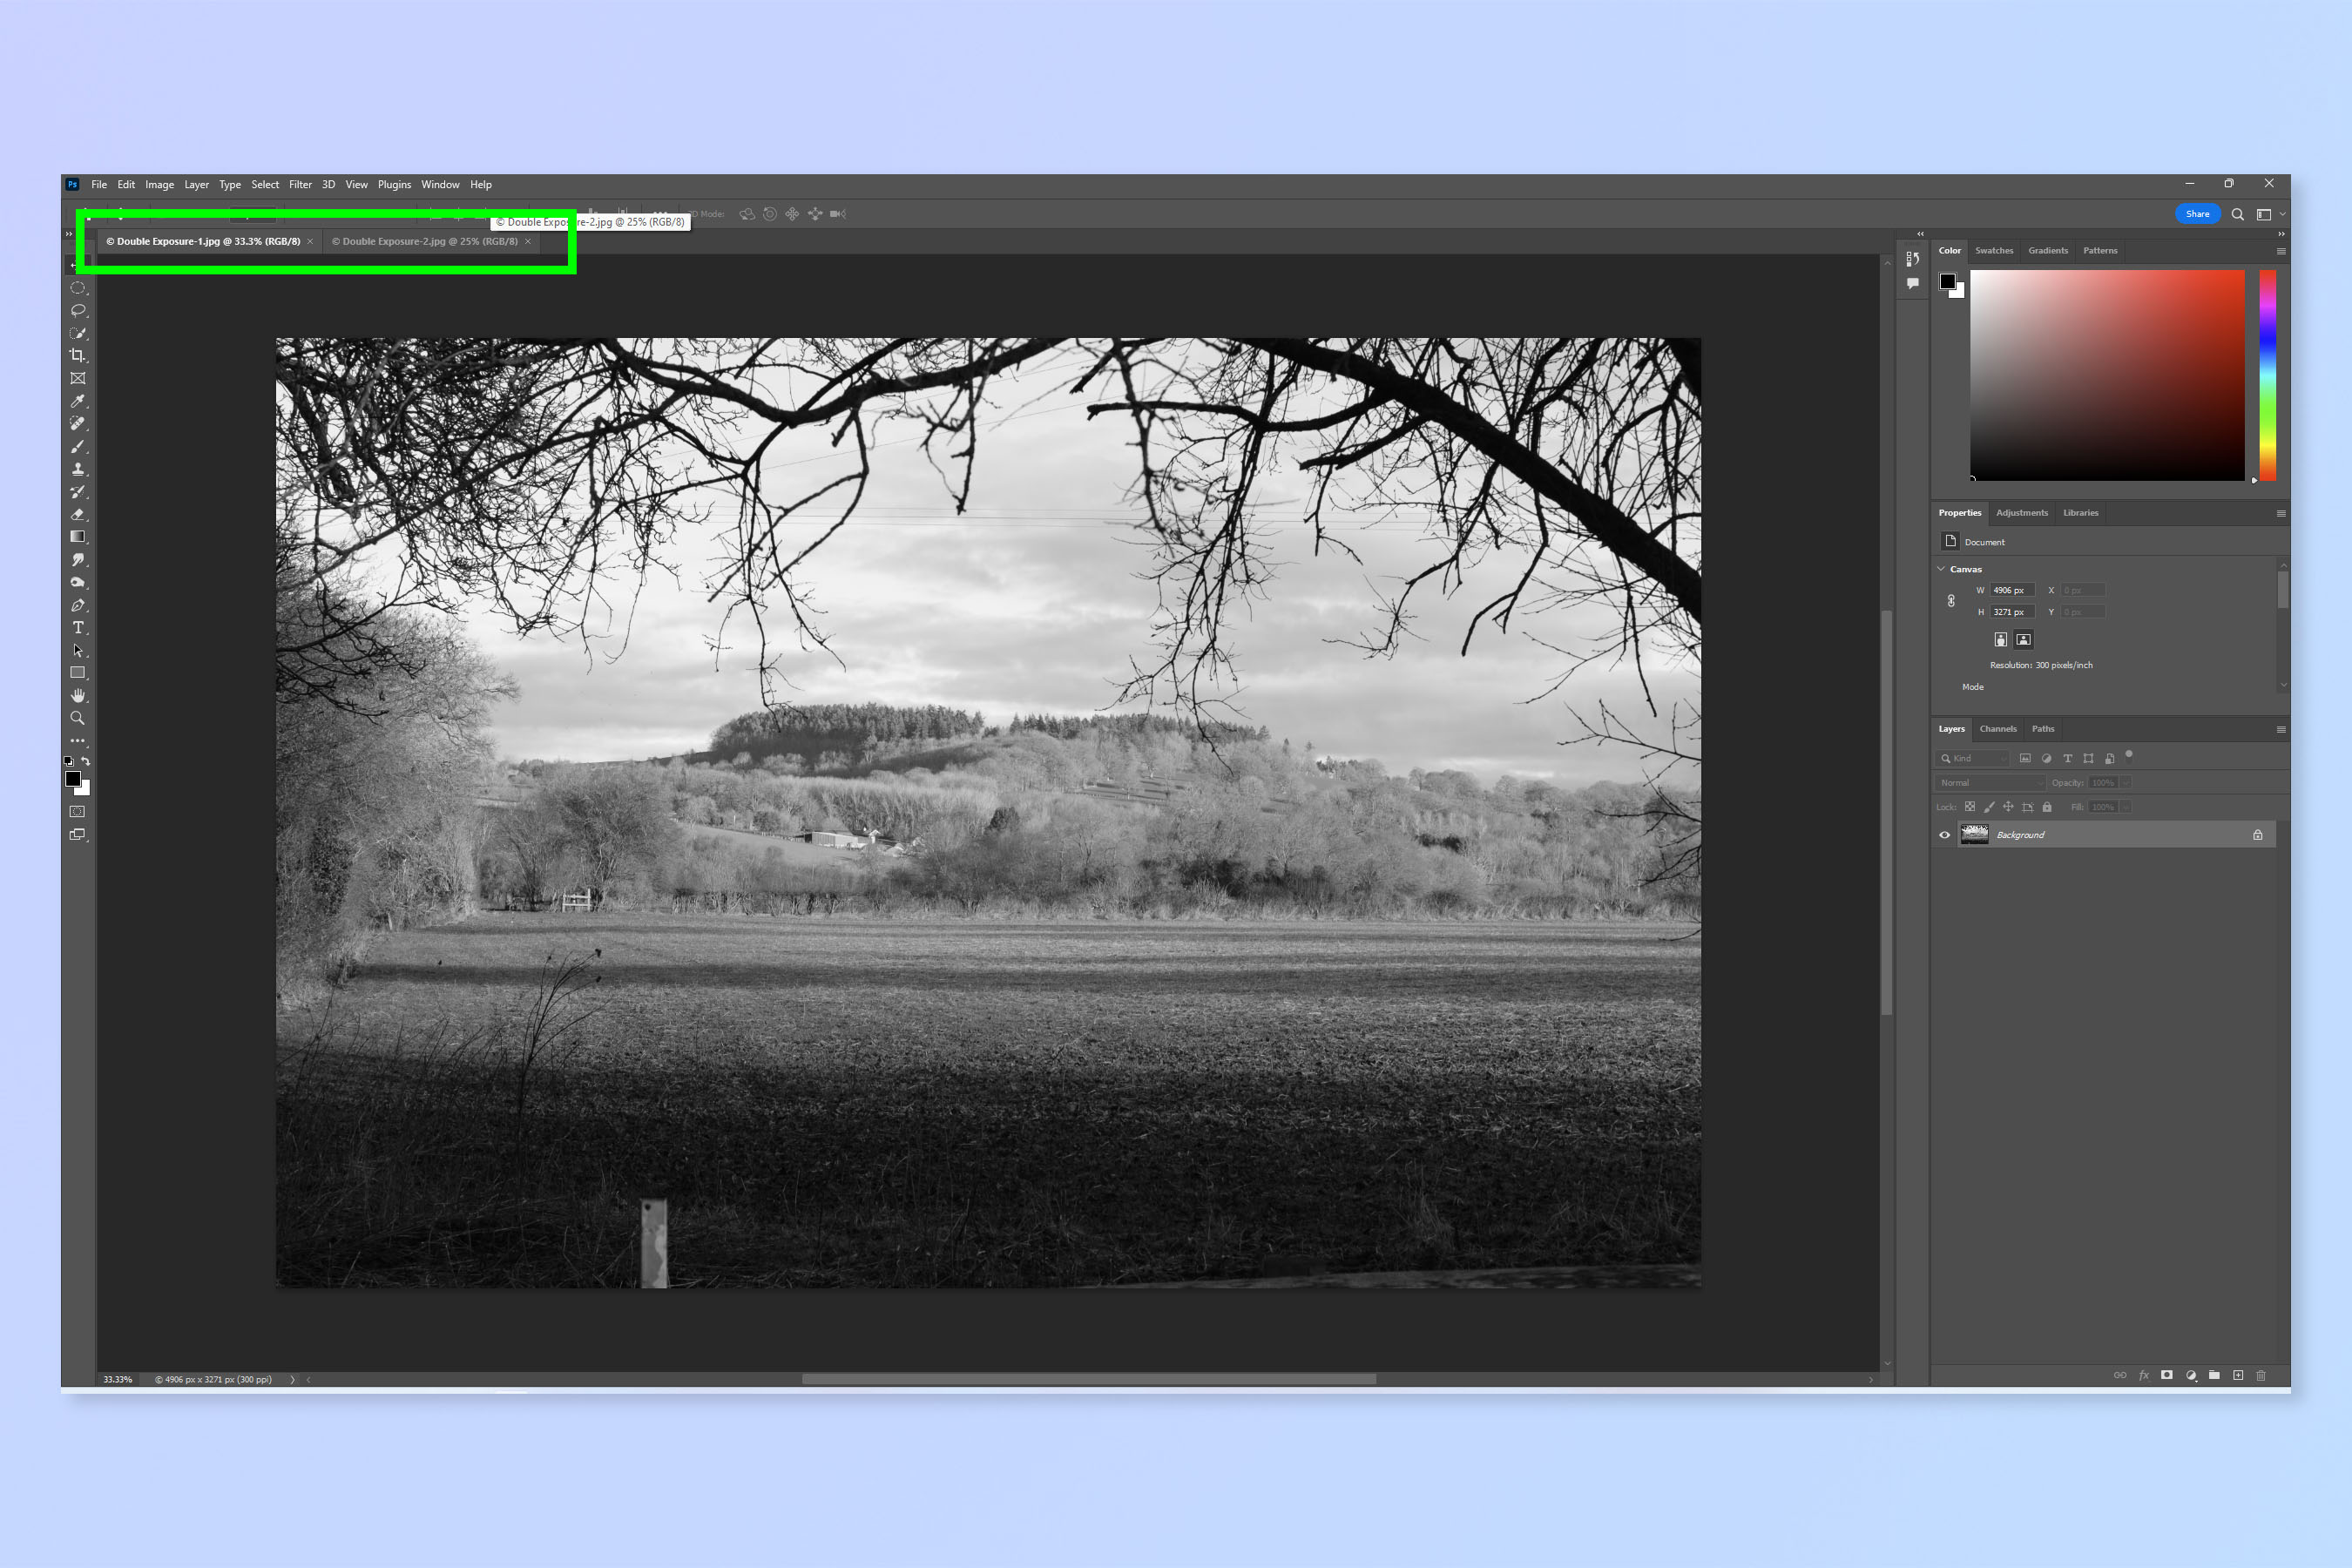
First up, open your images in separate canvases in Photoshop. You can do this easily by just dragging and dropping the files into the Photoshop home page. Or by going to File > Open and selecting the images you want. You can also load your files into a stack (where they open in the same canvas) by going to File > Scripts > Load Files into Stack, but you should only do that if you know your images are the same aspect ratio and exact dimensions (we'll cover why below).
2. Crop and resize images to the same ratio and dimensions
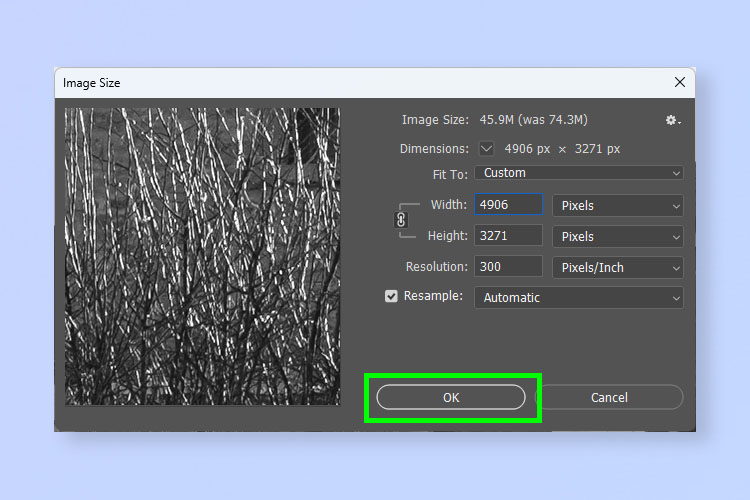
Ideally you want your images to overlay precisely so there aren't totally straight internal borders where a smaller image finishes. If you know what you're doing, you can get away with having differently-sized images if you know where those gaps will be and can hide them with the other image. But to start off with, just ensure they're the same size.
It's easiest if you do this before you load your images into the same canvas — if you loaded your files into a stack they'll already be in the same canvas, where it's a little more fiddly to change the sizes individually.
So, with the images in separate canvases, crop the images to same same aspect ratio and then, on the larger image (pixel-wise) press Option + Cmd + I (macOS) or Alt + Ctrl + I (Windows) to open the image resize tool. Then reduce the larger of the two images to the same dimensions as the smaller one. We've used the larger image as it's better to scale down a higher resolution image than it is to scale up a lower resolution one.
3. Convert both images to layers
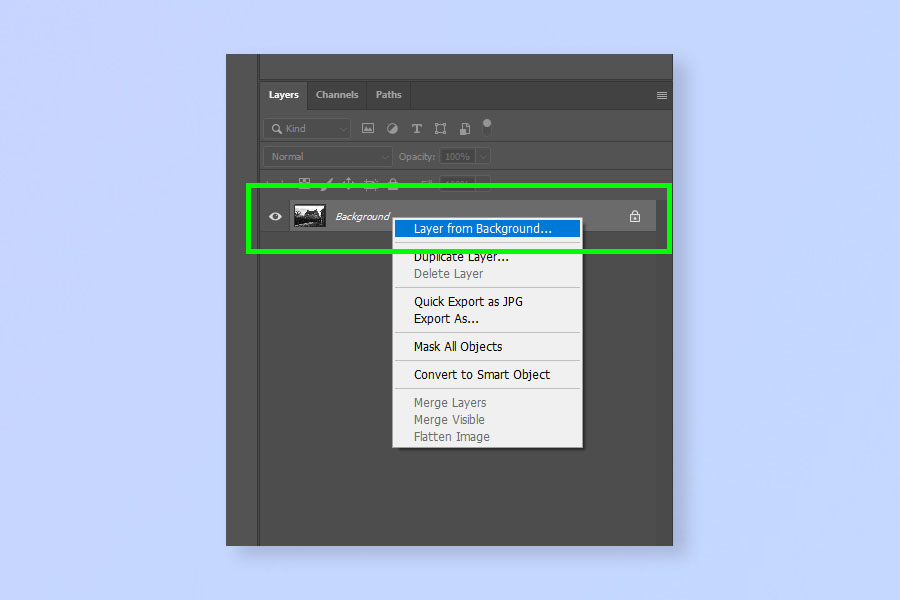
Now, for each image, right-click the background banner in the right-hand layers panel (if you don't see this, in the top toolbar click Window > Workspace > Essentials to reset your Workspace to default). Now select Layer from Background. If your images were .png or another format that supports transparency, they'll already show as "Layer 0" rather than "Background" and you won't need to do this.
4. Copy one image layer
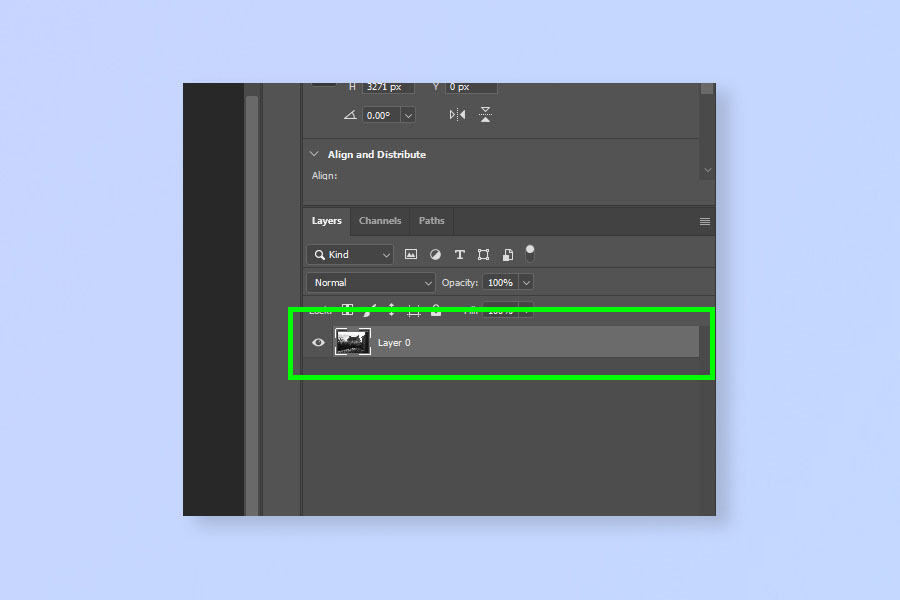
Now, on one of the images (it doesn't matter which) select the image layer in the right-hand layer panel and press Cmd + C (Mac) / Ctrl + C (Windows) to copy the layer.
5. Paste the layer into the other image canvas
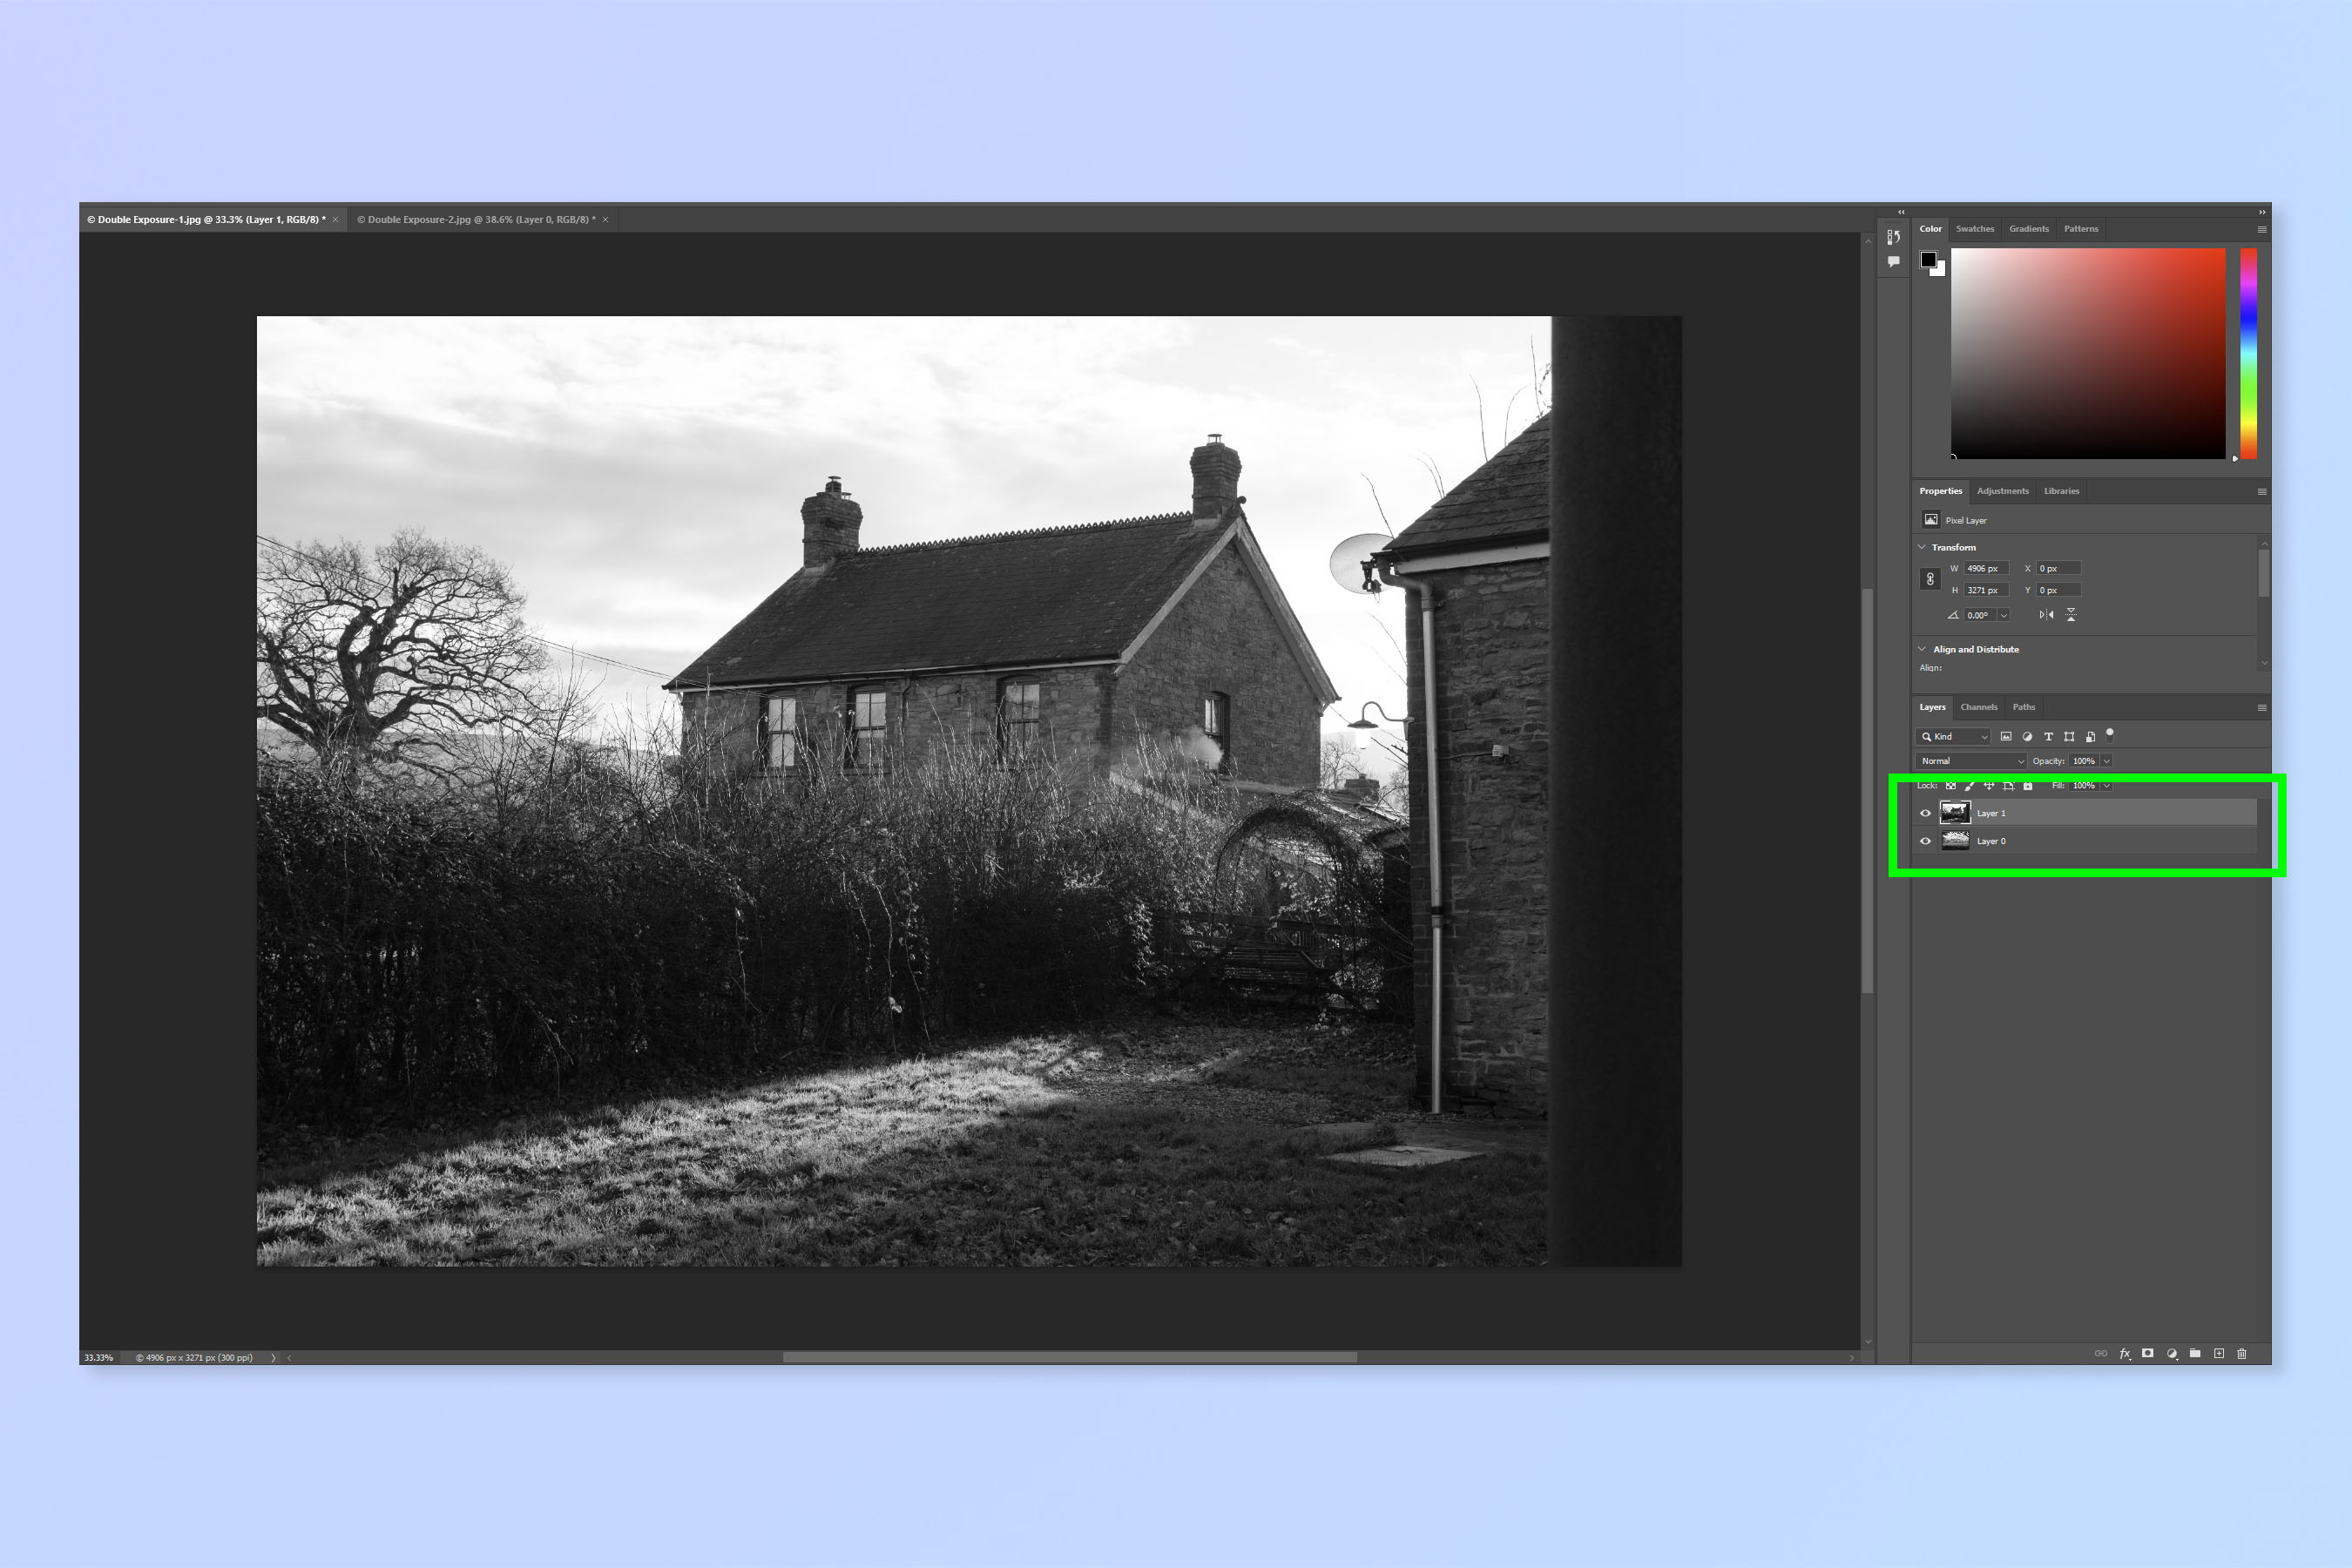
Switch to the other image canvas and press Cmd + V (Mac) / Ctrl + V (Windows) to paste the copied layer into the second image canvas.
You now have a double exposure, you just can't see it yet.
6. Select the top layer and adjust the opacity slider
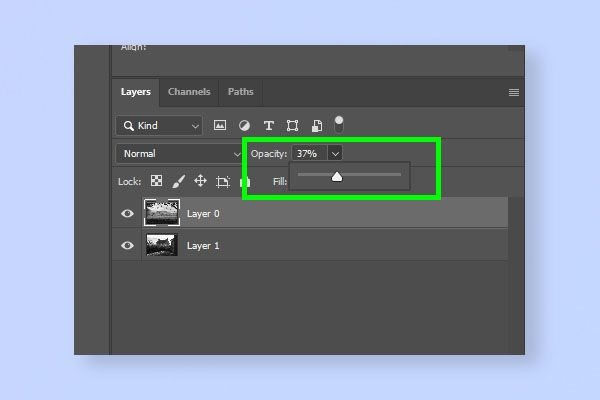
Select the top layer in the right-hand layers panel and adjust the opacity slider downwards. This will start to make the top image more transparent, revealing the lower image, as you can see in the screenshot below. Play around with opacities until you're happy.
Also, ensure to experiment with which image sits on the top and bottom, as this makes a dramatic effect (as a general rule, you want the more prominent image on the bottom and the more transparent image on the top. Drag the lower image layer(s) to the top and change opacities again until you reach a double exposure you're happy with.
You can play around with adjusting the opacity of the base layer, too, which will result in a lighter background image and more dream-like effect. To start with, though, we'd recommend keeping it simple with a fully opaque base layer and a transparent top layer.
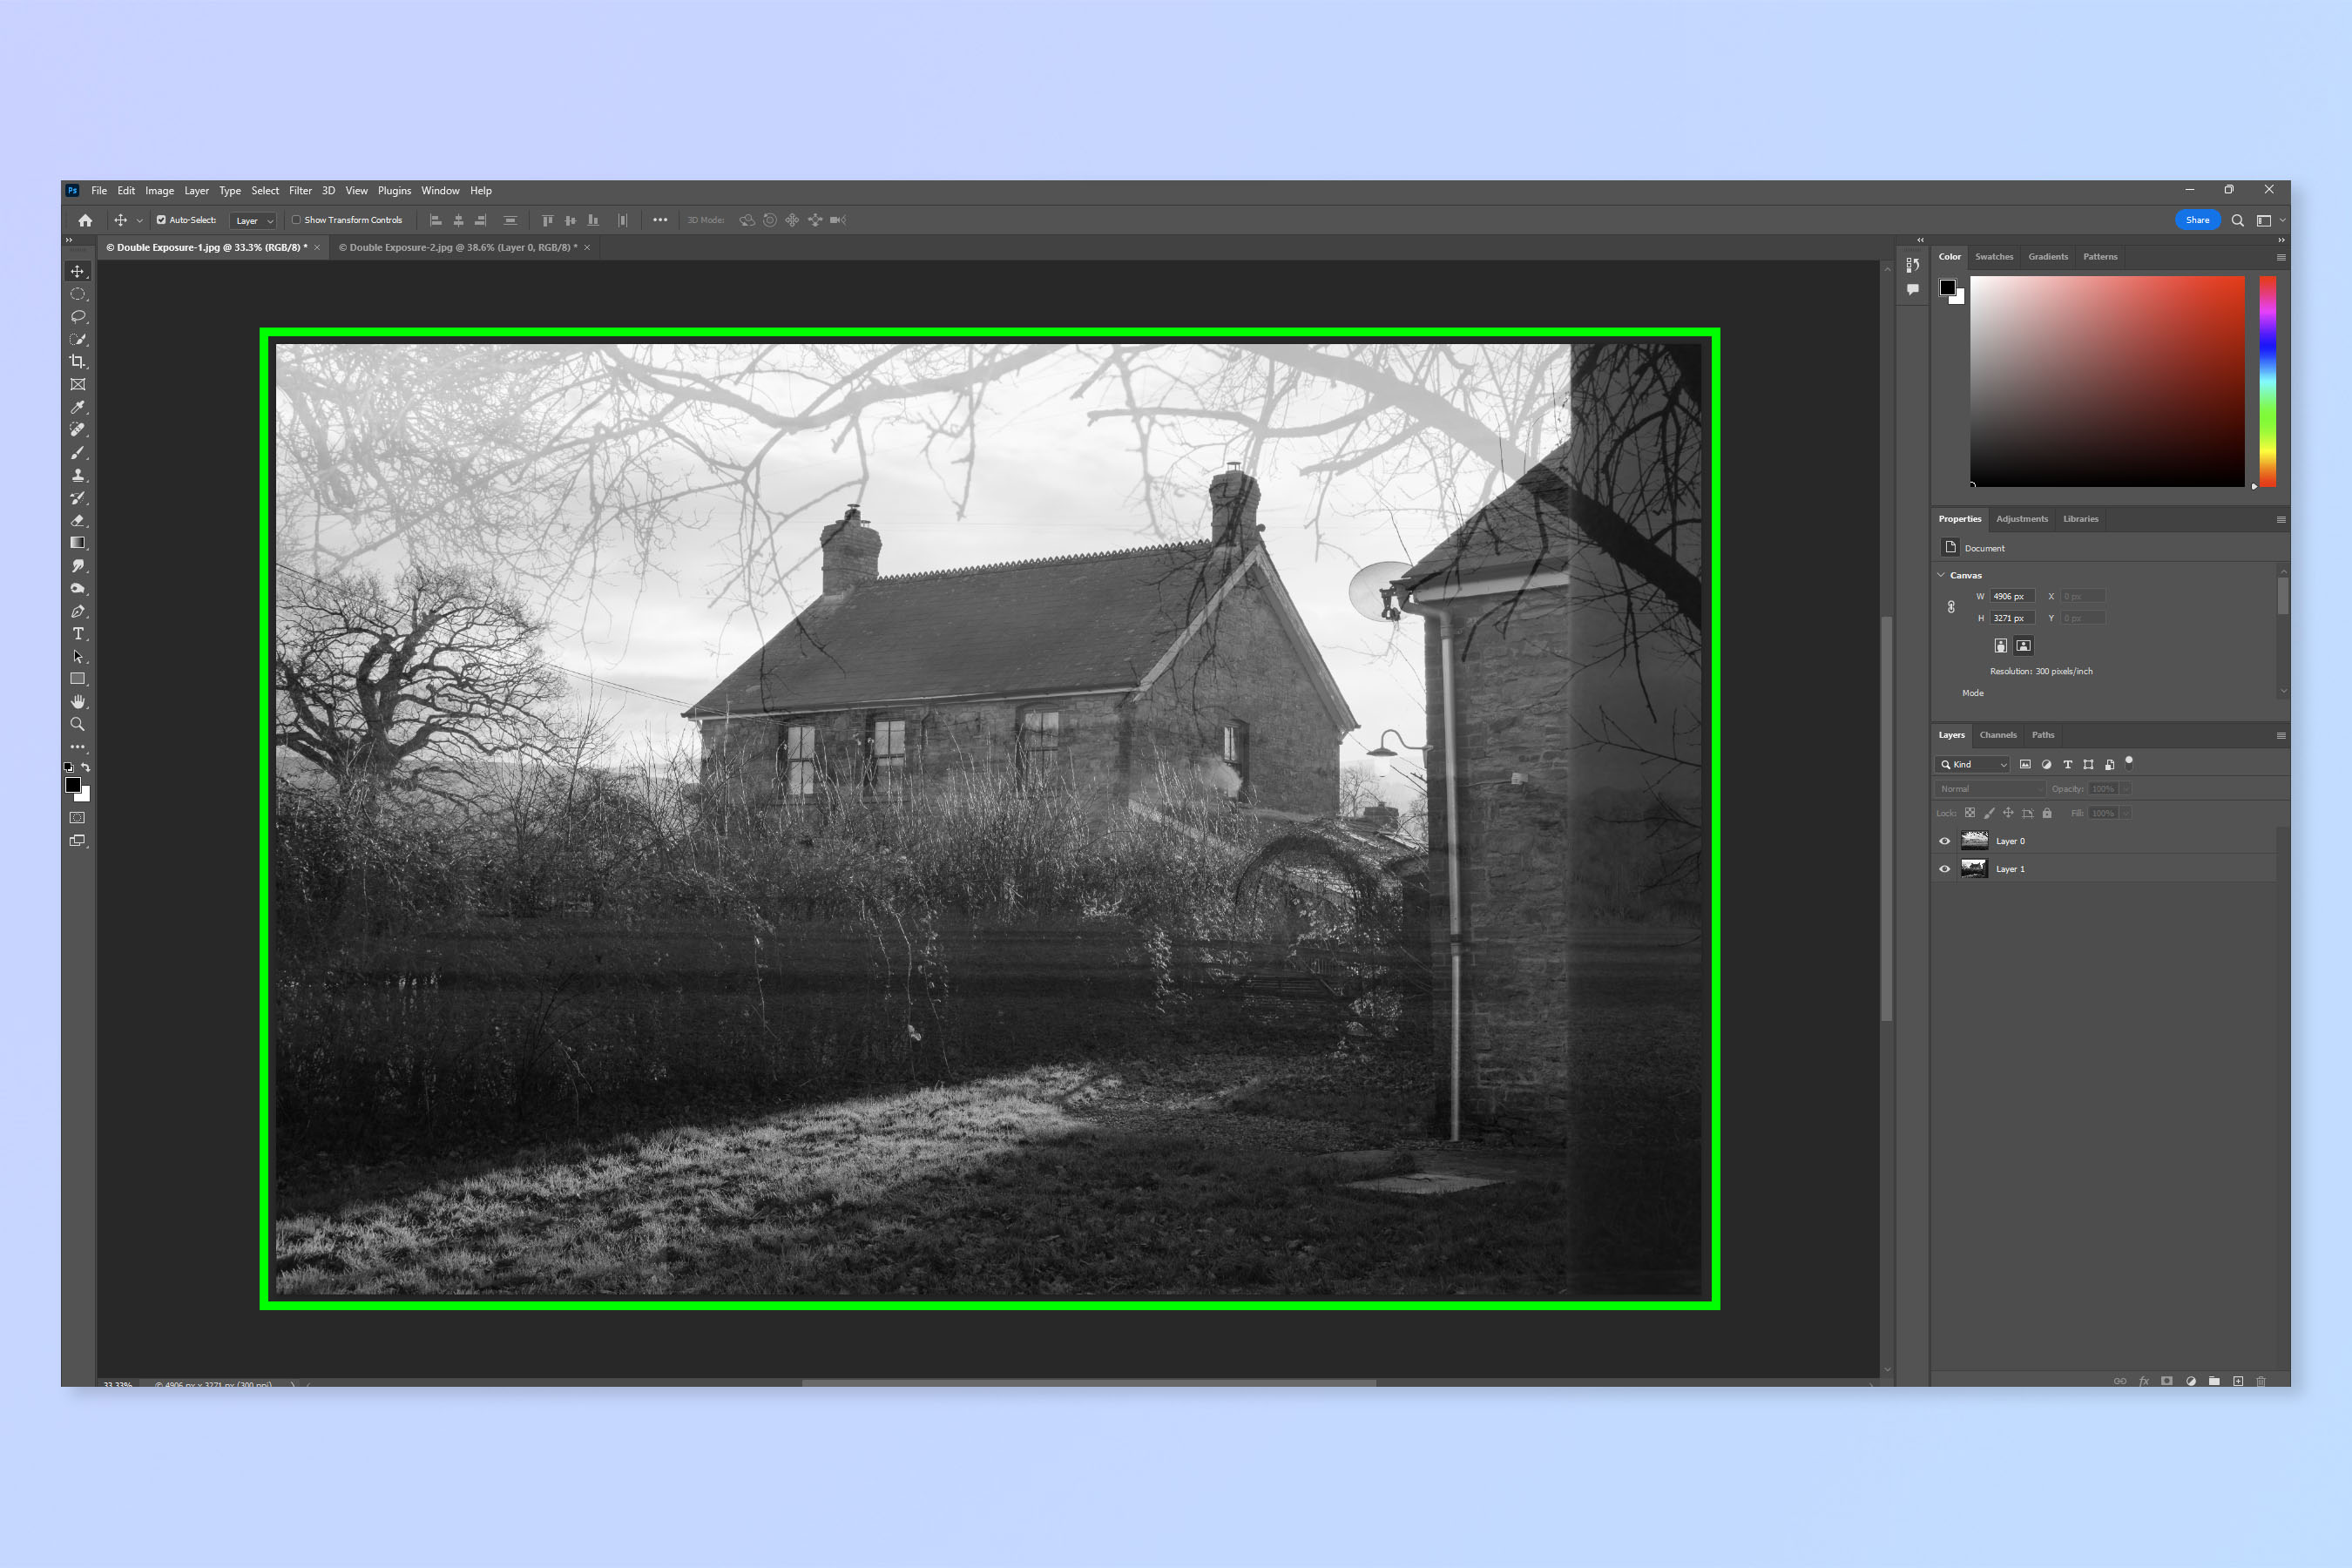
As you can see in the image above, two images are now overlaid, resulting in an atmospheric, haunting effect.
Sign up to get the BEST of Tom's Guide direct to your inbox.
Get instant access to breaking news, the hottest reviews, great deals and helpful tips.
7. Go to Layer > Flatten Image
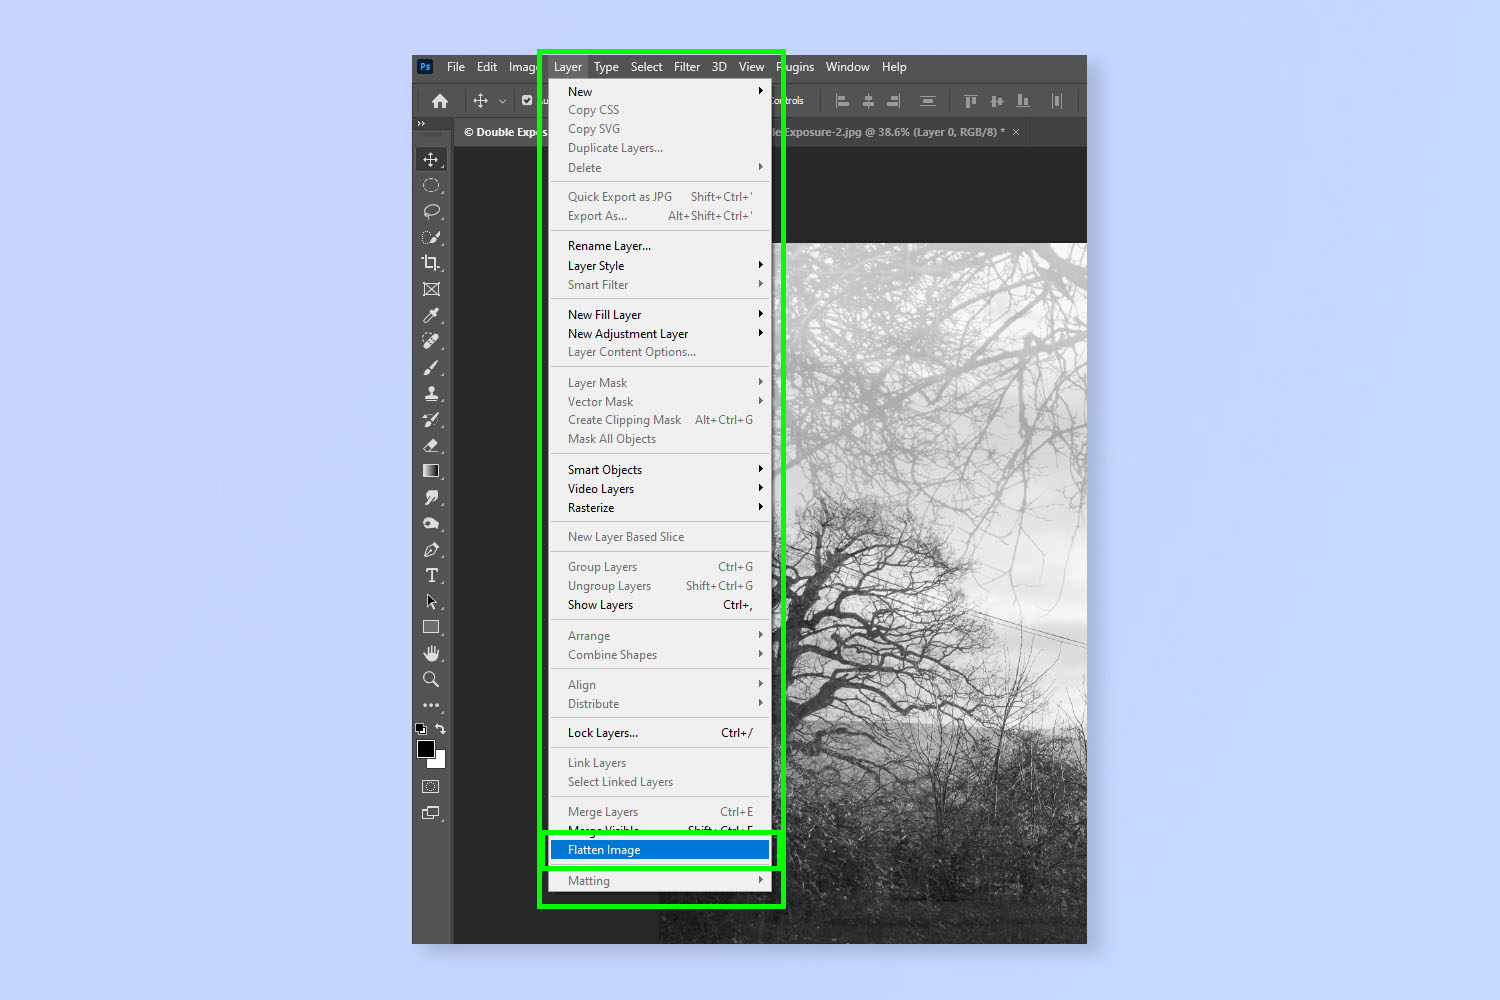
Once you're happy, it's time to condense the image by flattening. This combines the two layers into one, which finalizes your double exposure and locks it in. It also helps to shrink the image file size (useful given you just combined two potentially high-resolution image files). Select Layer in the top toolbar, then click Flatten Image.
8. Export your final image
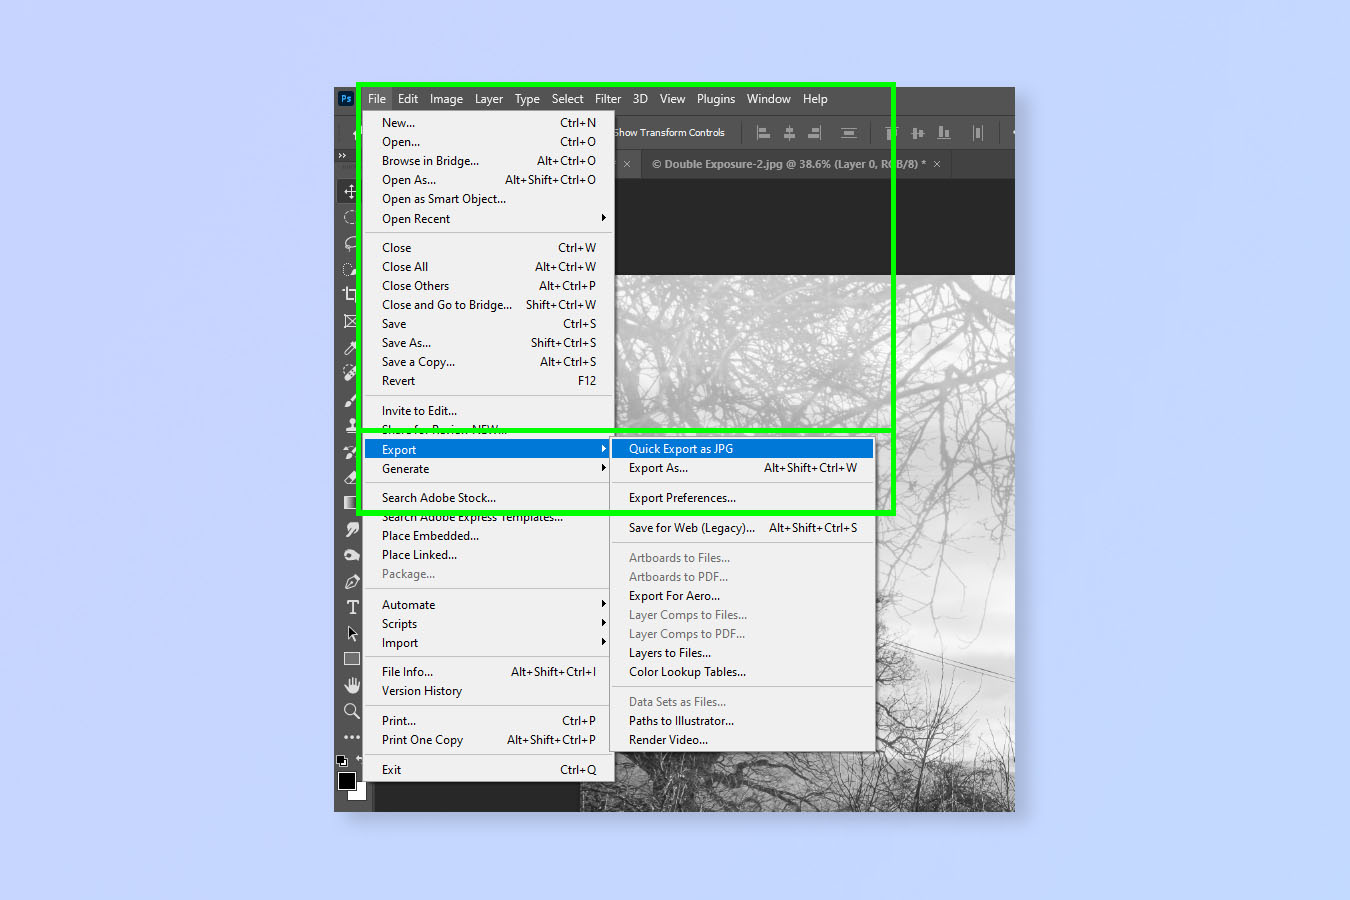
Now, all there's left to do is export your masterpiece. Click File in the top toolbar and export the image according to your preference.

That's all there is to it. Now you can share your artistic creations with the world, and experiment making more. Remember that you can repeat the steps above with more image layers to create multiple exposures!
If you'd like more help using Adobe Photoshop, check out our guides on how to open an image in Camera Raw in Photoshop, how to remove a background in Photoshop and how to blur a background in Photoshop.

Peter is a Senior Editor at Tom's Guide, heading up the site's Reviews team and Cameras section. As a writer, he covers topics including tech, photography, gaming, hardware, motoring and food & drink. Outside of work, he's an avid photographer, specialising in architectural and portrait photography. When he's not snapping away on his beloved Fujifilm camera, he can usually be found telling everyone about his greyhounds, riding his motorcycle, squeezing as many FPS as possible out of PC games, and perfecting his espresso shots.
