How to copy and paste edit settings in Adobe Lightroom
Save yourself time using Lightroom with a quick copy and paste
It pays to know how to copy and paste edit settings in Adobe Lightroom, especially if you use the software or plan on using it a lot.
While Adobe Lightroom is one of the best photo editing software applications out there, there isn't any way of getting around the fact that editing large numbers of photos takes time. One of the ways you can speed up your workflow and cut down on the time you spend in the editing studio is to copy edits from certain images and paste them to other images where the exposures are similar.
Using this method, you can effectively reduce your editing down to batches of images with reasonably similar exposures, tweaking to accommodate the subtle differences.
It's also a great way to copy and paste certain edits to an entire library of images — for example, copying and pasting a specific color profile like monochrome, or copying a lens profile correction to other images shot on the same lens.
But how do you do it? Well, thankfully, it's easy, but you might not have figured out how if you didn't know where to look. Fear not, this guide is here to show you.
How to copy and paste edit settings in Adobe Lightroom
The process is slightly difference for Adobe Lightroom and Adobe Lightroom Classic. It's more or less the same, but we've broken this guide down into the two different software applications so you can get an idea of the process on the software that's familiar to you.
How to copy and paste edit settings in Adobe Lightroom
First, let's look at the standard Lightroom application, which is a little simpler than Classic, and offers a similar experience across desktop, tablet and smartphone apps.
Sign up to get the BEST of Tom's Guide direct to your inbox.
Get instant access to breaking news, the hottest reviews, great deals and helpful tips.
1. Right click an image tile > Copy Edit Settings
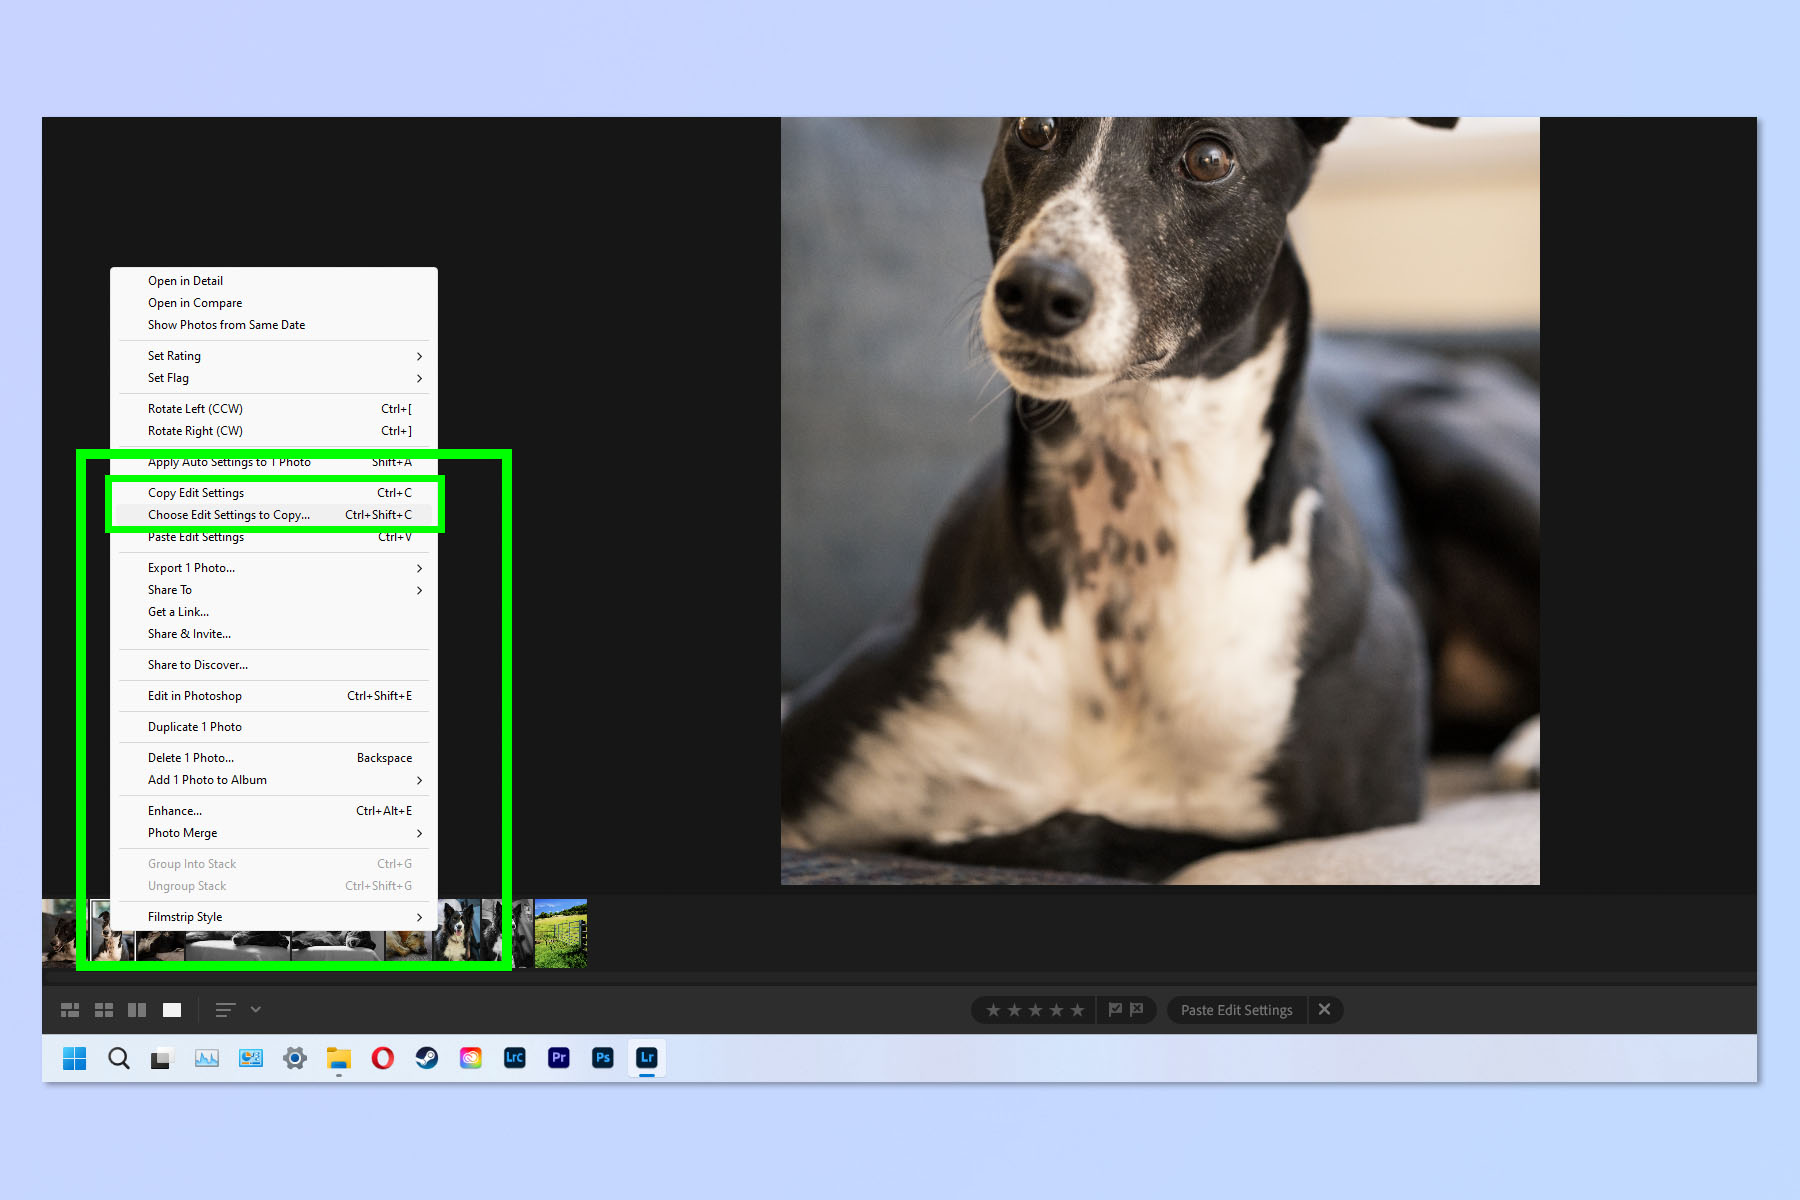
In the image selection bar at the bottom of the window, right click the image whose edits you want to copy. Now you have two options. You can either select Copy Edit Settings to copy all edit settings for that image, or you can select Choose Edit Settings to Copy.
We would recommend the latter, as you can specify the exact edits to copy, which is usually more appropriate. For example, if you have put a crop or spot healing on the first image, the crop won't necessarily make sense on the second image unless the framing is exactly the same, so you'd want to be able to specify the crop is not included in the copied edits.
2. Select which edits to apply (if choosing edit settings)
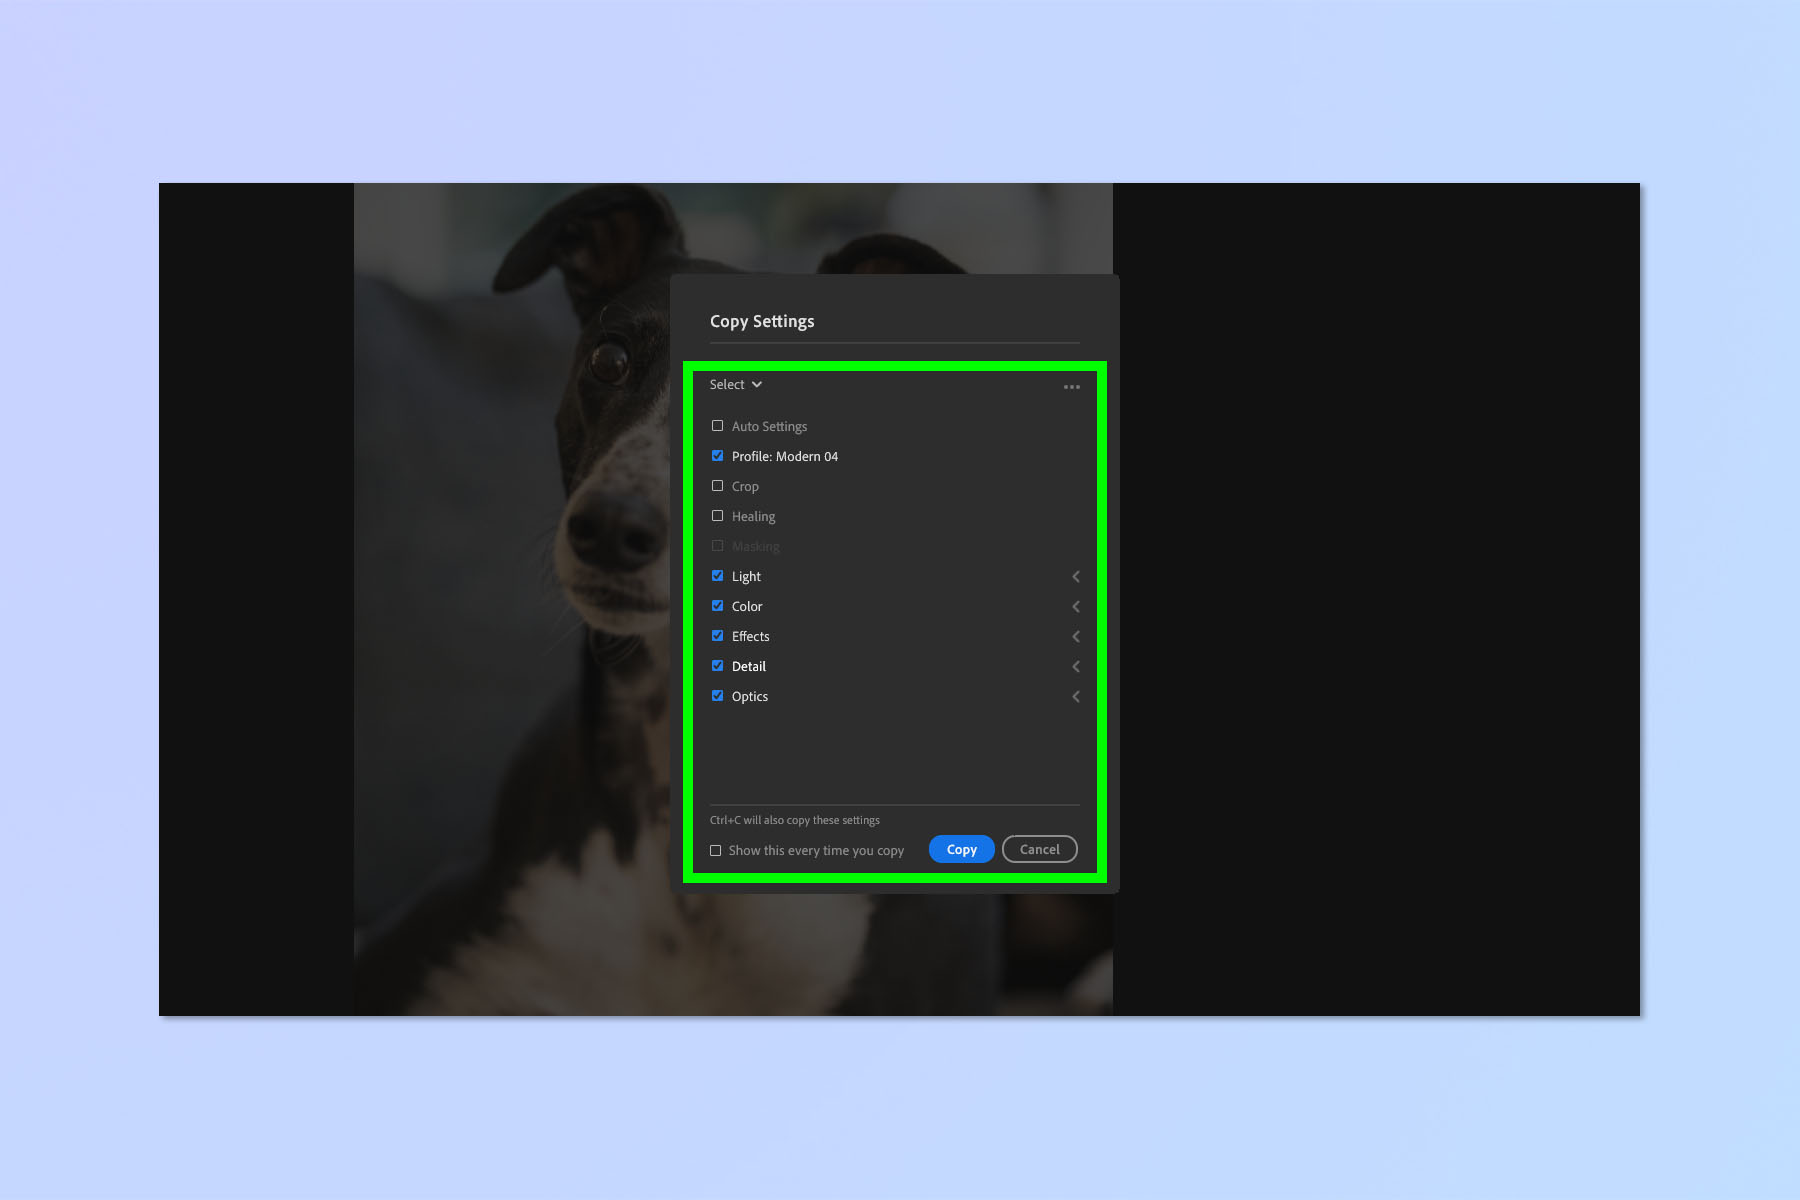
Now tick the boxes for the edits you want to apply and click Copy.
3. Right click an image tile > Paste Edit Settings
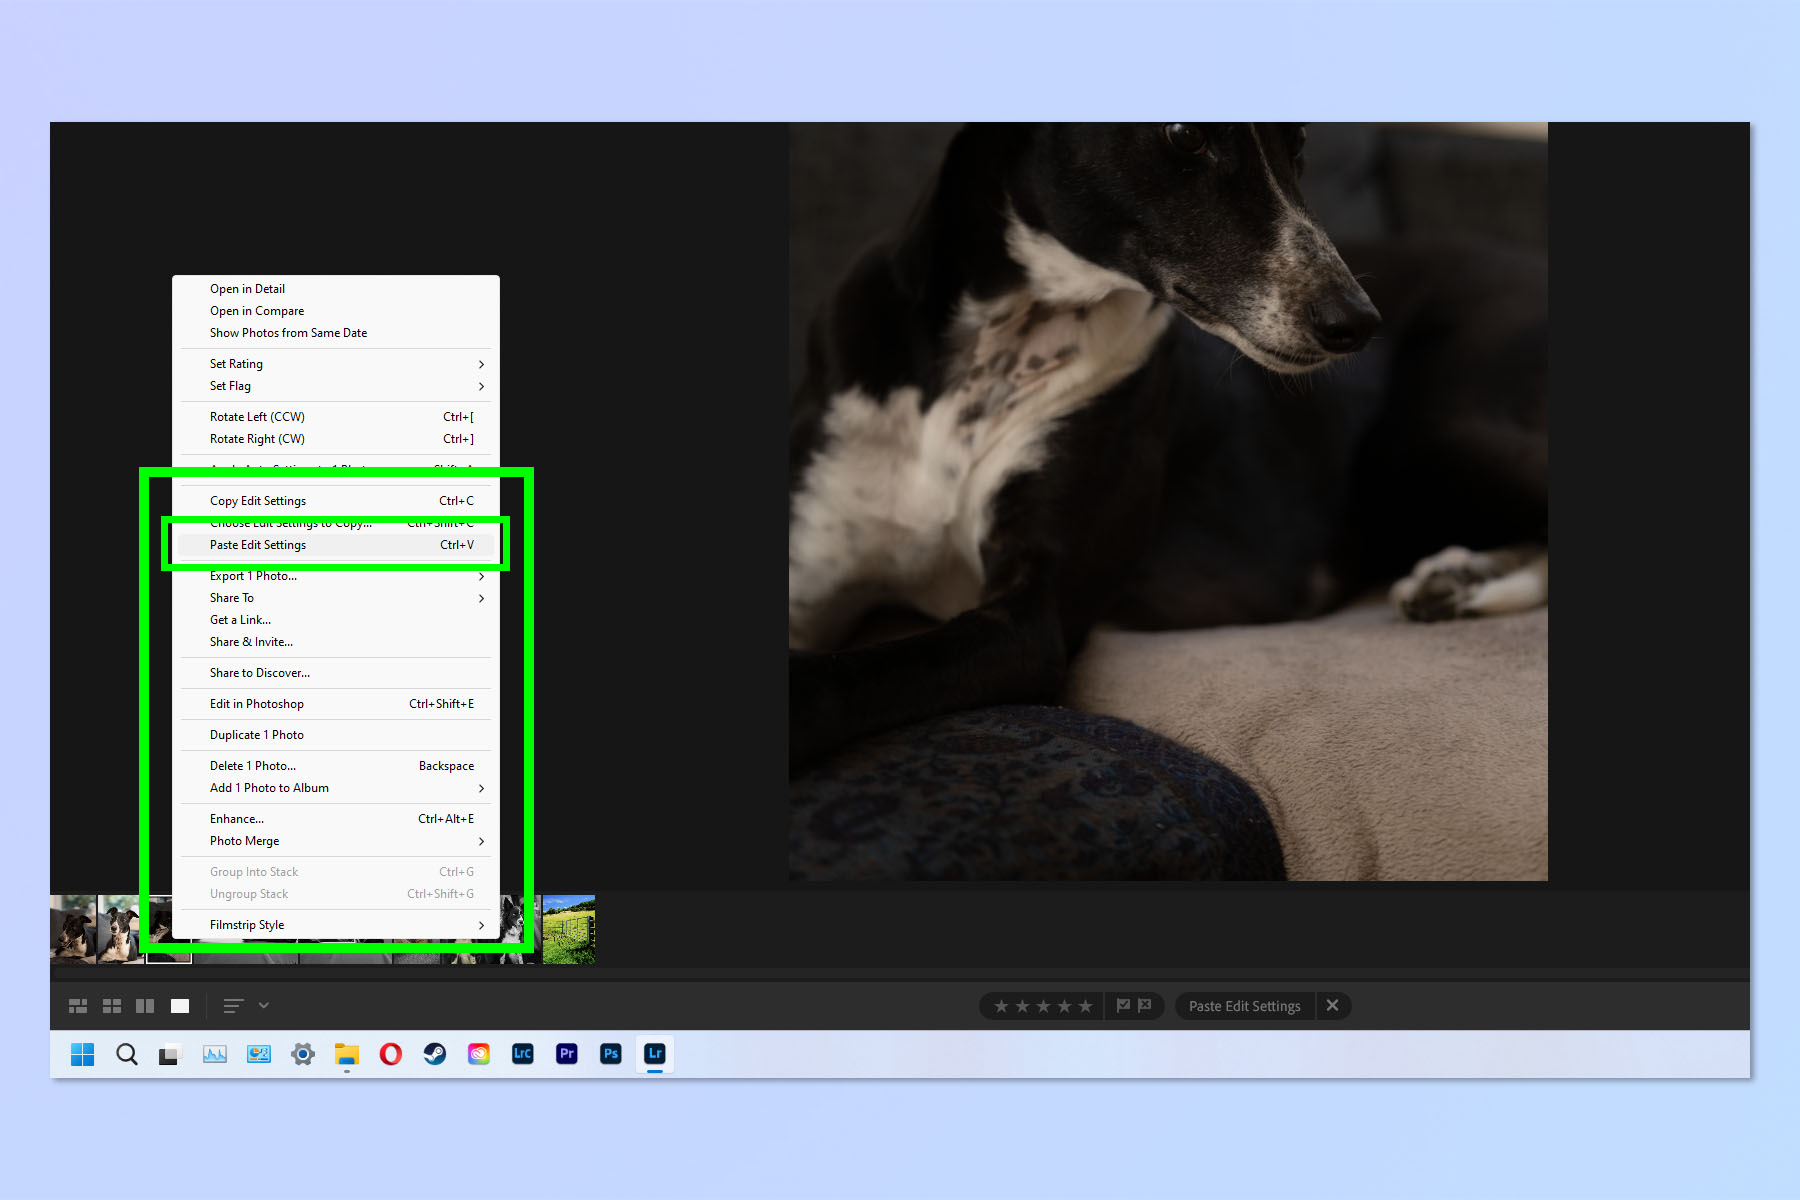
Now, in the image selection bar at the bottom of the window, select the image you want to paste to (you can select multiple images using Ctrl/Cmd or Shift), then right click (on any of the selected images if multiple are selected) and select Paste Edit Settings.
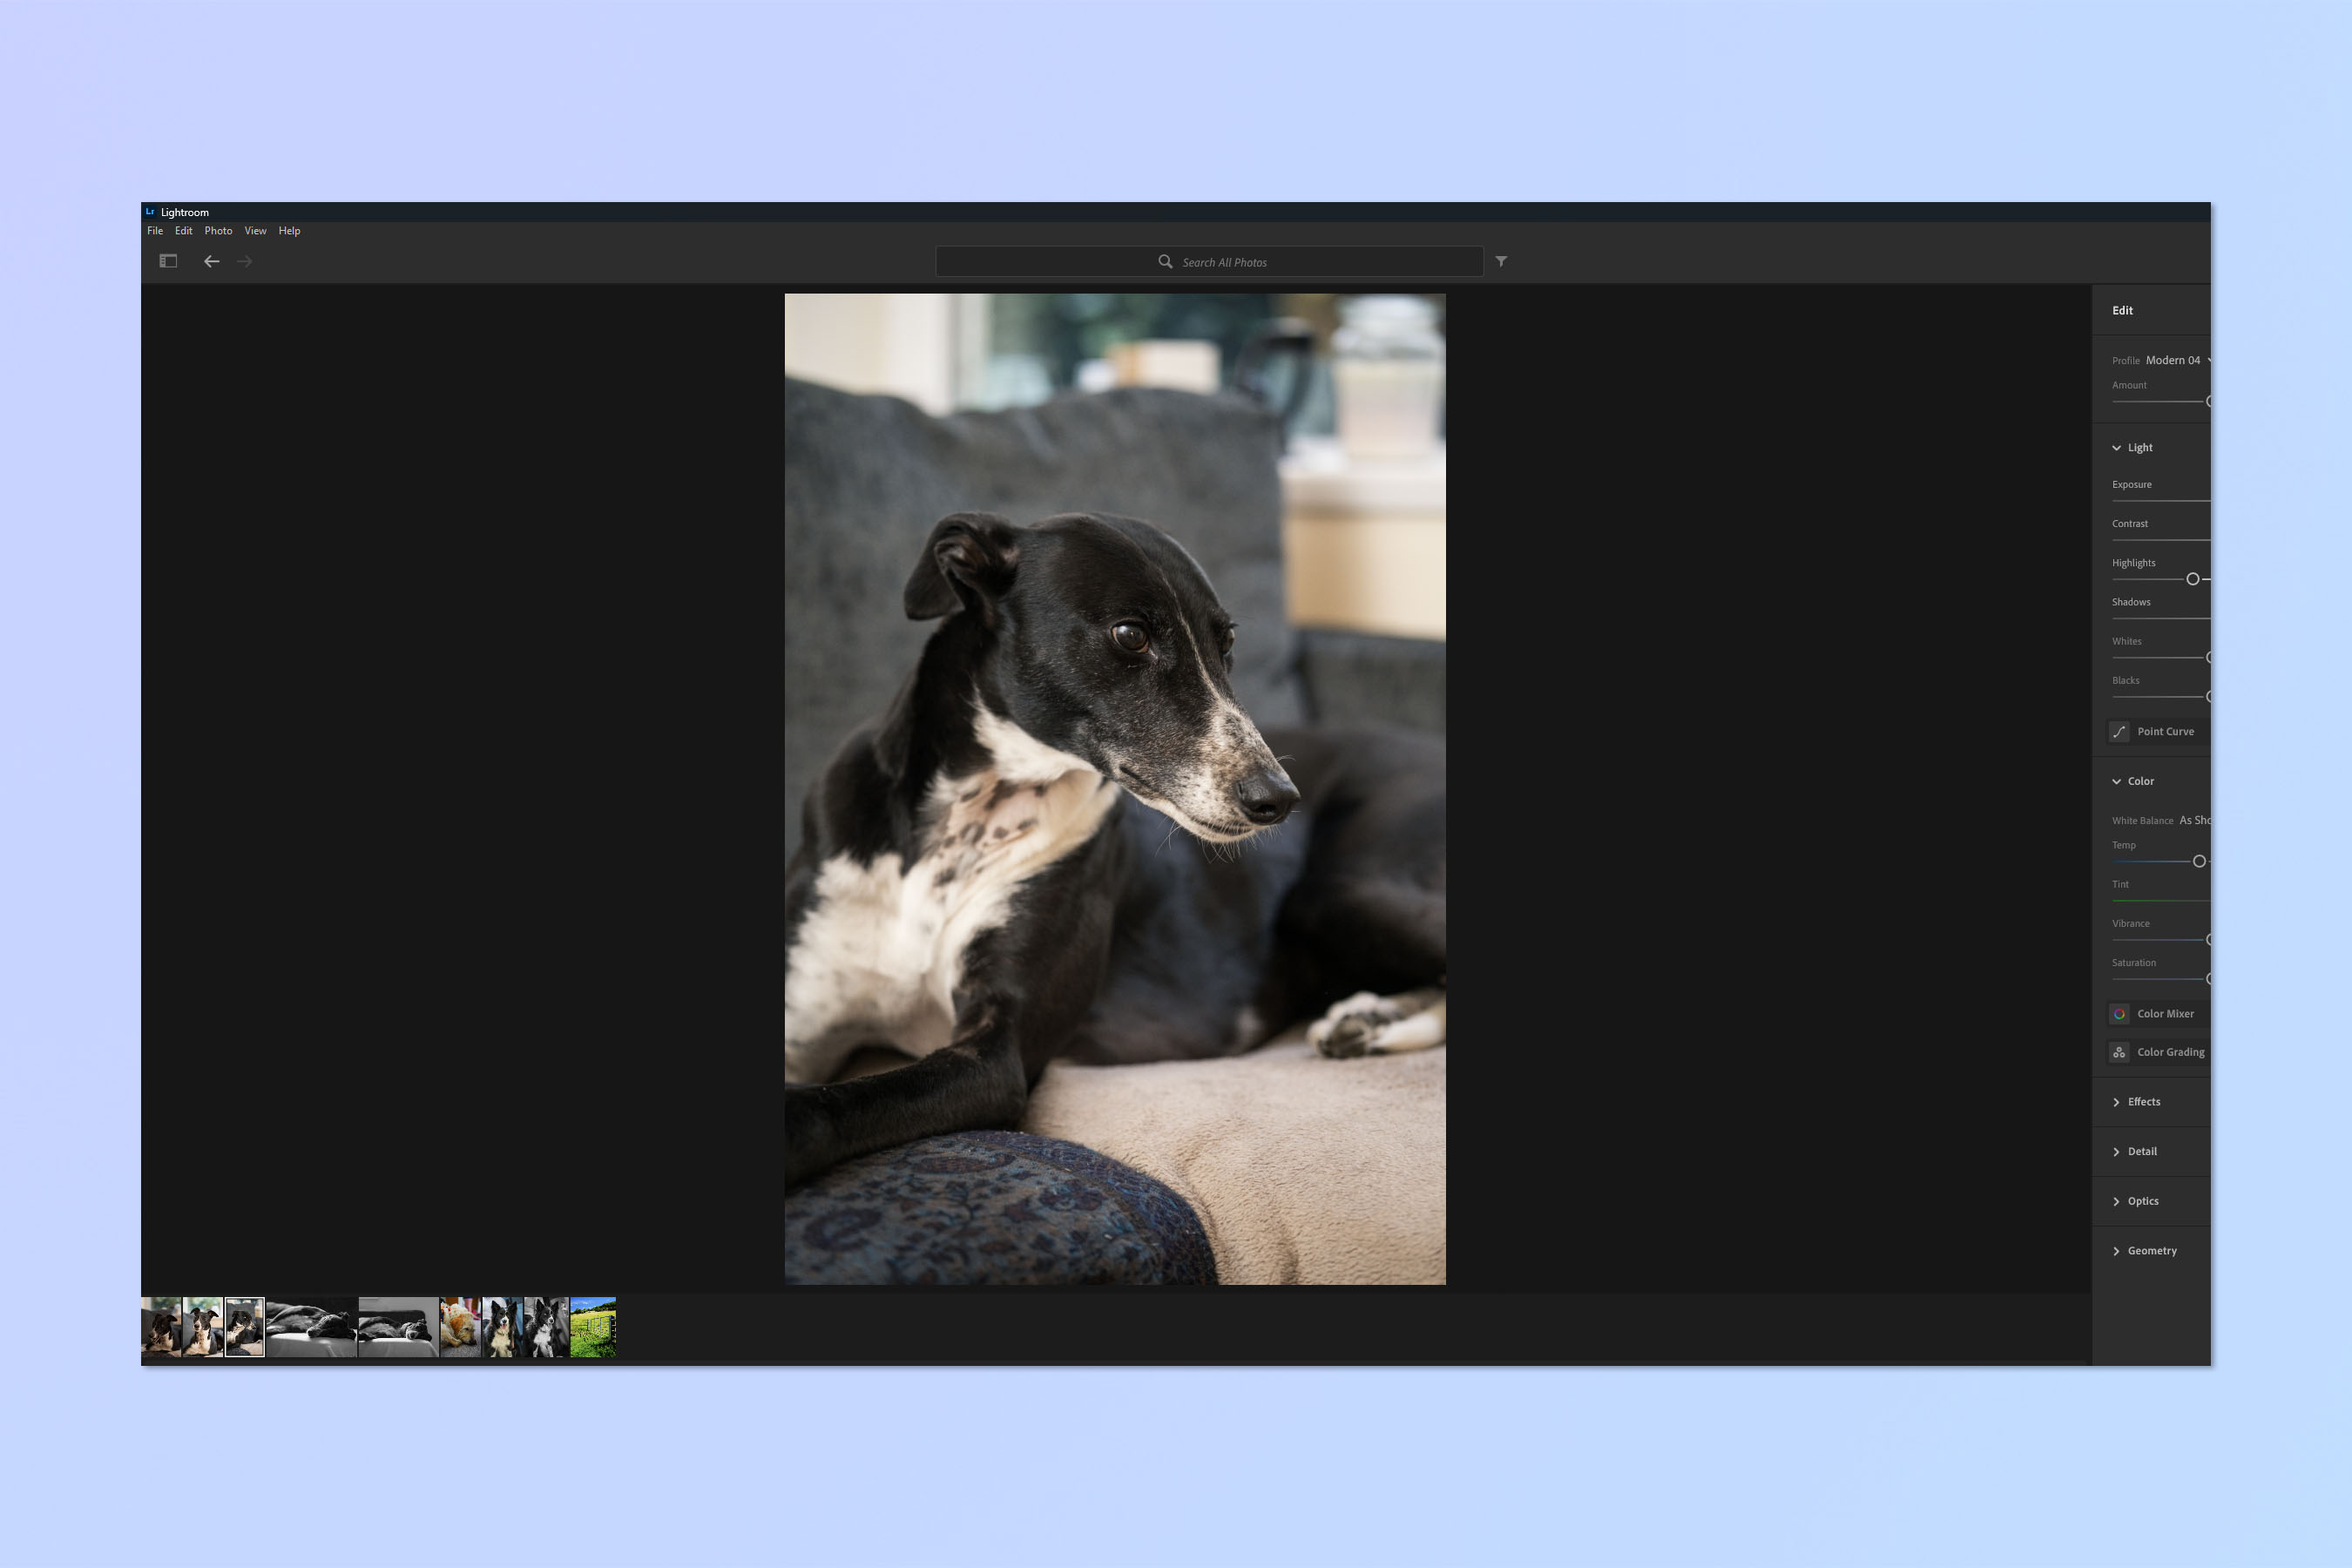
And voila! Your new image(s) have the same edits applied to them as the original.
How to copy and paste edit settings in Adobe Lightroom Classic
Now let's look at Lightroom Classic, which is a more professional-focused software package, offering better workflow tools and giving long-term users the familiar classic interface. The process is pretty much the same as the standard Lightroom, although the wording is a little different.
1. Right click an image tile > Develop Settings > Copy Settings
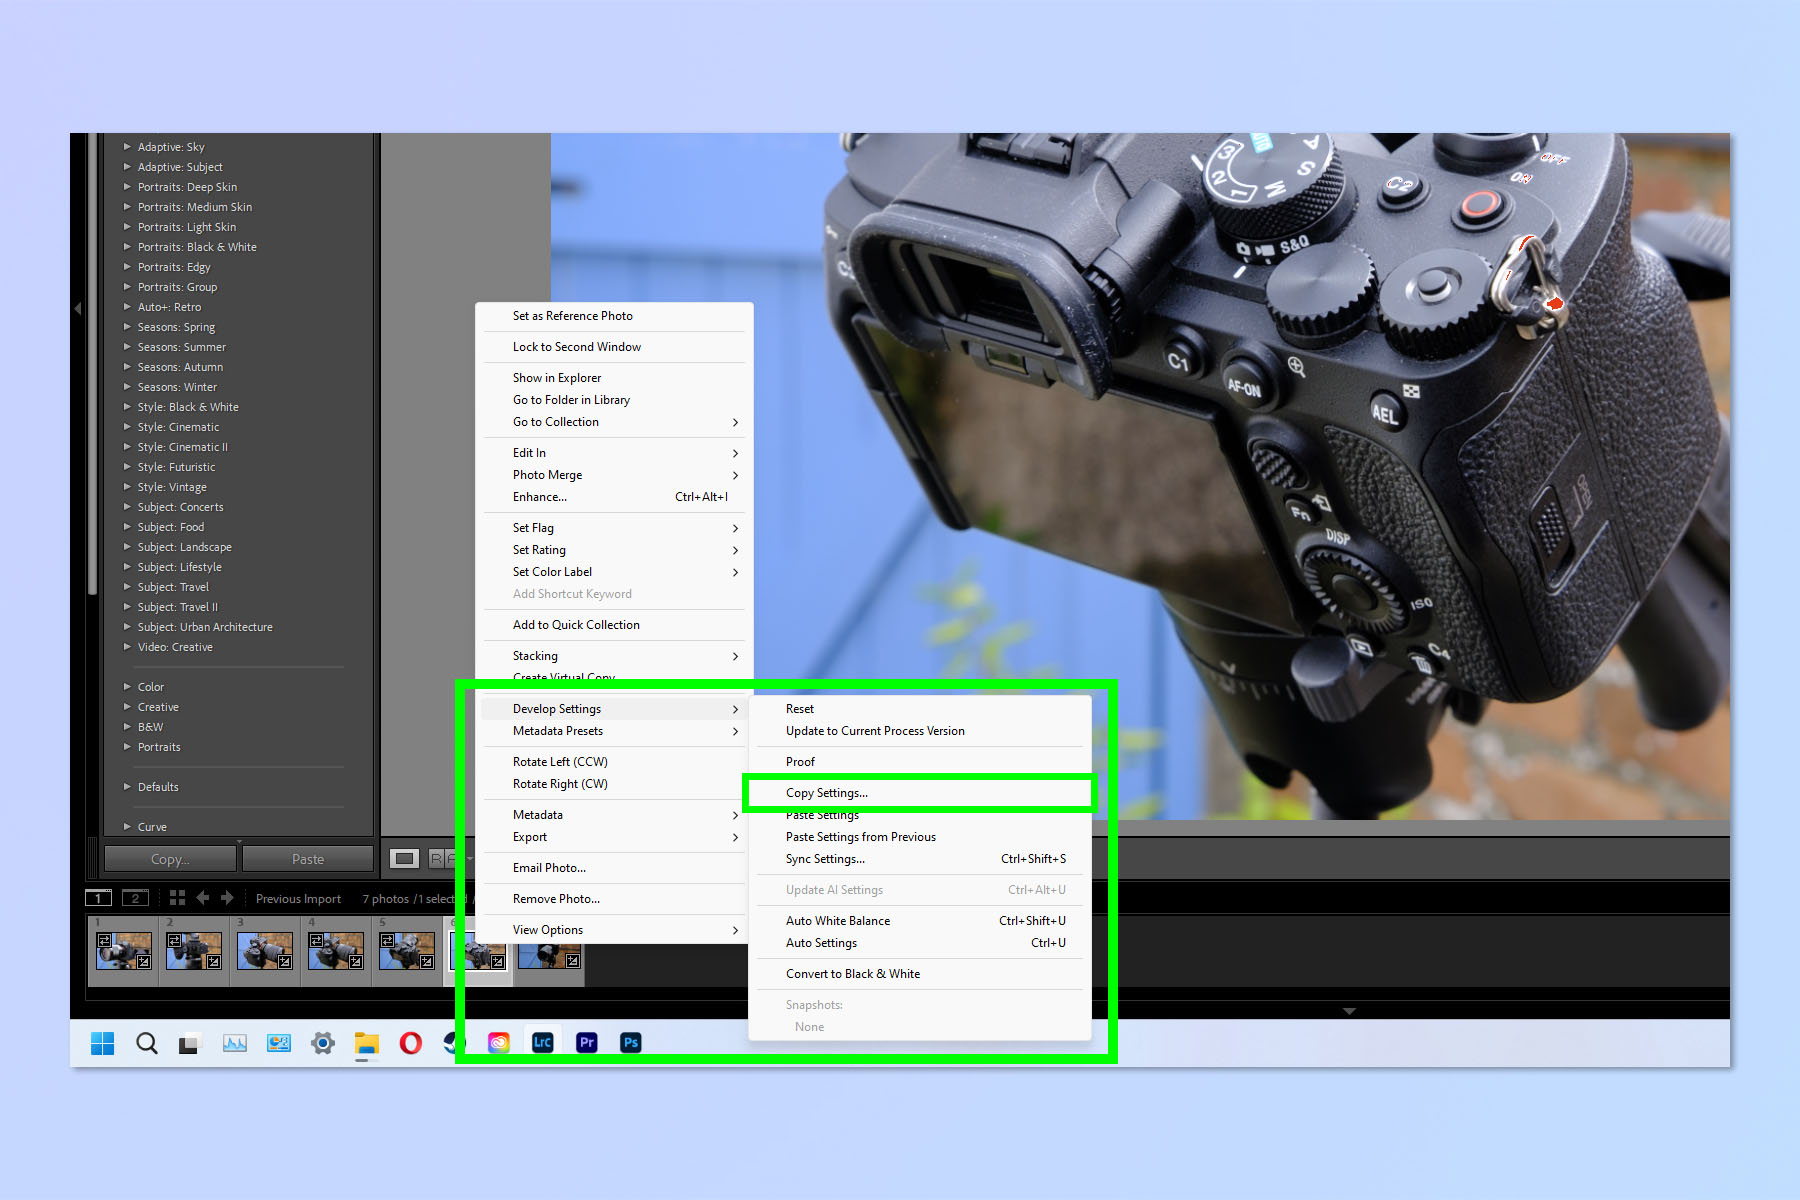
Firstly, make sure you are in the Develop window — click Develop, top right. Now, in the image bar at the bottom of the window, right click an image tile, then click Develop Settings and select Copy Settings.
2. Select the edits to copy
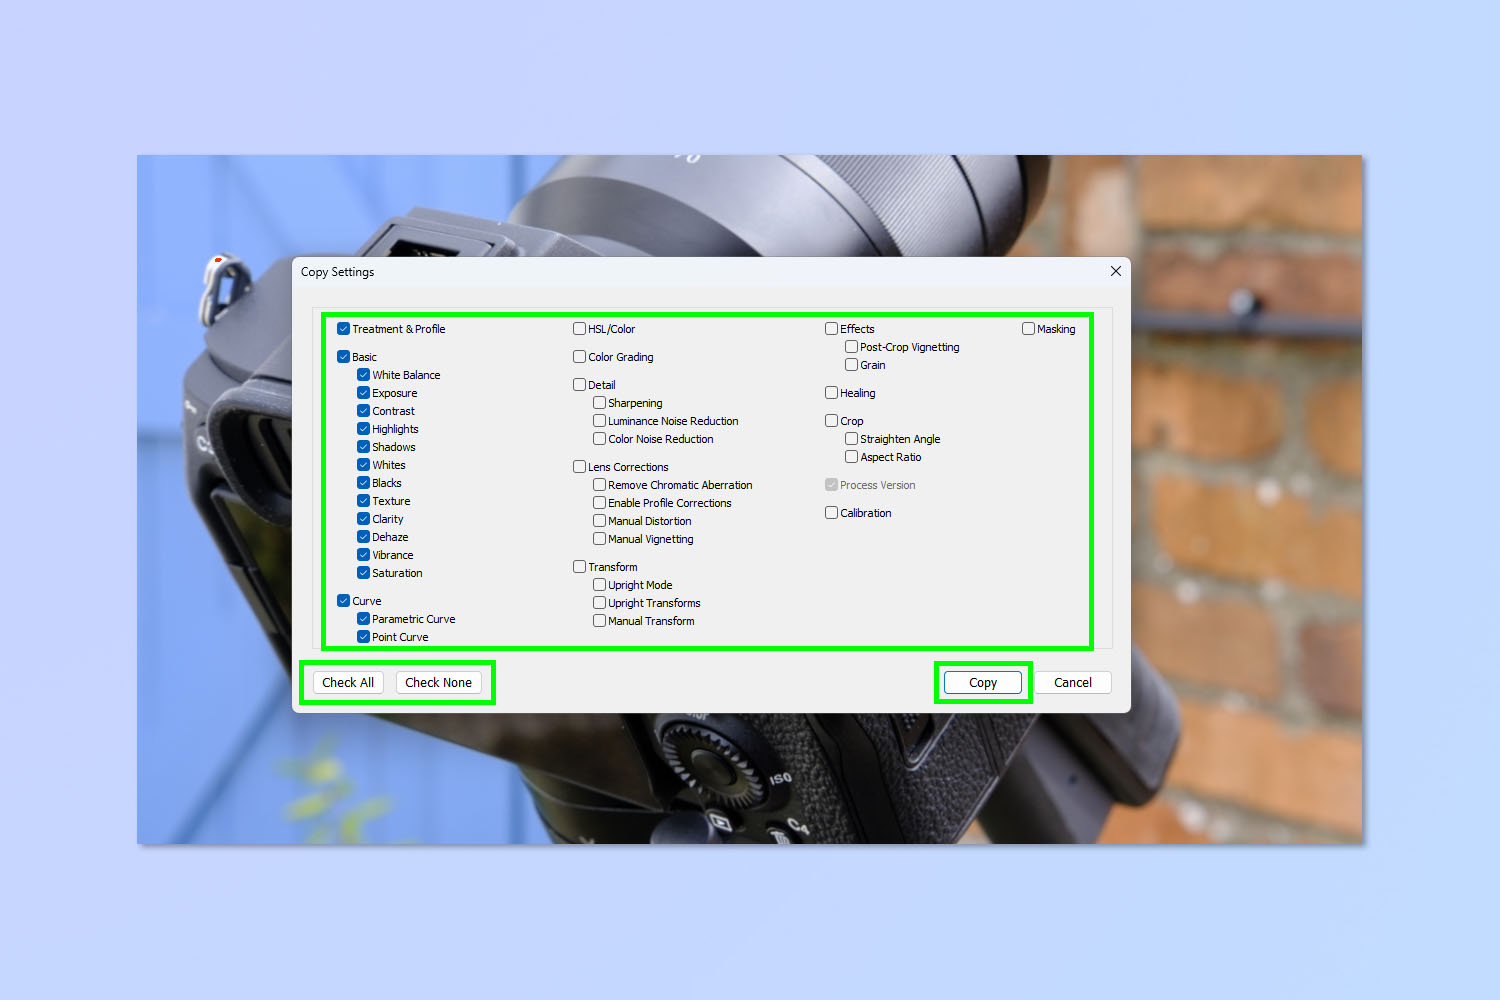
Now tick the edits you wish to apply to other images. Be sure to consider any edits that don't work across differently framed images, such as cropping or spot healing — only tick these if the framing across images is the same or similar enough to work. Click Check All or Check None to select or wipe all choices respectively. When happy, click Copy.
3. Right click an image tile > Develop Settings > Paste Settings
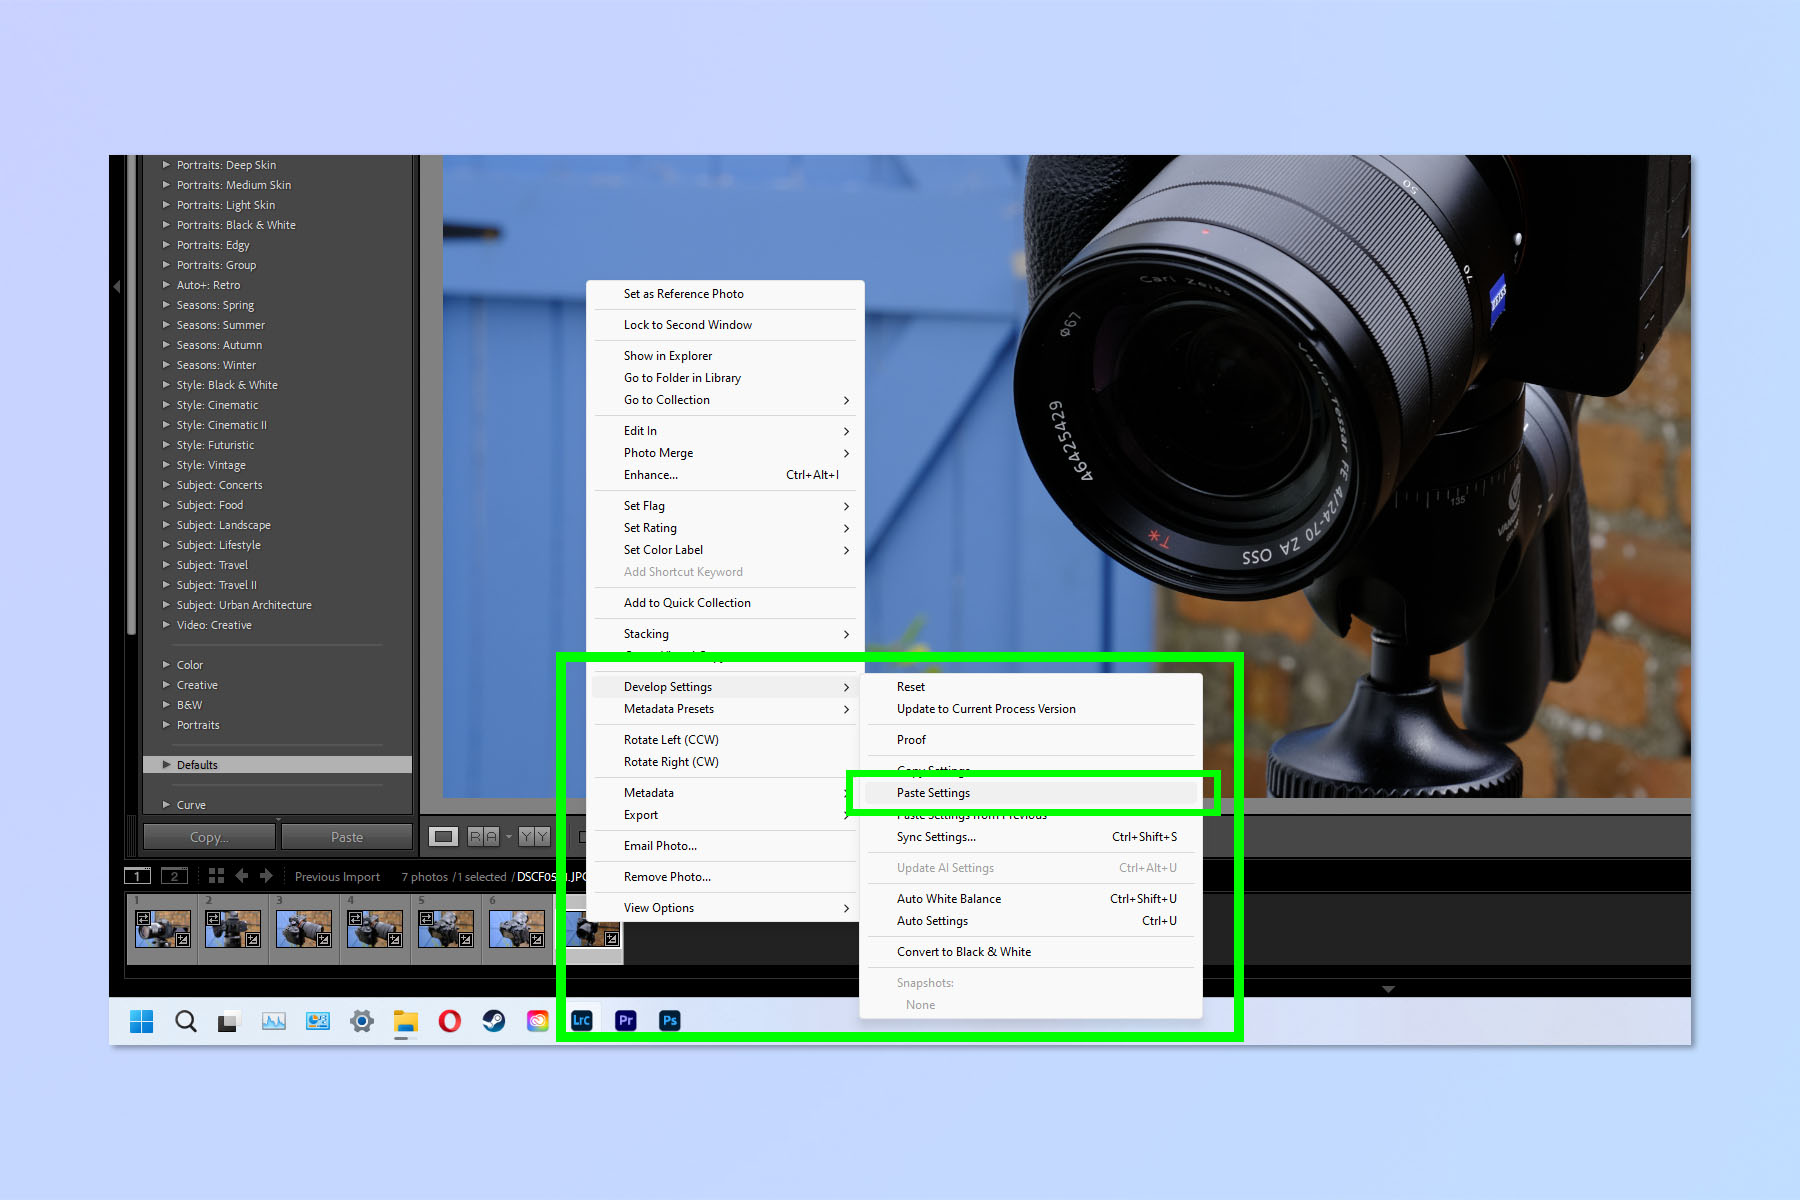
Select an image to have edits pasted to (you can select multiple images using Ctrl/Cmd or Shift). Now right click on the image tile (any selected tile if multiple are highlighted) and select Develop Settings. Finally, click Paste Settings.
That's all there is to it. Whichever version of Lightroom you use, you should now know how to copy and paste edits. We also have other handy photo editing tutorials, so why not check out our guides on how to rotate an image in Lightroom, how to resize an image in Photoshop, how to flip an image in Photoshop and how to resize a canvas in Photoshop.

Peter is a Senior Editor at Tom's Guide, heading up the site's Reviews team and Cameras section. As a writer, he covers topics including tech, photography, gaming, hardware, motoring and food & drink. Outside of work, he's an avid photographer, specialising in architectural and portrait photography. When he's not snapping away on his beloved Fujifilm camera, he can usually be found telling everyone about his greyhounds, riding his motorcycle, squeezing as many FPS as possible out of PC games, and perfecting his espresso shots.
