How to convert WEBP to JPEG or PNG
Here's how to convert WEBP to JPEG or PNG so you can open image downloads
If you regularly download web images, it's helpful to know how to convert WEBP to JPEG or PNG. You've undoubtedly come across WEBP images on websites, though you may not have realized the pictures were in that format until you right-clicked them and chose "Save as..."
WEBP was developed by Google as a way to display web images using a unique compression system. This reduces their size by up to a third compared to the traditional JPEG and PNG formats, while retaining their quality.
The trouble is that many popular image editors, even paid ones, still don't support WEBP. This means that you can't open WEBP images you download to your desktop if you want to edit and reuse them.
- The best free photo-editing software currently available
- Discover how to convert PDF to JPEG
- Find out how to convert HEIC to JPEG
One solution is to right-click the WEBP image on a web page and choose "Open image in new tab," then take a screenshot of it. However, this won't preserve the picture's quality; in fact it'll be comparatively low resolution.
A better option is to convert the WEBP file into JPEG or PNG format, so you can do whatever you want with the image. In our guide below, we'll explain the two best ways to convert WEBP to JPEG or PNG, for free.
How to convert WEBP to JPEG or PNG using Microsoft Paint
Although many image editors can’t open WEBP files, let alone convert them, one notable exception is Microsoft Paint. This built-in Windows app is often dismissed as basic, but it does a great job of converting WEBP images to JPEG or PNG format. Here’s how to use it.
1. Launch MS Paint, either from the Start menu or by typing “paint” in the Windows search box and clicking Paint at the top of the results list.
Sign up to get the BEST of Tom's Guide direct to your inbox.
Get instant access to breaking news, the hottest reviews, great deals and helpful tips.
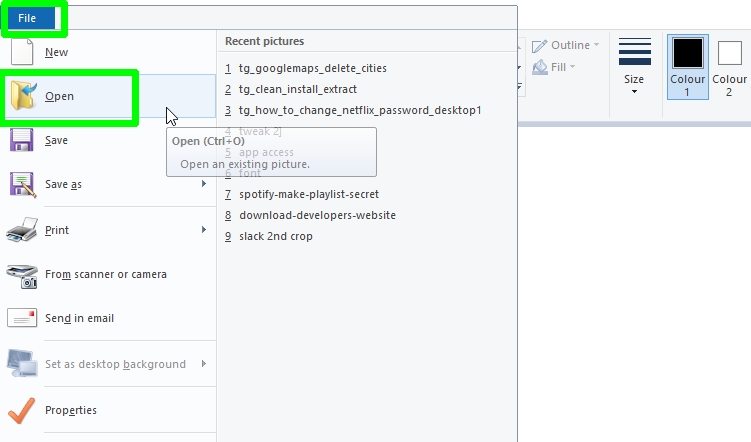
When Paint opens, click the File menu and choose Open.
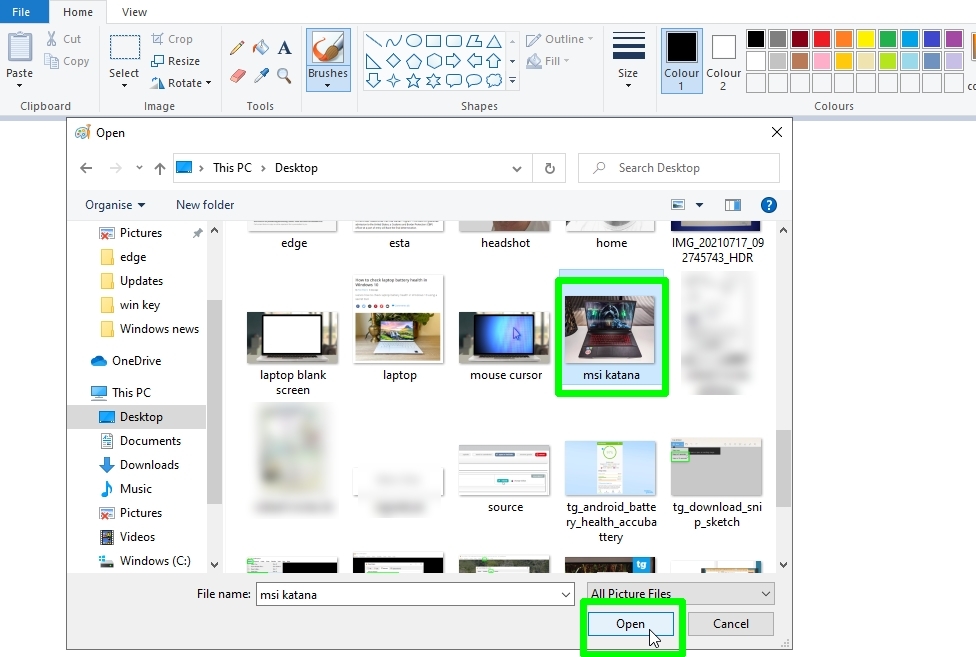
2. Browse to the WEBP image file you want to convert, then select it and click Open.
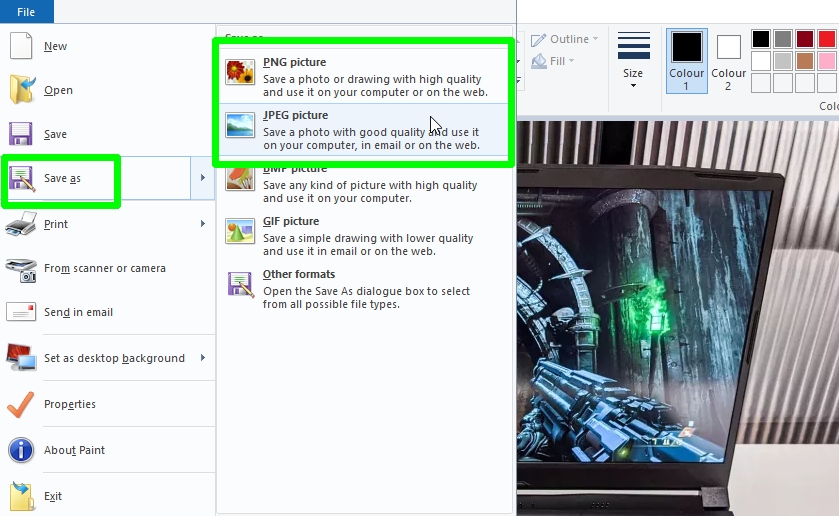
3. Once the WEBP image loads in Paint, click the File menu and move your mouse cursor down to “Save as." Select “JPEG Picture” or “PNG Picture” from the side menu.
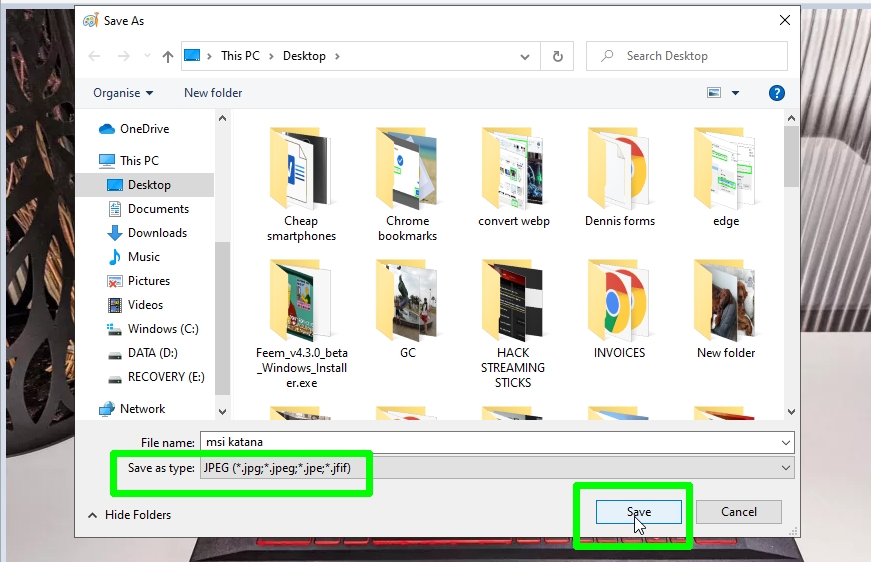
4. When the Save As box opens, choose the folder you want to save the converted image to, and enter a file name. Ensure that “JPEG” or “PNG” is selected in the “Save as type” menu, then click Save.
Your WEBP file will now be converted to your preferred image format, so you can open it in your preferred image editor. Or if you want to stick with Paint, see our guide to how to edit images in Microsoft Paint.
How to convert WEBP to JPEG or PNG using an online converter
If you’re not using a Windows PC, the easiest way to convert a WEBP file to JPEG or PNG is to use an online conversion tool such as CloudConvert. This site works with macOS, Android, iOS, and Linux, as well as Windows, and the process takes a matter of seconds.
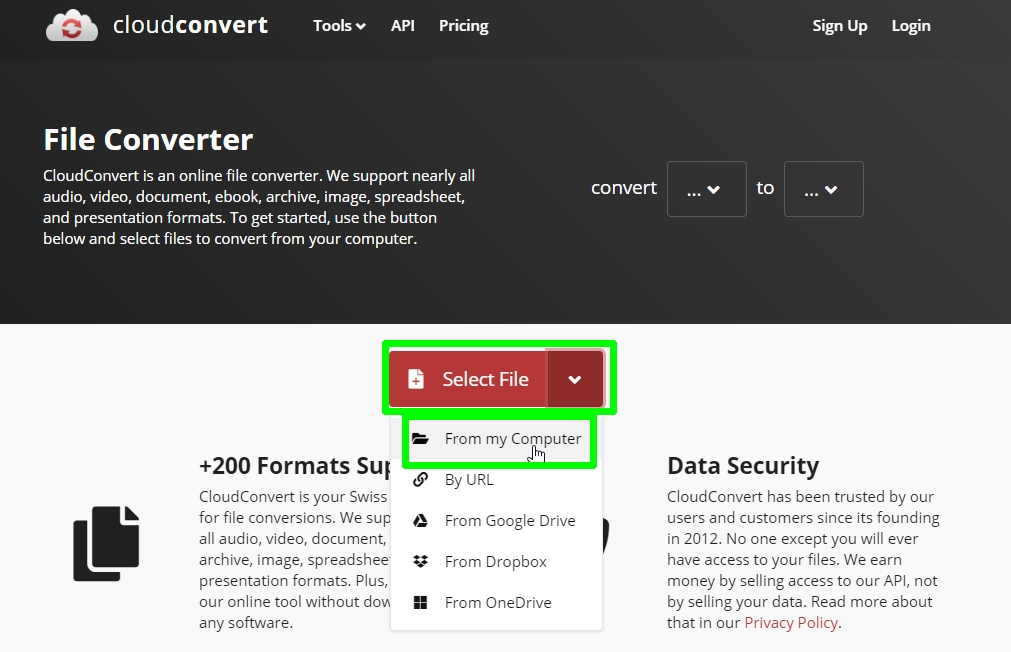
1. Visit CloudConvert in your desktop or mobile browser. Click or tap the arrow next to the Select File button on the homepage.
Choose whether you want to upload the WEBP file from your computer (or mobile device), enter its URL to convert it from the web, or import it from Google, Dropbox, or OneDrive.
2. CloudConvert will automatically detect the format of the file as WEBP. If not, click the “Convert” drop-down menu and select “Image,” then “WEBP.”
Now click the “Convert to” drop-down menu and choose “Image,” then “JPG” or “PNG.”
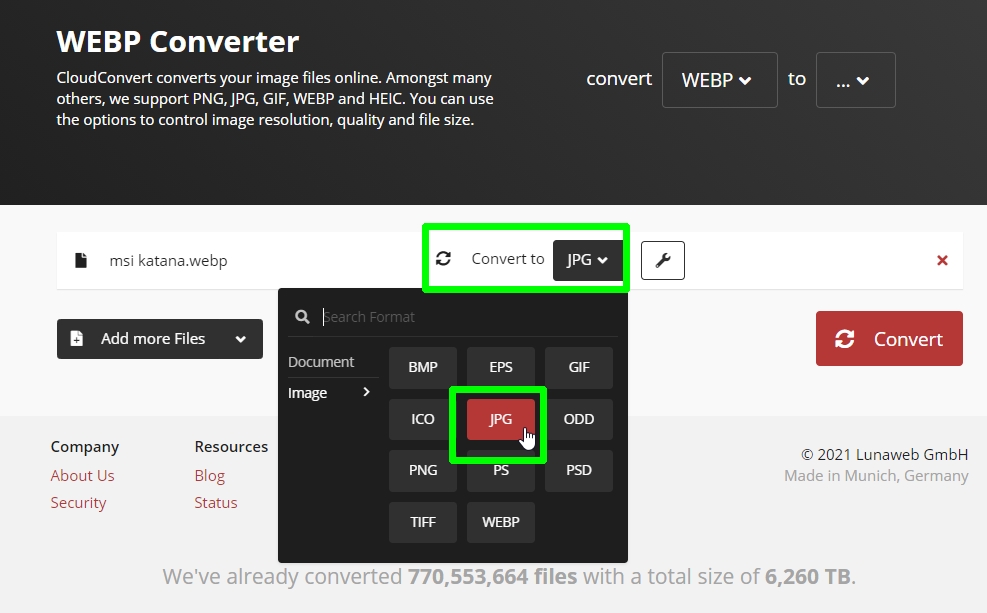
3. CloudConvert will adjust to show “WEBP to JPG Converter” or “WEBP to PNG Converter” as the page title. Click the “Convert” button to convert your file.
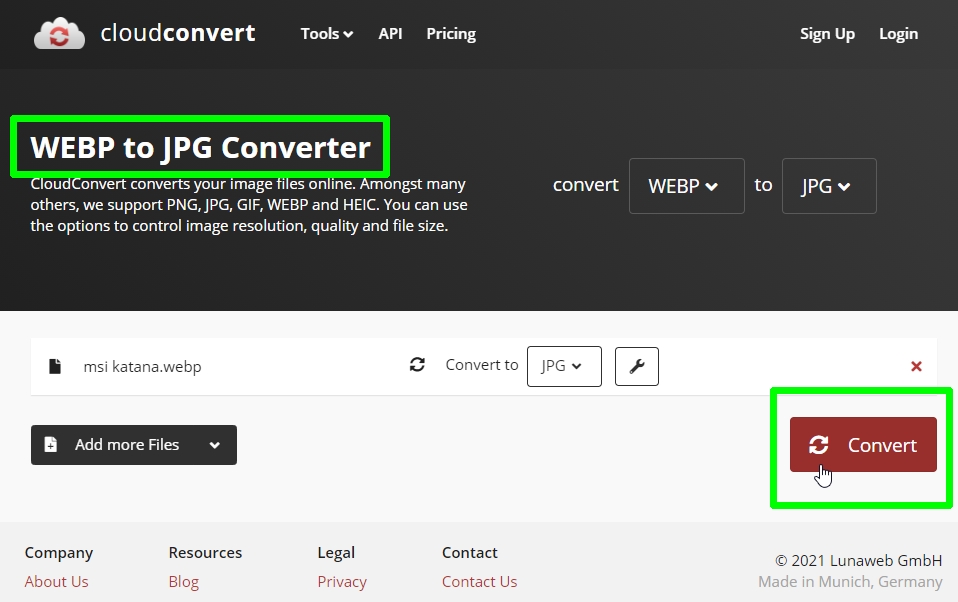
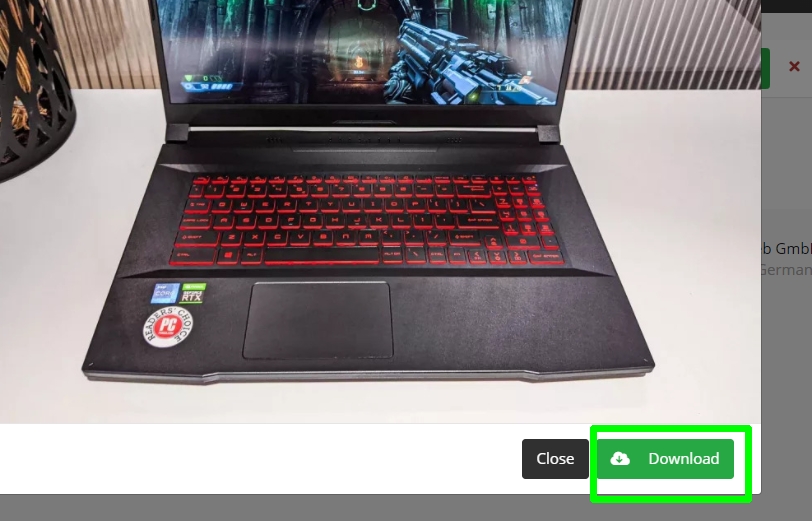
4. Once the conversion is complete, just click the Download button to save the former WEBP file to your computer or mobile device as a JPEG or PNG image.
CloudConvert lets you convert up to 25 files (of any format) per day for free, which should be enough for most people. If you need more, you’ll need to register with the website and either buy credits (called “conversion minutes”) or pay for a subscription.
Read more about the service’s payment options on the CloudConvert Pricing page
- More: The best cloud storage for photos: free and paid
- How to upload to Google Photos
Robert Irvine was previously the How-To Editor at Tom's Guide. He has been writing tutorials about software, hardware, websites and other tech topics since the days of dial-up modems, and was previously the editor of Web User magazine. Robert enjoys cooking, and makes a mean sausage casserole, but is definitely not the celebrity chef of the same name.

