How to change your MAC address in macOS
How to change your MAC address in macOS in a few simple steps

If you're wondering how to change your MAC address in macOS, then you'll likely already know what this action will do. In simple terms, a MAC (or Media Access Control) address is a unique identifier built-into a device's Network Interface Controller.
The 12-digit hexadecimal address lets a network know which devices are connected and it allows for communication between them.
By changing this address, you are able to do one of a number of things. For starters, you can hide the identity of your device. You may not, for example, want to share your Apple Mac computer's MAC address on a public network so changing it can hide the original identifier and give you additional privacy.
It's also possible to get around restrictions on a network. You may find, for instance, that a Wi-Fi network won't let you stream movies but changing to another MAC address could get around them. You may also find that some apps won't work on your computer because your purchase has been linked to a particular device which you don't have access to any more. By changing to that MAC address, you could get it to work.
So, with all of that in mind, let's check out how to change your MAC address in macOS.
How to find and change your MAC address in macOS
For this tutorial, we're using the Terminal app which is built into macOS.
1. Find your MAC address
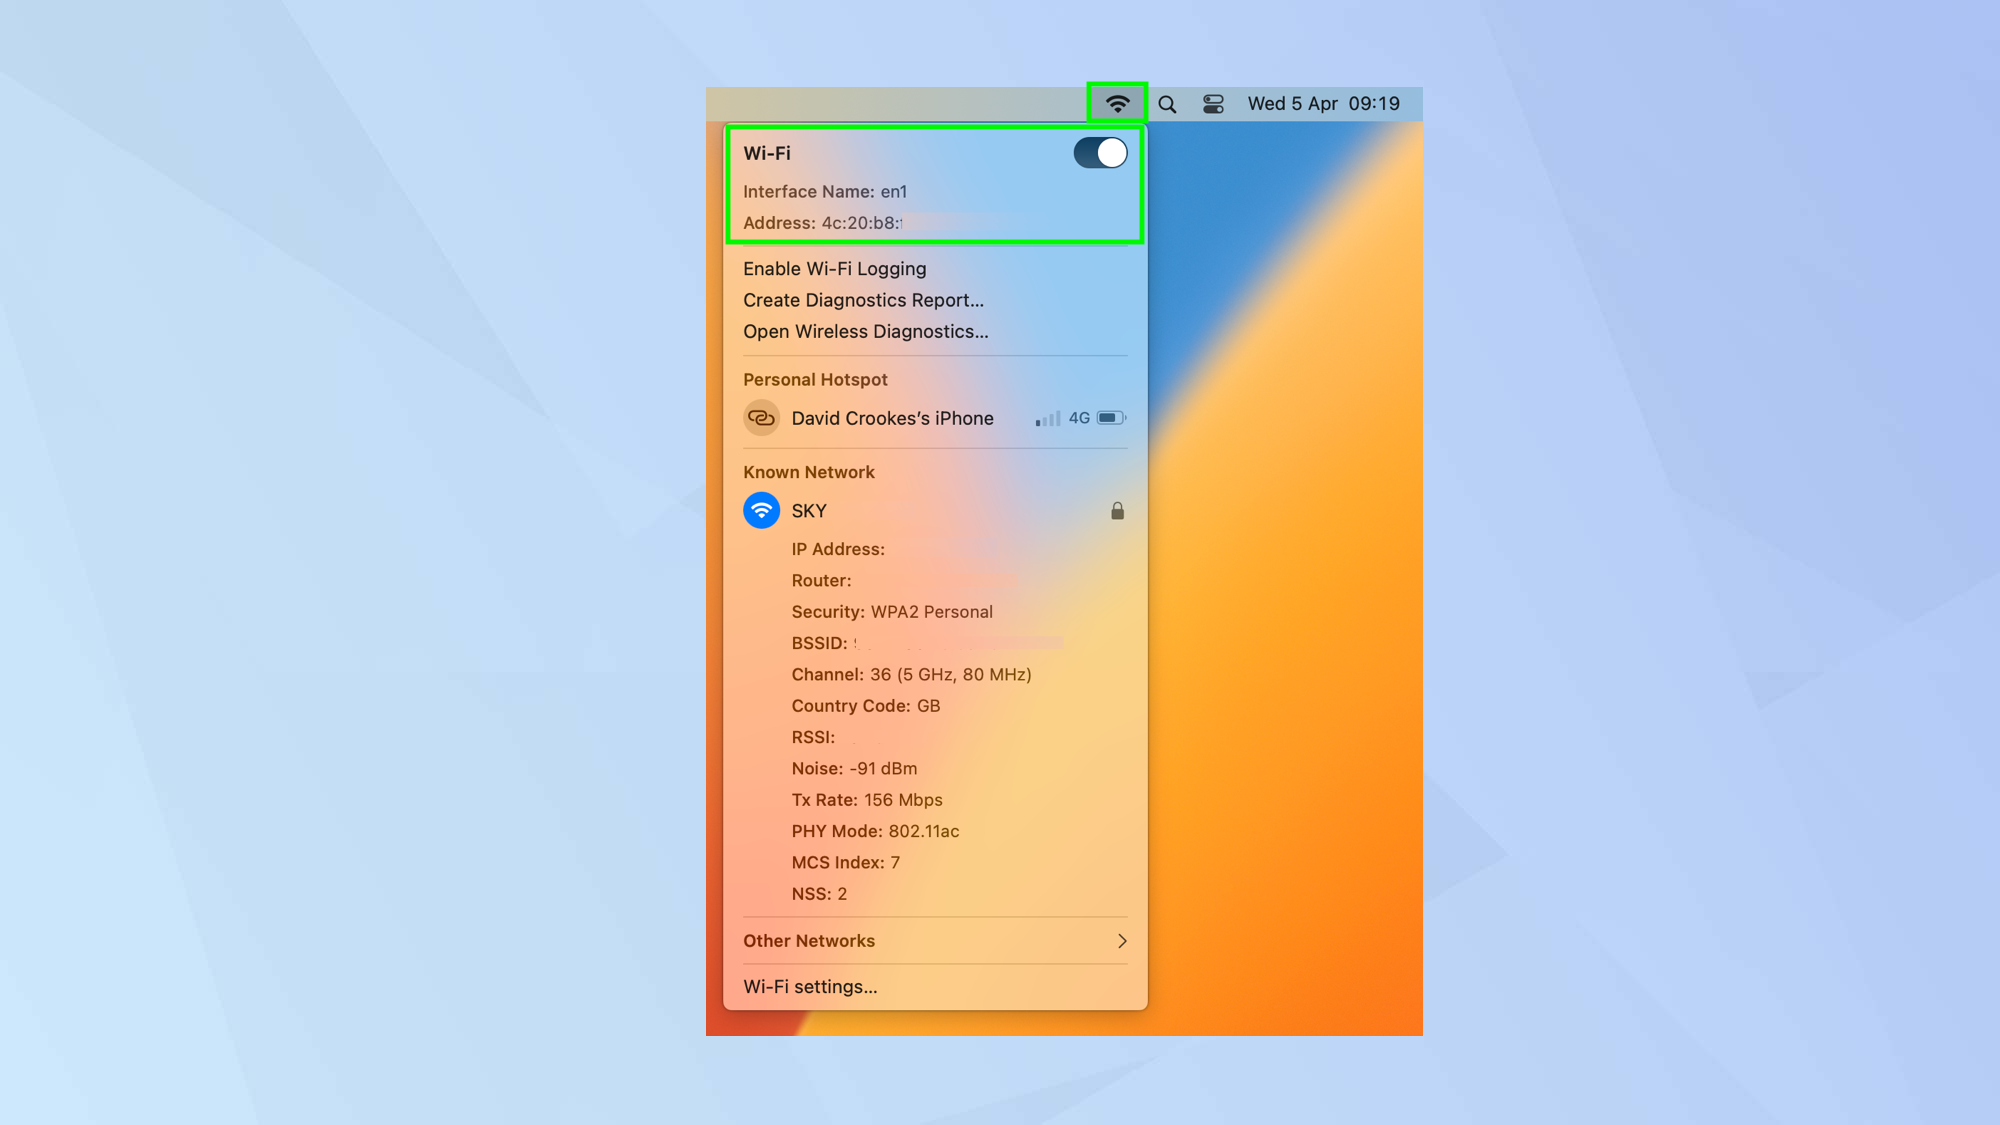
You can easily discover your current computer's MAC address. Simply hold down the key marked either Alt or Option on your keyboard then click the Wi-Fi icon in the bar at the top of macOS. Look for the MAC address in the Wi-Fi section of the drop-down menu.
Make a note of the Interface name as well. Keep both of these safe.
2. Launch Terminal
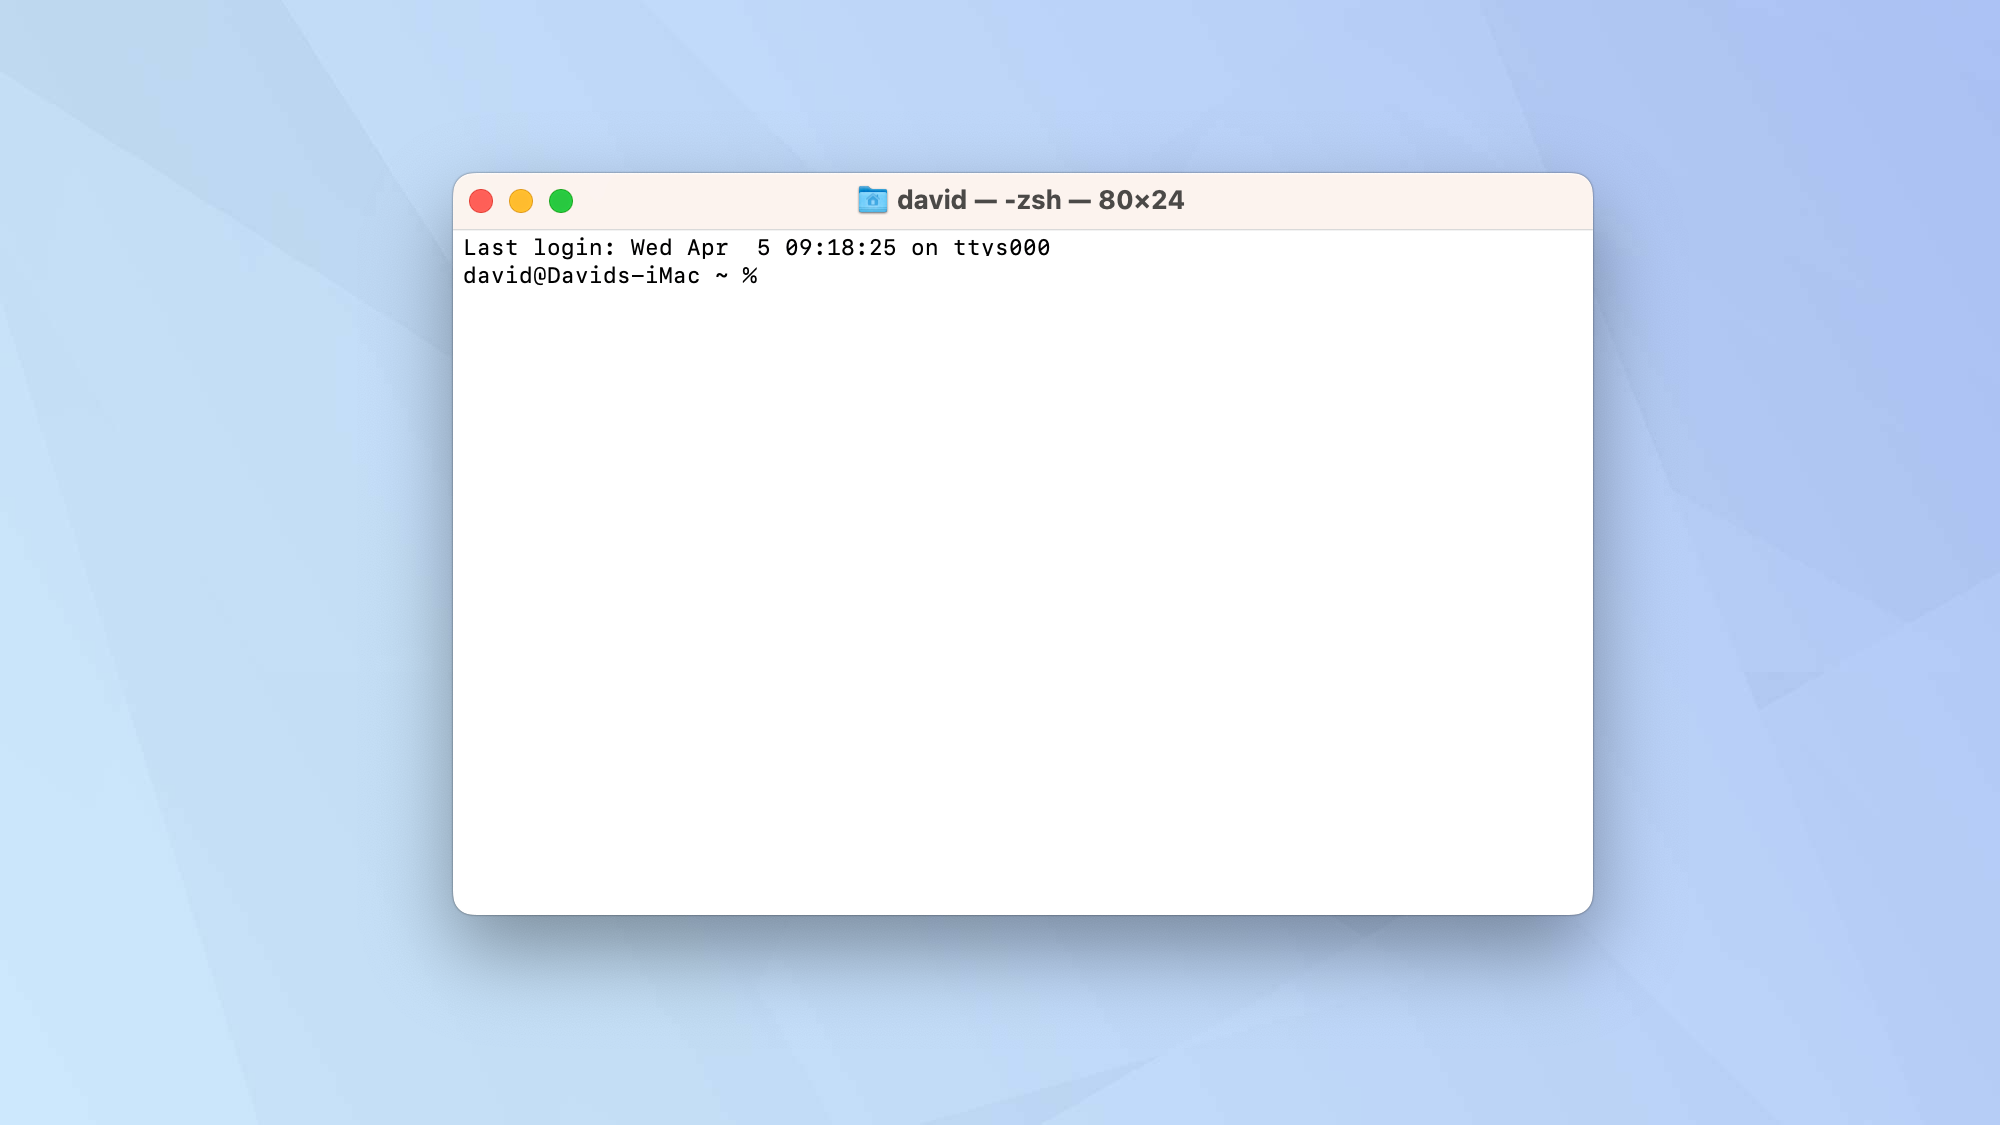
Now open the Terminal app which is built into macOS. Having trouble finding it? Then learn how to open Terminal on Mac – it's worth knowing because it comes in handy for many other things.
3. Type in the commands
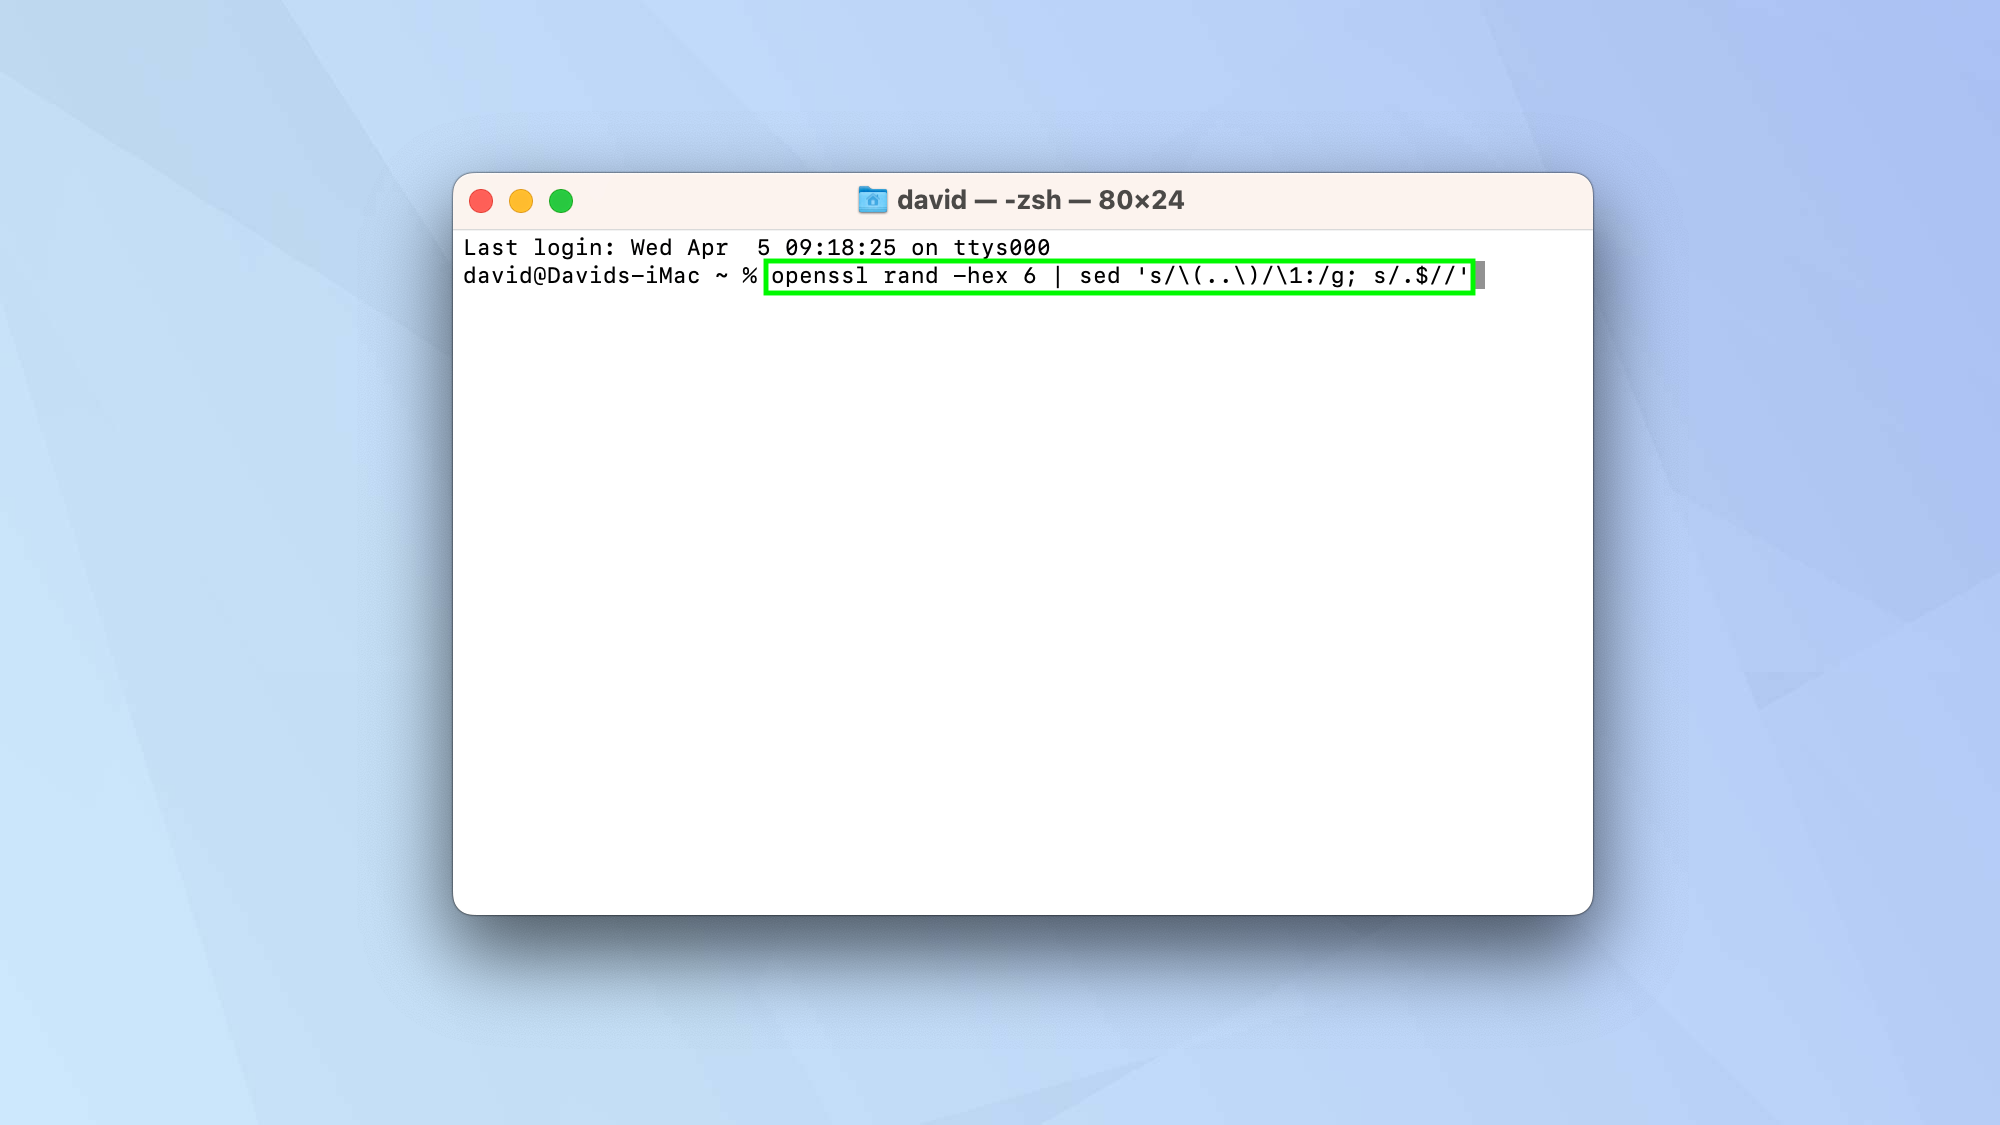
Now that Terminal is open, you have two main options. If you already have a MAC address in mind then go to step 4. But if you want to generate a random one, you need to enter the following line and press Enter.
openssl rand -hex 6 | sed 's/\(..\)/\1:/g; s/.$//'
Be sure to type it exactly as it appears here. You can copy and paste it into Terminal to be sure.
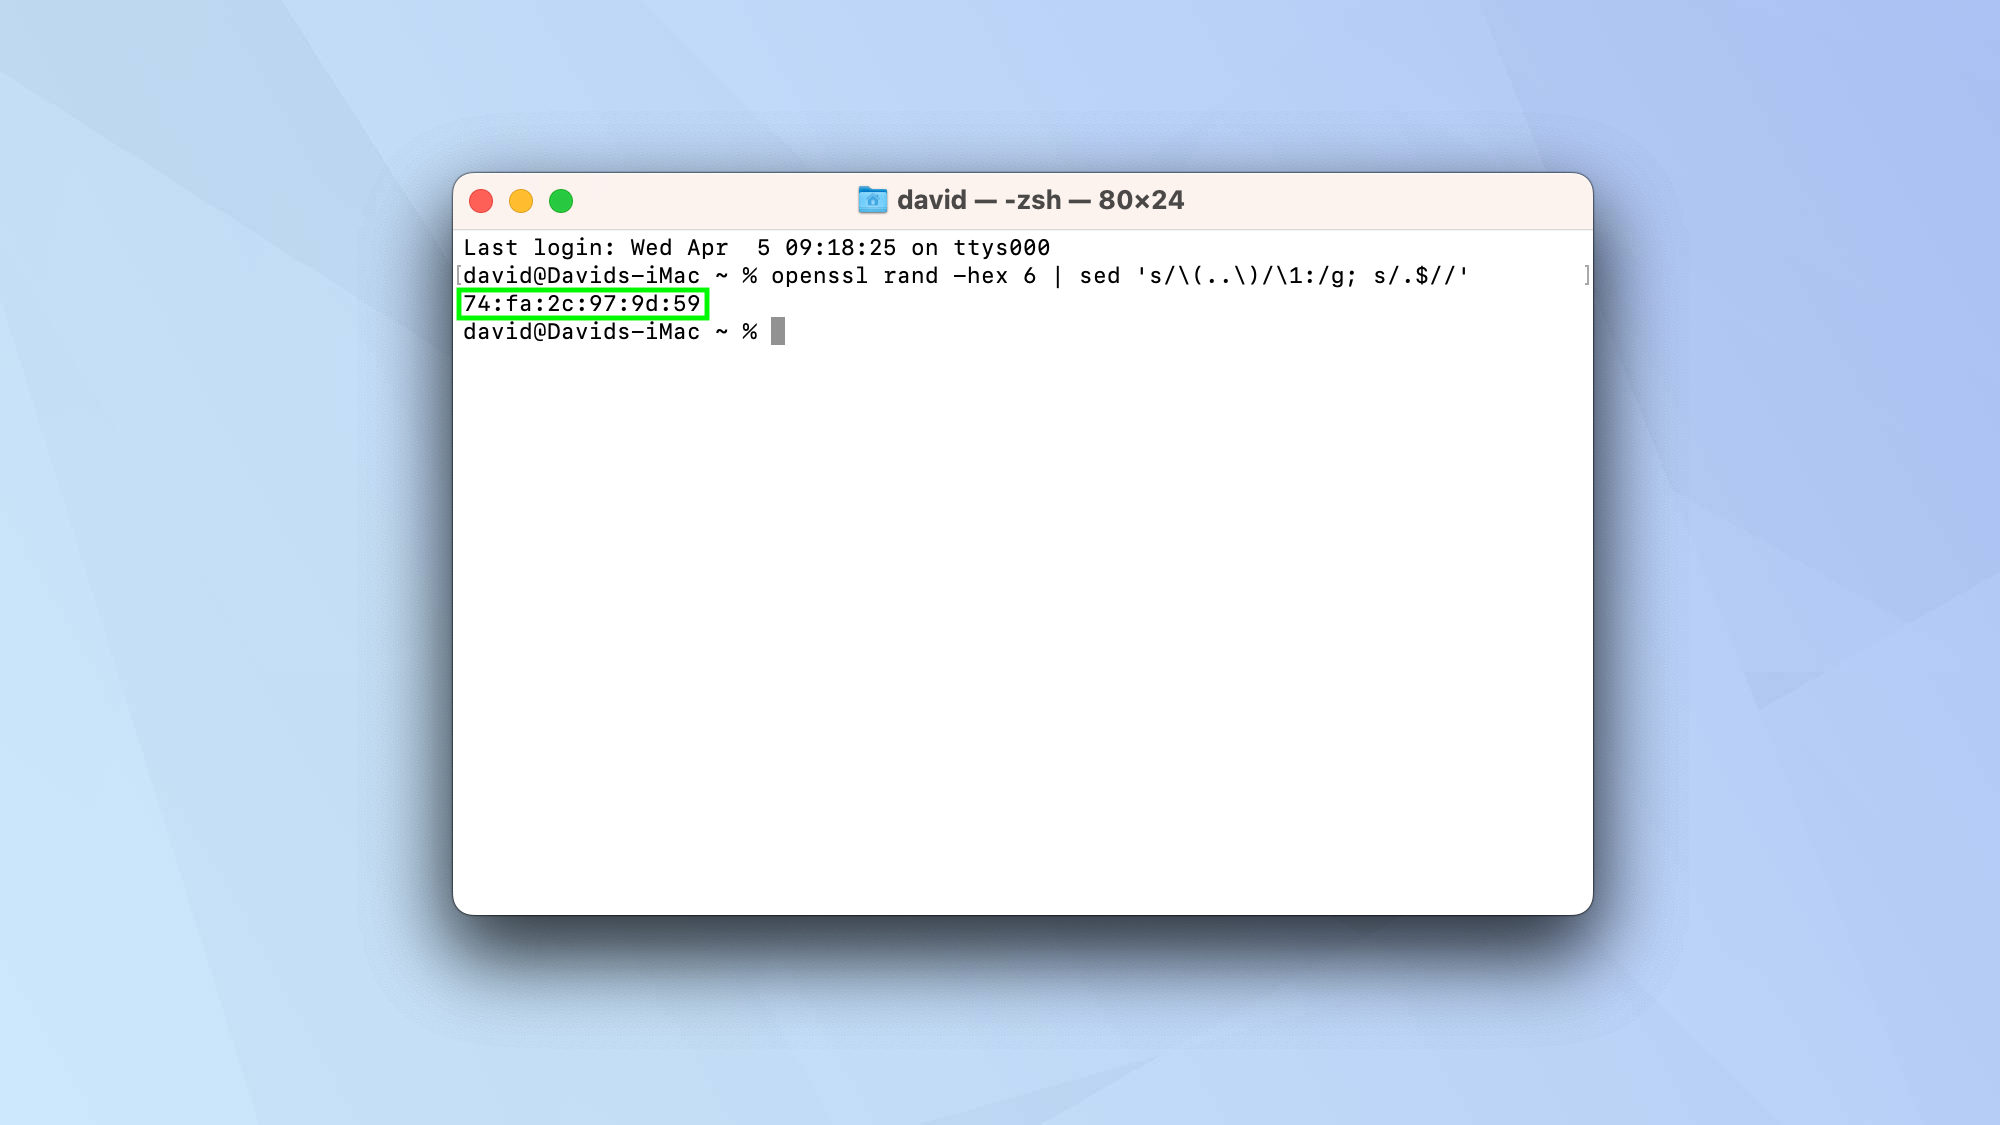
You will see that a a hexadecimal number has appeared (in our example it's 74:fa:2c:97:9d:59).
4. Go offline
You should now disconnect your Mac from the internet. Just click the Wi-Fi icon again and toggle the Wi-Fi button off.
5. Enter a second command
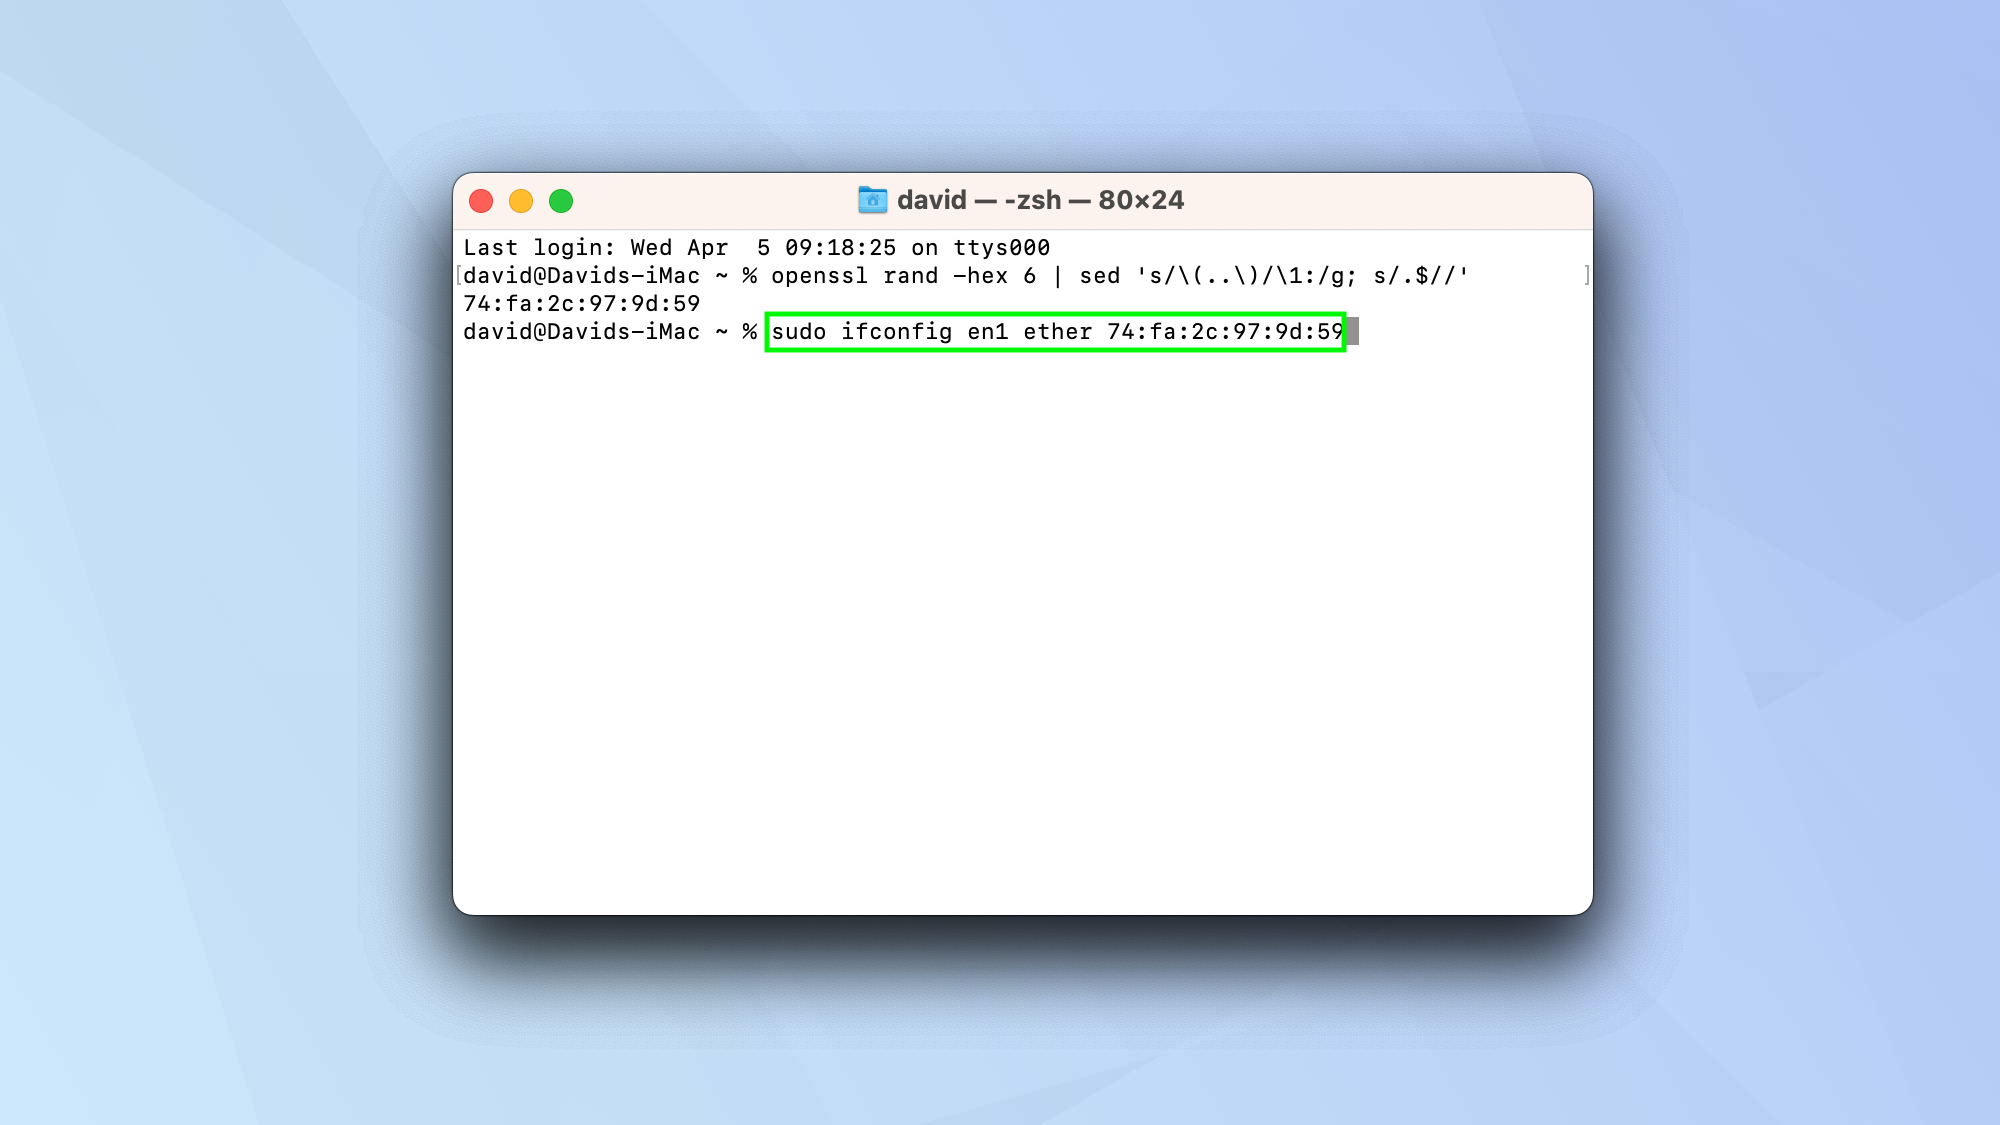
Now type this line into Terminal and press Enter. Where you see <interface name> enter the Interface name you saw in step 1. Where you see <MAC address> enter the Mac address generated by Terminal in step 4.
sudo ifconfig <interface name> ether <MAC address>
Once you enter your Apple Mac computer's password, the address will change. You can reconnect to a Wi-Fi network.
And there you go. You now know how to change your Mac address in macOS. Now you've mastered that, why not check out 18 macOS Terminal commands to turn you into a Mac power user, learn how to show the hidden files in Mac or figure out how to change the screenshot location on Mac. You may also want to know how to edit the Host file on macOS. The more familiar you become with Terminal, the more you'll see how powerful this tool is. Messy desktop? Learn how to use desktop stacks on Mac.
Sign up to get the BEST of Tom's Guide direct to your inbox.
Get instant access to breaking news, the hottest reviews, great deals and helpful tips.
More from Tom's Guide

David Crookes is a freelance writer, reporter, editor and author. He has written for technology and gaming magazines including Retro Gamer, Web User, Micro Mart, MagPi, Android, iCreate, Total PC Gaming, T3 and Macworld. He has also covered crime, history, politics, education, health, sport, film, music and more, and been a producer for BBC Radio 5 Live.
