How to change the screenshot location on Mac
Learn how to change the screenshot location on Mac to keep your desktop clear
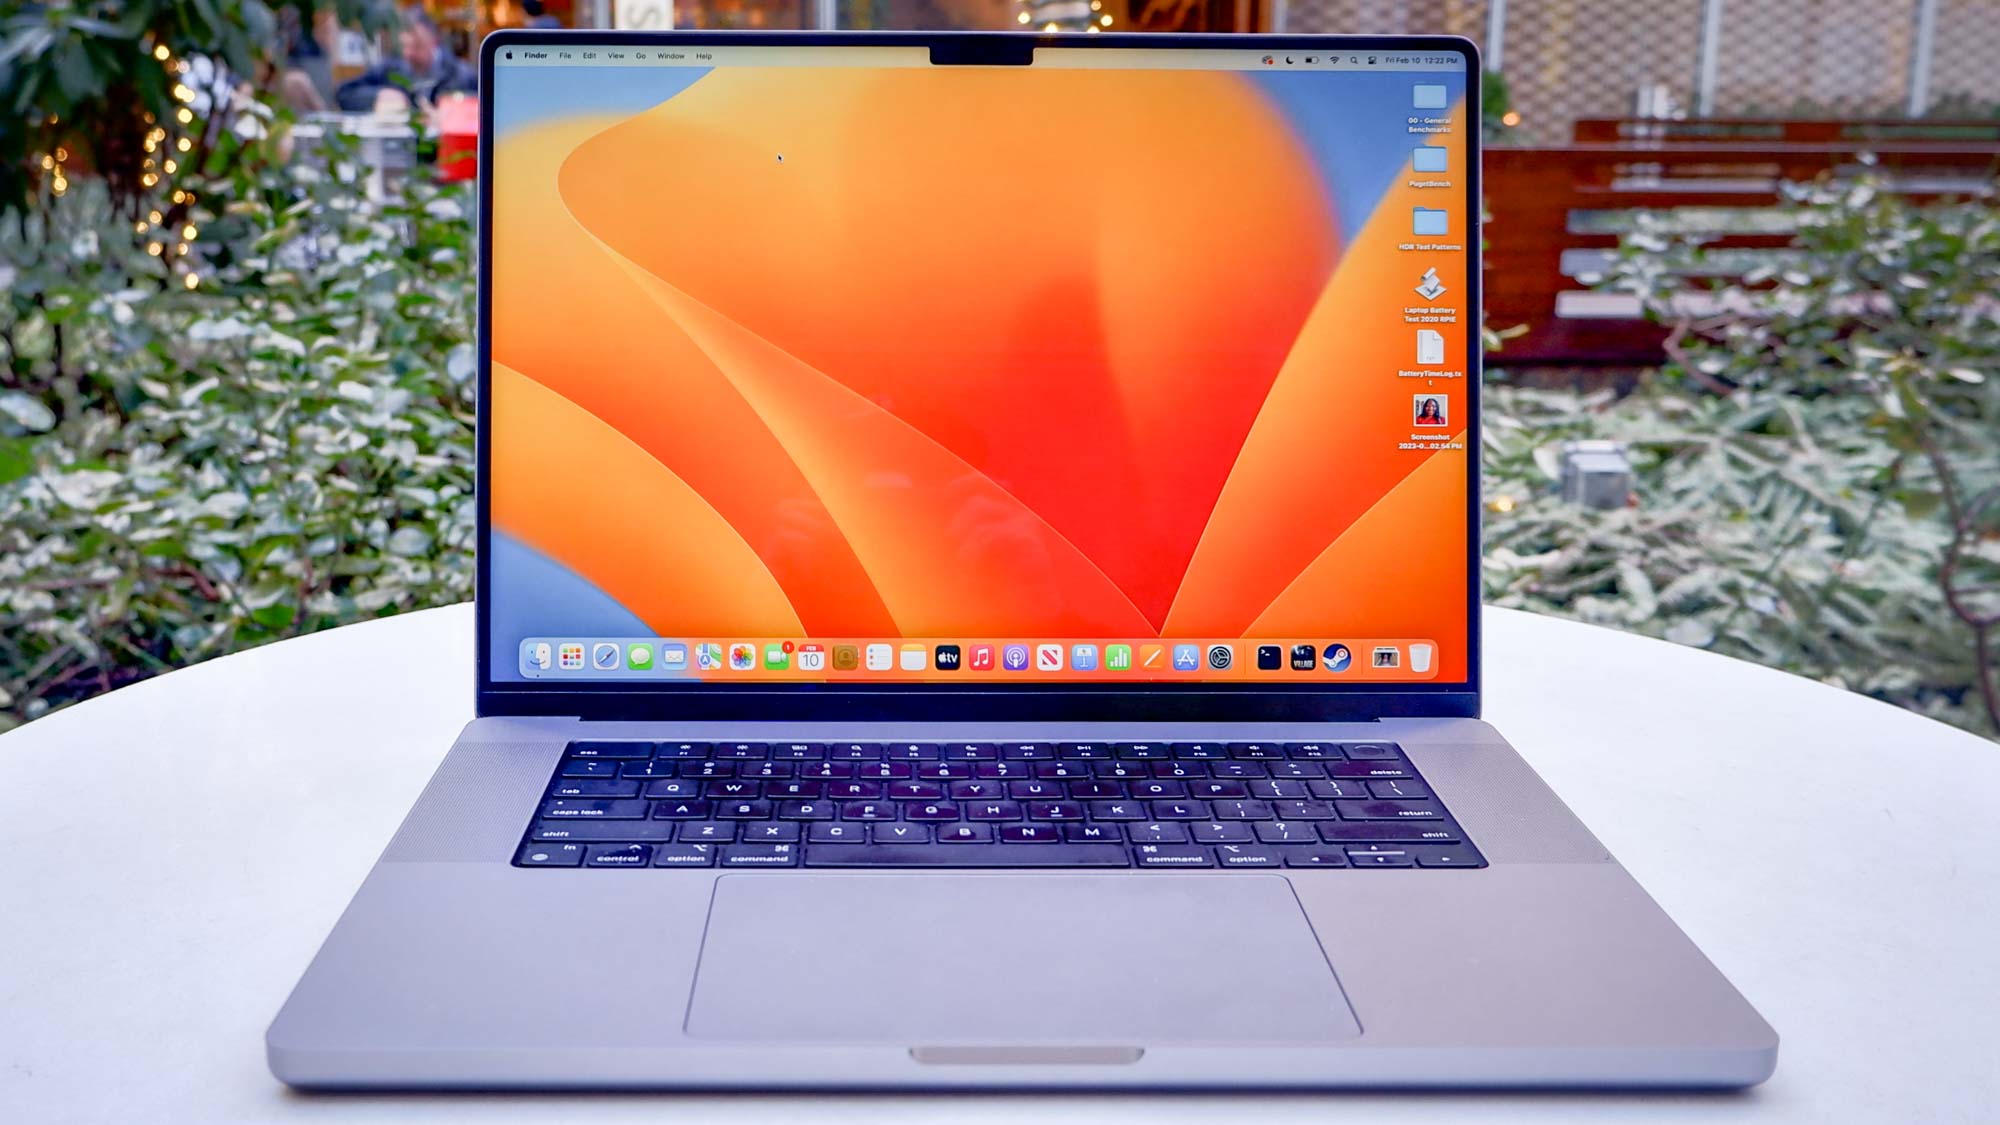
By changing the screenshot location on Mac, you can make sure your desktop stays clear. The built-in screenshot tools on Mac are awesome and as someone who takes lots of screenshots for my job, they make my life much easier versus taking screenshots on Windows. It's humble workflow features like this that help make Macs some of the best computers around.
Unfortunately though, macOS saves your screenshots to the Desktop by default. This results in a clogged up and unsightly screen. Why have that lovely sleek Mac if the screen looks like a mess?
Changing the default screen location on Mac is thankfully very easy to learn — almost as easy as learning how to screenshot on Mac in the first place. And there are a couple of ways to do it.
Here's how to change the default screen location on Mac.
How to change the screenshot location on Mac
The easiest method is by using the screen capture tool.
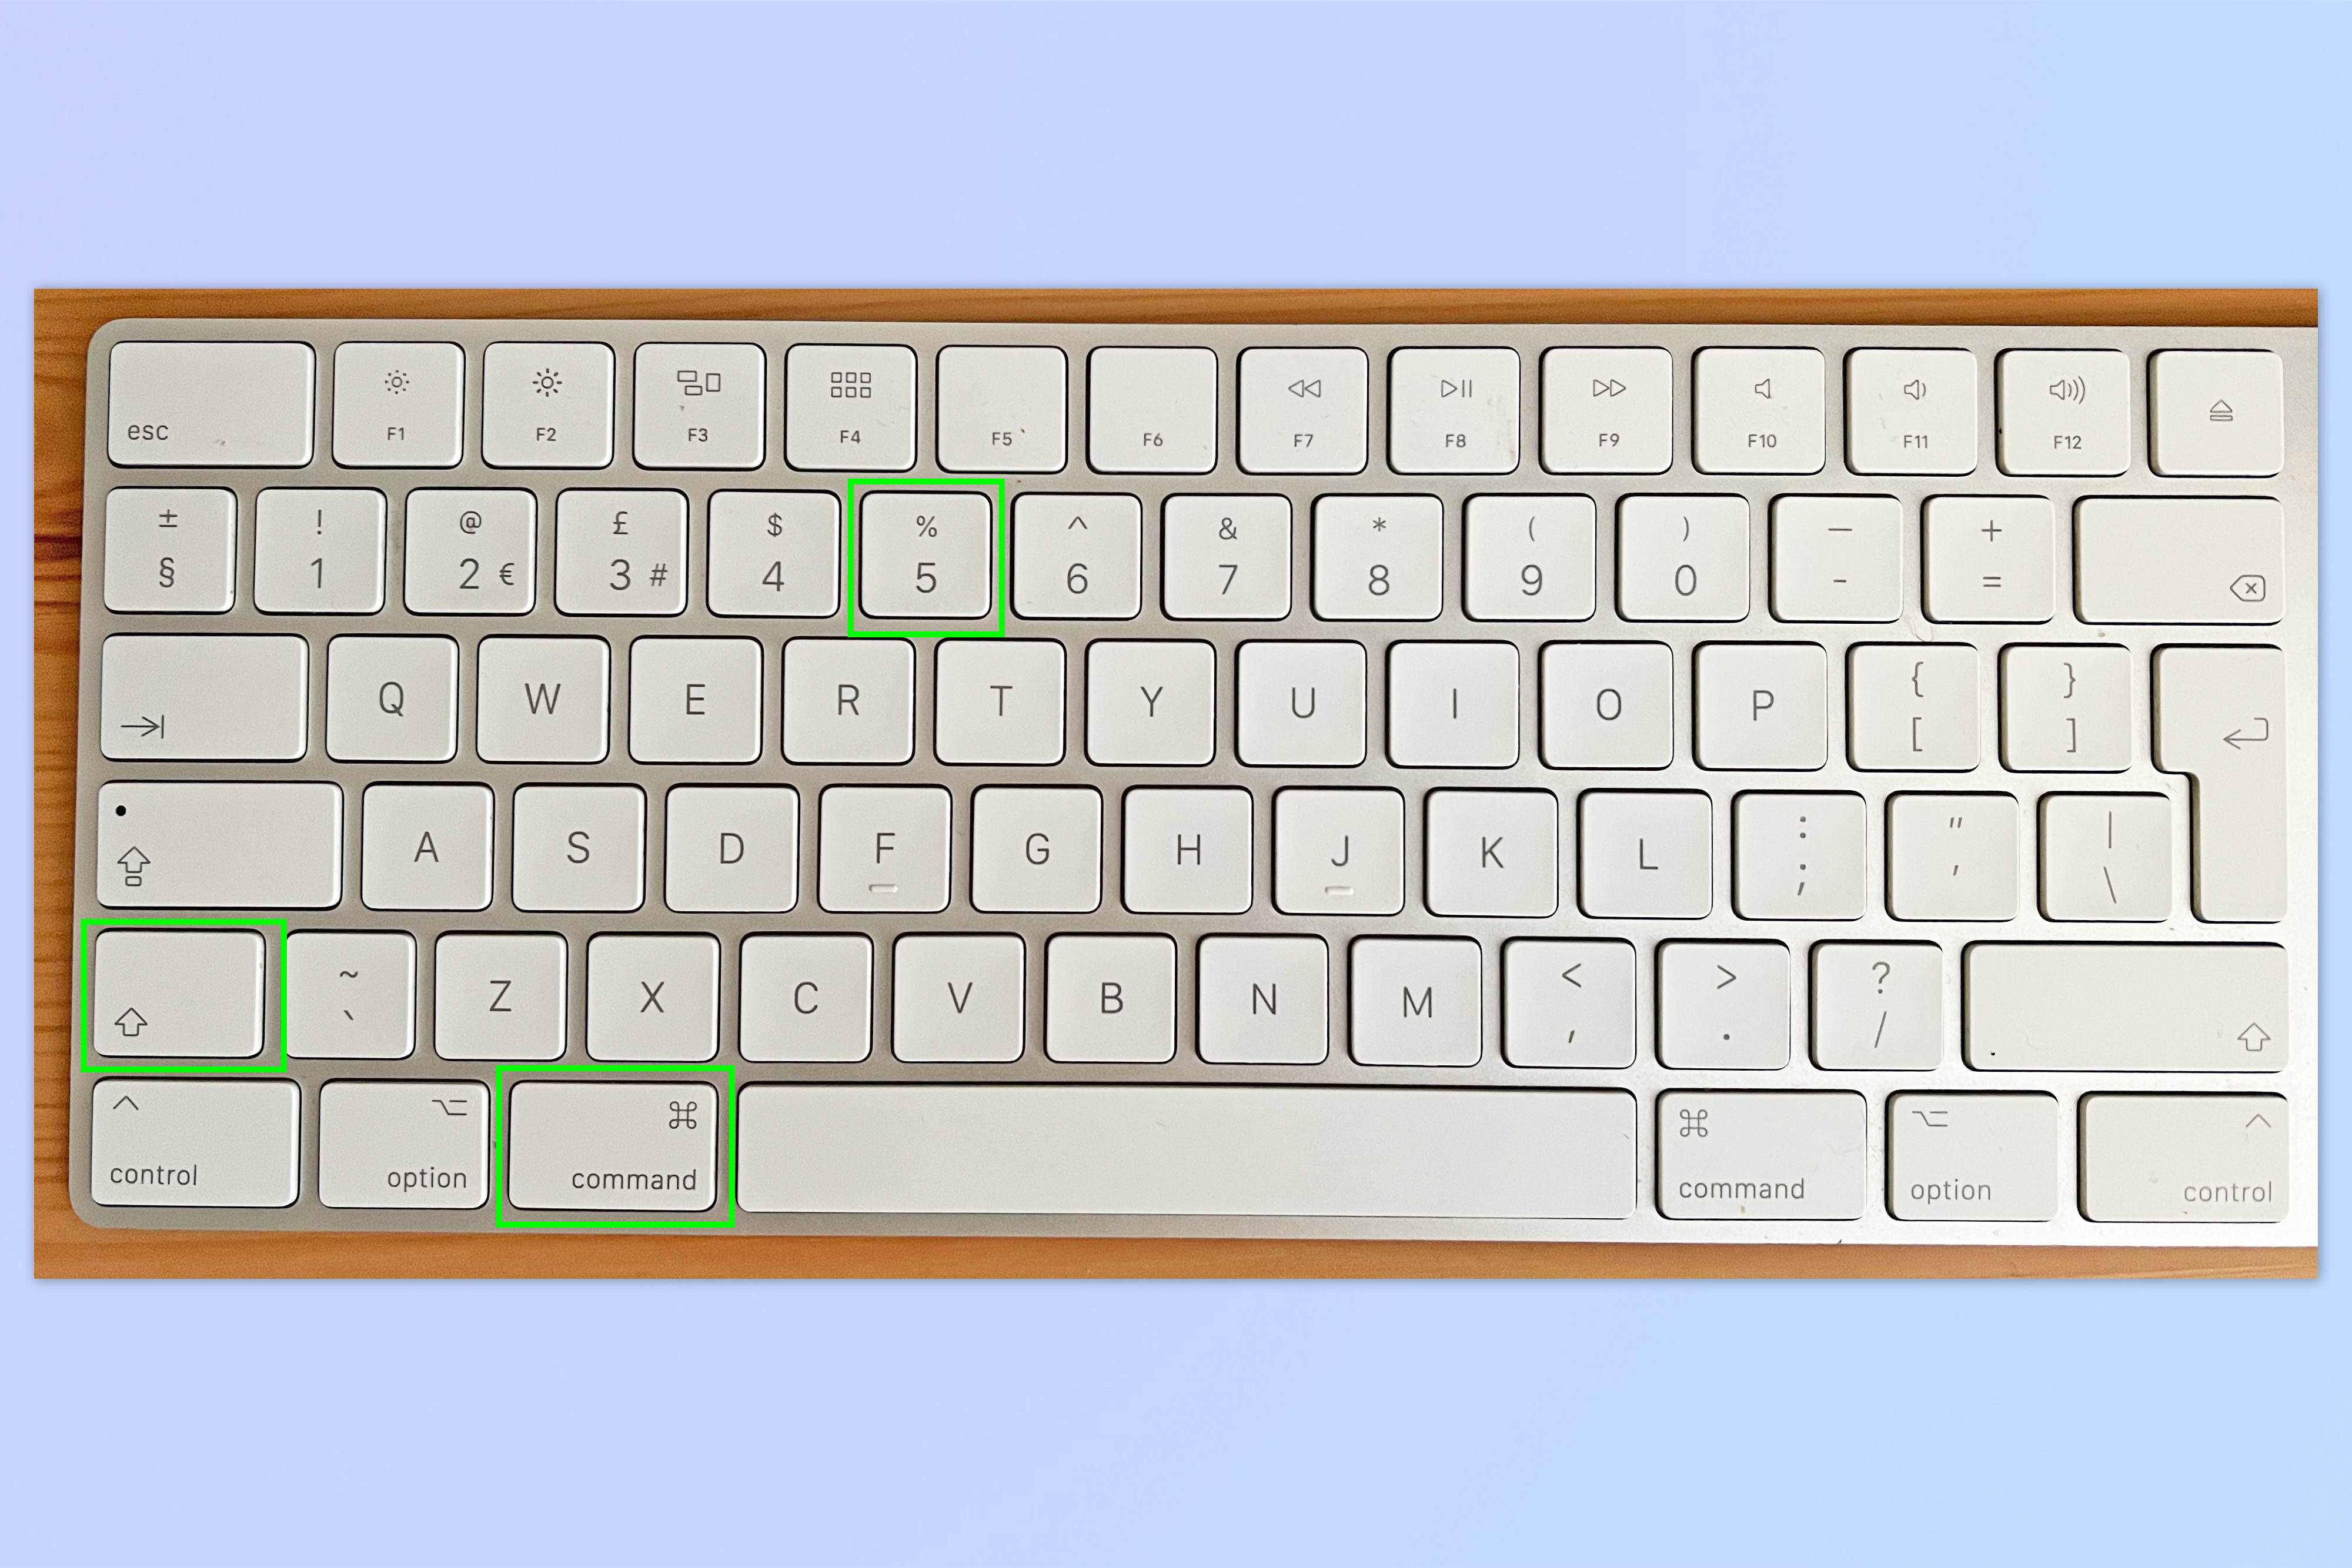
1. Hold Shift + Cmd + 5 to bring up the screenshot tool.
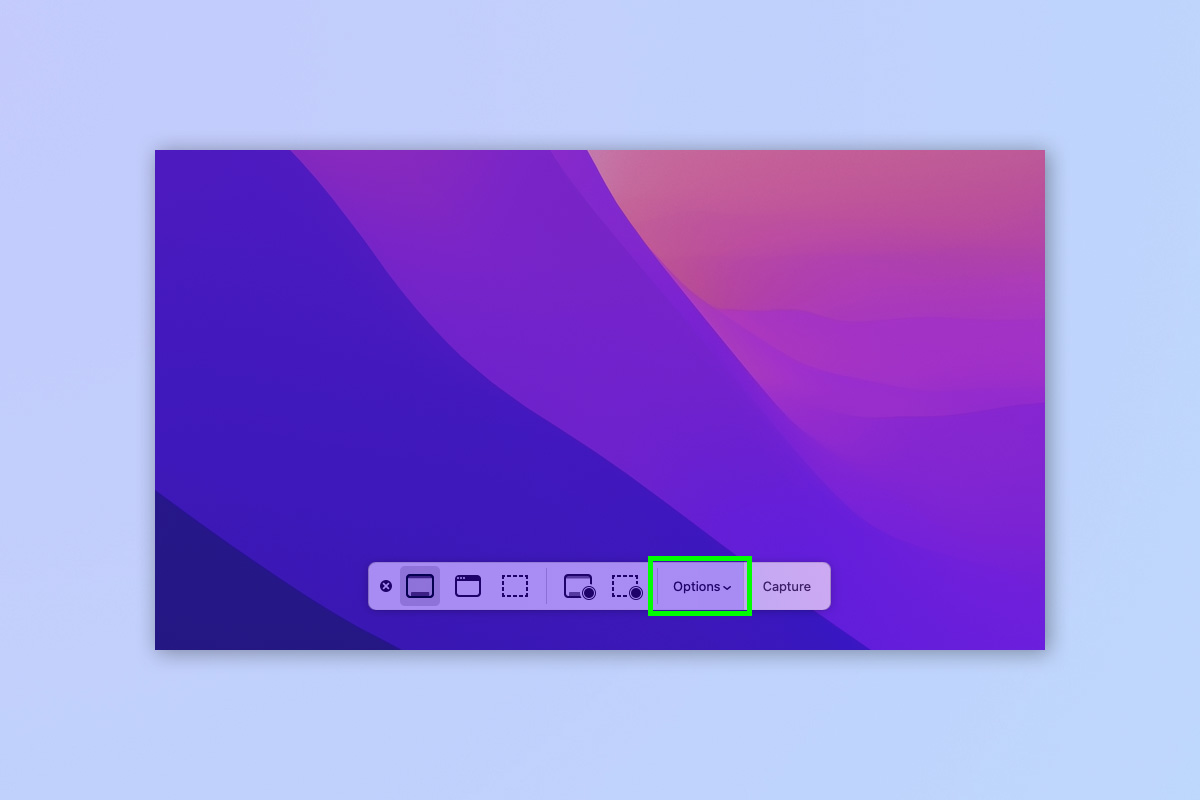
2. Click Options.
Sign up to get the BEST of Tom's Guide direct to your inbox.
Get instant access to breaking news, the hottest reviews, great deals and helpful tips.
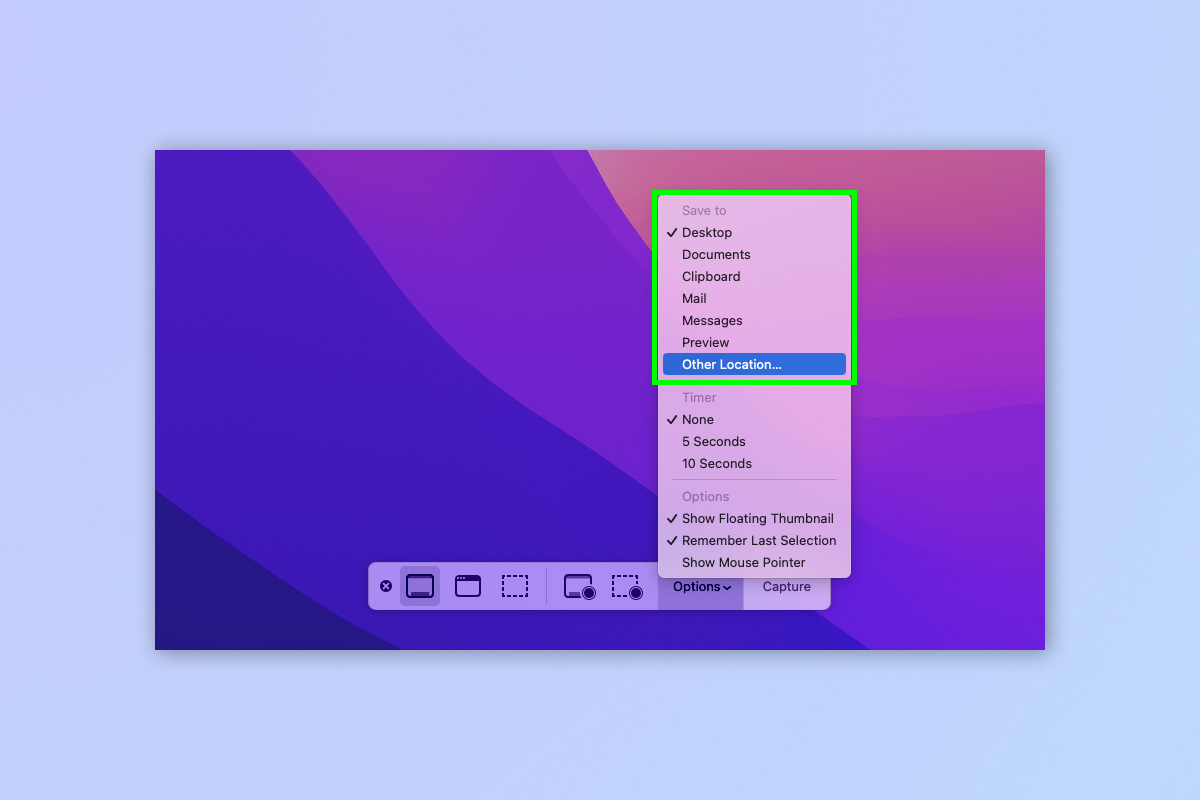
3. Under Save to, click one of the pre-defined save locations, and you're done. Alternatively, to specify your own location, click Other Location.
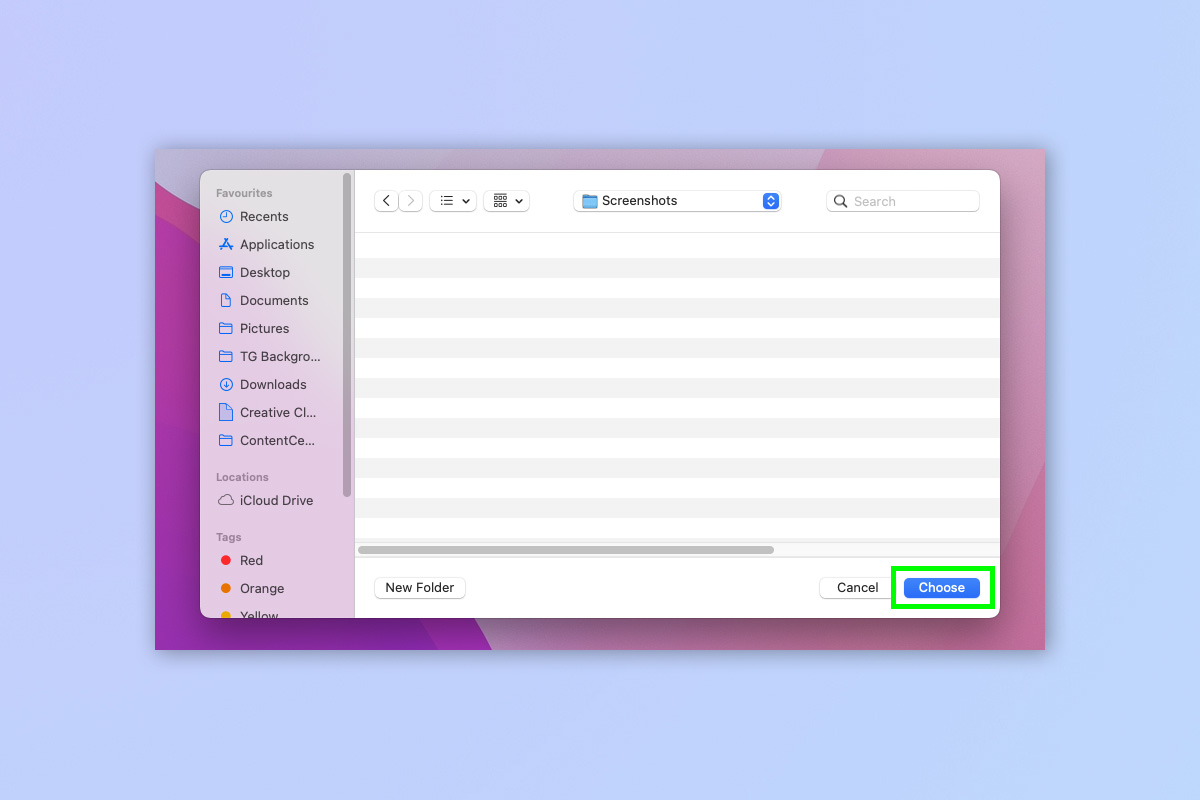
4. Choose and/or create a folder to save your screenshots in and click Choose.
How to change screenshot location on Mac using Terminal
There's also a power user way to change your screenshot location. This is a fun way to change the location if you're experimenting with Terminal and using your Mac in a more in-depth way. It's also useful if you're having keyboard issues or are using a non-Mac keyboard, and can't access the screenshot tools fully.
1. Open Terminal.
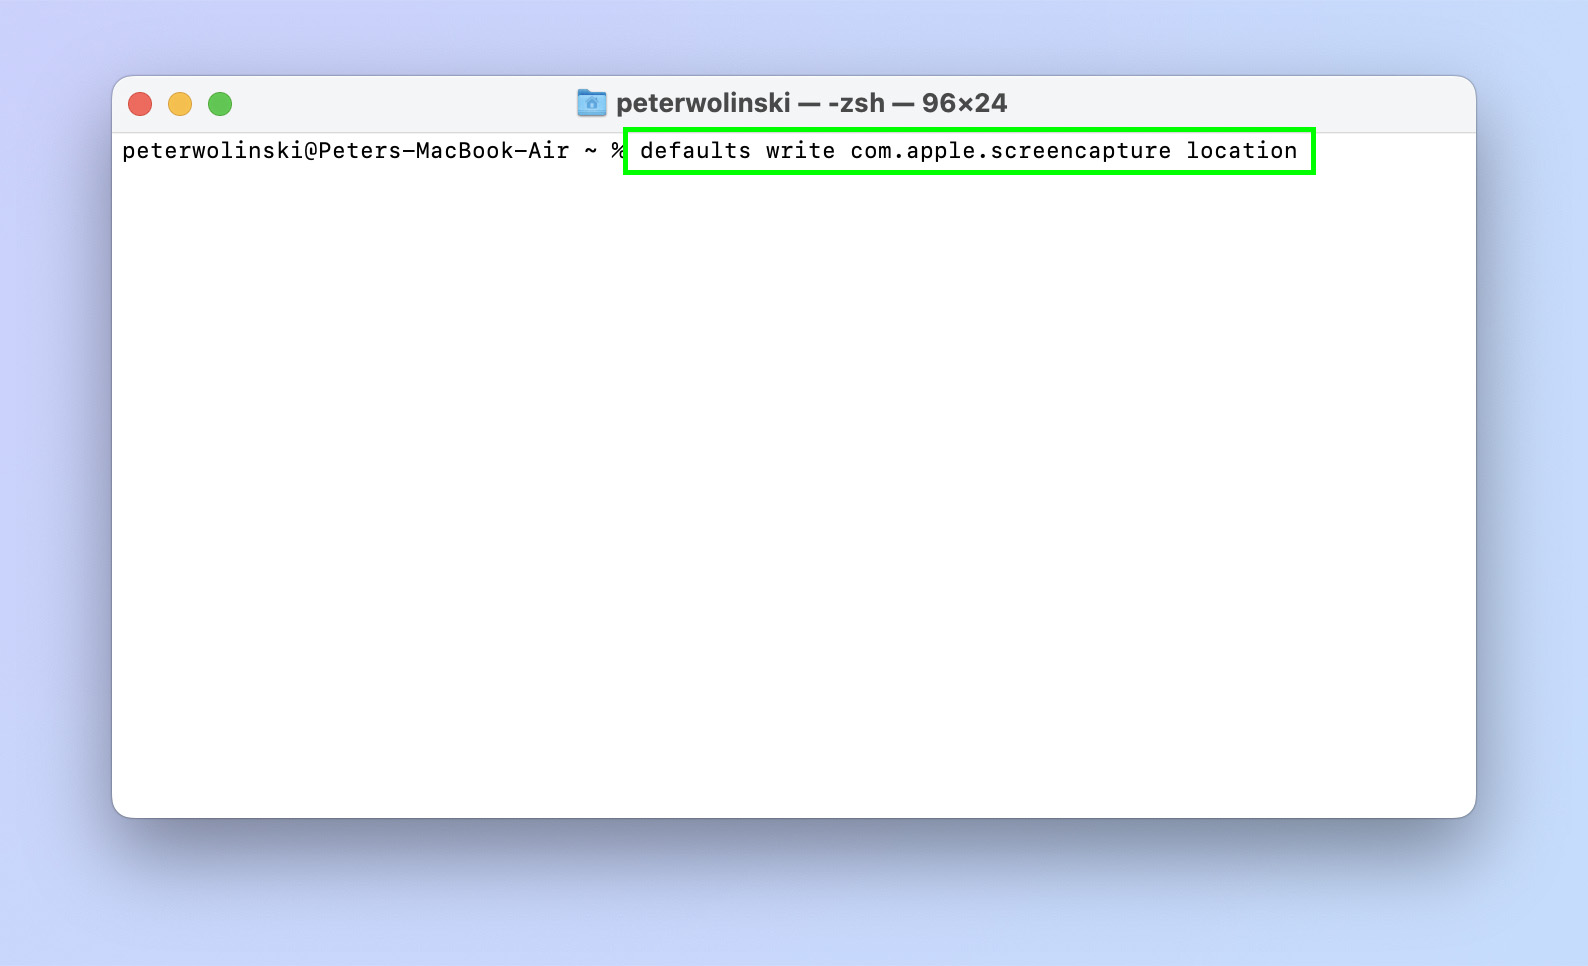
2. Type the following command into Terminal (but don't press Enter yet):
"defaults write com.apple.screencapture location "
Don't type the quotation marks, but do type the space after "location".
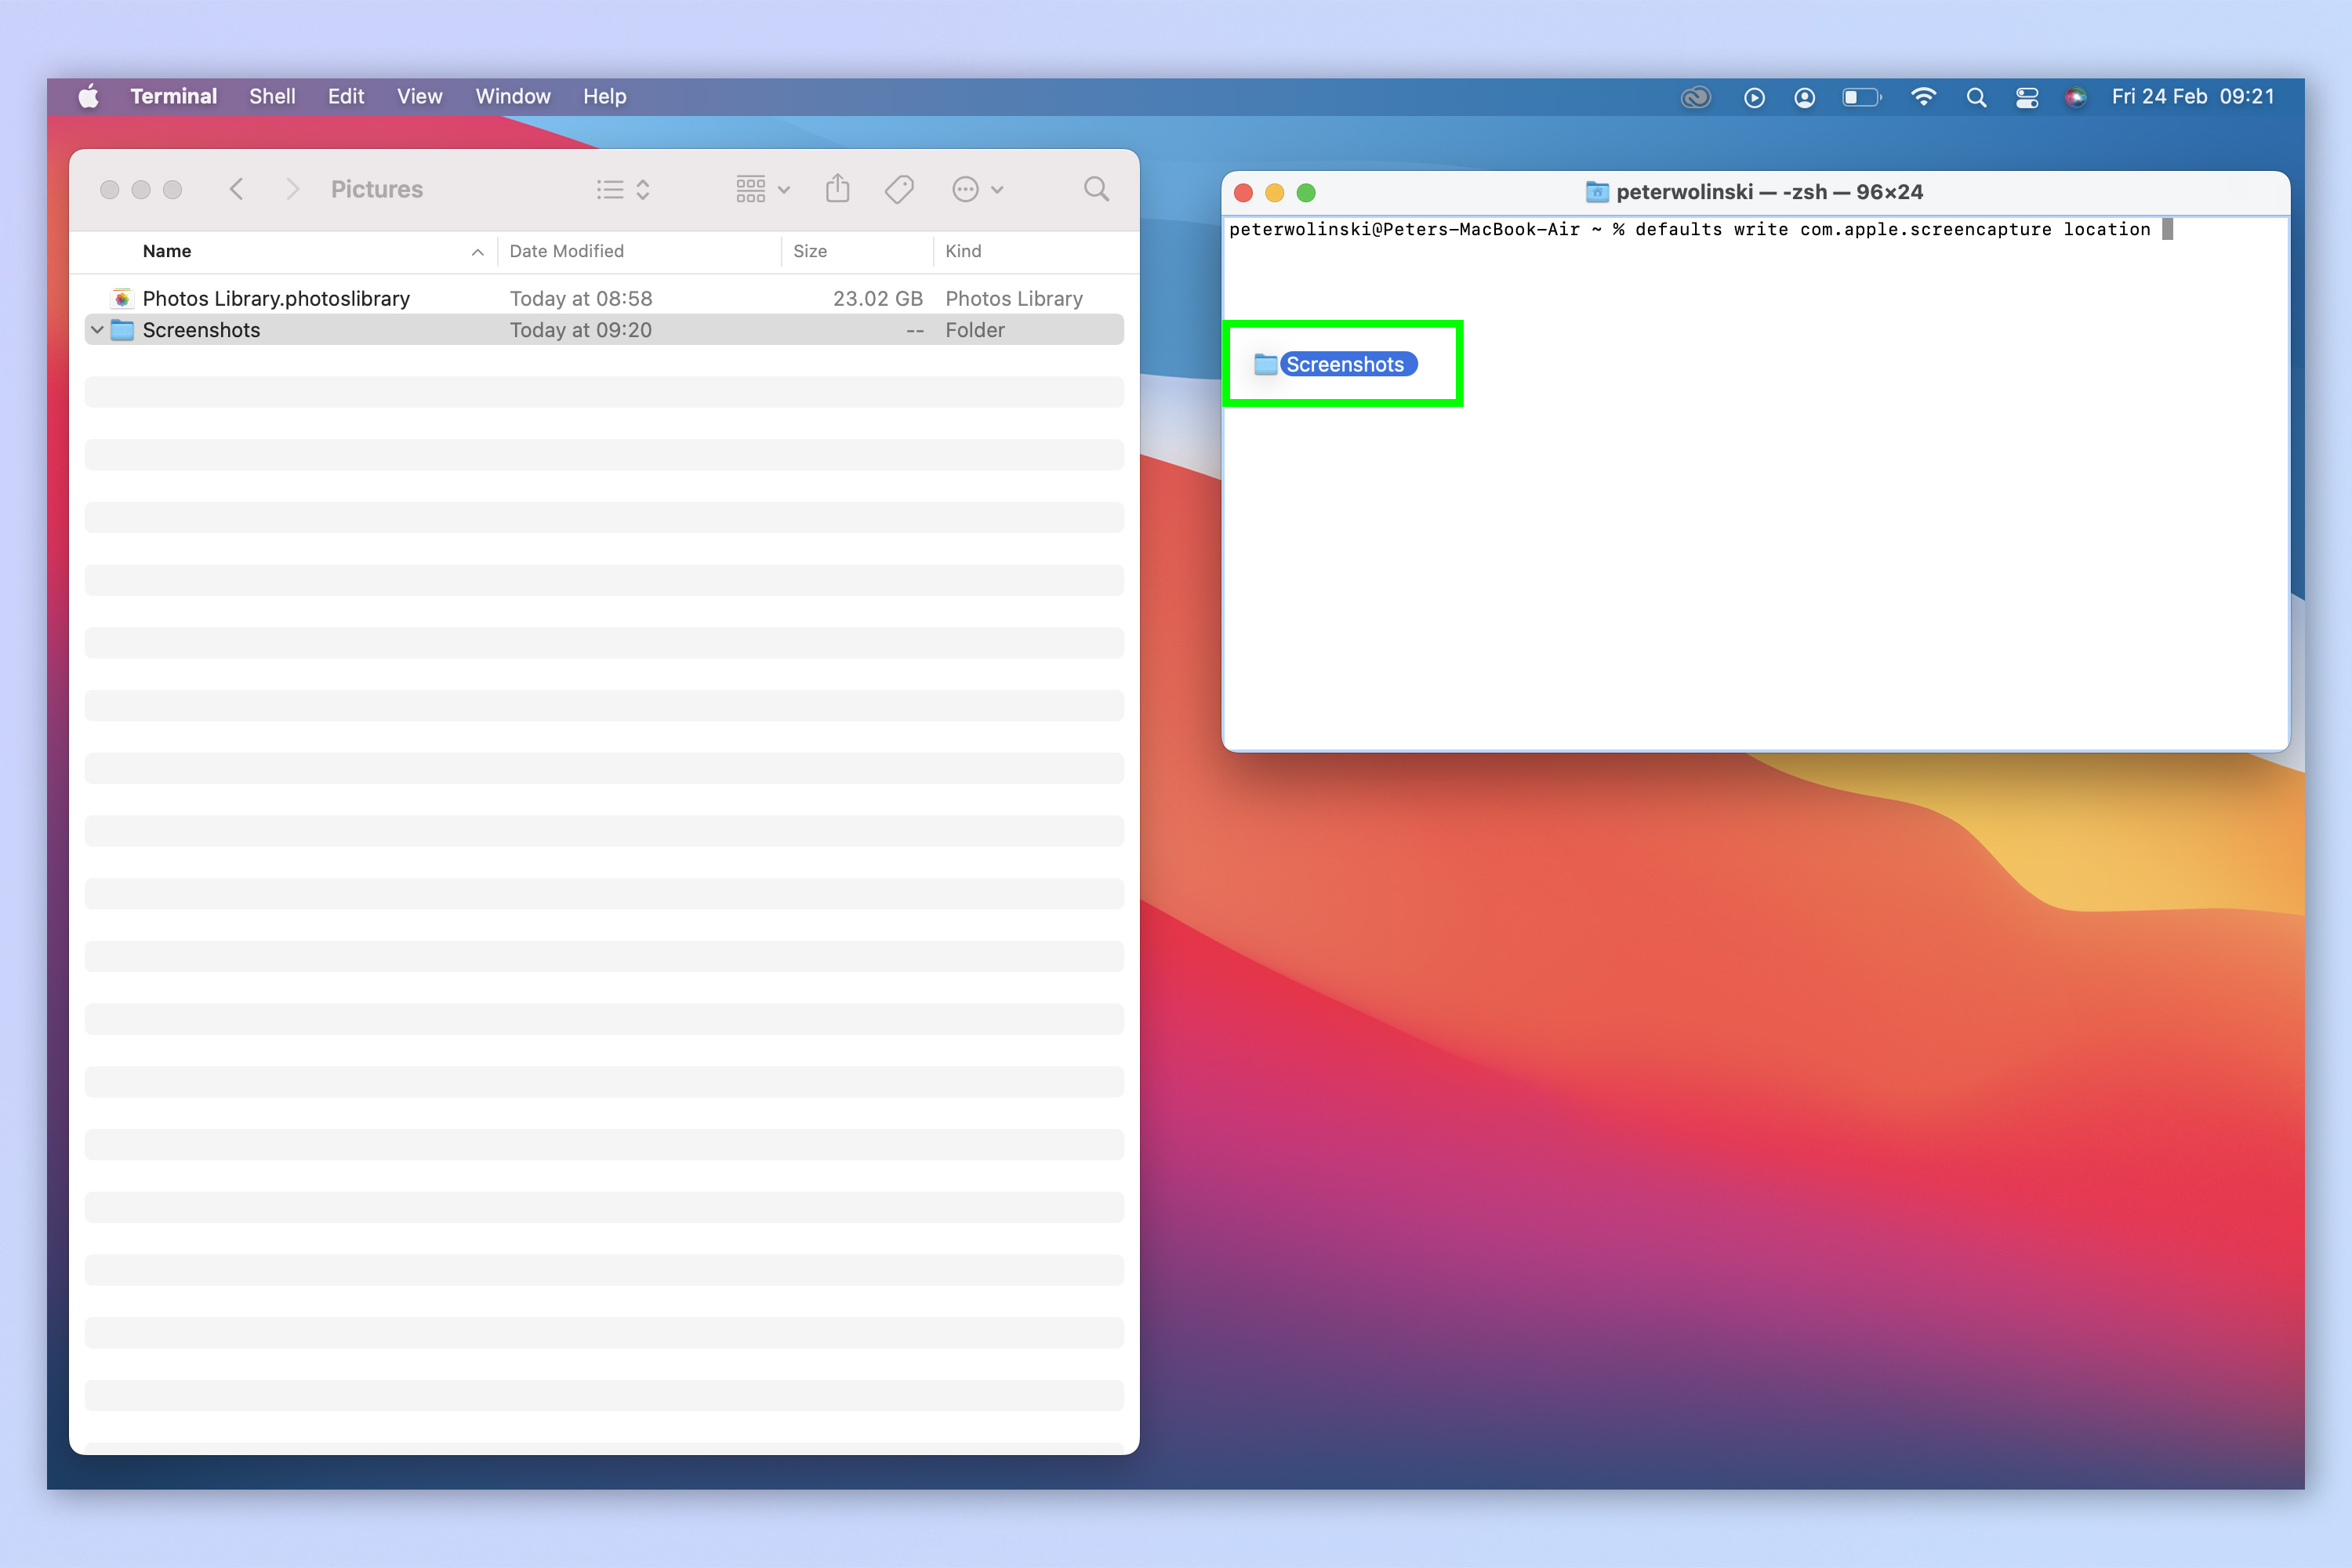
3. Locate the Finder folder you want to use to store your screenshots and drag the folder into the Terminal window. When you see its file path added to the end of your command from step 2, press Enter.
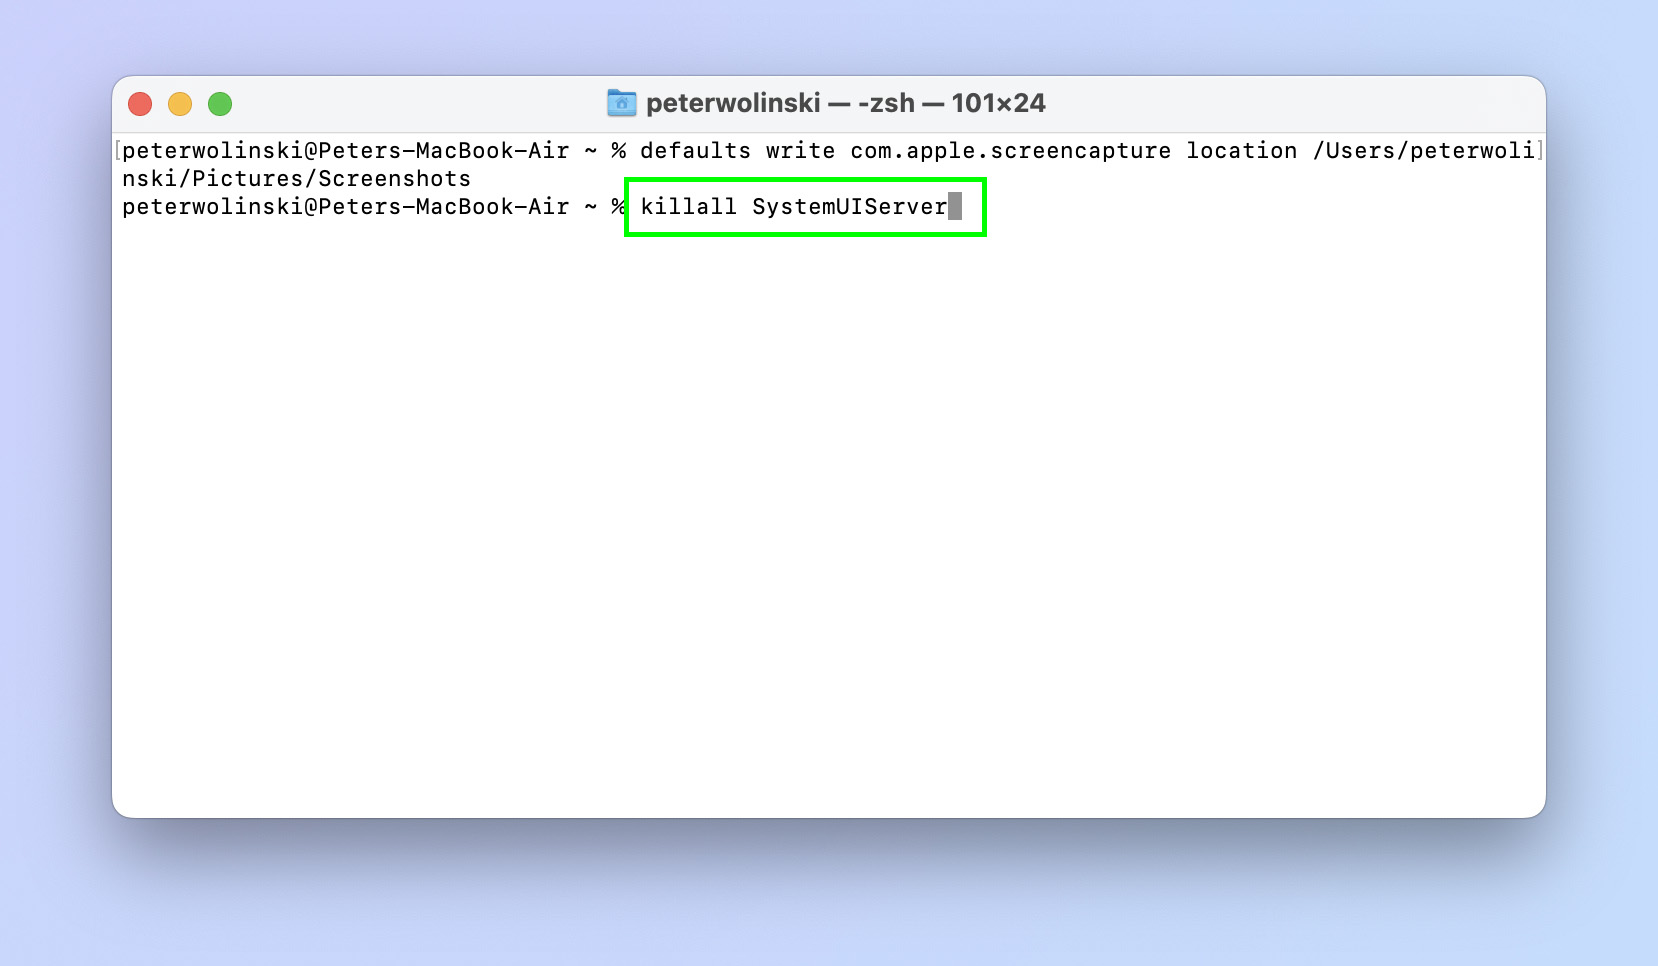
4. Type the following command into Terminal and hit Enter once you have.
"killall SystemUIServer"
You're done! Your screenshots will now appear in the folder you have specified, and you're fully deserving of feeling like a proper Mac power user.
If you'd like more tips for using your Mac, check out our guides on how to reset SMC on a MacBook Pro (Intel) and how to clear the cache on Mac. Both of these can be used to try and speed up a sluggish Mac.

Peter is a Senior Editor at Tom's Guide, heading up the site's Reviews team and Cameras section. As a writer, he covers topics including tech, photography, gaming, hardware, motoring and food & drink. Outside of work, he's an avid photographer, specialising in architectural and portrait photography. When he's not snapping away on his beloved Fujifilm camera, he can usually be found telling everyone about his greyhounds, riding his motorcycle, squeezing as many FPS as possible out of PC games, and perfecting his espresso shots.
