Knowing how to calibrate your TV for your Xbox Series X or Xbox Series S could make a huge difference to your gaming experience.
A few years ago, all it took to get gaming was to connect your console to an A/V port, pop in a cartridge, then find a comfortable spot on the carpet close to the TV. But these days, the best TVs contain a maze of options, and ensuring your games look their best can become overwhelming. And that's before we even discuss refresh rates, AKA the biggest lie told to TV buyers.
Thankfully, Microsoft makes the process a little easier with the Xbox Series X and Series S, providing a built-in calibration tool that guides you through which settings to adjust on your TV in order to get the best visual results. All you need is your TV remote, 10-15 minutes, and, of course, an Xbox Series X or S.
Editor's note: This guide involves using your TV remote to enter the settings menu of your TV to change picture settings. If you're unsure of how to do this, consult your TV's user guide. Also, you may not see the exact options contained in the Xbox calibration tool on your TV, as the tool is a general guide for all TV brands. Some settings may be listed under a similar name, or may not be there at all. With this in mind, try to follow the instructions as closely as possible, and consult your TV's user guide if you're unsure of any settings.
How to calibrate your TV for Xbox Series X or S
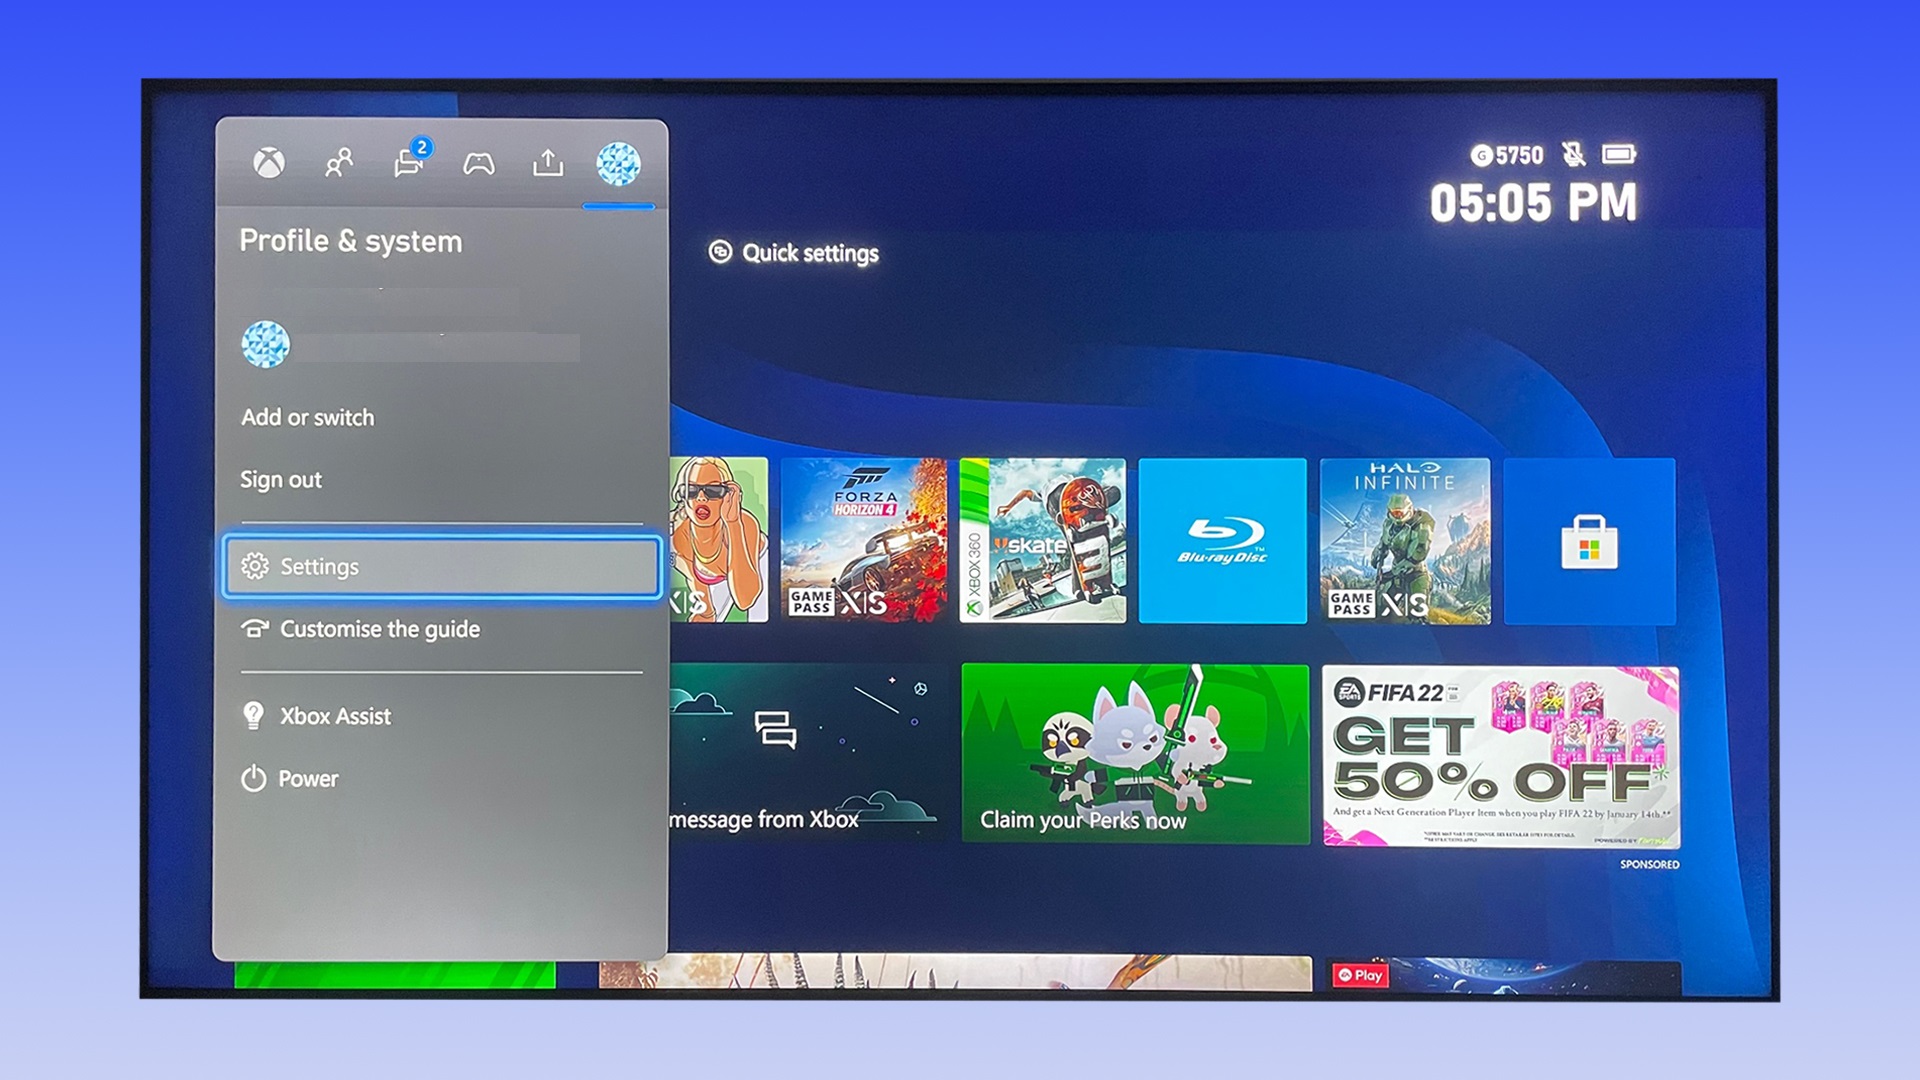
1. After powering on your console, press the Xbox button on your Xbox controller to bring up the guide menu. Press right on the D-pad to scroll to "Profile & system" to the furthest right of the guide, then scroll down to "Settings." Press A to enter the Settings menu.
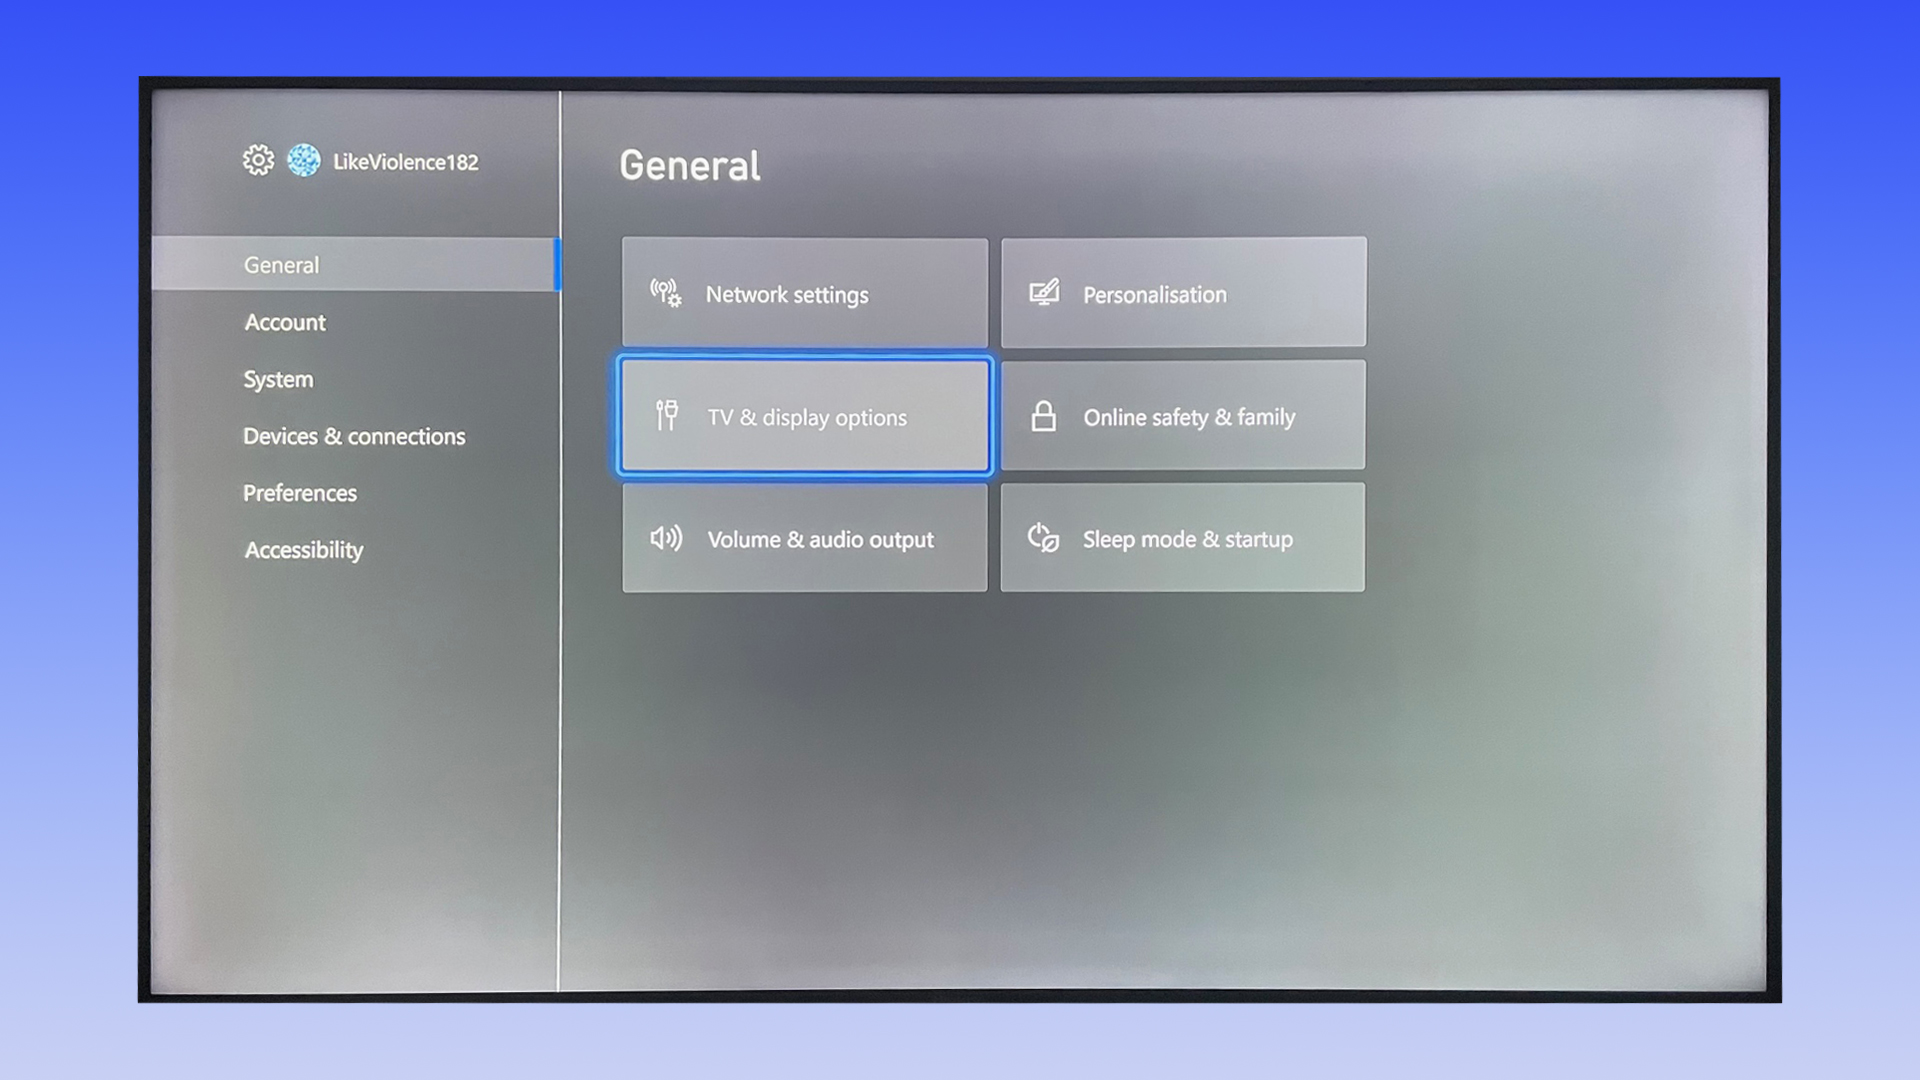
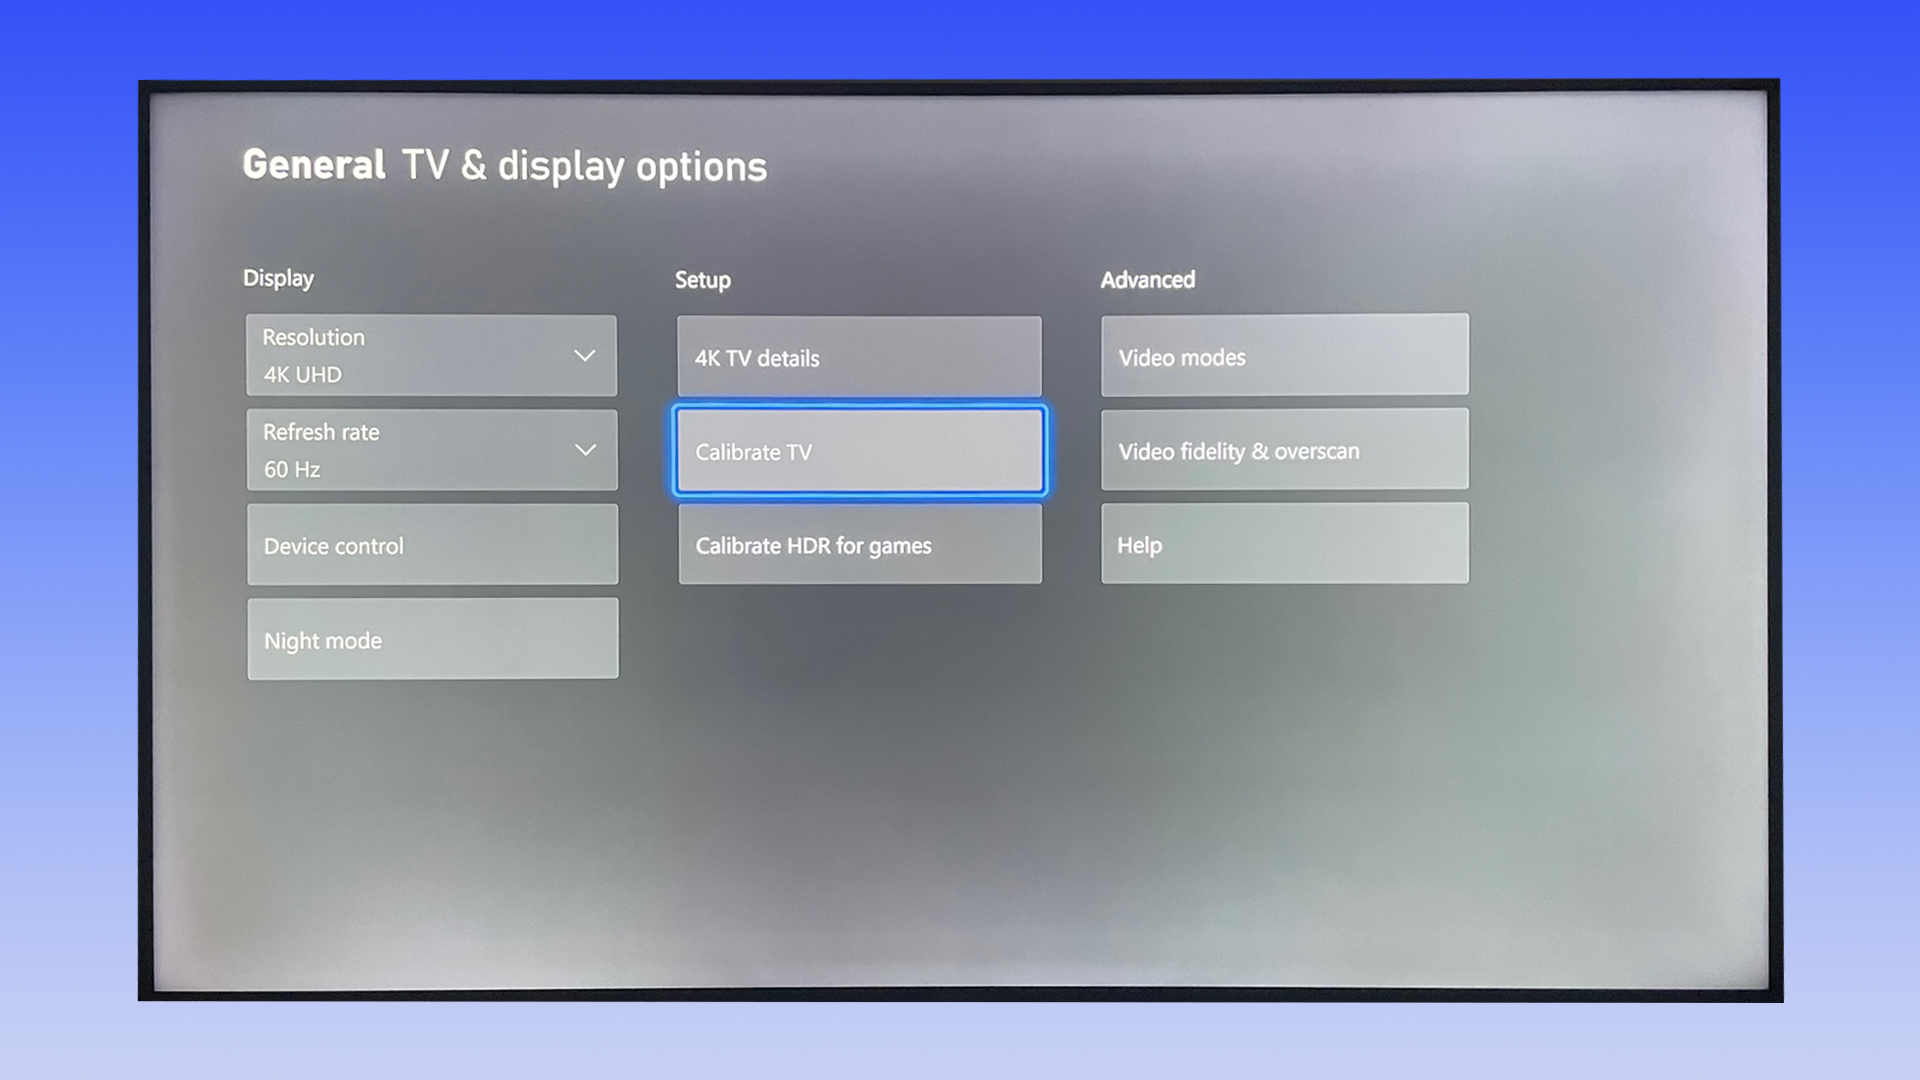
2. On the "General" tab, scroll across to the right, highlight "TV & display options," then press A to select it.
3. Scroll to the "Setup" column in the middle, then down to "Calibrate TV." Press A to enter the "Calibrate TV" menu.
Sign up to get the BEST of Tom's Guide direct to your inbox.
Get instant access to breaking news, the hottest reviews, great deals and helpful tips.
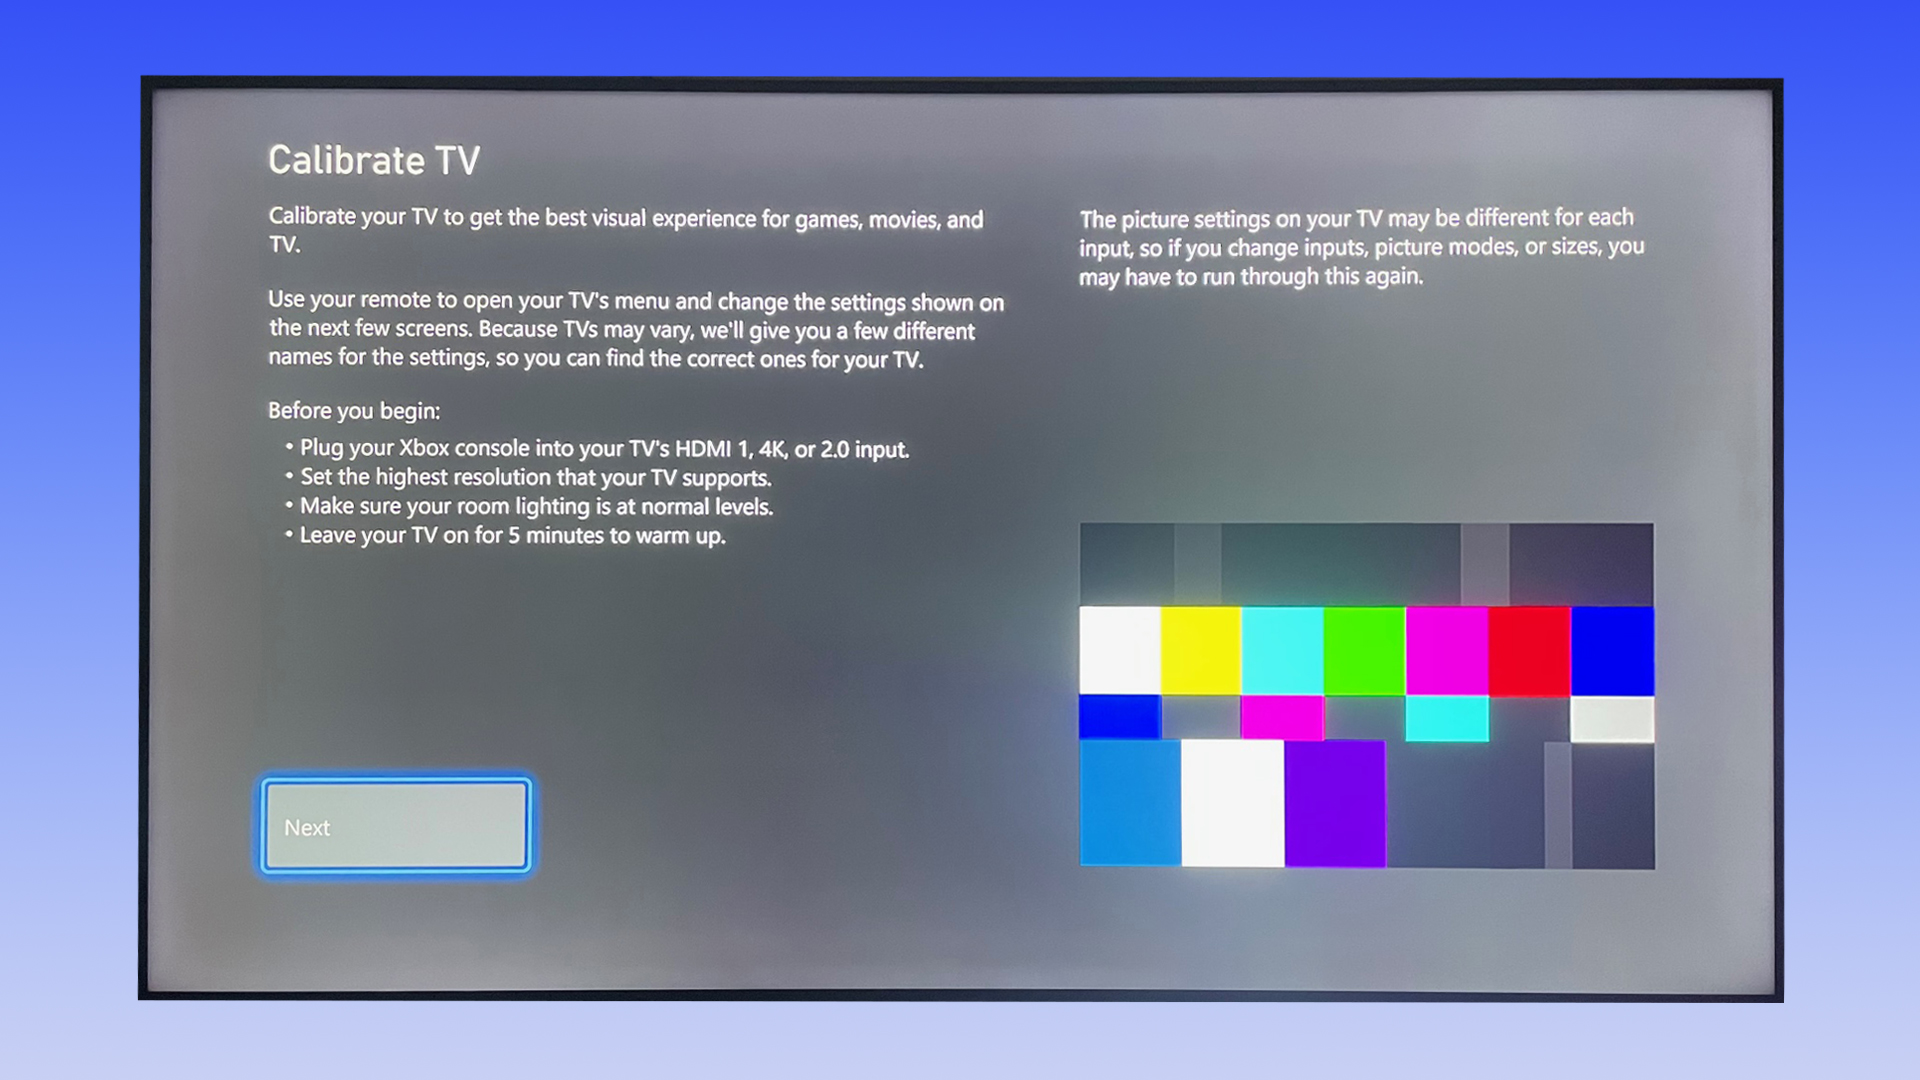
4. Read through and follow the instructions on this screen. If you're not sure whether your TV supports the HDMI specifications mentioned here, or which HDMI port on your TV is the correct one, consult your TV's user guide. When you're ready, press A on your Xbox controller to continue.
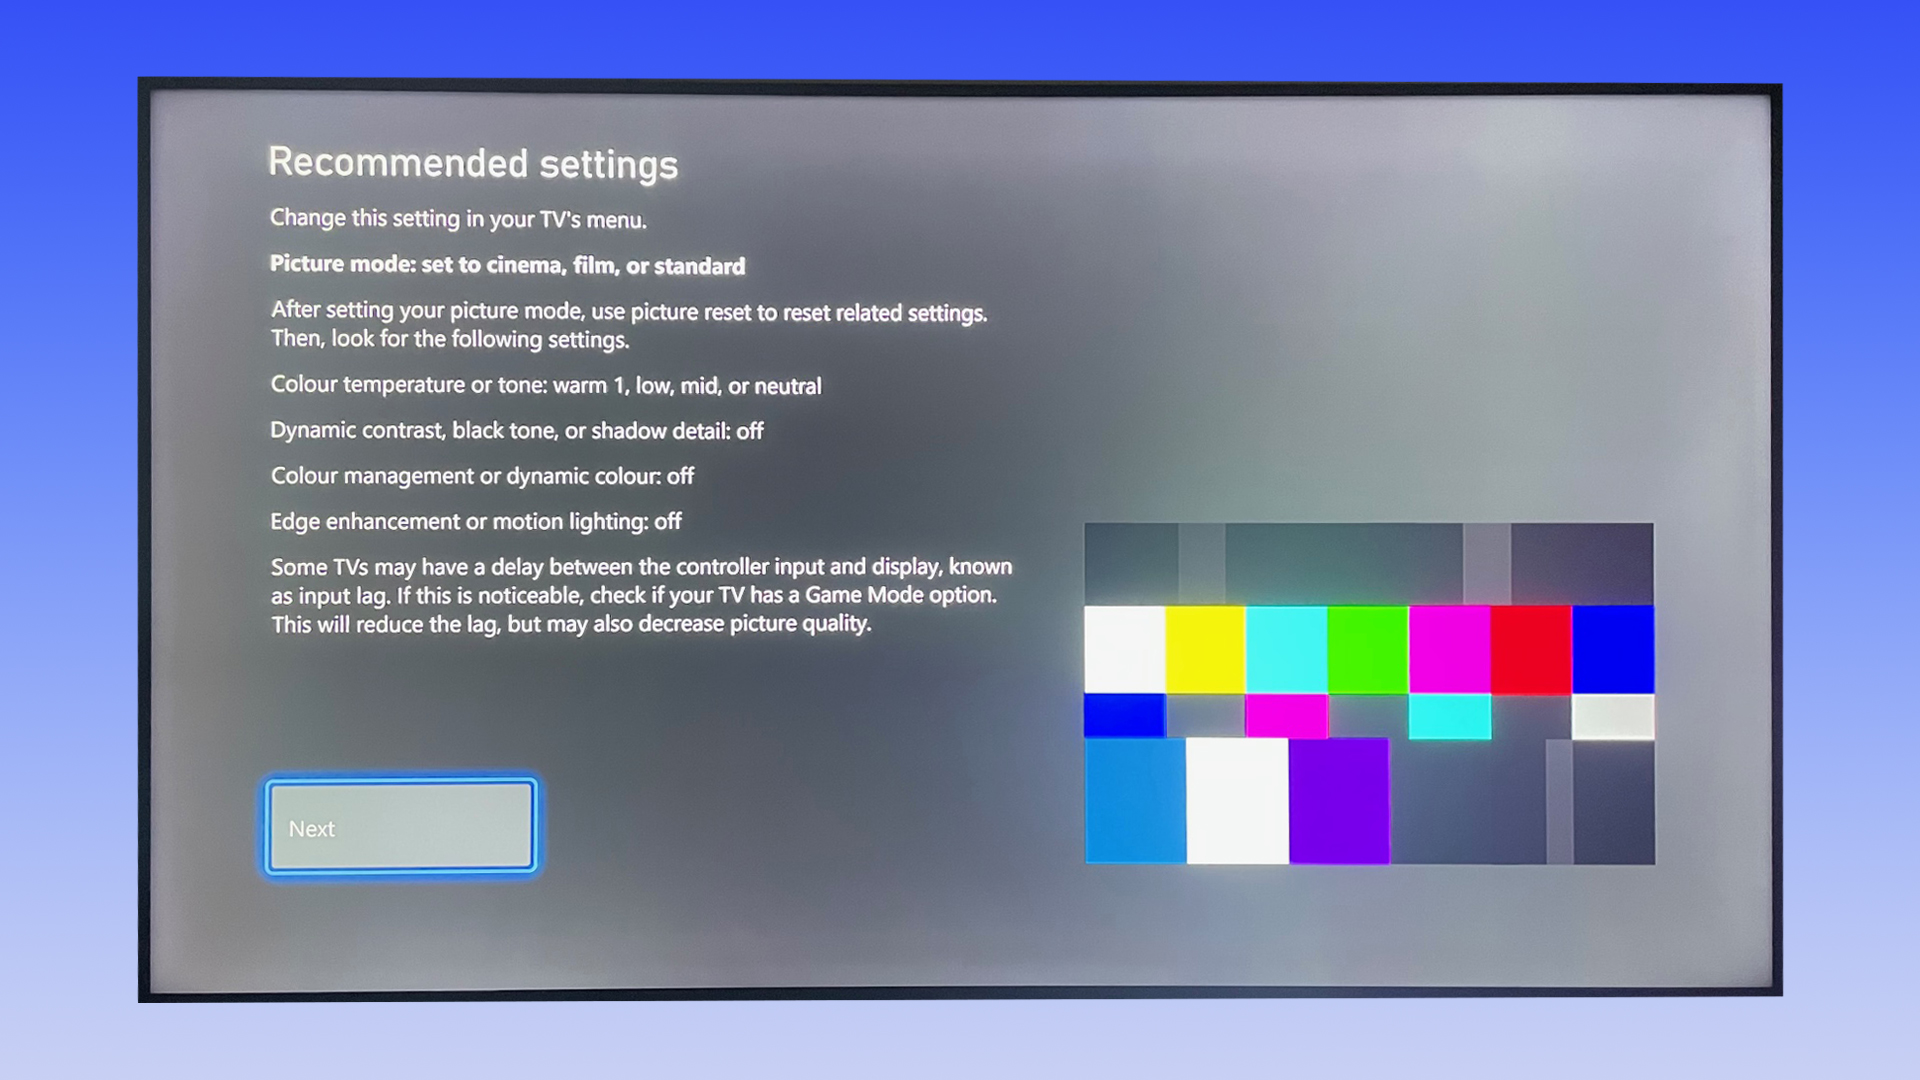
5. You'll now see the "Recommended settings" page, where you should follow the on-screen instructions. You can change these settings using your TV remote. Press A on the Xbox controller when you're done here, to go to the next step.
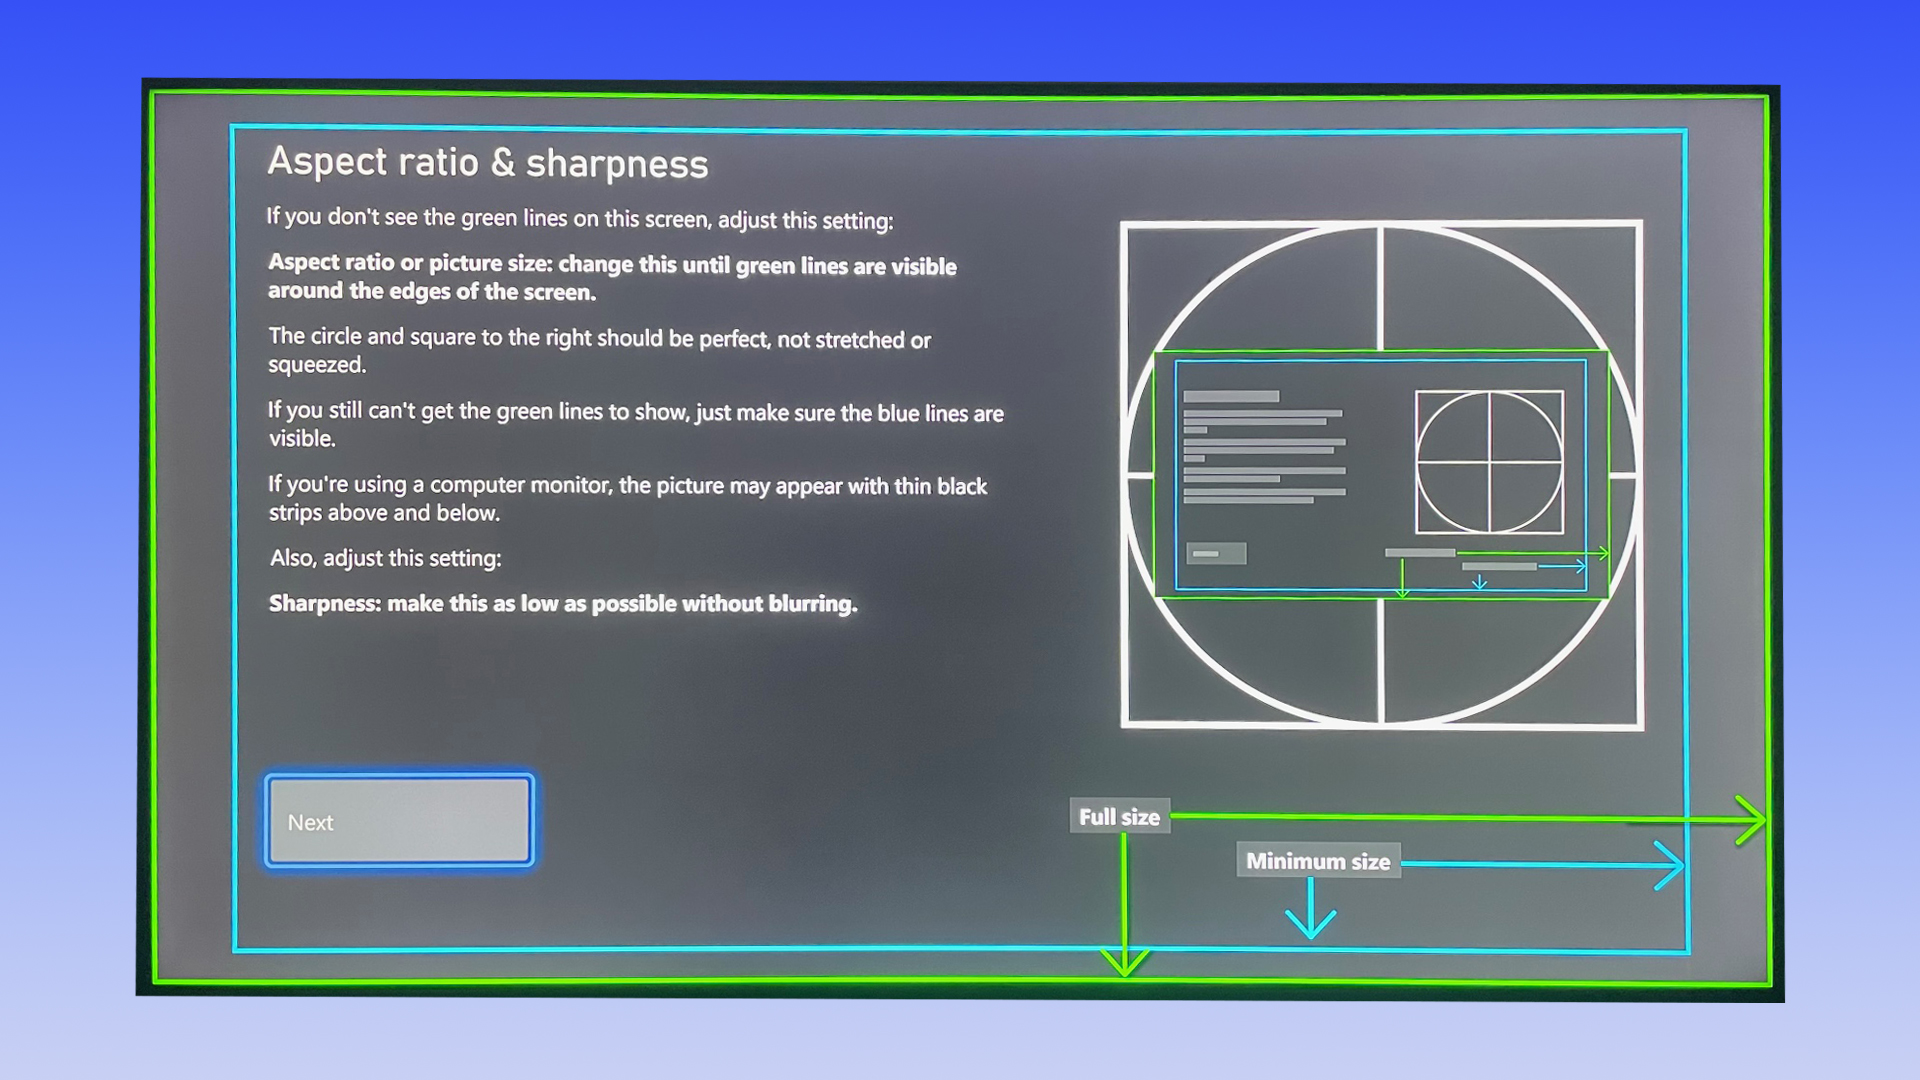
6. You'll now see the "Aspect ratio & sharpness" page, which shows you how to make sure your picture is the correct size and is sharp enough. You can change the settings here using your TV remote. Press A on the Xbox controller when you're done, to move on to the next step.
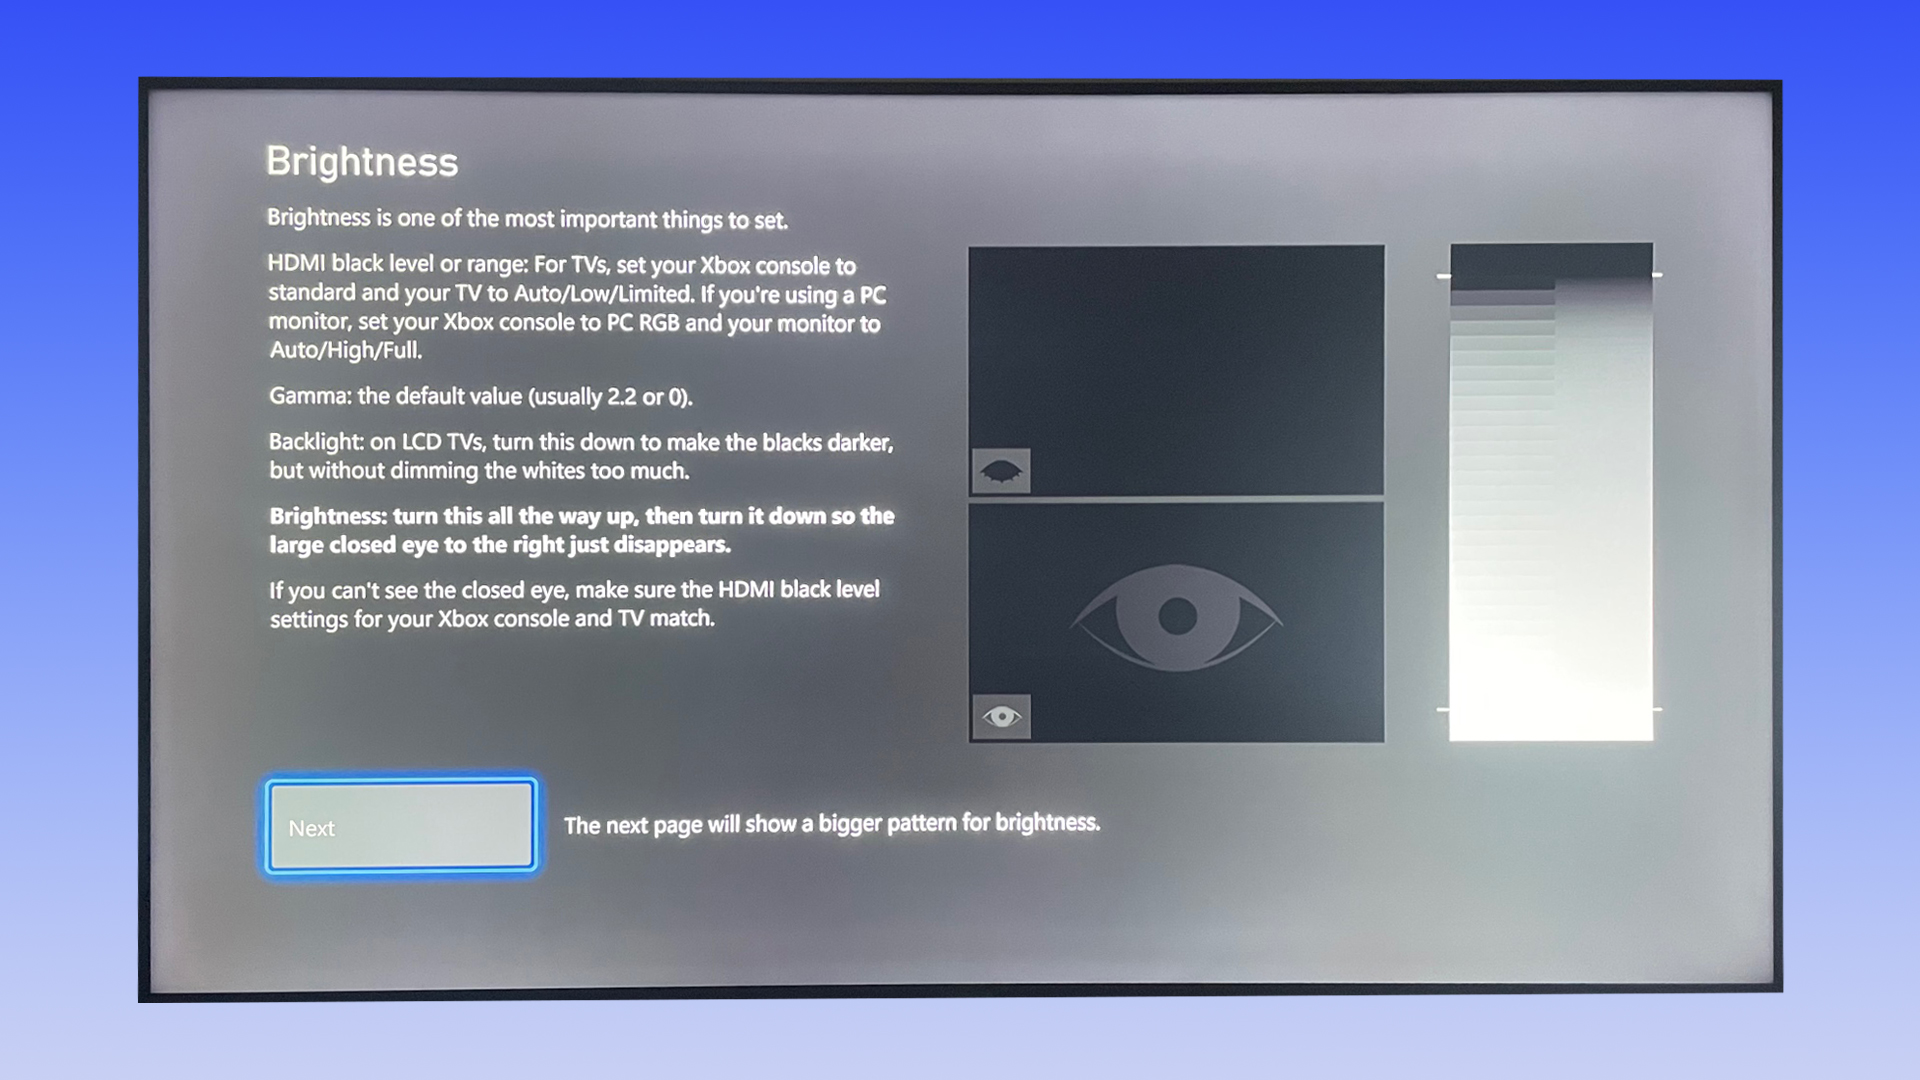
7. You're now on the "Brightness" page, where you can adjust your TV's brightness and gamma settings. Follow the on-screen instructions, using your TV remote to adjust the settings until the closed eye image disappears. When you're done, select "Next" with your Xbox controller to see a bigger view of the images. If you want to go back to the main "Brightness" menu, press B on your Xbox controller. If you're happy with your results, press A to go to the next step.
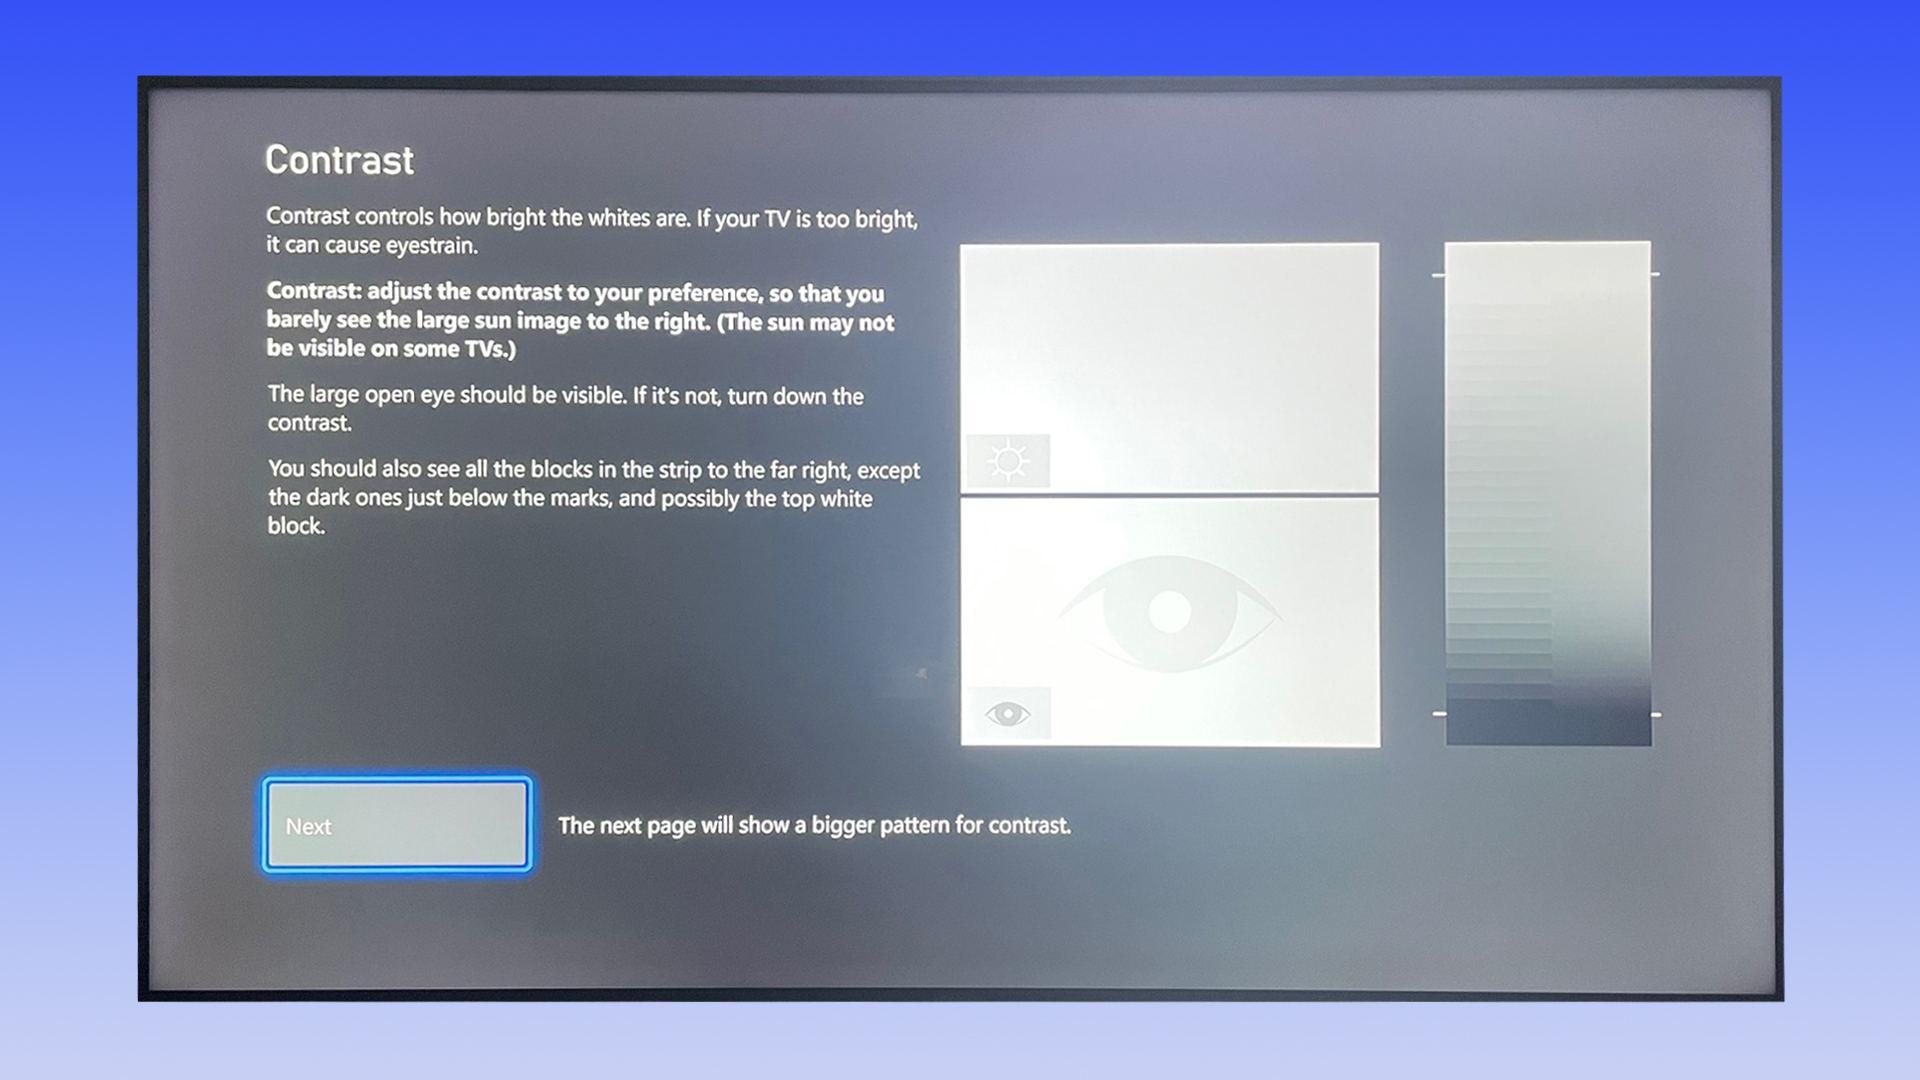
8. Now it's time to adjust your TV's contrast settings. Follow the directions on the screen, lowering or increasing the contrast using your TV remote. When you're satisfied, select "Next" to see a bigger version of the test image. To go back to the main "Contrast" menu, press B on your Xbox controller, or select "Next" and press A to move on.
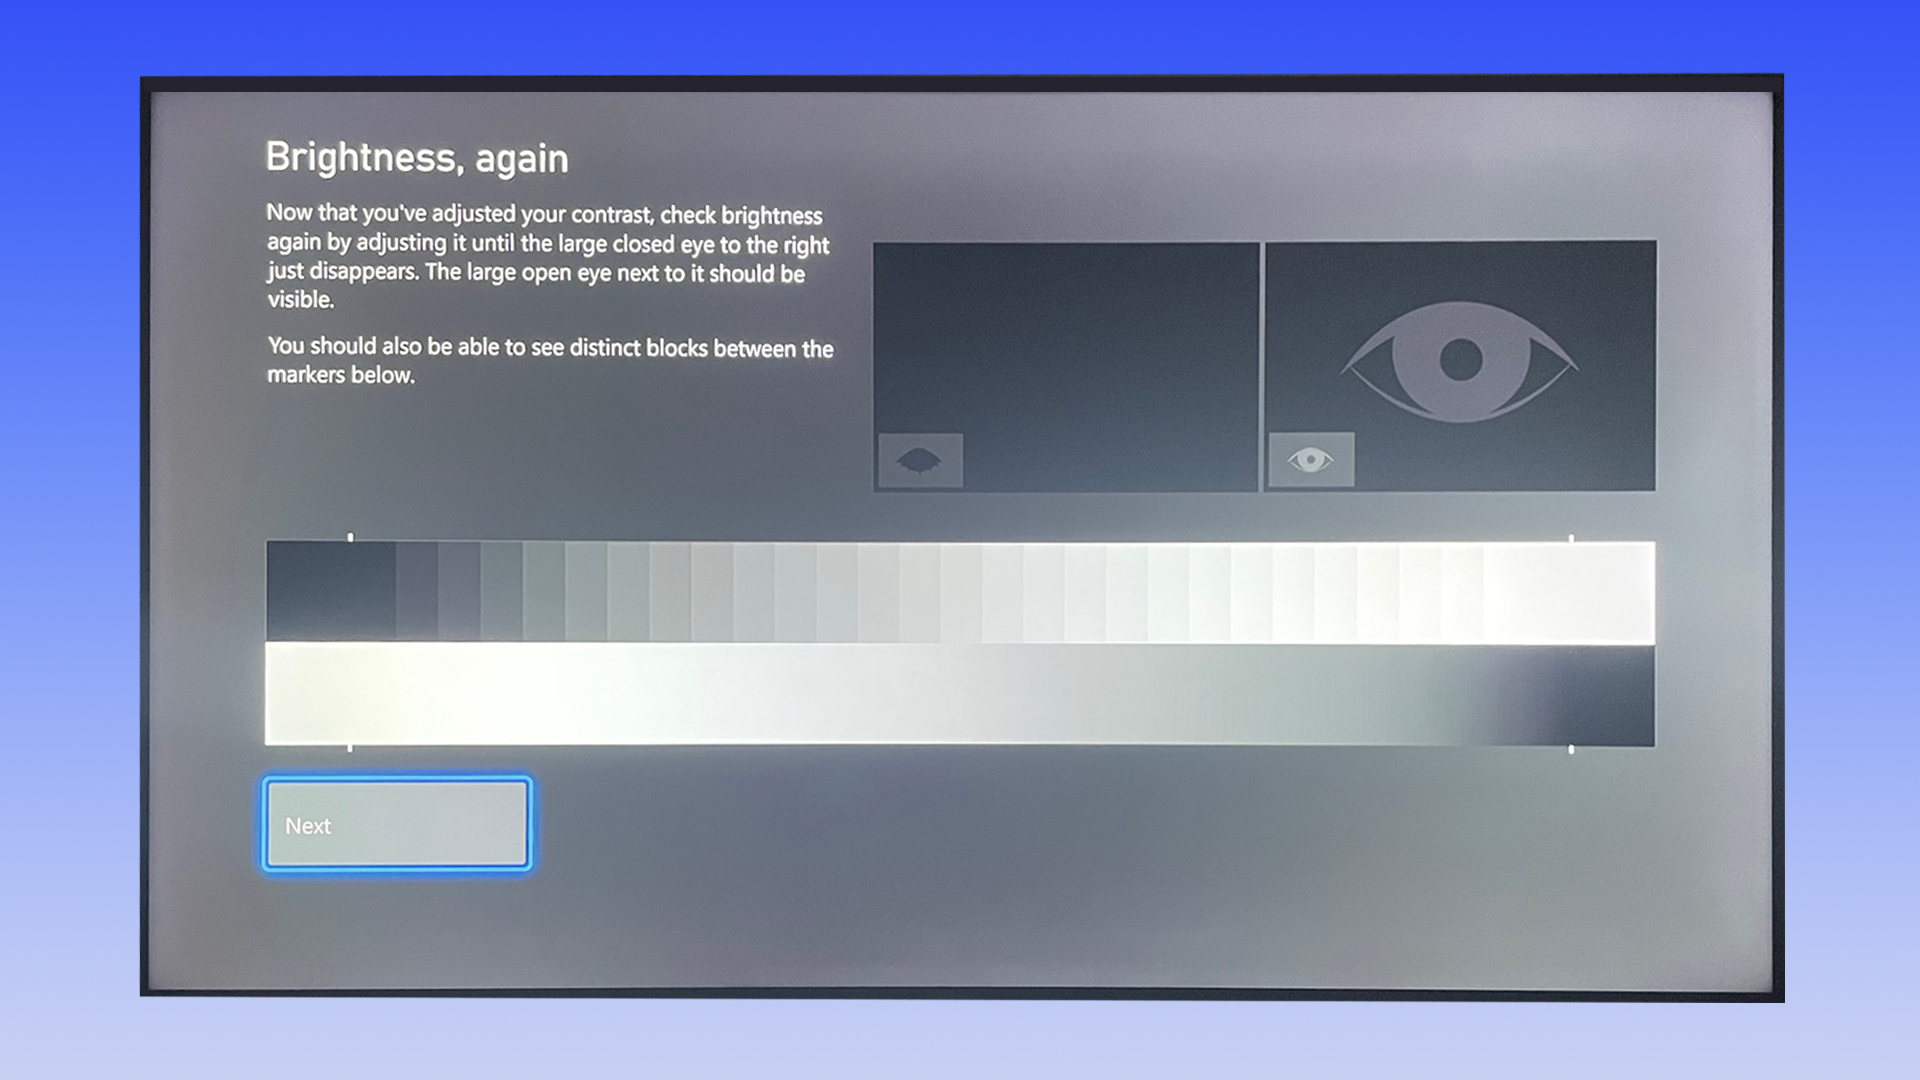
9. Here, adjust the brightness one more time using your TV remote, following the on-screen directions. When you're done, press A on your Xbox controller to move on to the final step.
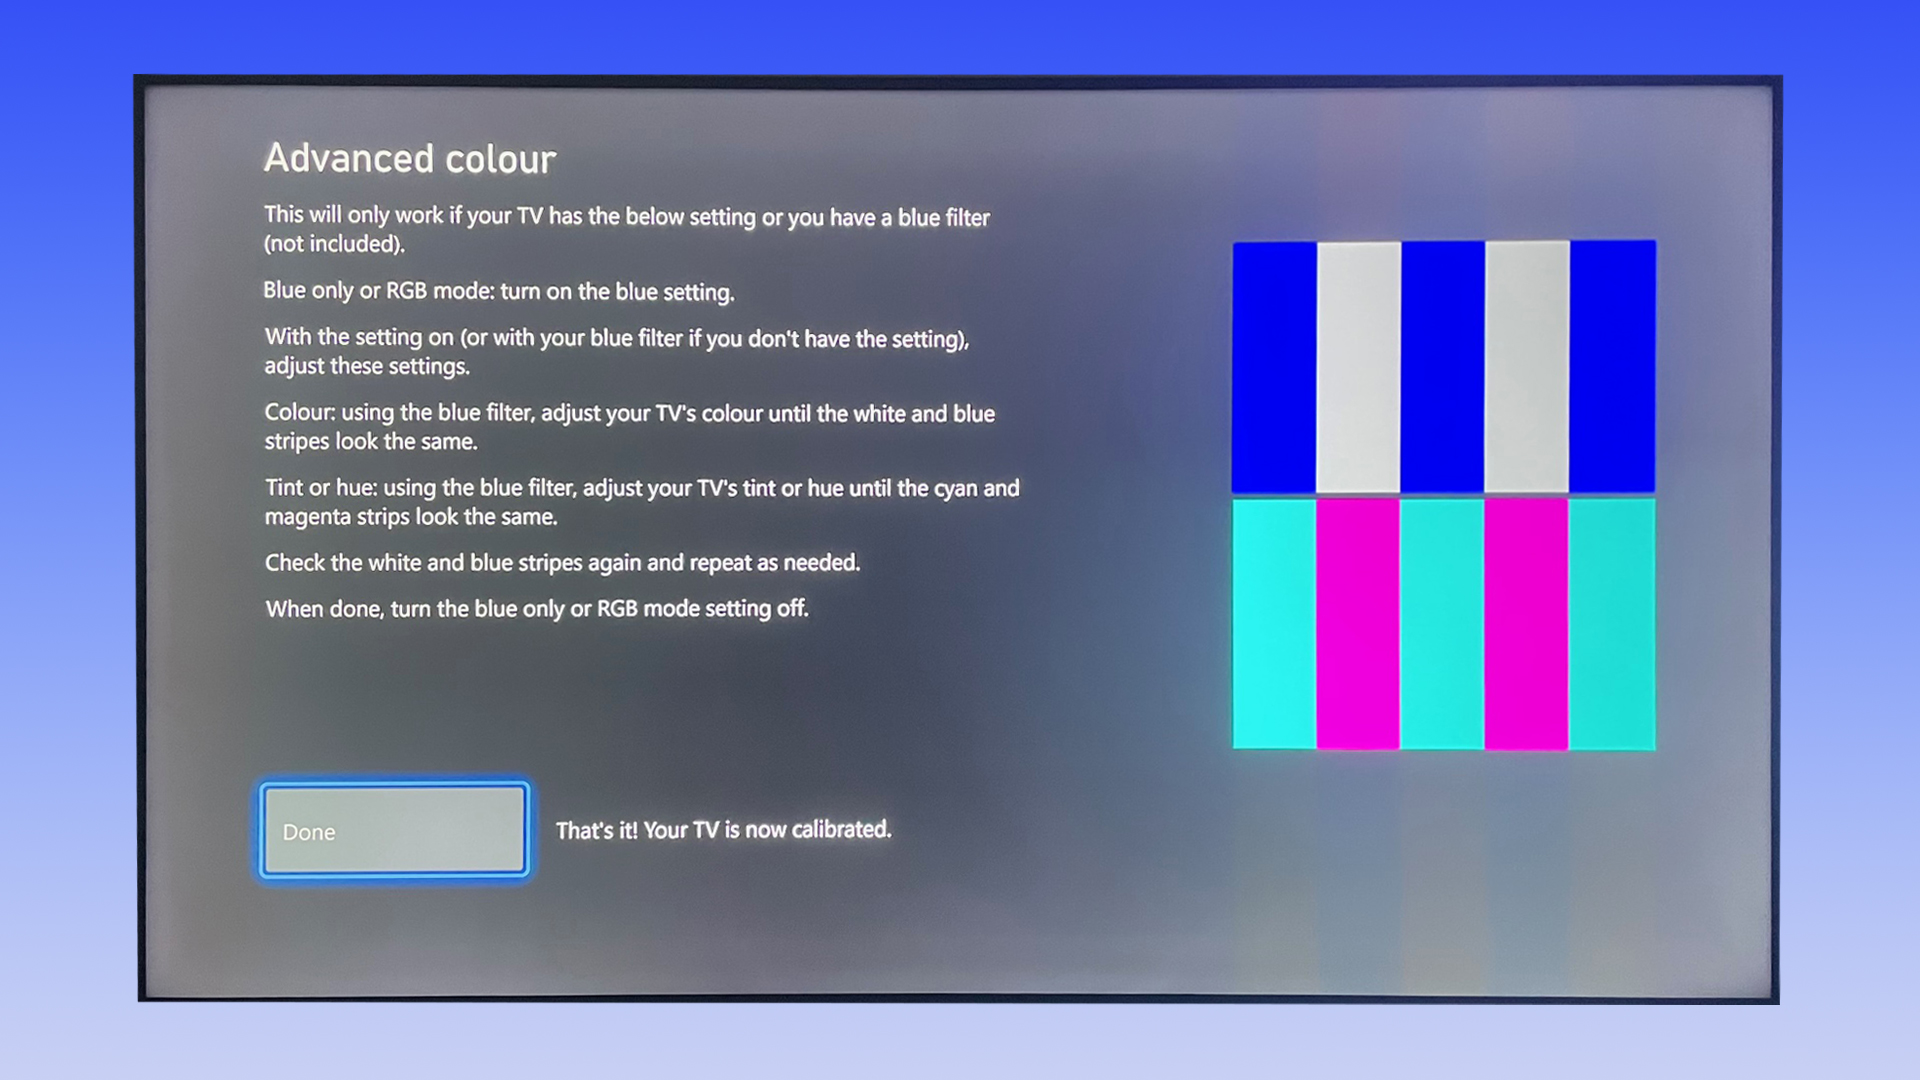
10. On the "Advanced color" menu, you'll see a list of final tweaks that can be made. As mentioned on the screen, only certain TVs support these settings, so don't worry if you don't see them on your TV's settings menu. If you do see these settings, follow the instructions on the screen and select "Done" when you're finishing adjusting them. If you don't see them, you can skip this part and select "Done."
After following this guide on how to calibrate your TV for your Xbox Series X or S, you should immediately notice a difference in the visual quality of your games and movies. If you want to revert back to your previous picture settings, simply reset them in your TV's settings menu using your TV remote.
If you're after some inspiration on what to play next, check out our guide on the latest Xbox Game Pass news and deals and our picks of the best Xbox Series X games. Or if you're looking to pick up a second (or first) Xbox Series X or S, keep an eye on our Xbox Series X restock tracker for all the latest stock drops as they happen.
For more Xbox tips, check out how to redeem an Xbox code and how to connect an Xbox Wireless Controller to Android.

Dale Fox is a freelance journalist based in the UK. He's been a tech nerd ever since childhood, when he used the money from his first job as a paperboy to buy a subscription to GamesMaster magazine. Dale was previously a presenter and editor in China, where he also worked as a copywriter for OnePlus at its Shenzhen HQ.
