This hidden iPhone feature takes your portraits to the next level
Find out how to blur the backgrounds of iPhone photos (or unblur them) for professional-looking shots
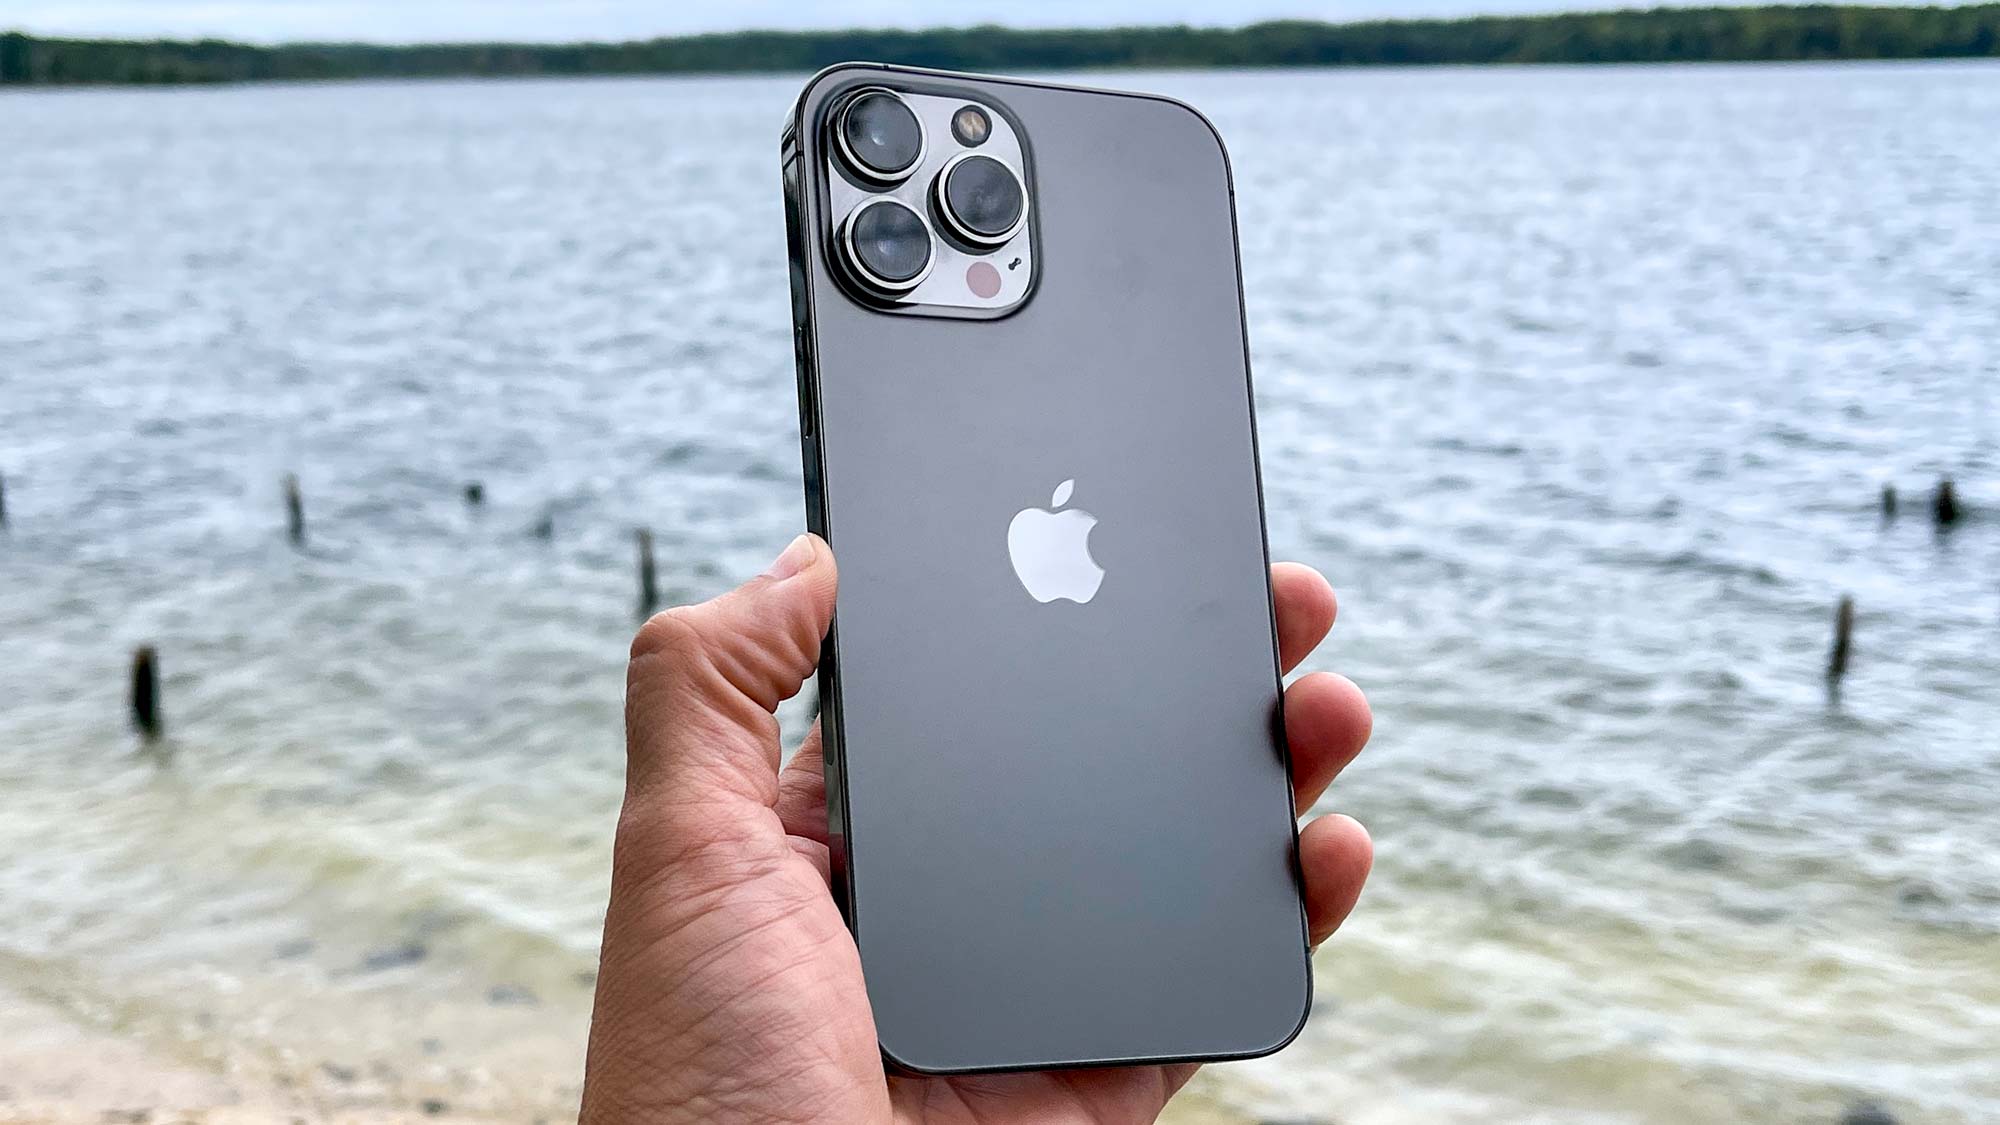
Being able to blur the backgrounds of iPhone photos (and unblur them) is a godsend for anyone interested in portrait photography. One of the most important aspects of portraiture is obtaining a separation between the subject of your photo and their background. Blurring the background does this, isolating the subject against a distraction-free backdrop, allowing the viewer to focus solely on the person in the portrait.
That said, blur isn't the only technique used in portraiture, and you might not necessarily want it in your photos. Sometimes, for example, a photographer wants to encapsulate a subject within their surroundings, if the background is of contextual importance to the photo or to who the subject is as a person. Either way, blur or no blur, what's important when shooting portraits is having the ability to control what's going on in the background.
(You can also learn how to add a background in Photoshop with these simple steps.)
On a full-sized DSLR or Mirrorless camera, you'd do this by adjusting the aperture of the lens, which is measured in 'f-stops'. The wider the lens aperture (opening), the lower the 'f-stop' value and shallower the depth of field, resulting in greater background blur, and vice versa. On the best iPhones, there's a super easy but not too obvious trick to let you do the same.
In Portrait mode, there exists a depth control slider to let you tailor the background blur of your images. It's not actually controlling the physical aperture of the iPhone's lens like an aperture control ring would do on a camera lens, and is instead using software to add or remove blur to give the effect of a changing depth of field. That said, it's a nice way to give you as a photographer control over your images and make them feel more professional.
This is just one of the reasons why the iPhone shows up on our best camera phone list. Whether you own an iPhone 13 or an older iPhone, here's how to blur the background of an image on iPhone.
Sign up to get the BEST of Tom's Guide direct to your inbox.
Get instant access to breaking news, the hottest reviews, great deals and helpful tips.
In addition to our helpful tutorials, we also have a range of expertly crafted buying guides to help you make the right purchase. If you're in the market for a new phone, make sure you check out our guides to the best phones and best cheap phones.
How to blur the backgrounds of iPhone photos
- Open the Camera app
- Head to Portrait mode
- Tap the f button
- Move the depth control slider
- Take your photo
- Adjust using the Edit feature
Read on to see detailed instructions for each step.
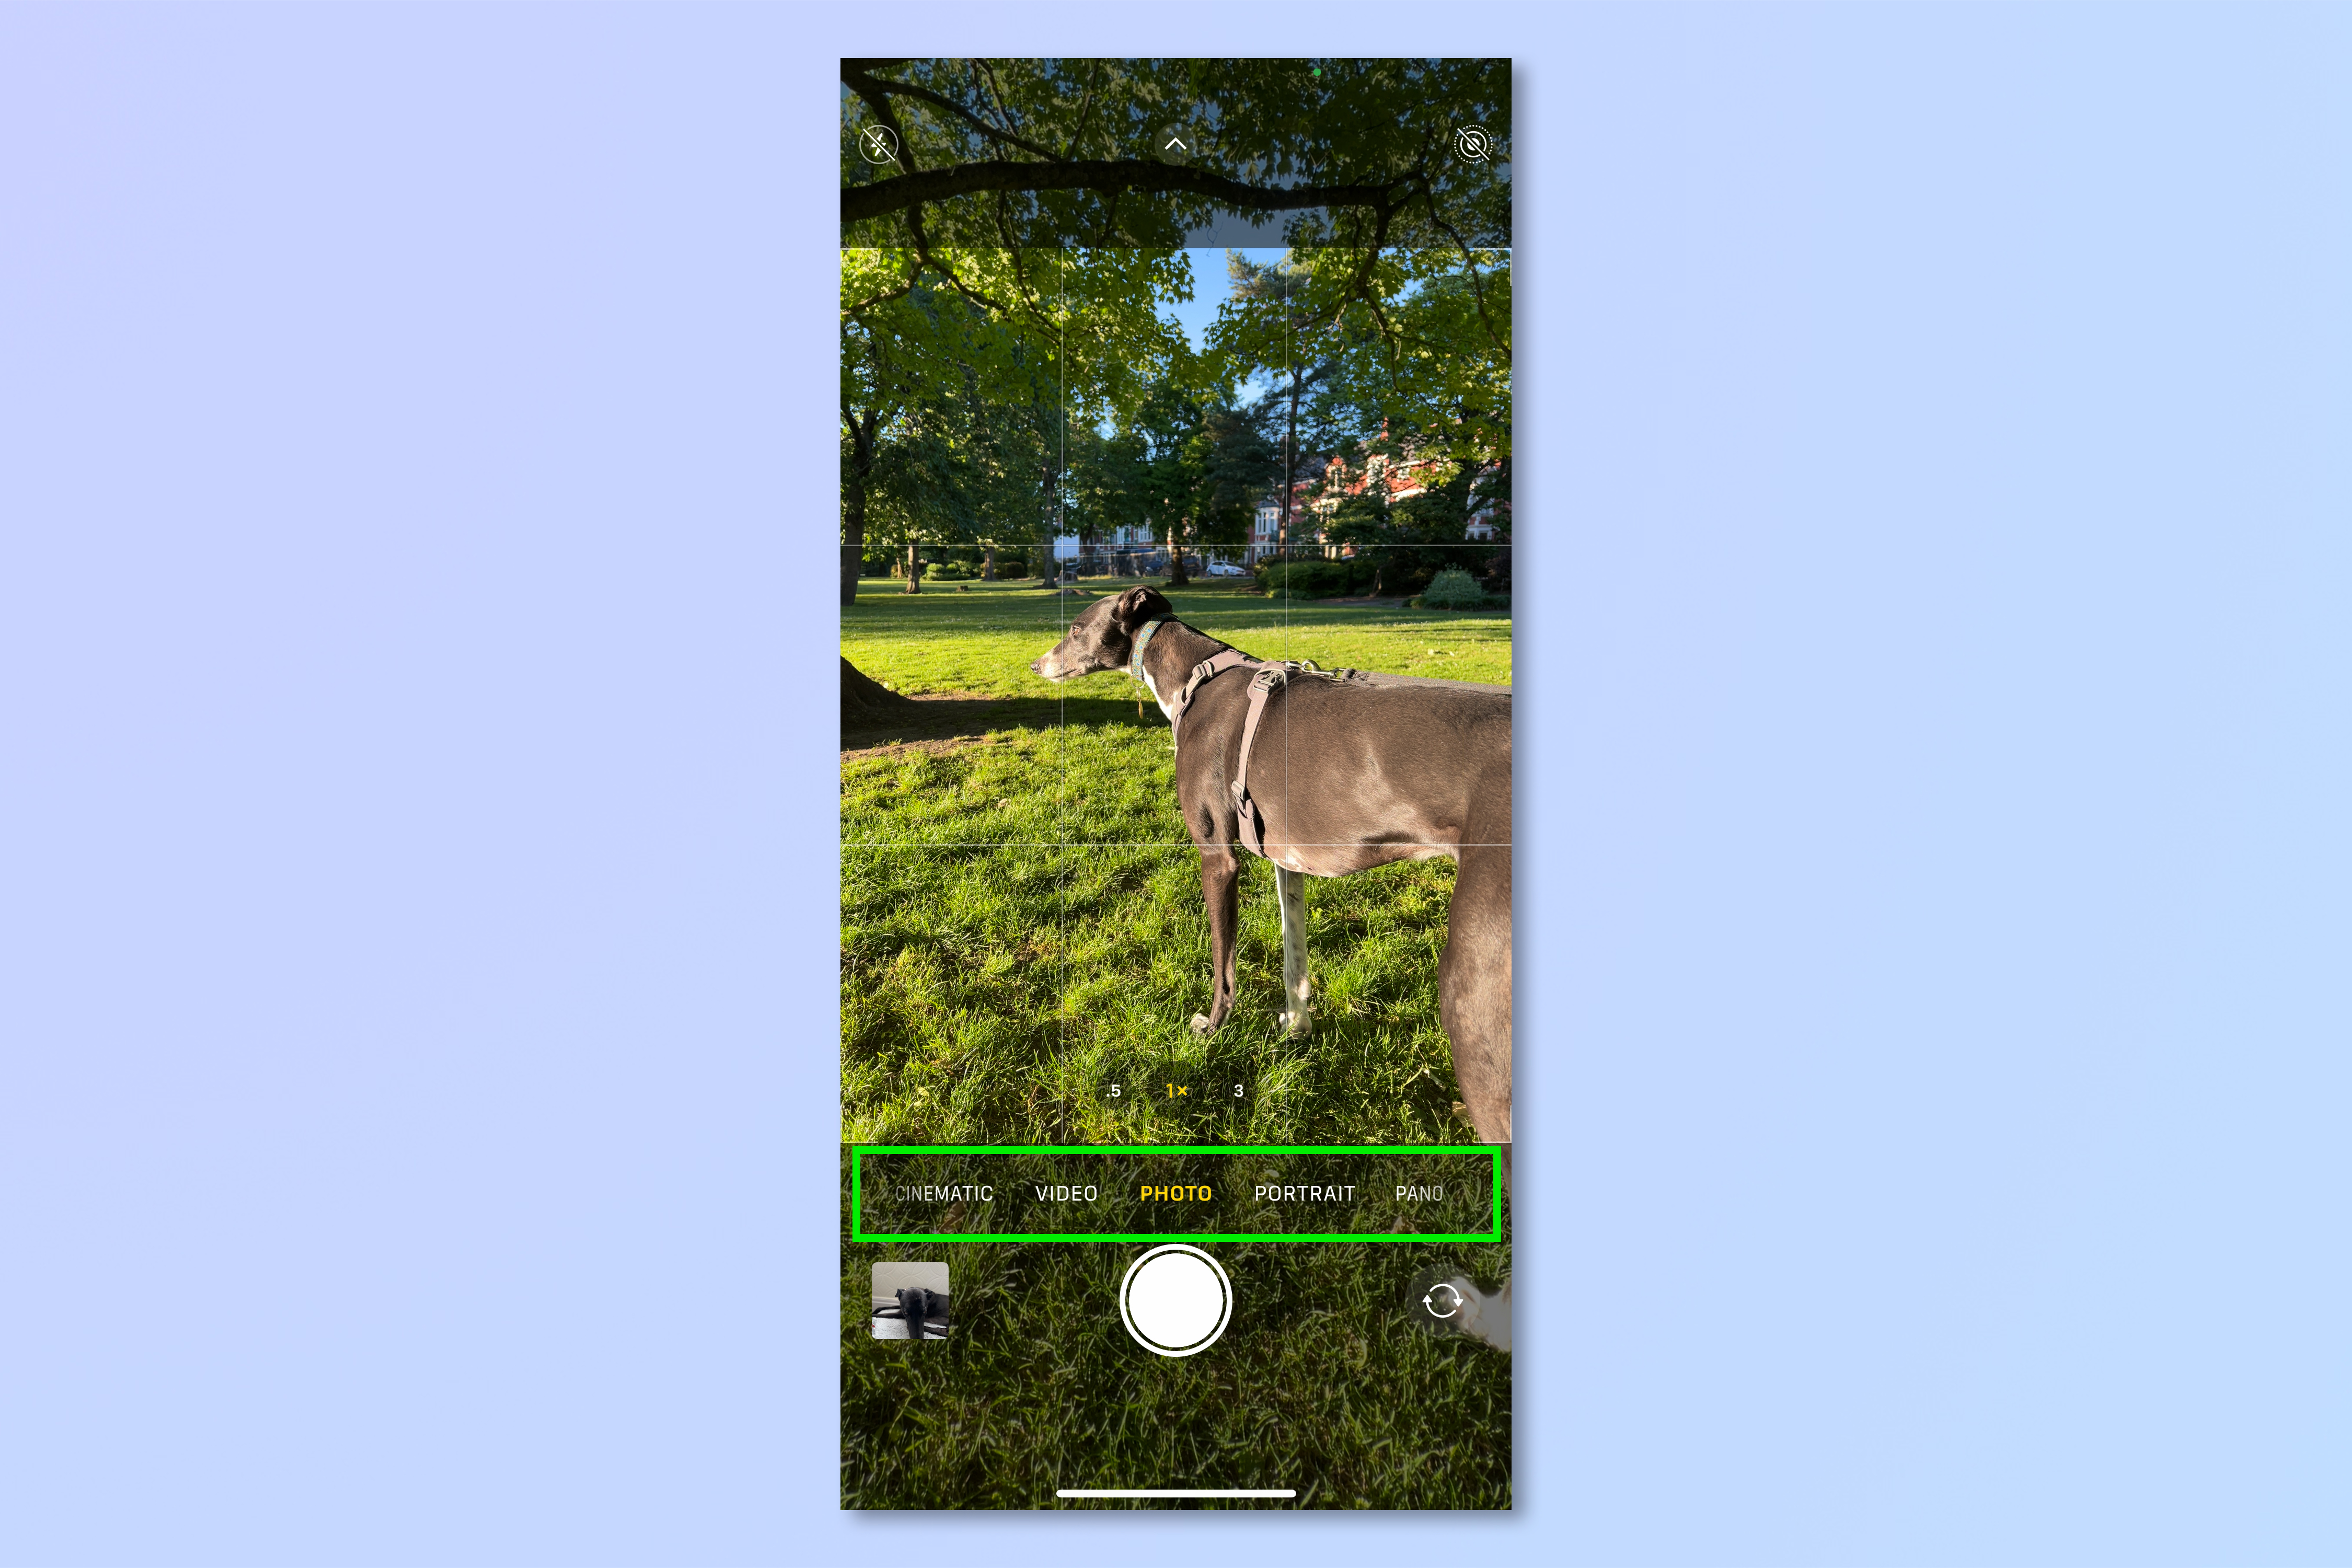
1. Open the Camera app and choose Portrait from the camera mode bar. Position your subject (if they'll stay still).
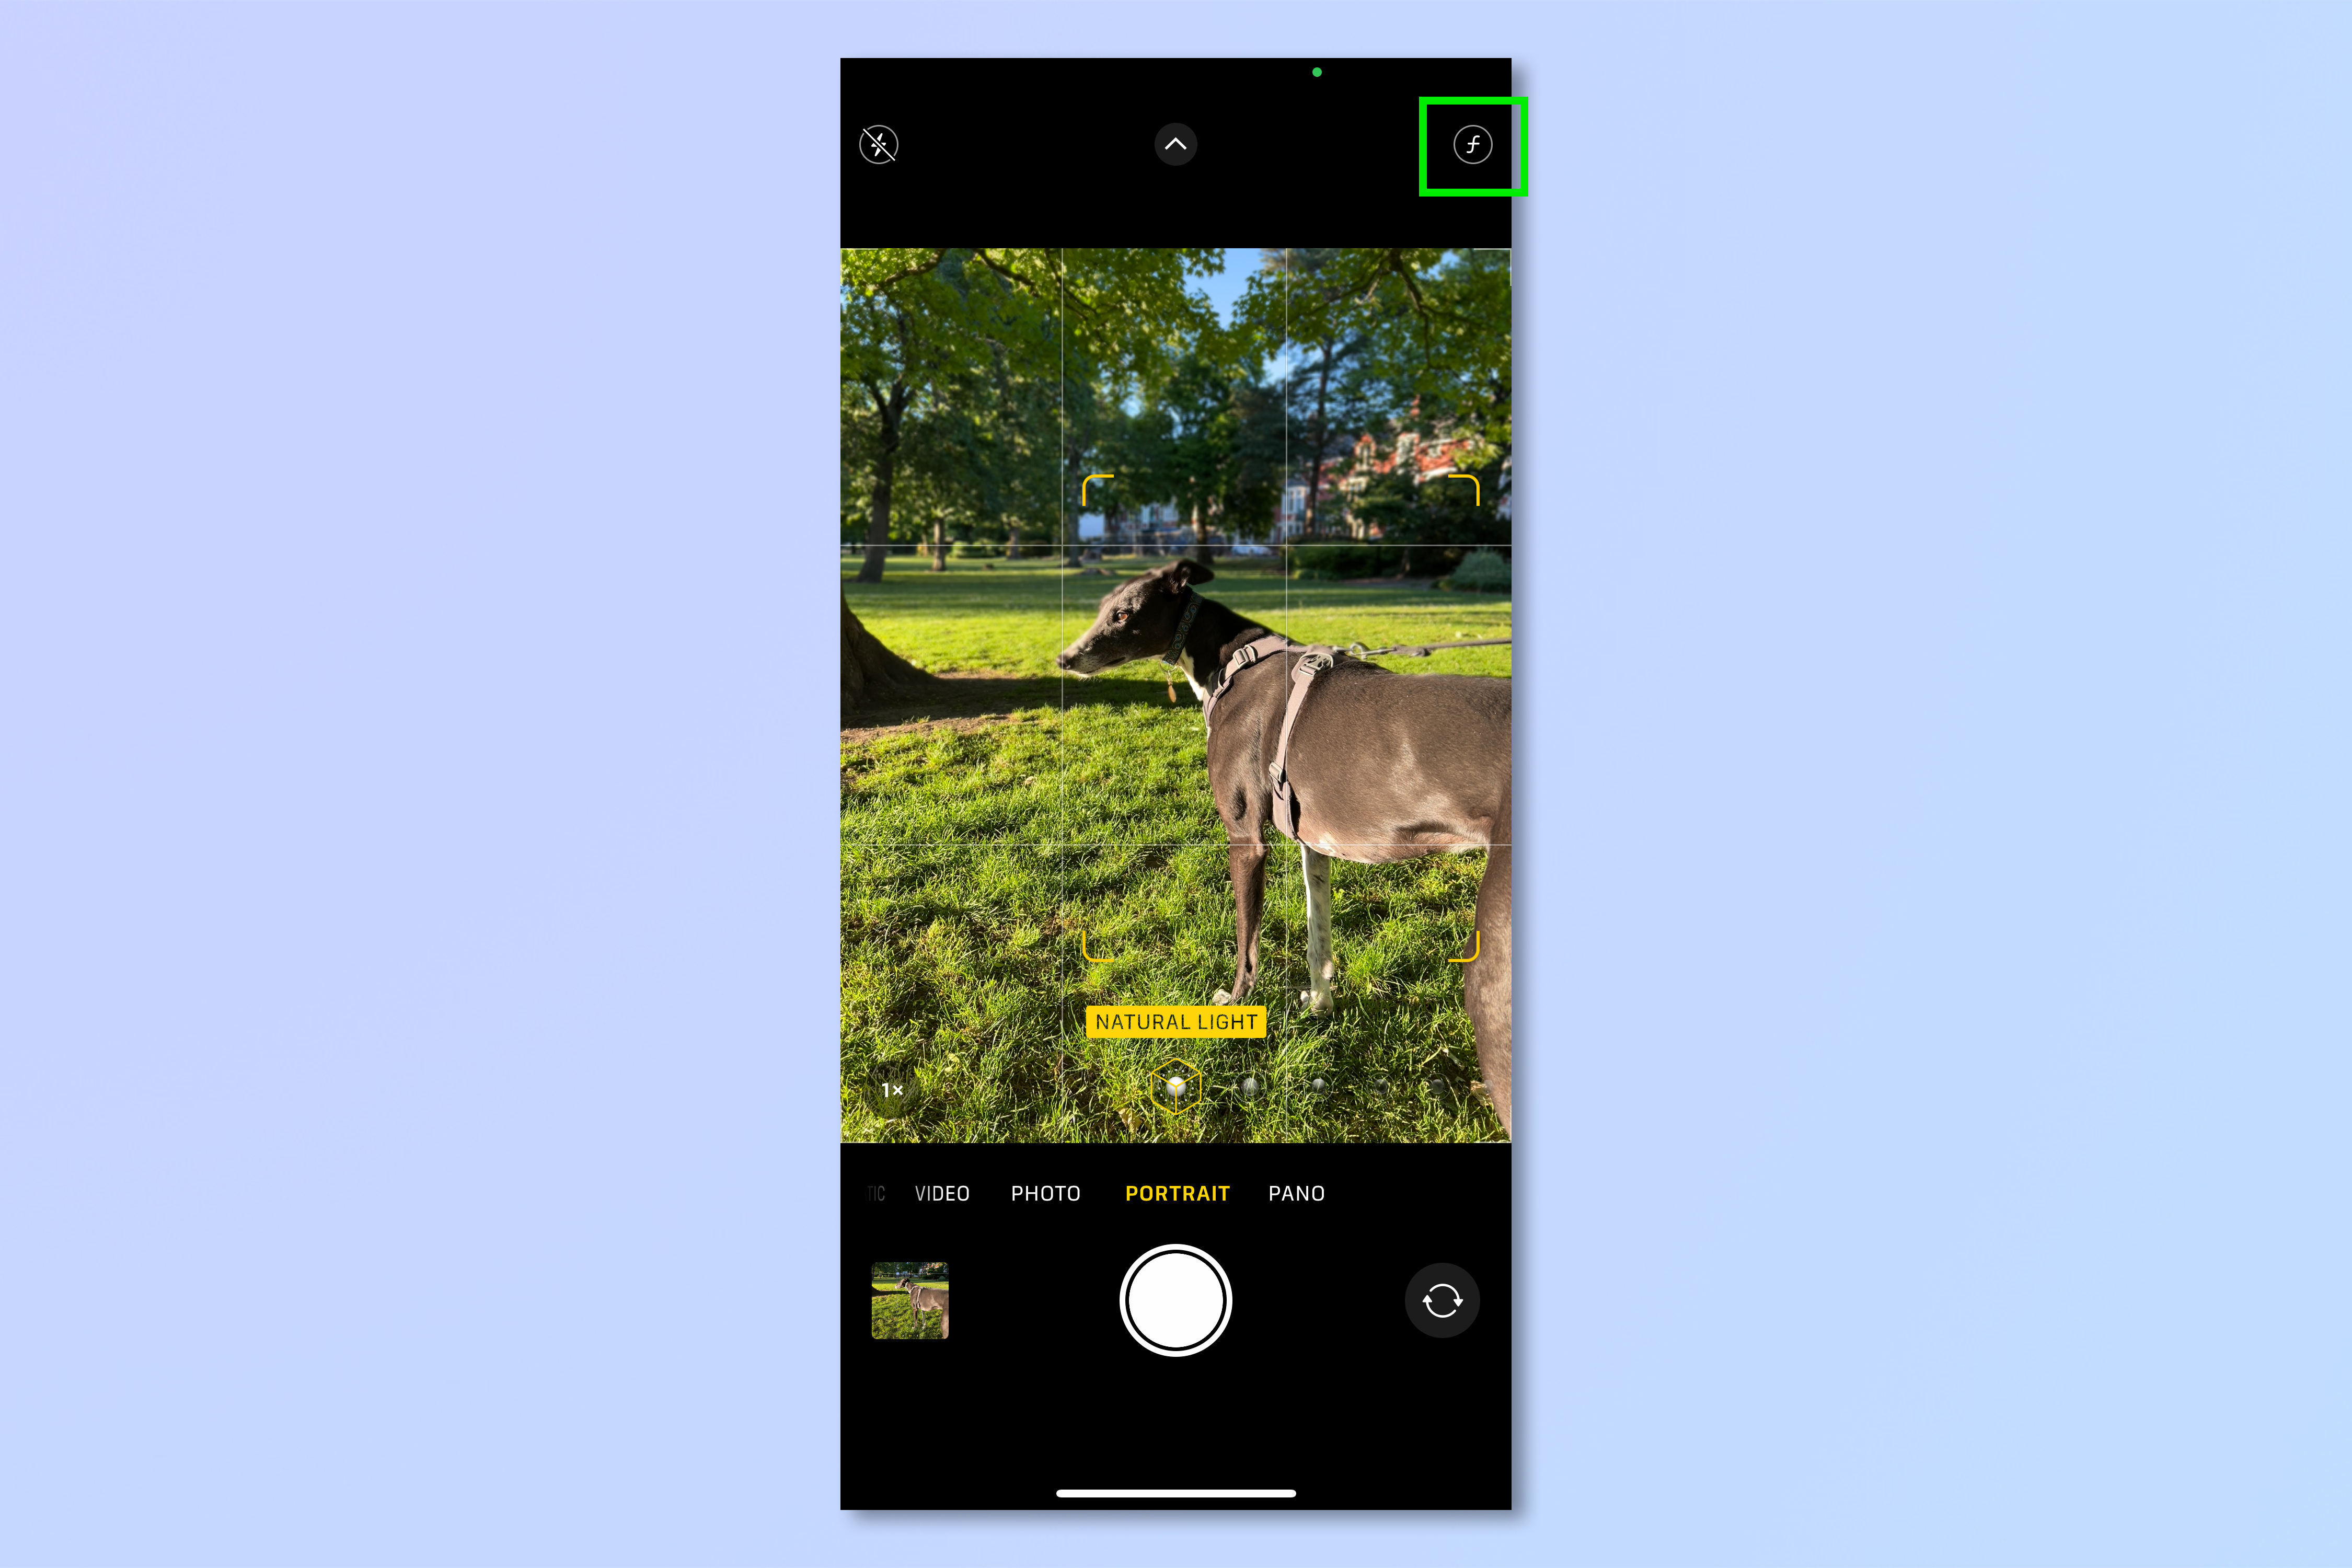
2. Tap the f button, top right.
3. Use the depth control slider at the bottom and adjust the background blur. By default, it's set to a depth equivalent to f2.8, a commonly used f-stop in portraiture to achieve a shallow depth of field.
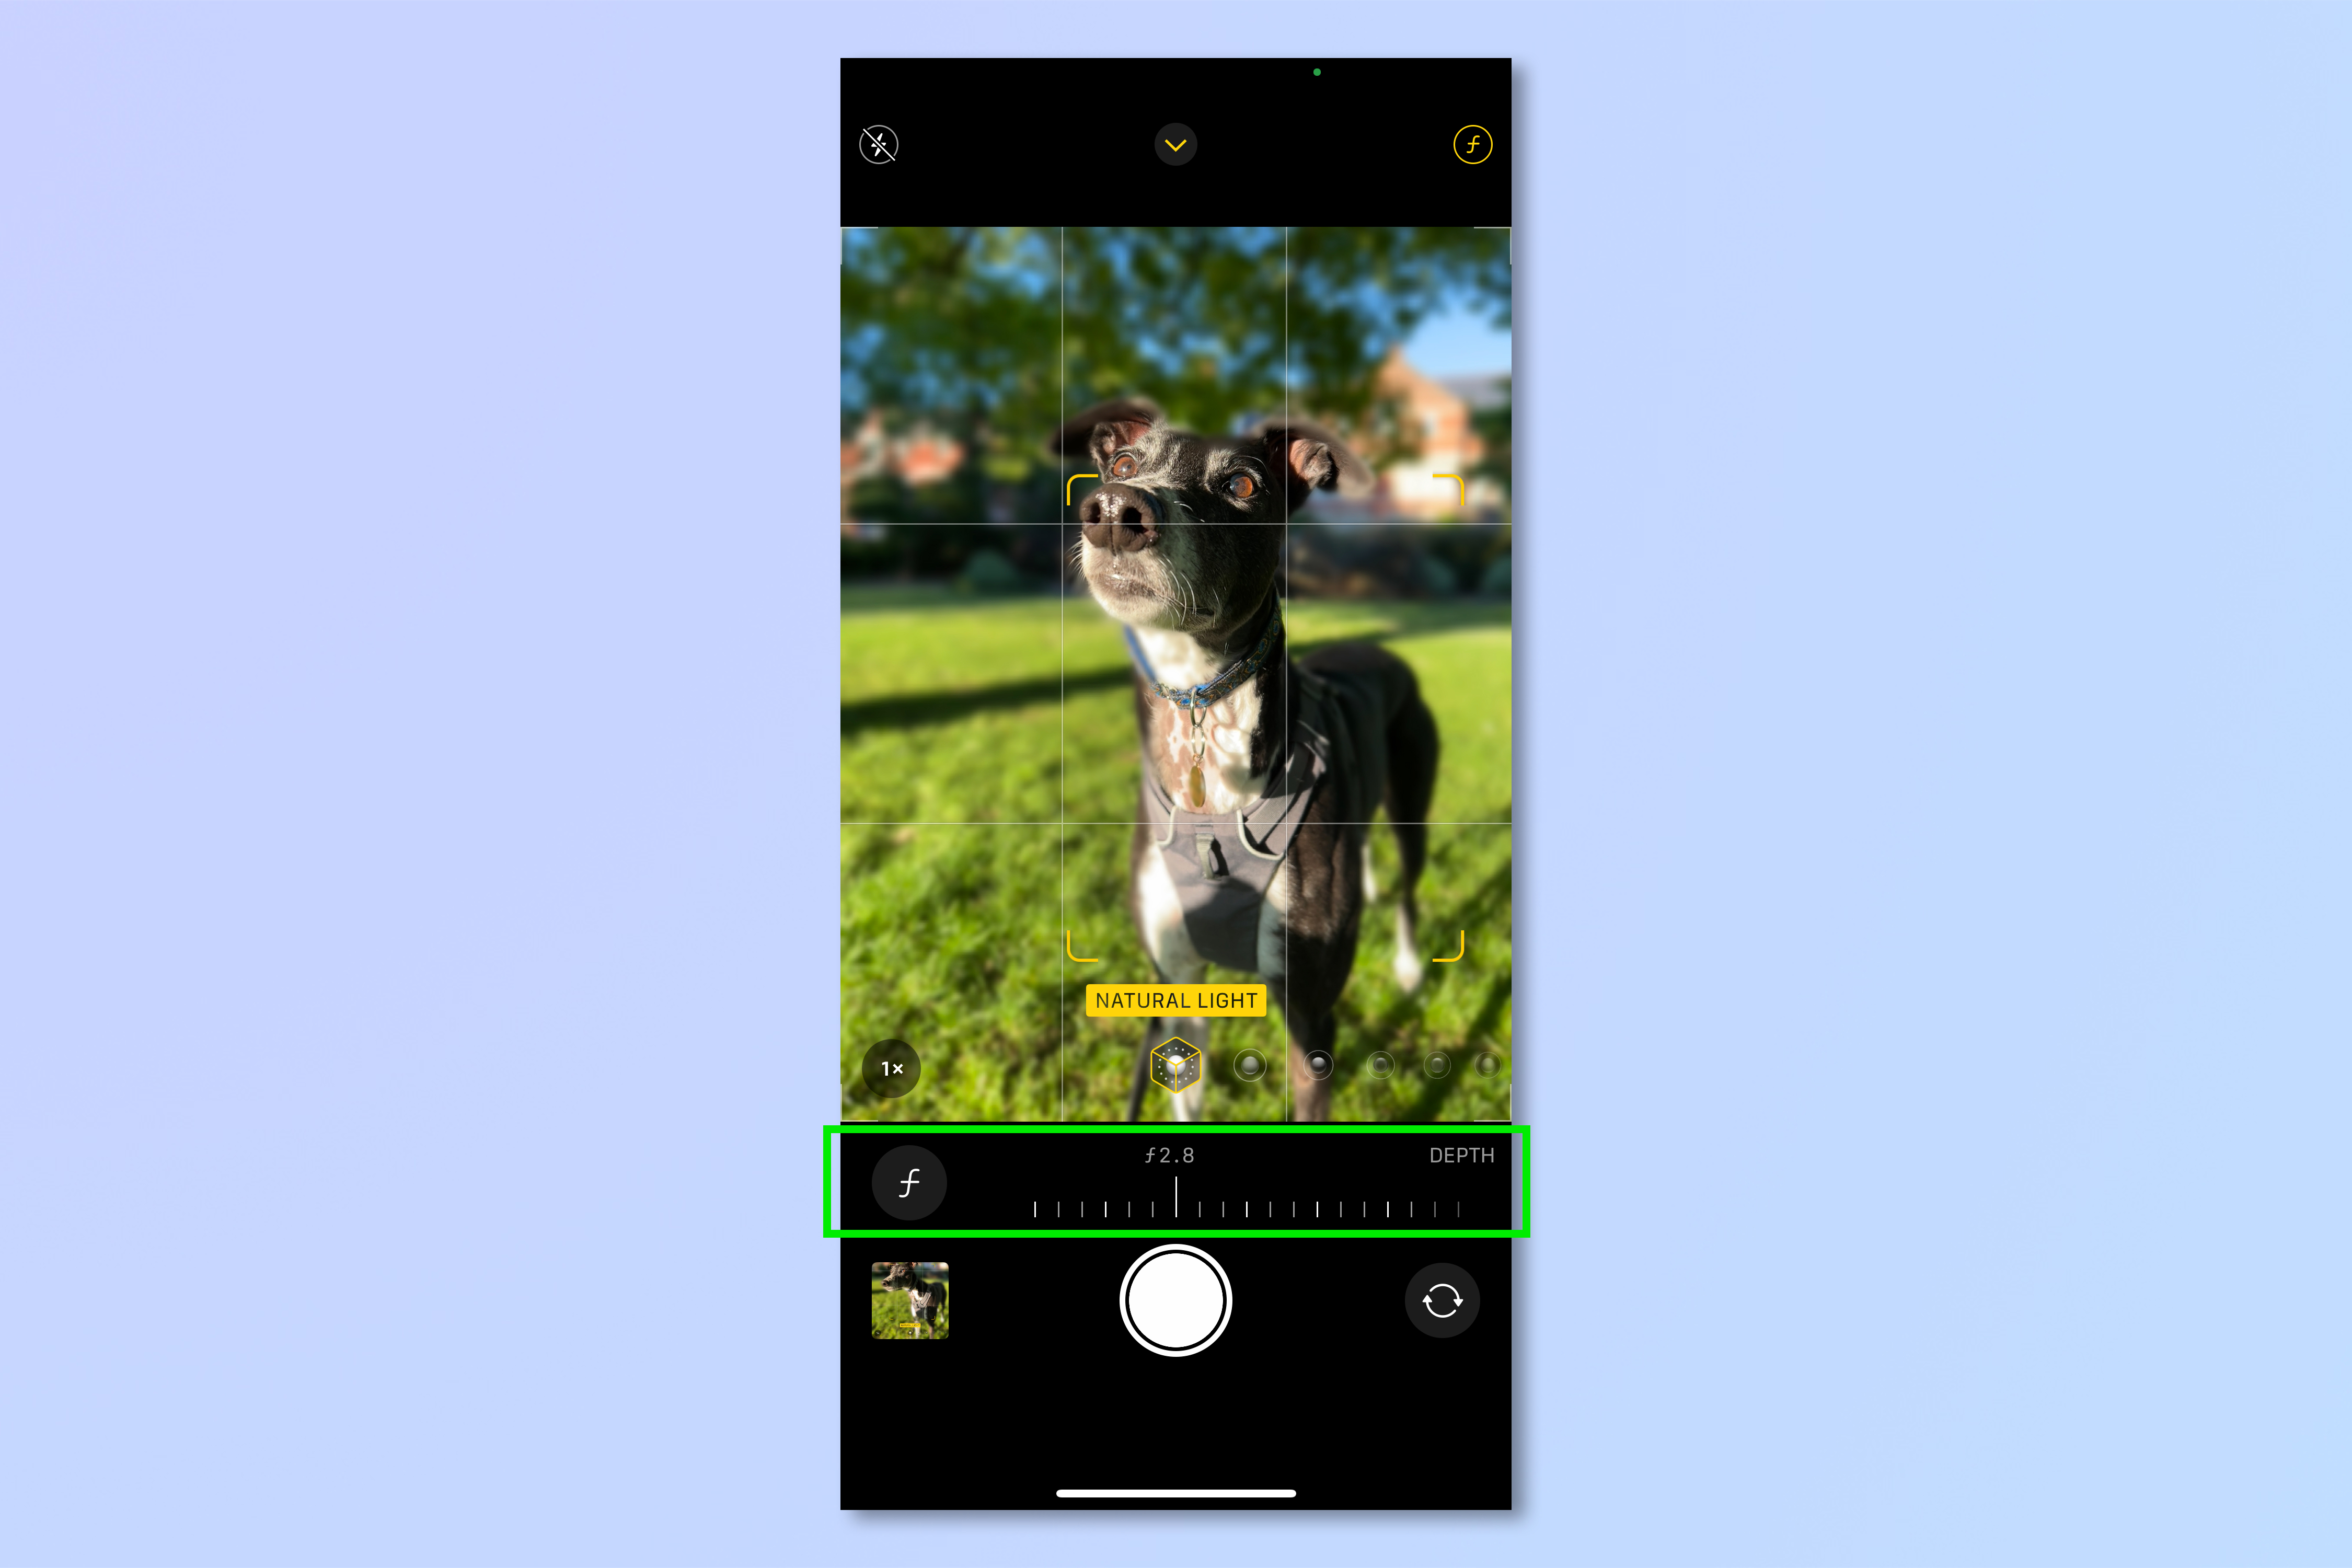
4. Slide the bar to the right to lower the equivalent f-stop and set a shallower depth to blur out more of the surroundings. Be wary of going too low, though — as this is in effect just a software tweak, going too far can result in too much blur and a strange looking image.
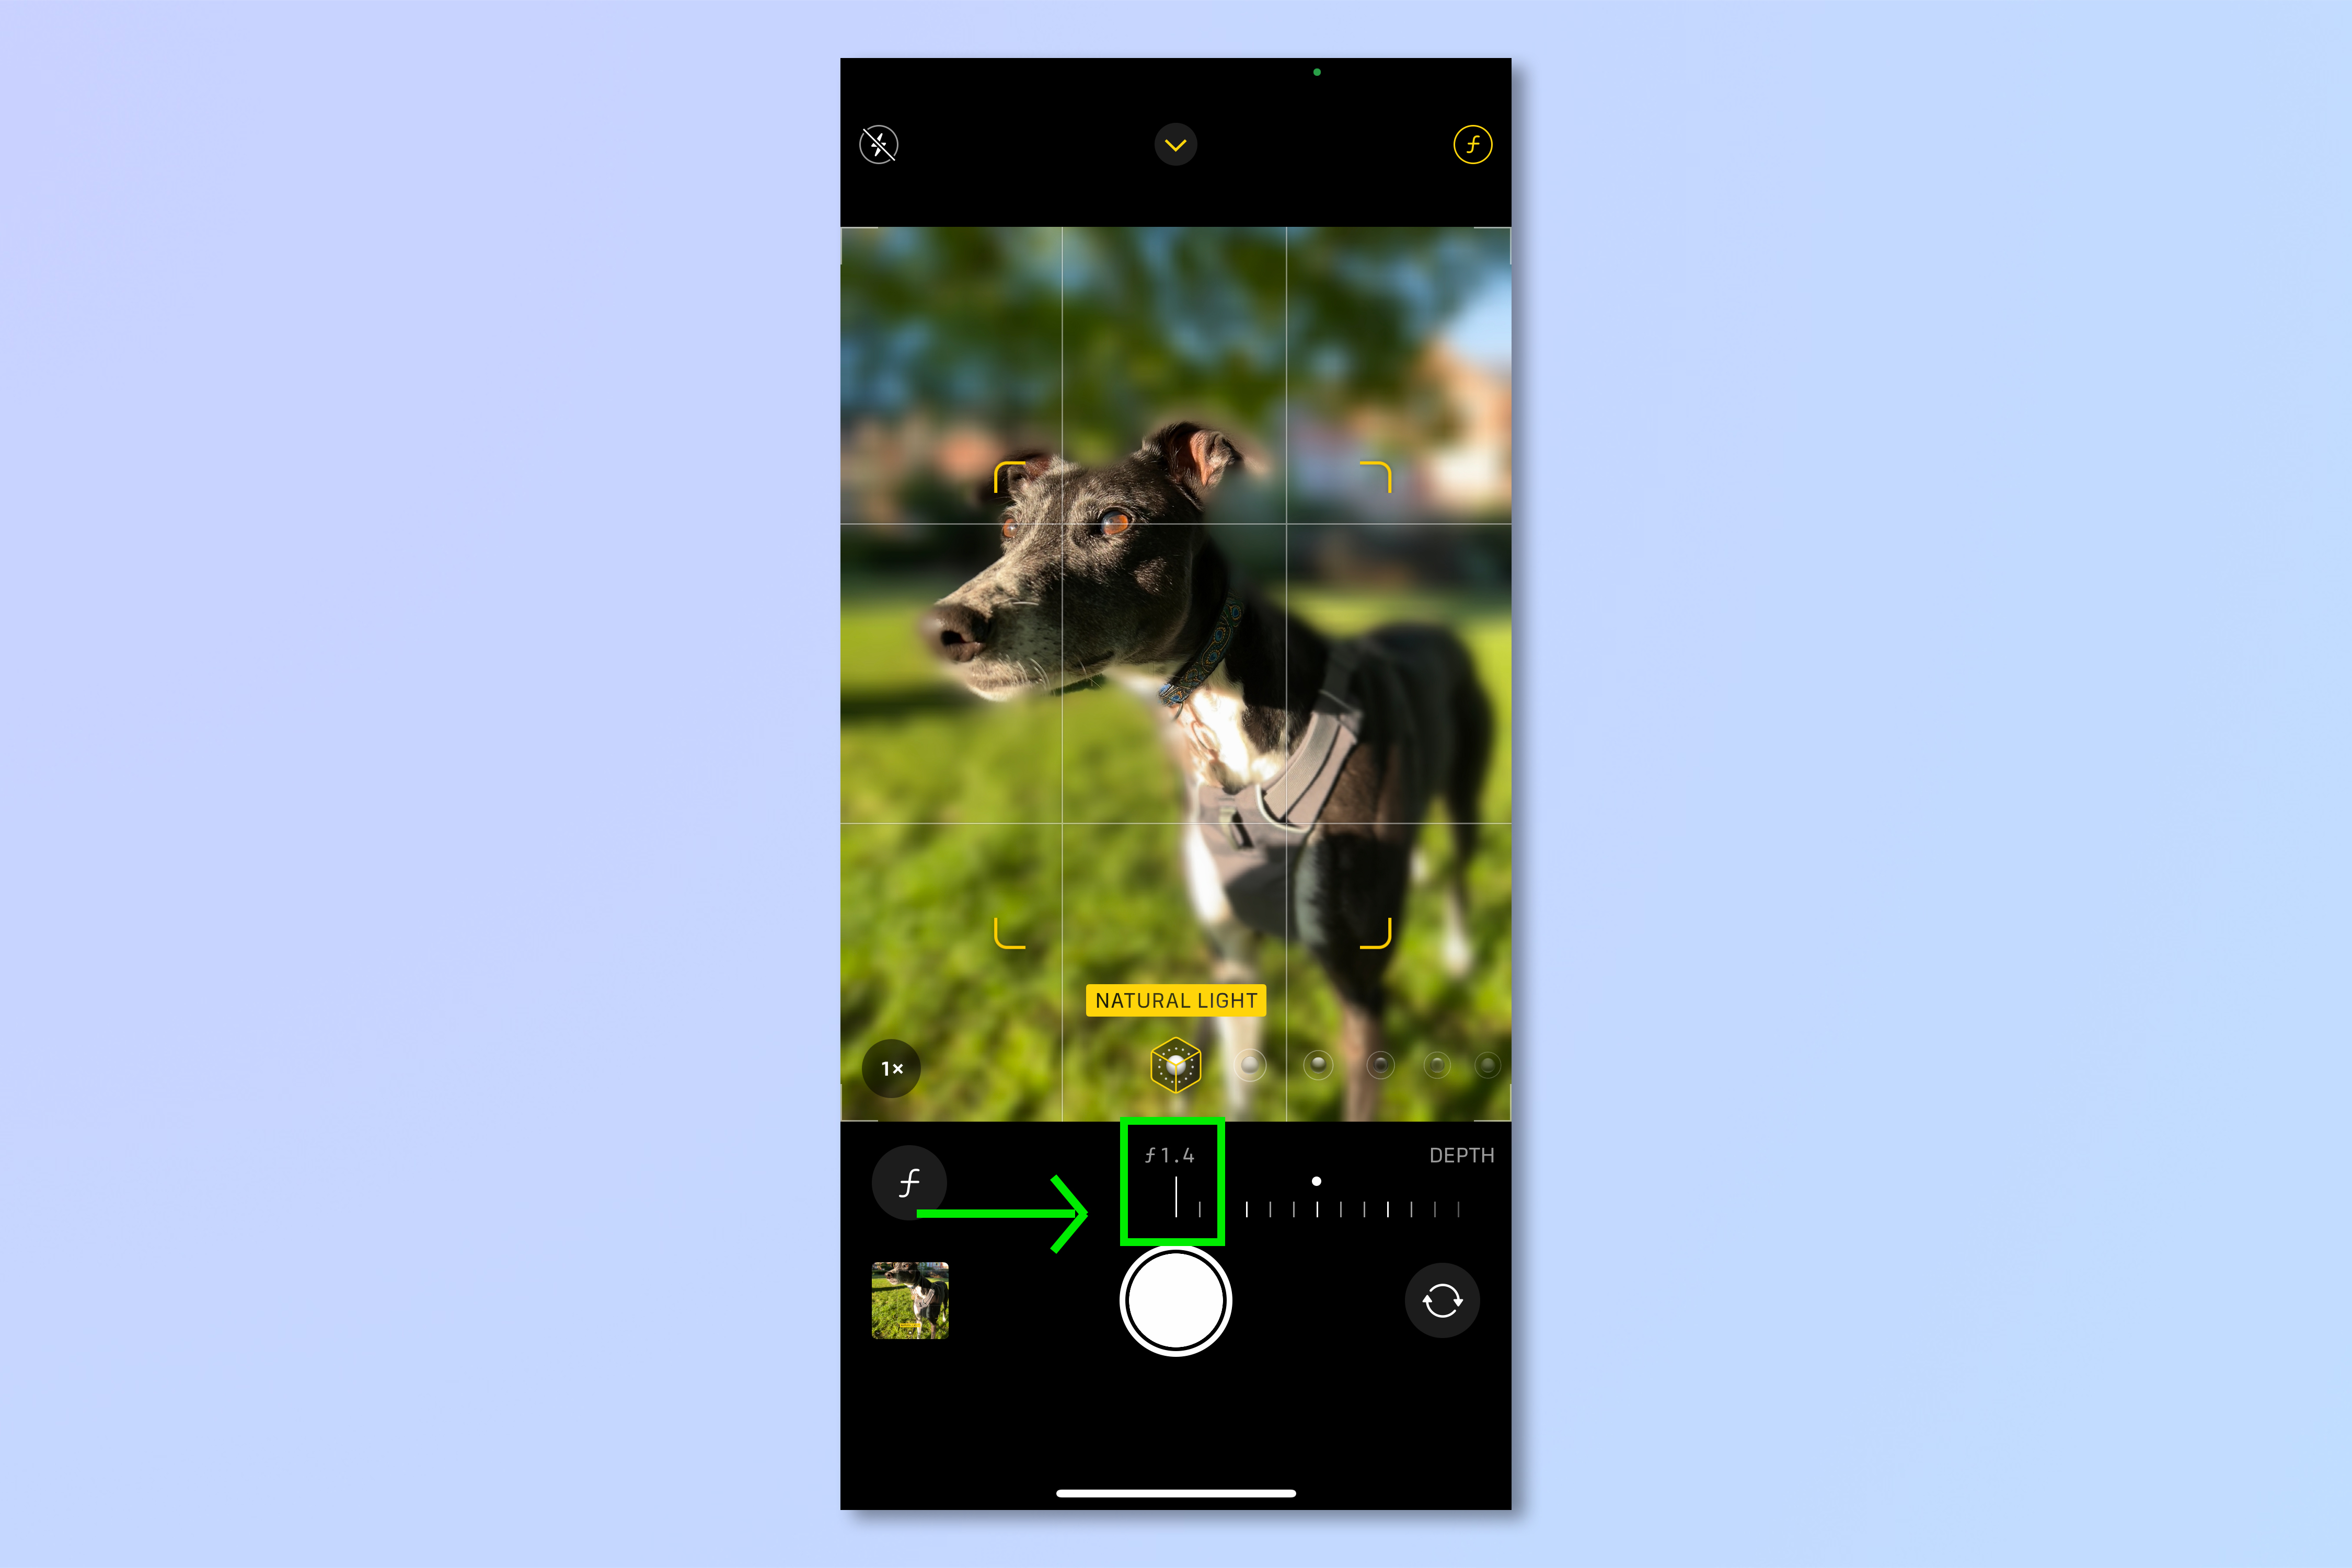
5. Slide the bar to the left to raise the equivalent f-stop for greater depth of field and less blur.
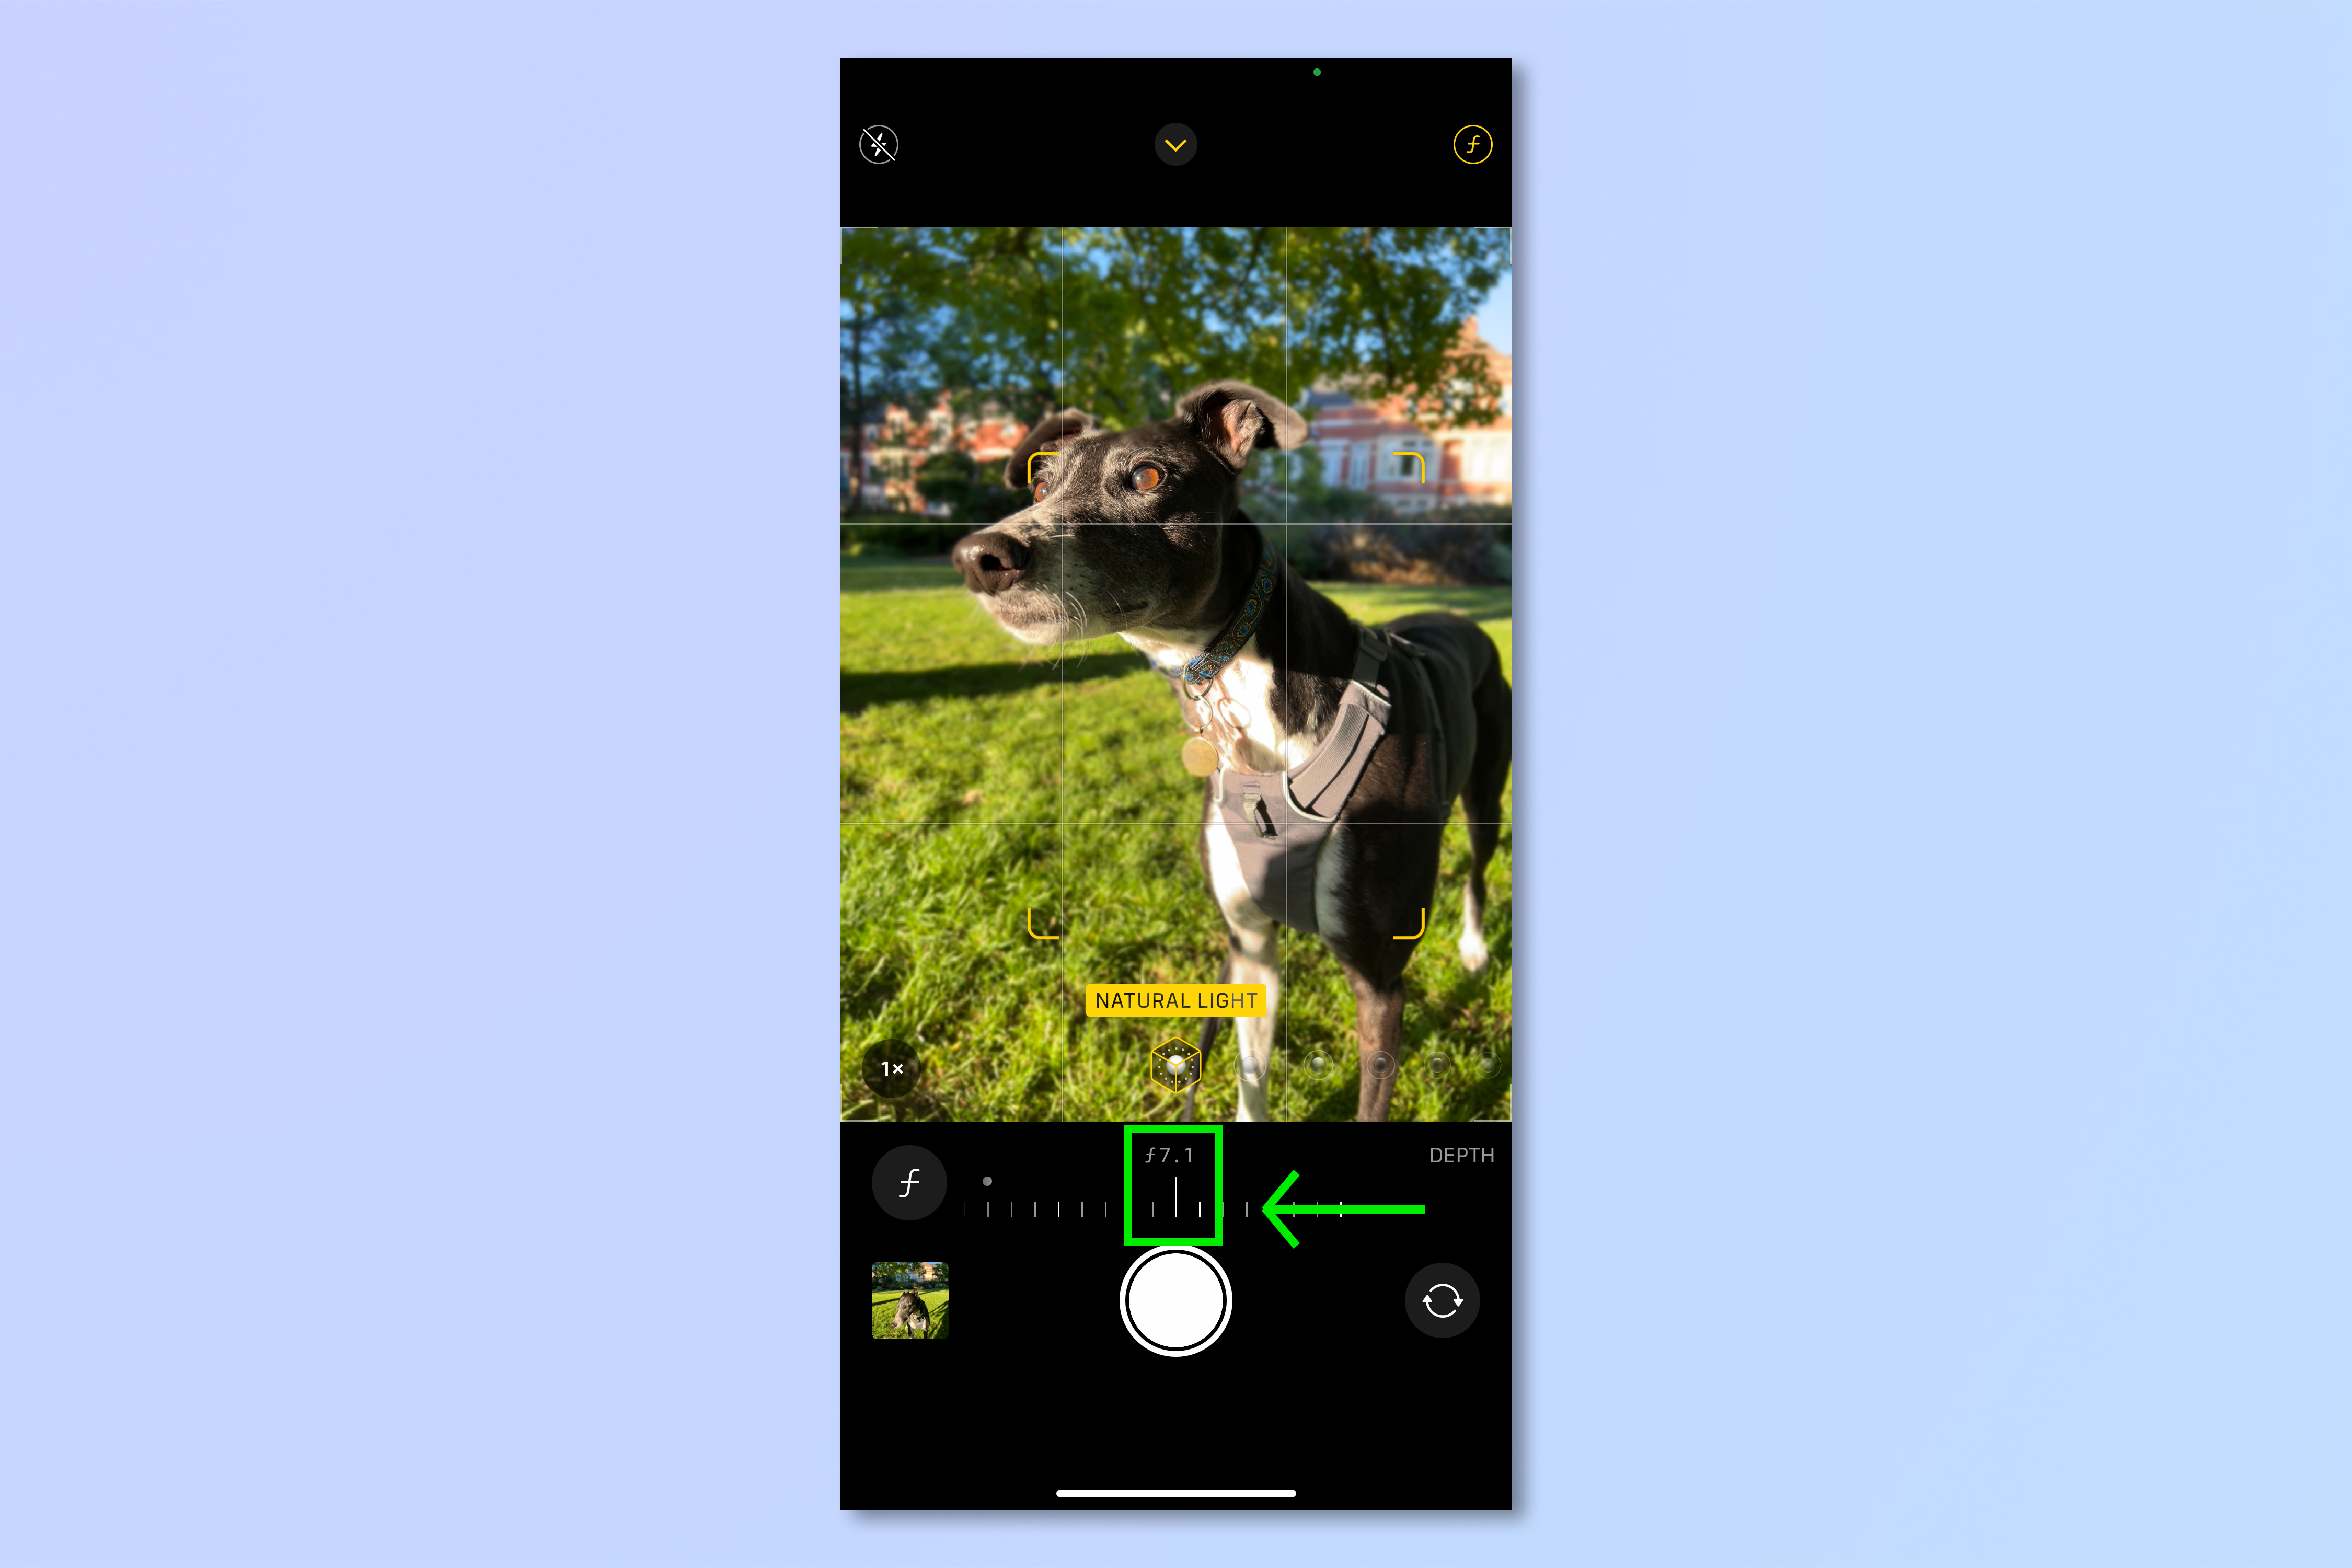
6. Slide the bar up to a high f-stop value for minimal blur. Once you're happy with how much blur you've got, press the shutter button to take the picture.
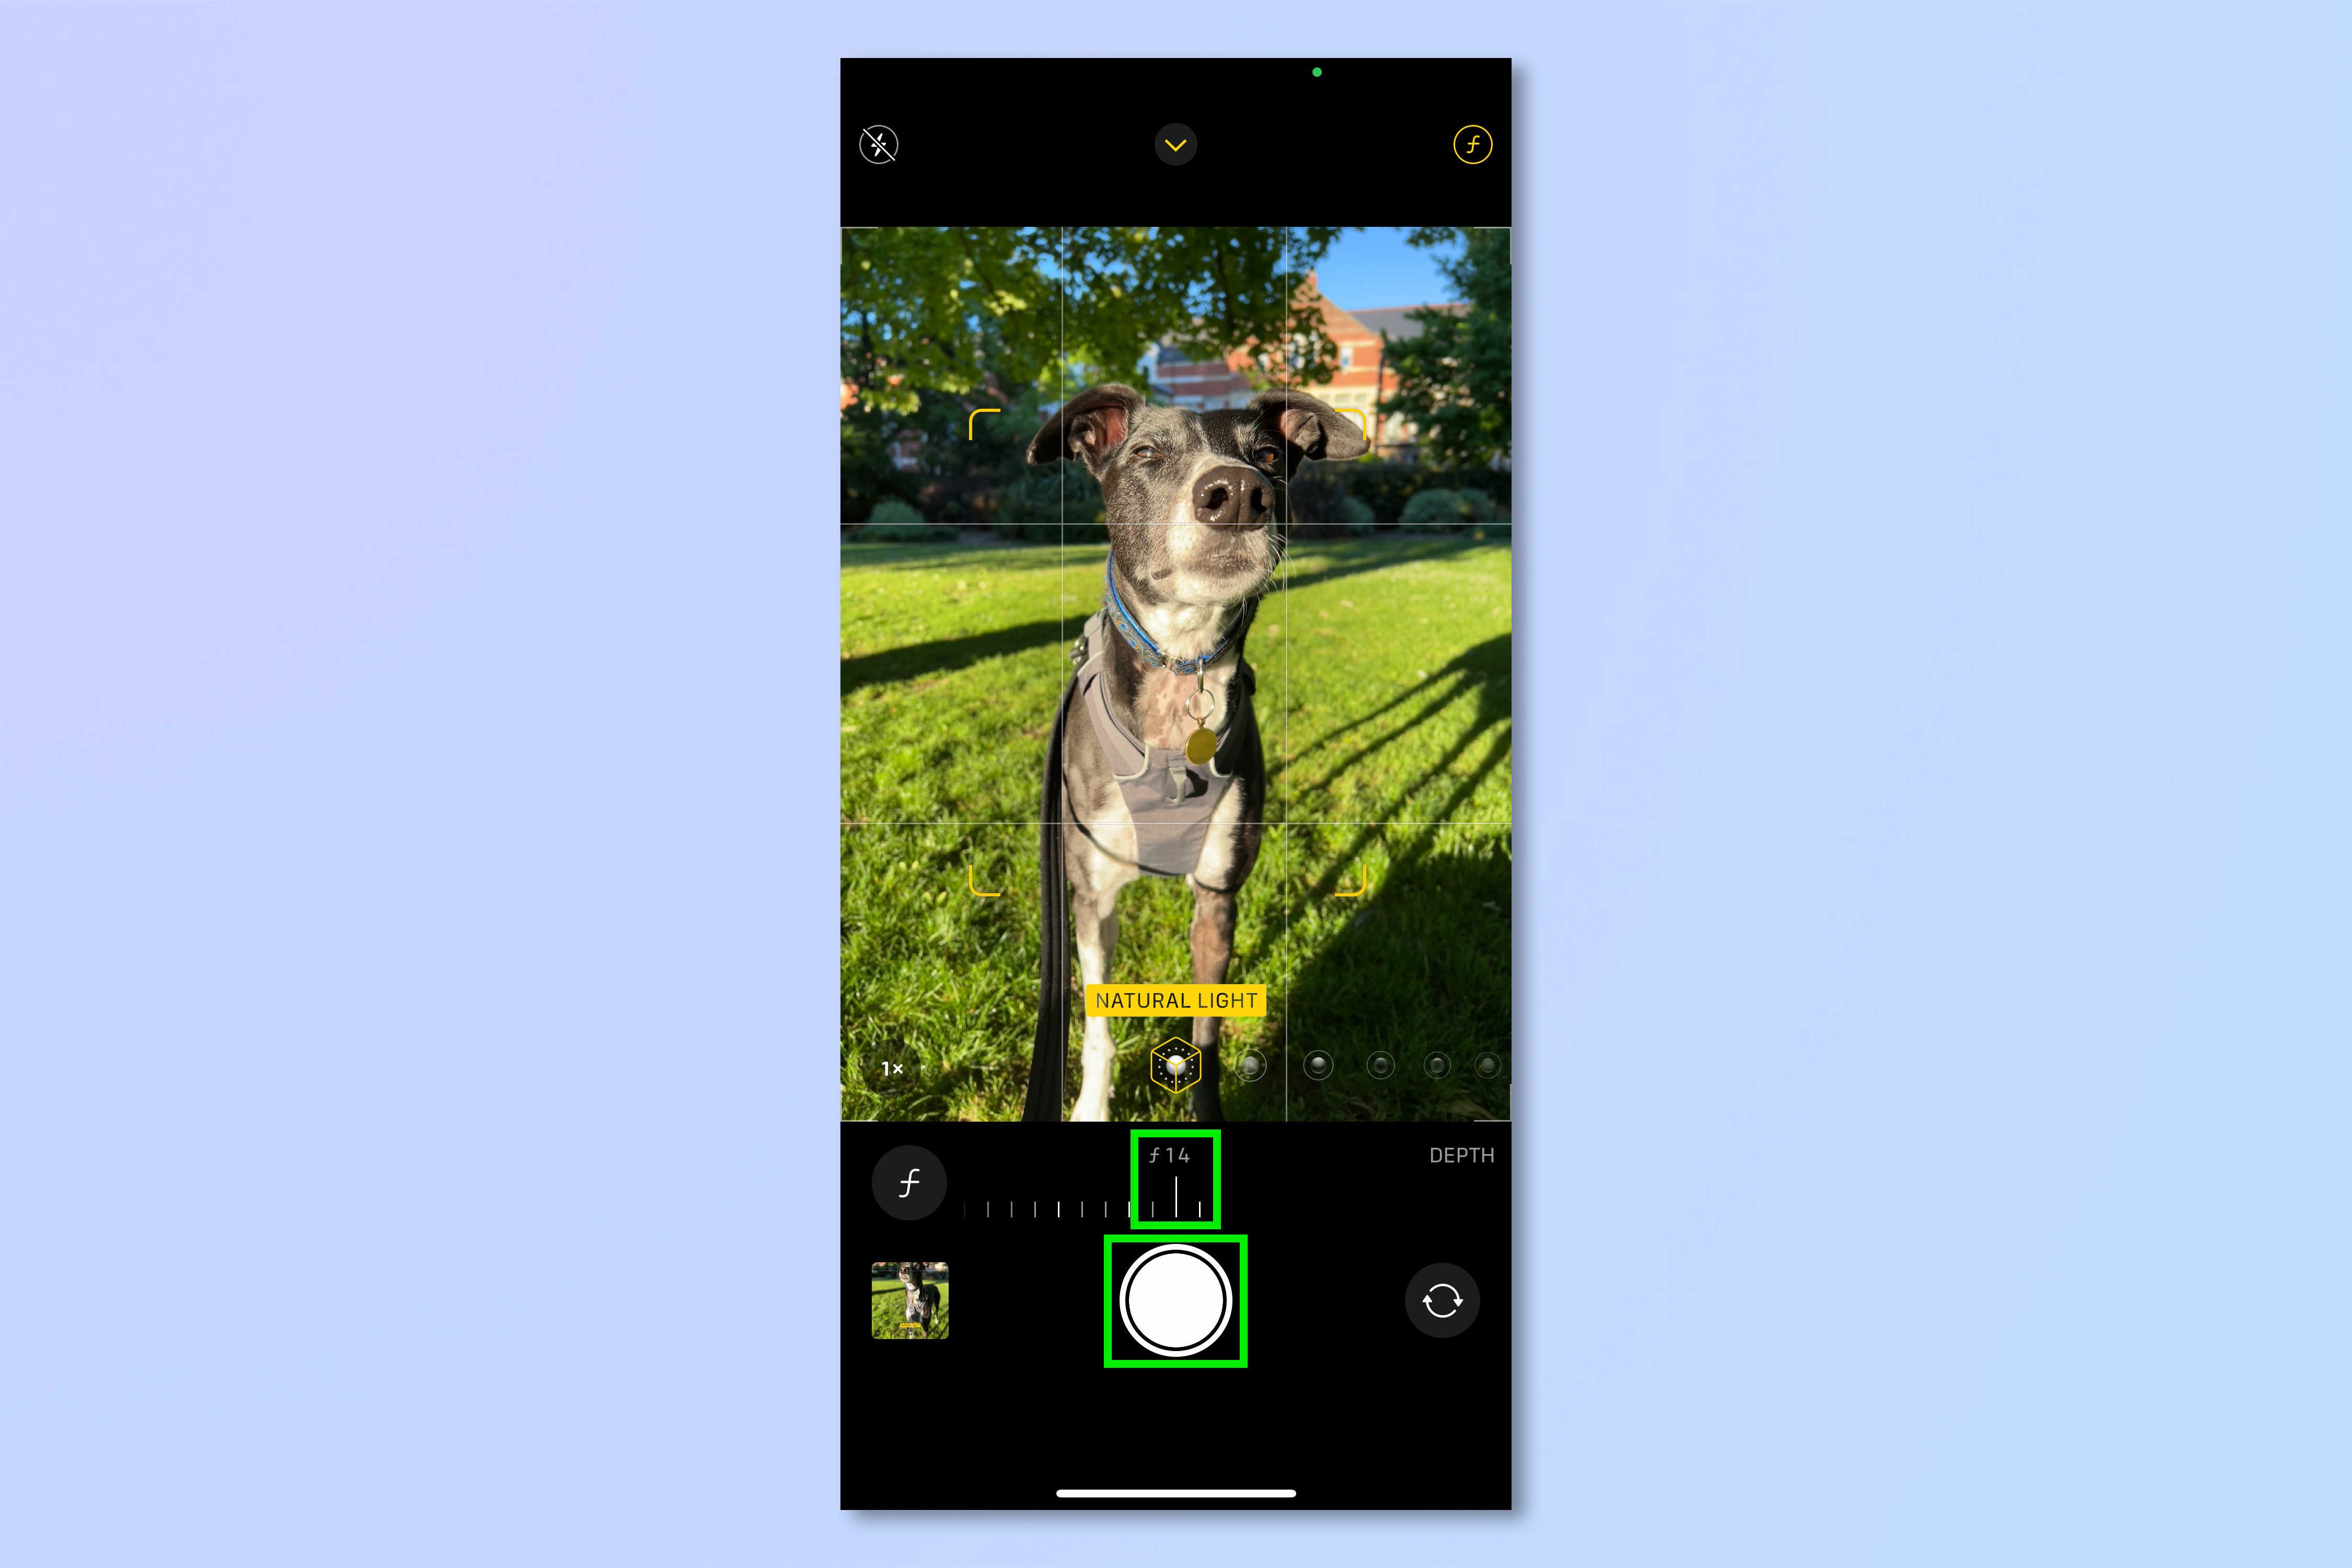
7. If you decide you aren't happy with the blur and want more or less, open the Photos app and select the image, then tap Edit.
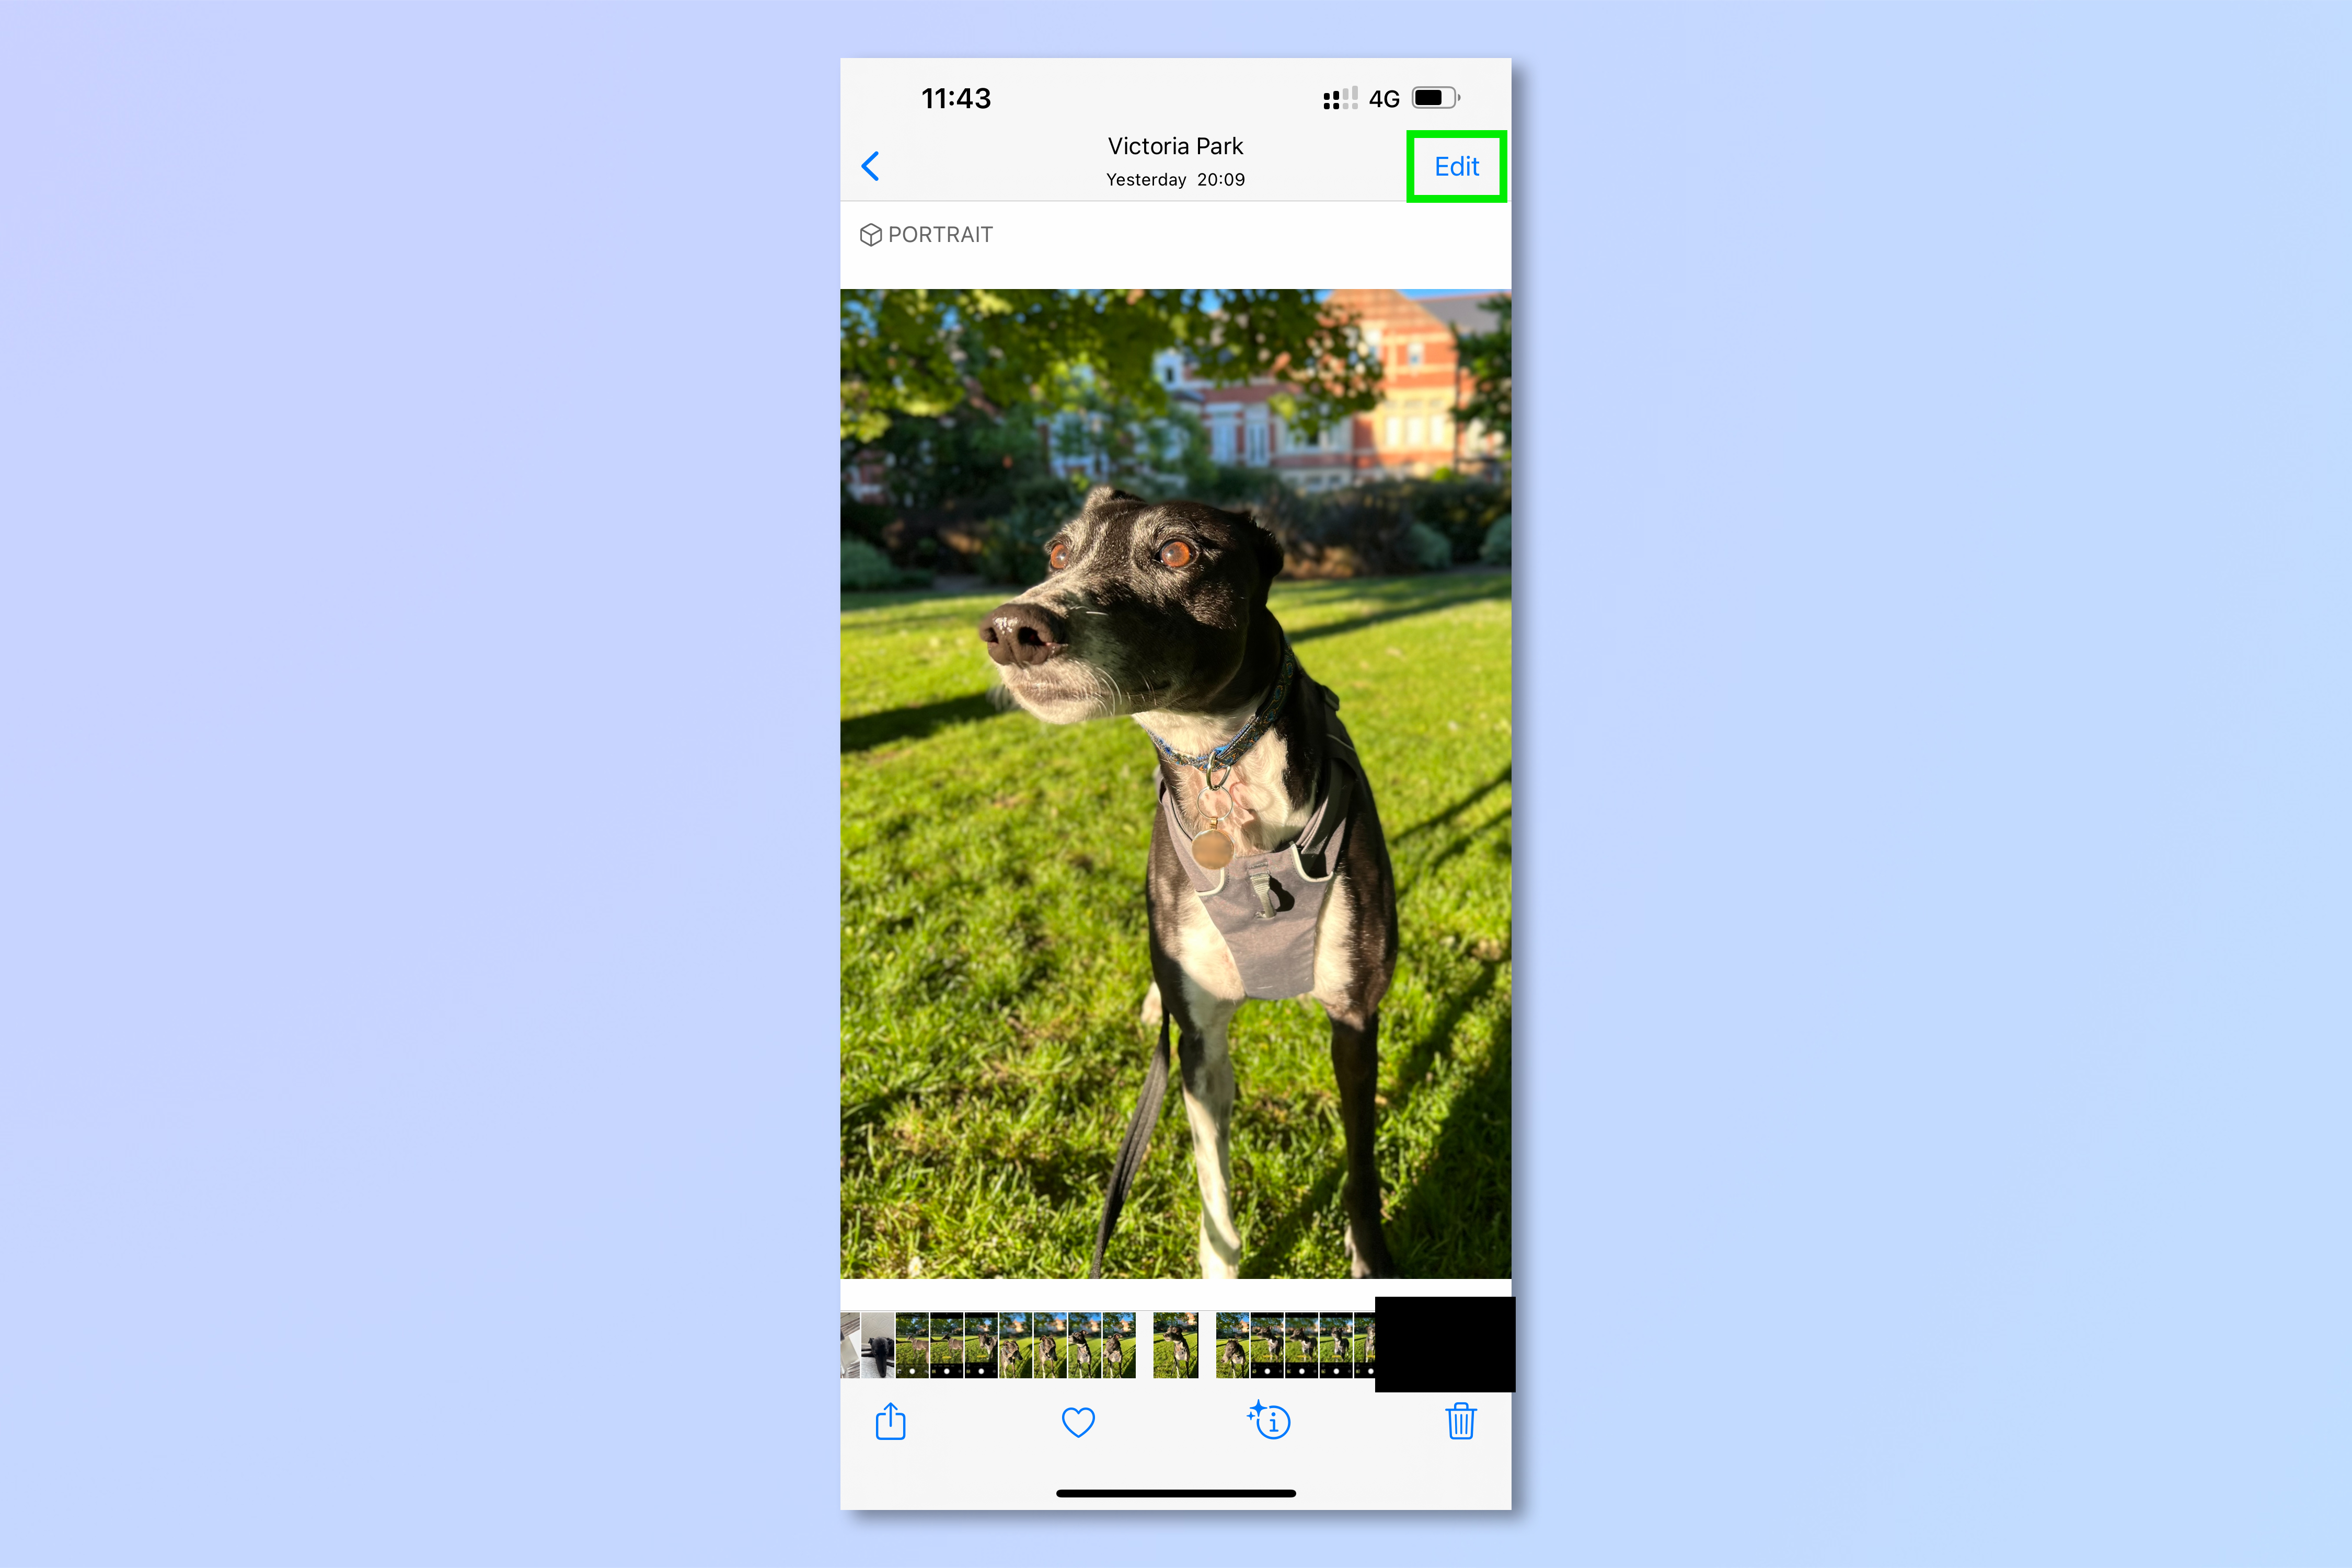
8. Ensure you're on the first effects tab down at the bottom. Then, in the top left, tap the f button, which will be displaying the current equivalent f-stop value.
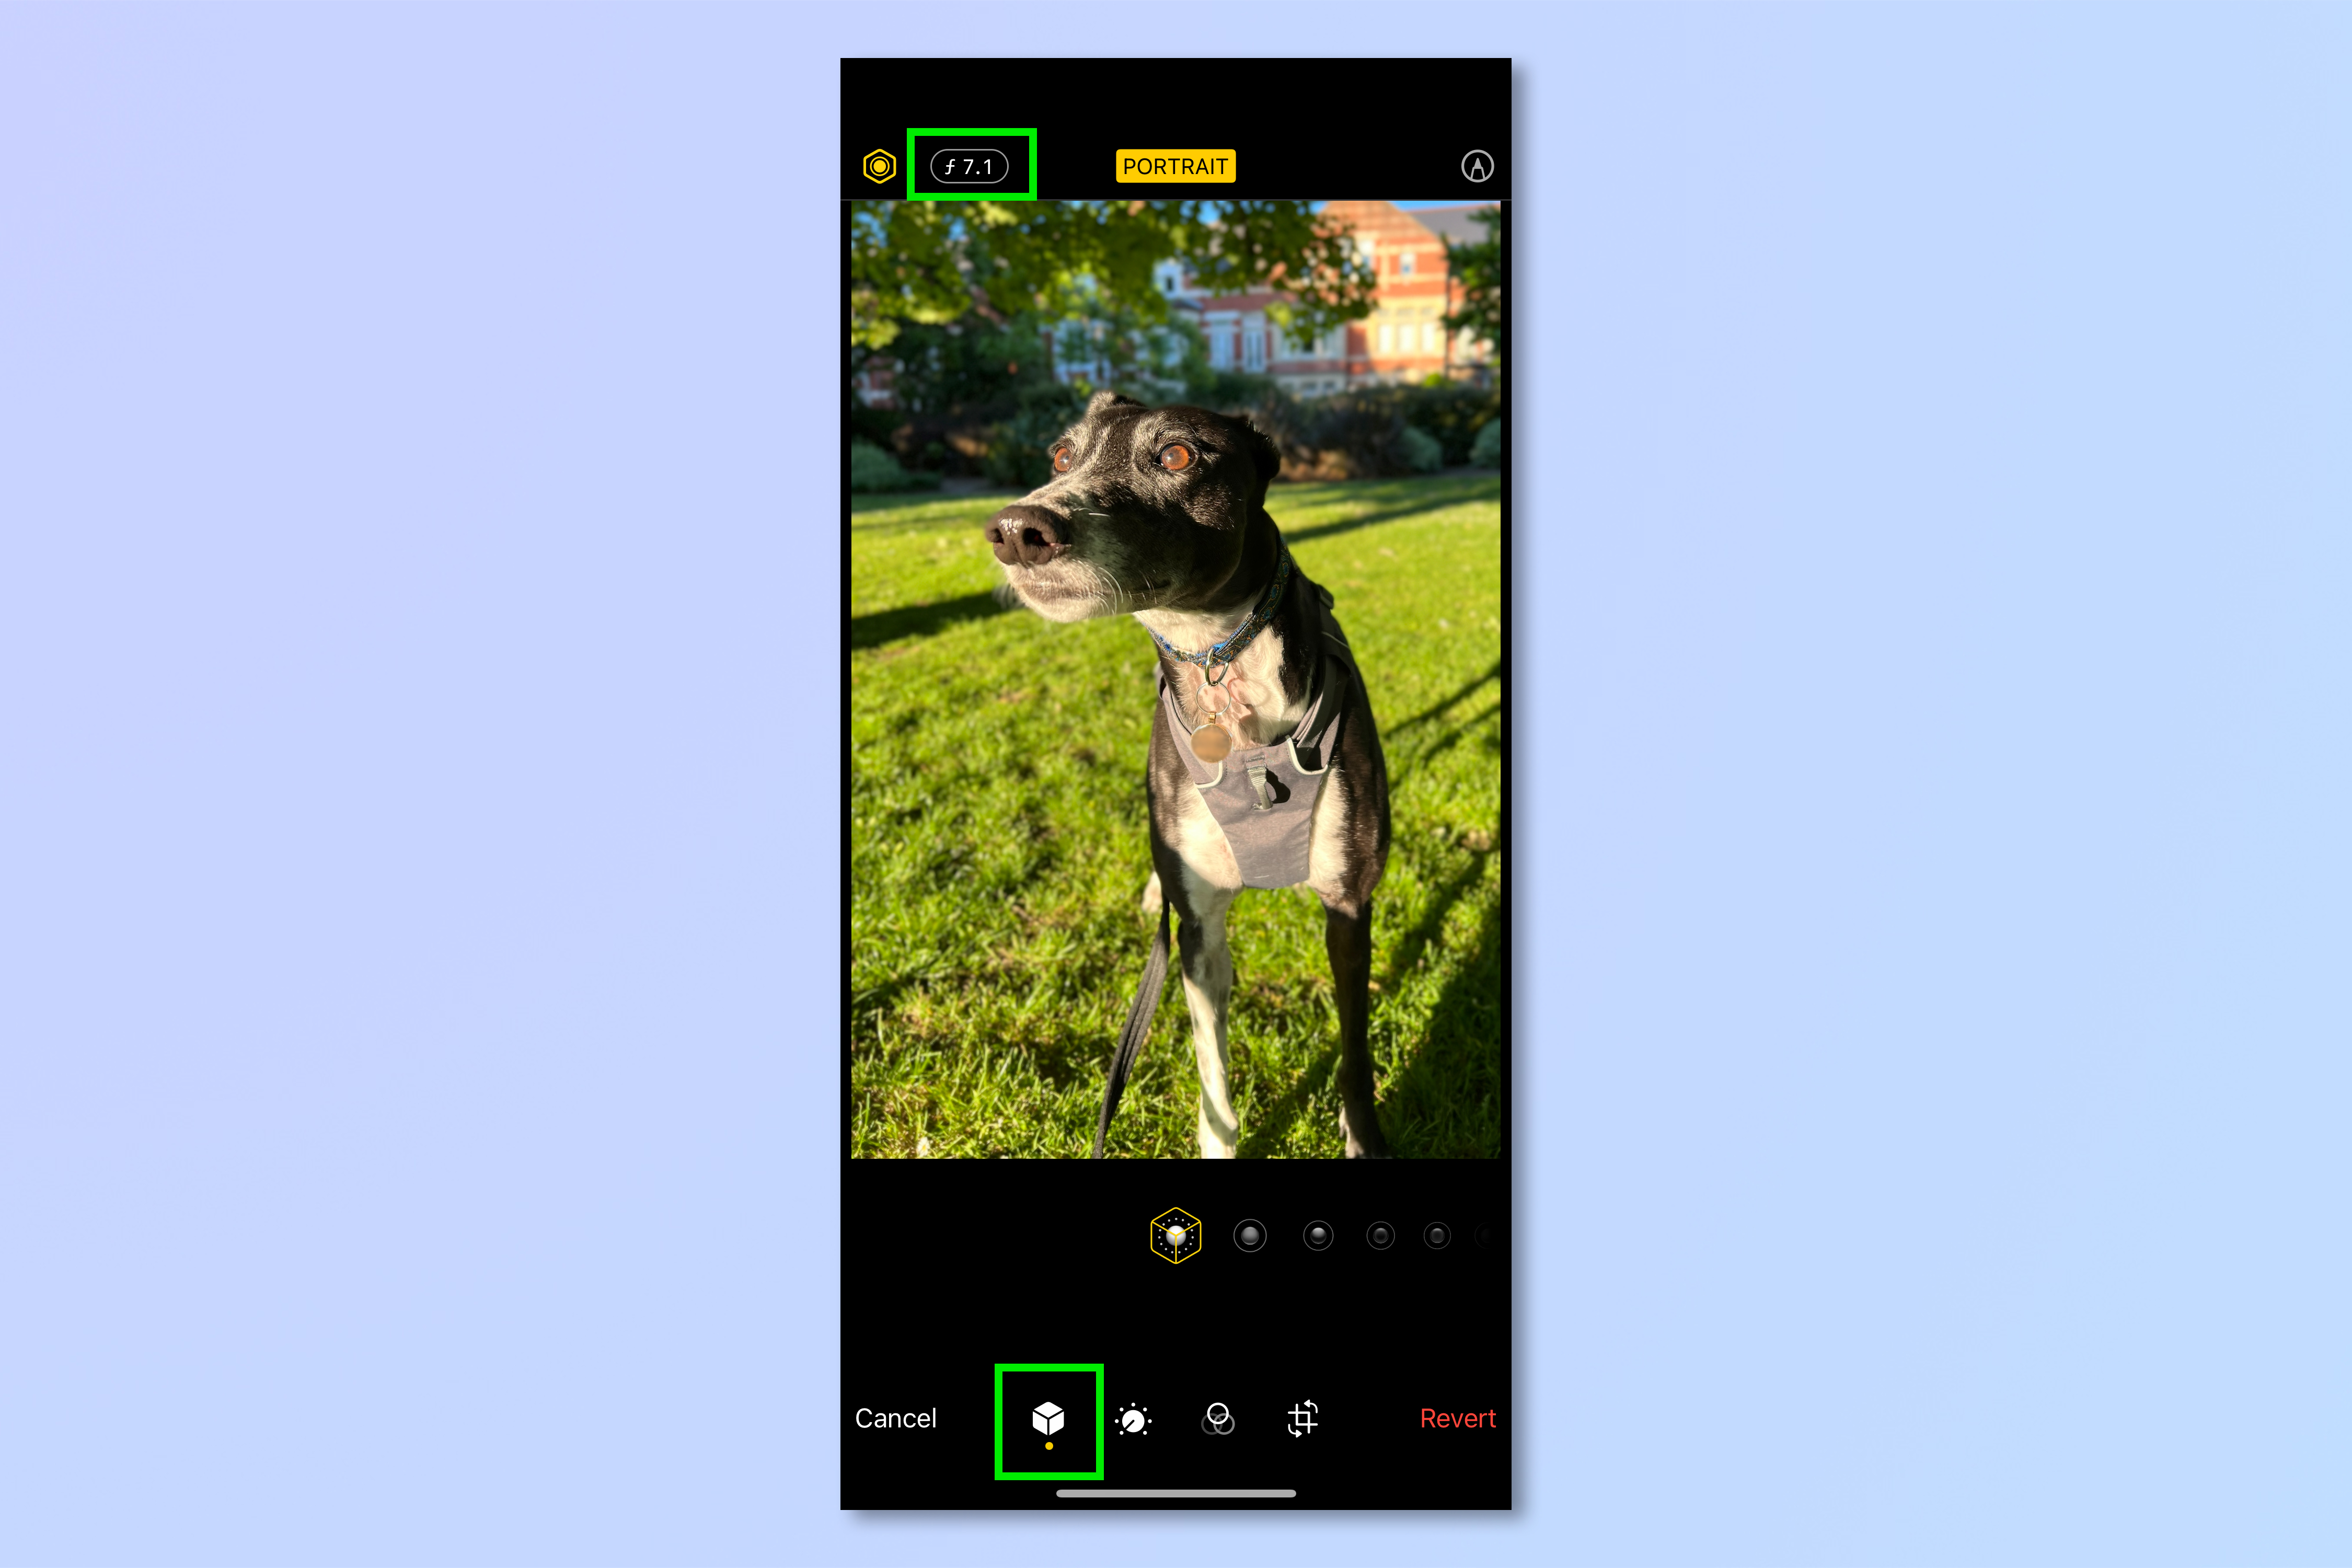
9. Slide the Depth Control bar left or right to adjust the blur in your image. When you're happy, tap Done.
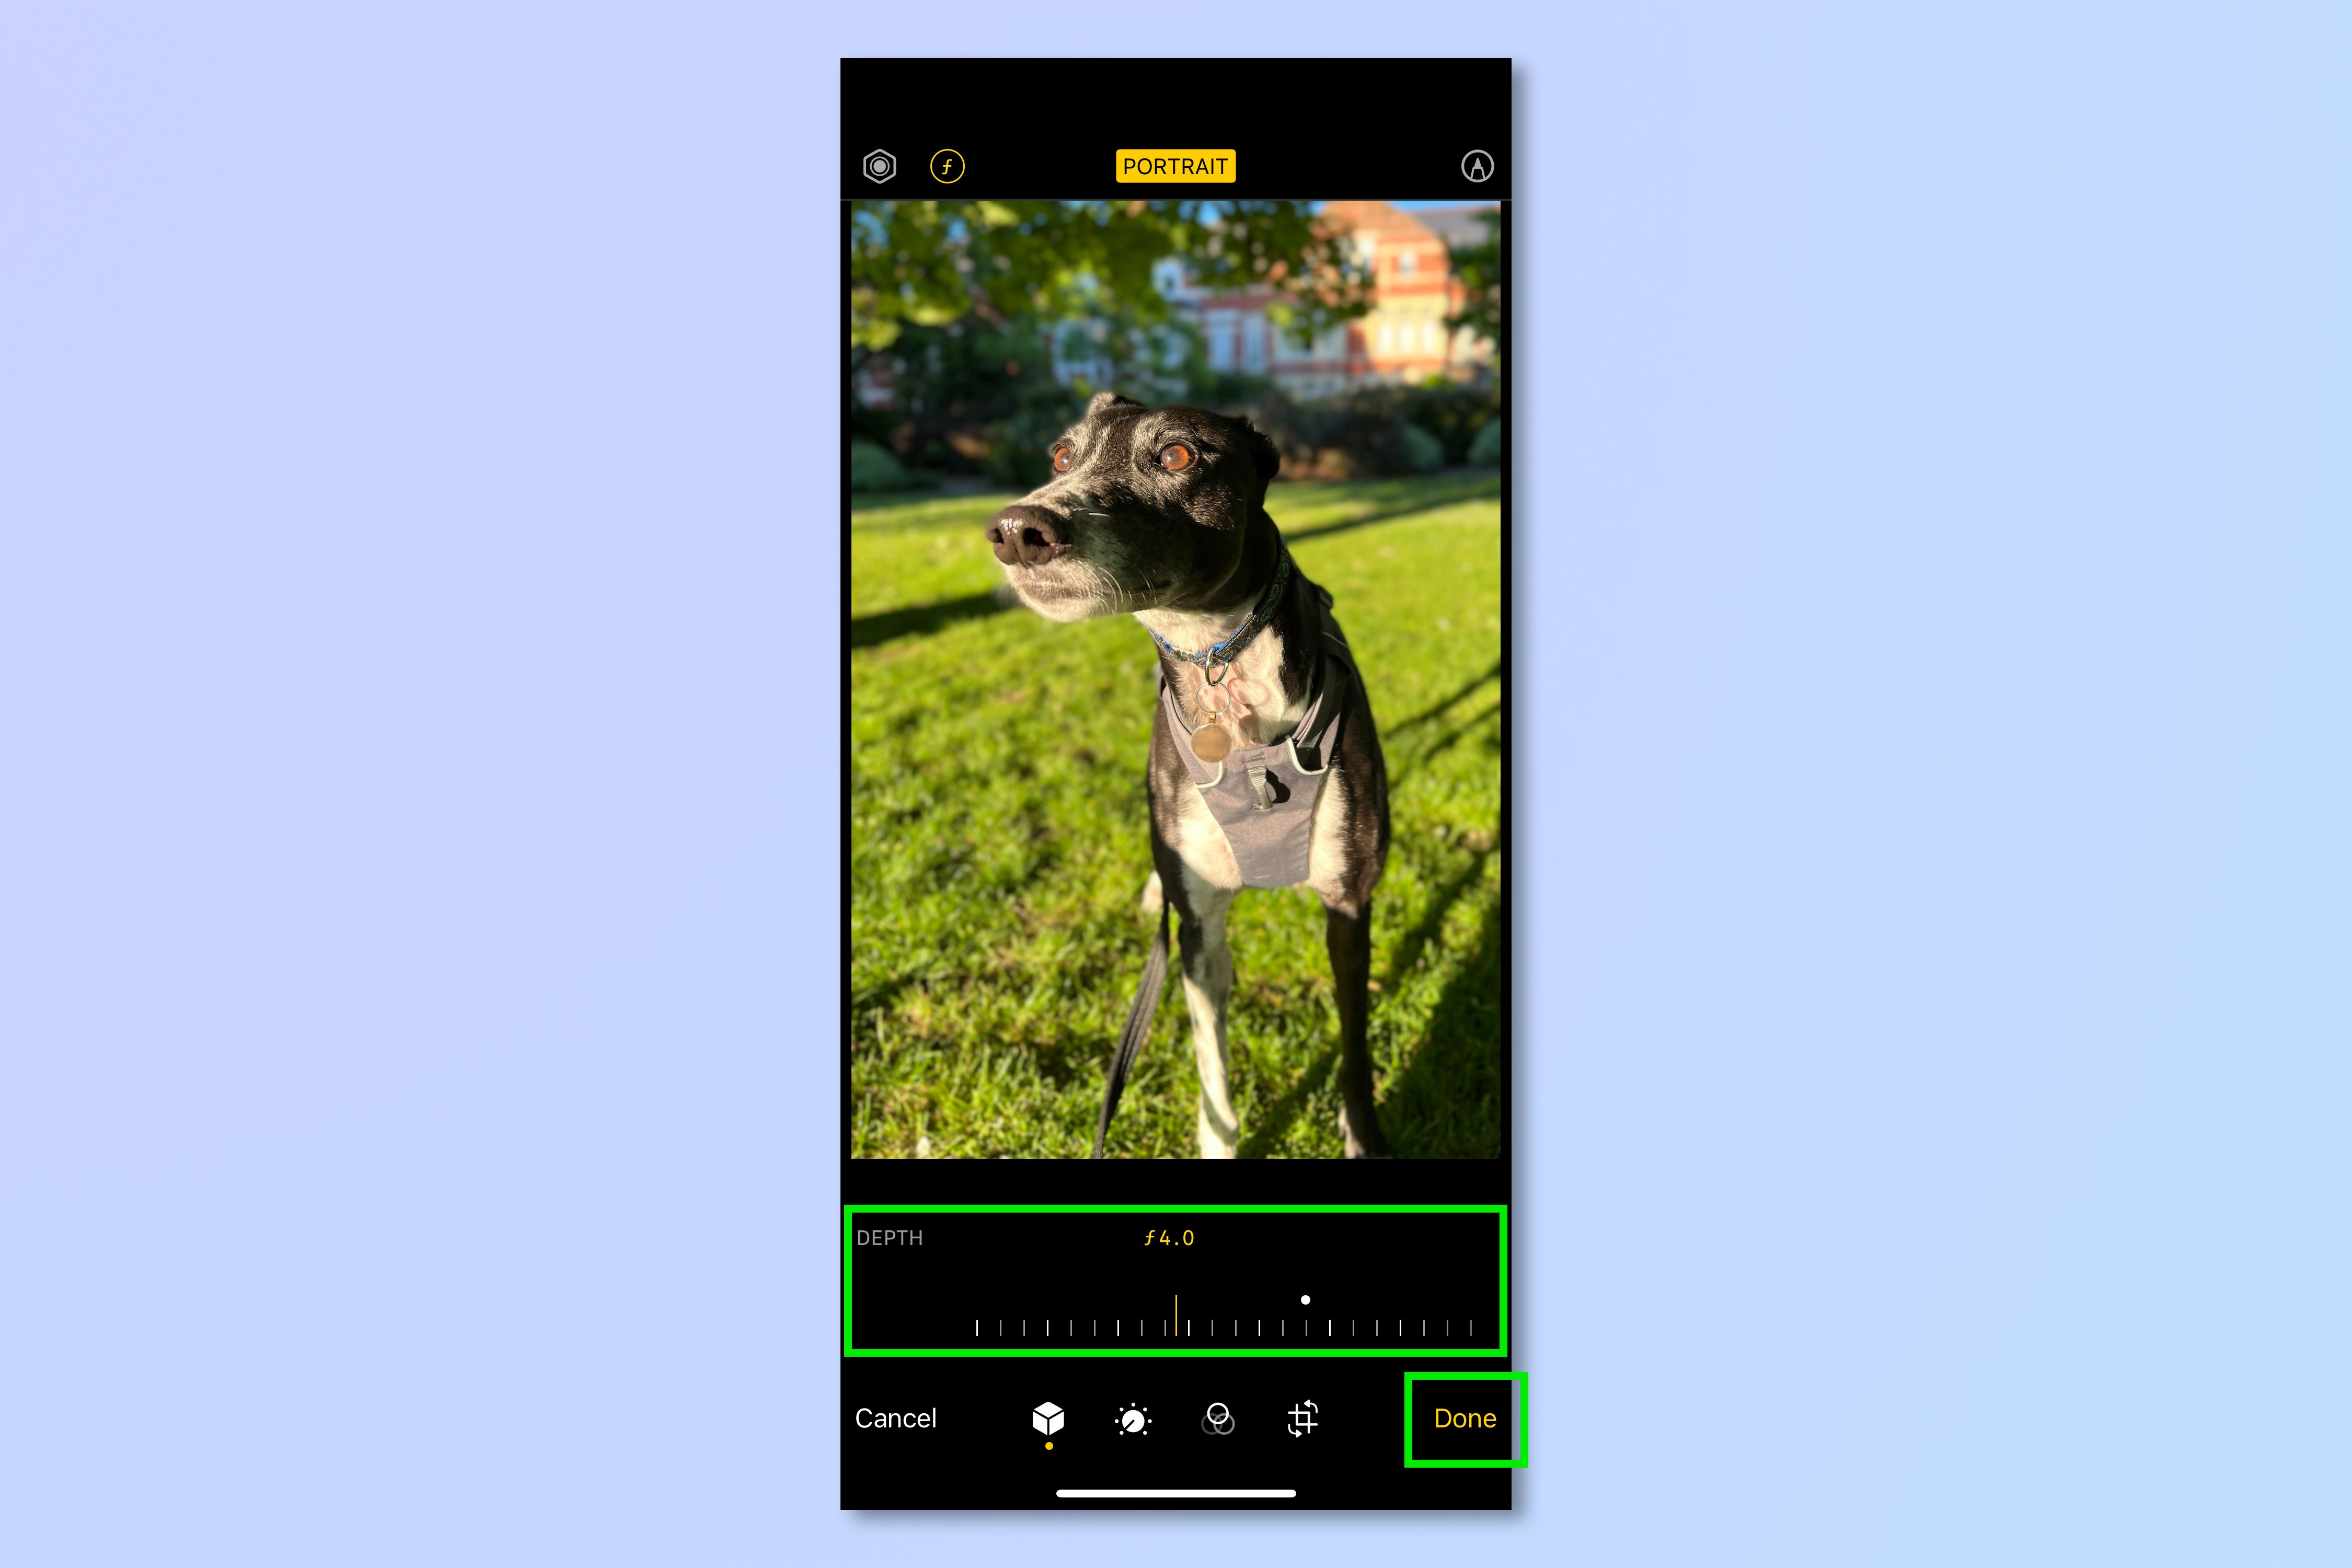
And there you have it. You can now take portraits of people and dogs and control the background blur like a pro.
If you're interested in reading about more iPhone tips and tricks, make sure you read our guides on how to change your iPhone's ringer volume, how to set custom battery alerts on iPhone, how to share a Wi-Fi password from iPhone to Android and how to use the iPhone Guided Access mode before lending anyone your phone. If you're looking to take image editing to the next level with professional software, we also have a range of Photoshop guides, including how to add a drop shadow in Photoshop, how to add a border in Photoshop and how to add a background in Photoshop.
Next: Your iPhone Pro camera has a professional RAW mode — here's how to turn on RAW photos on iPhone.

Peter is a Senior Editor at Tom's Guide, heading up the site's Reviews team and Cameras section. As a writer, he covers topics including tech, photography, gaming, hardware, motoring and food & drink. Outside of work, he's an avid photographer, specialising in architectural and portrait photography. When he's not snapping away on his beloved Fujifilm camera, he can usually be found telling everyone about his greyhounds, riding his motorcycle, squeezing as many FPS as possible out of PC games, and perfecting his espresso shots.
