How to blur a background in Photoshop
Want to know how to blur a background in Photoshop? Follow these step-by-step instructions

Once you know how to blur a background in Photoshop, friends photobombing and strangers walking into shot will never be a problem again. Blurring a background is the perfect technique to make sure that everyone who sees your pictures focuses on exactly what you want them to.
When you blur a background in Photoshop, all eyes fall to the foreground and the contrast in definition can make your main subject really "pop" and stand out. This is an especially useful tool for shots in crowds, such as at concerts or sporting events, where you can blur out strangers' faces and just focus on the memories of having fun with friends.
Although the backgrounds may be blurry, our instructions are clear, so keep reading to learn how to blur a background in Photoshop.
How to blur a background in Photoshop
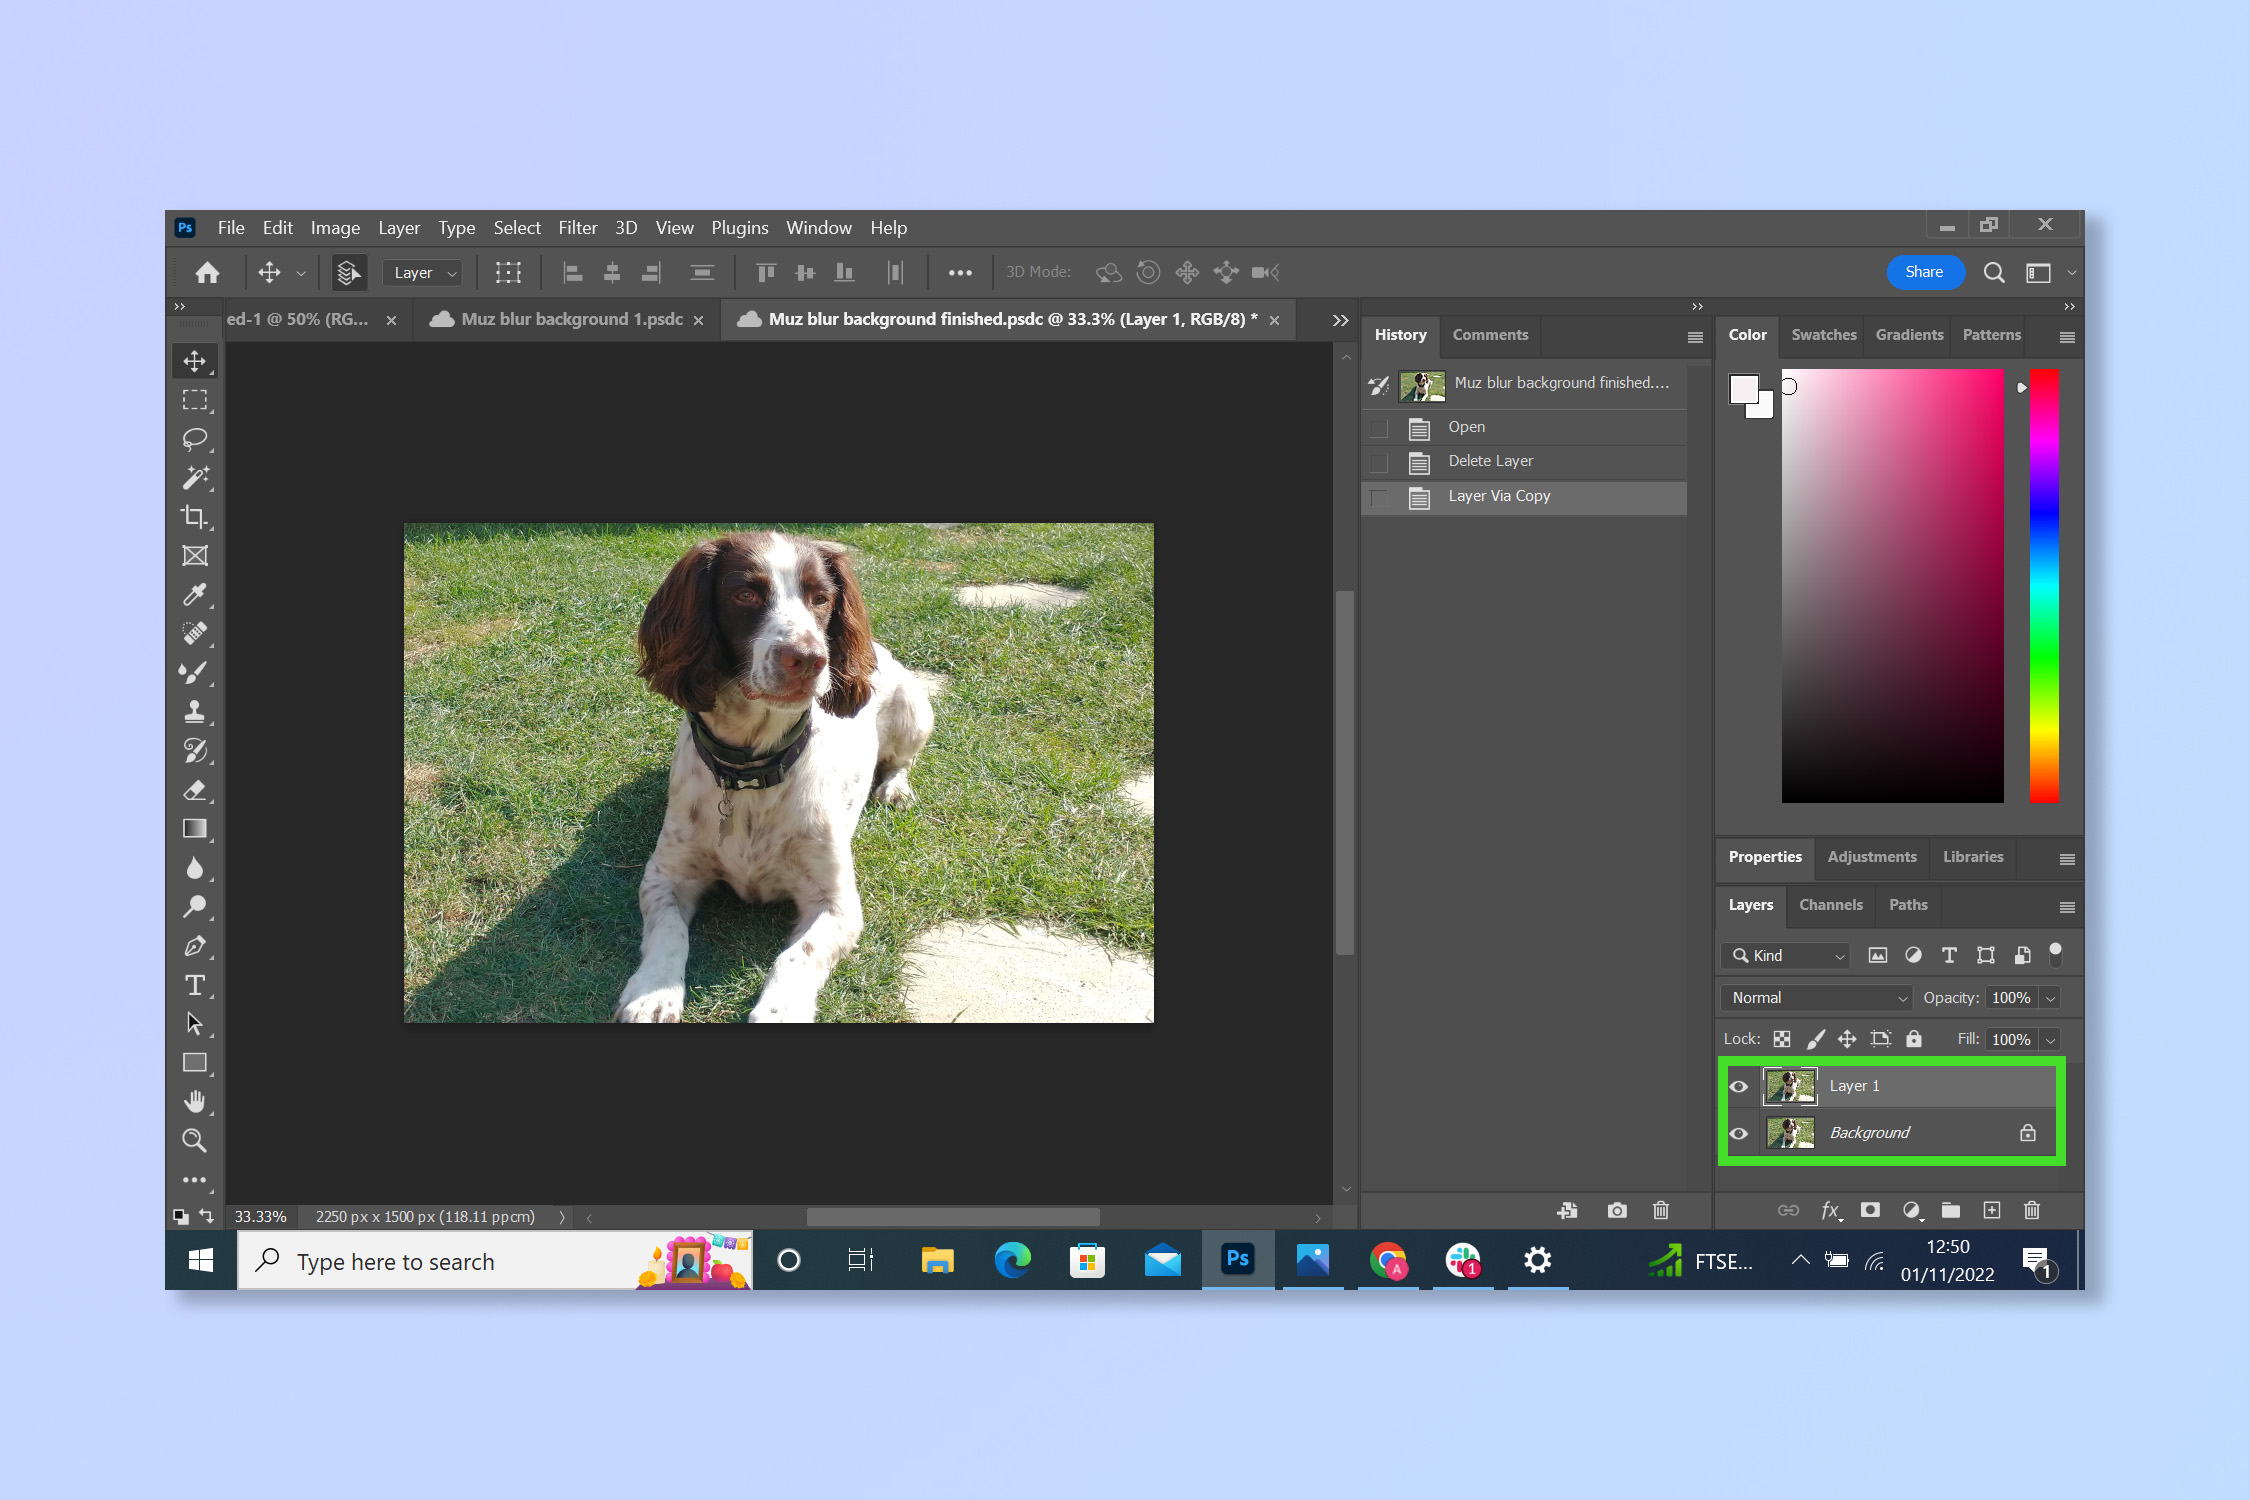
1. Create a duplicate of your background layer.
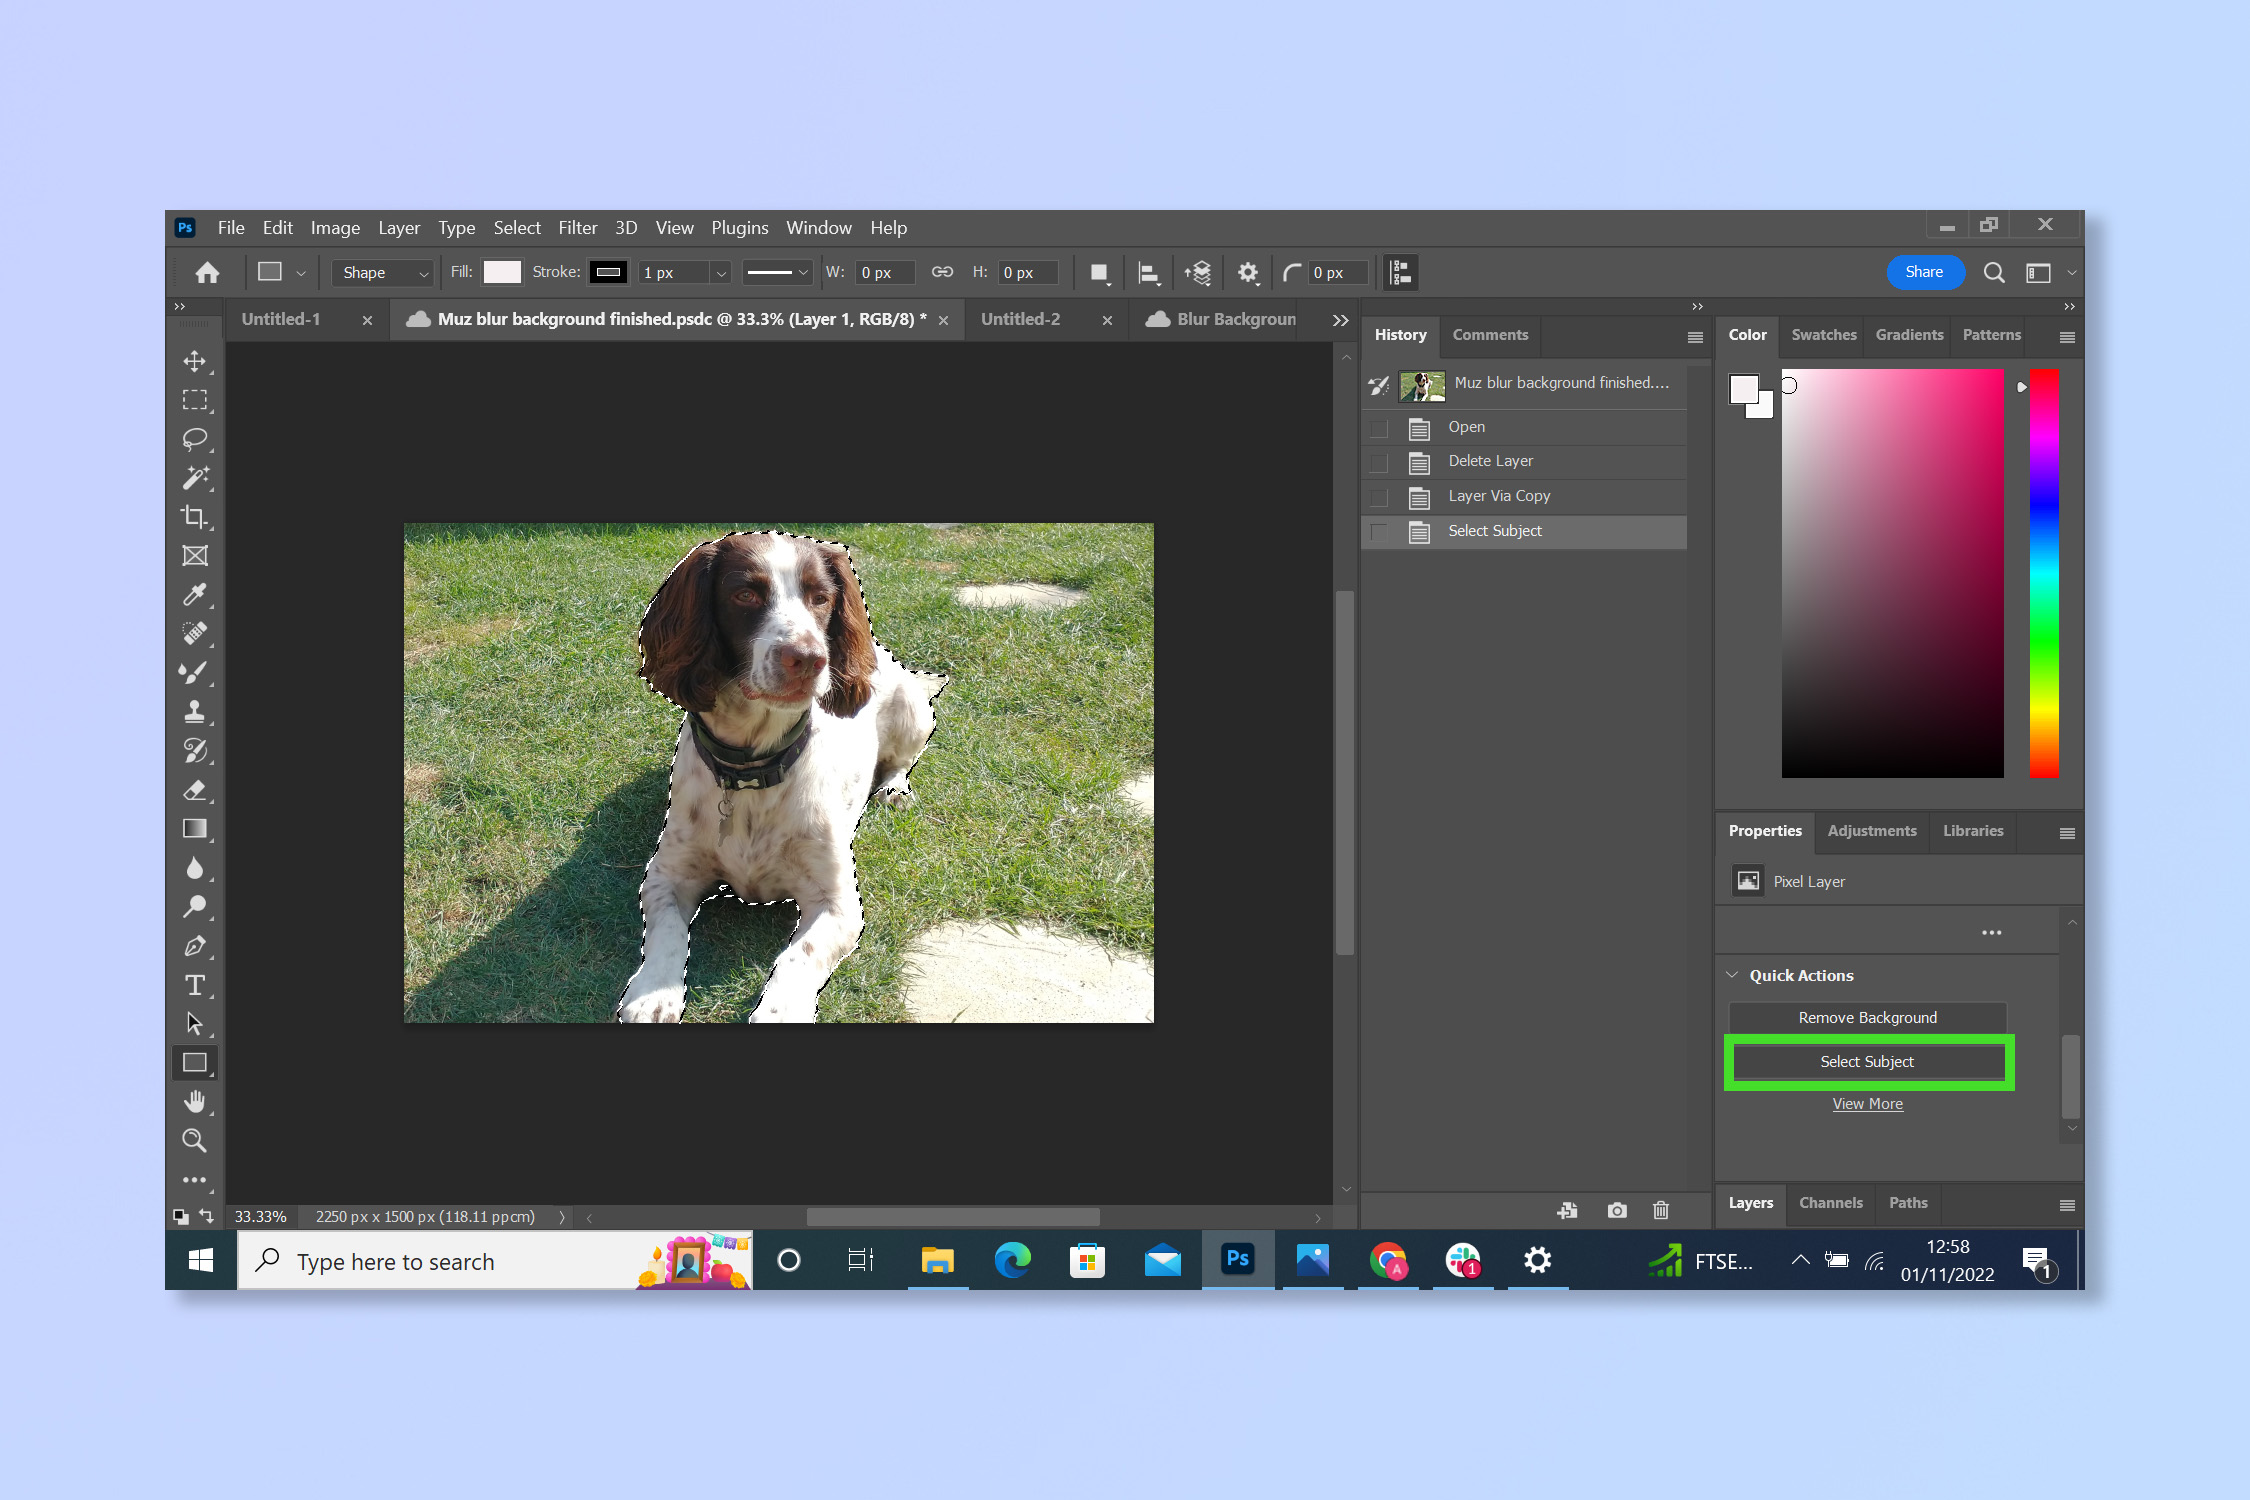
2. Use the Select a Subject tool to highlight the main subject in your image.
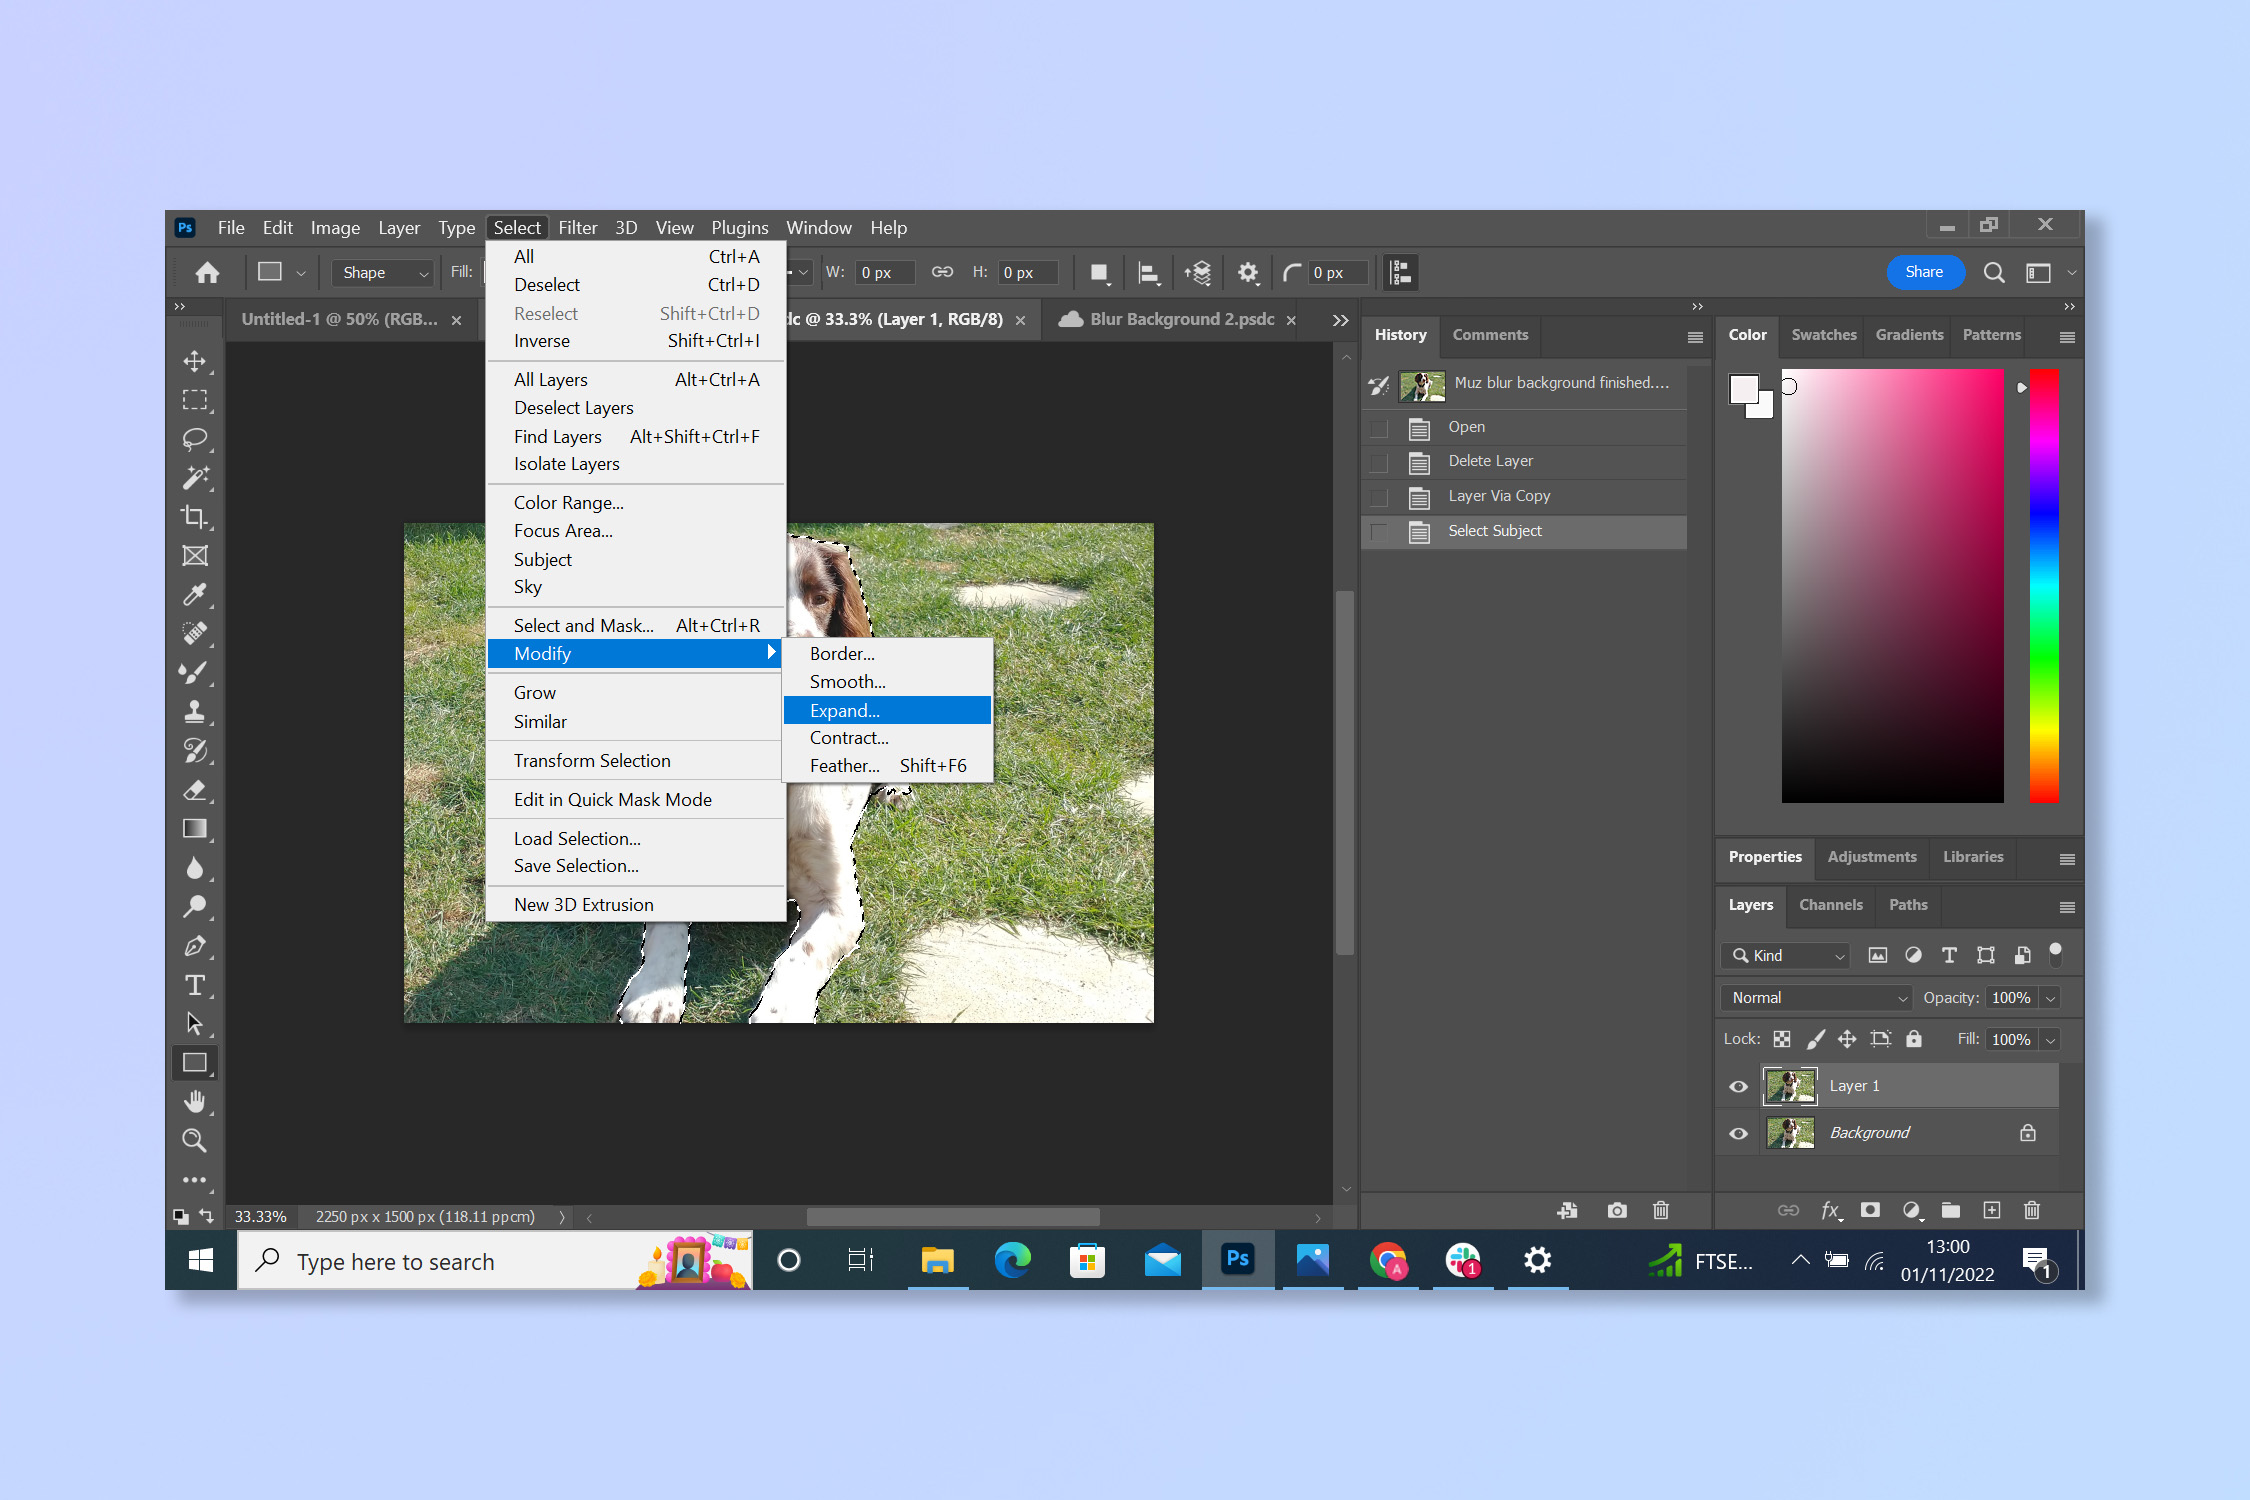
3. Click on Select -> Modify-> Expand and then expand the selection by 5 or so pixels.
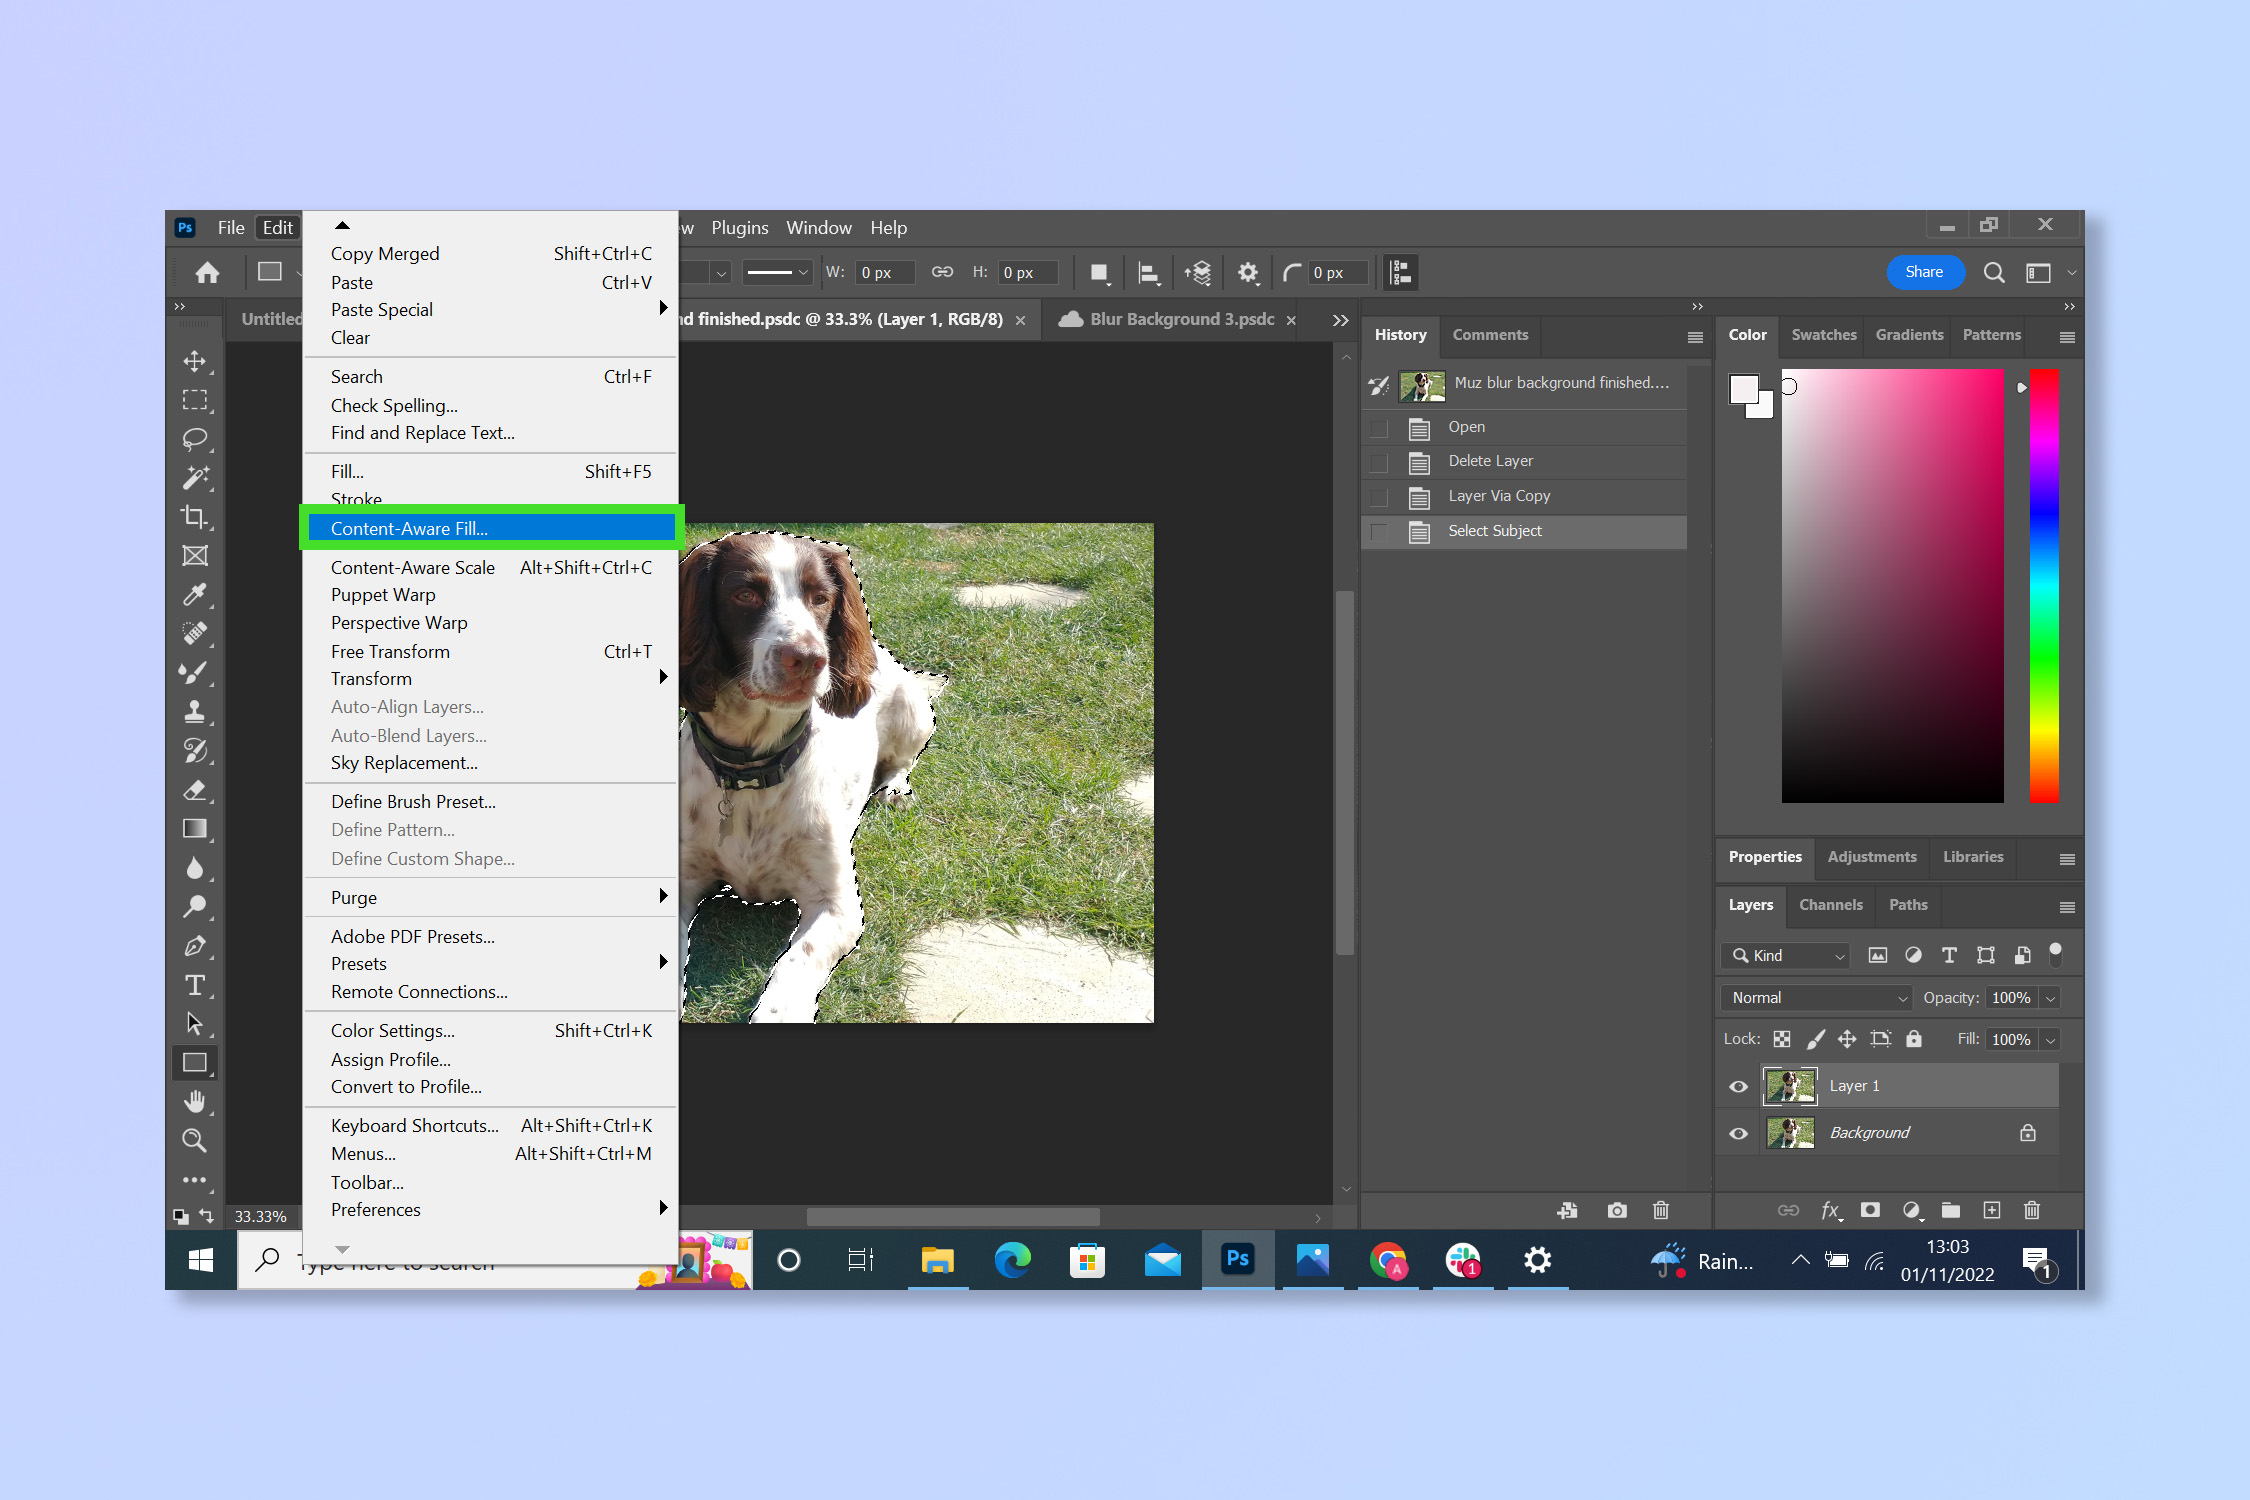
4. On the Edit tab select Content-Aware Fill.
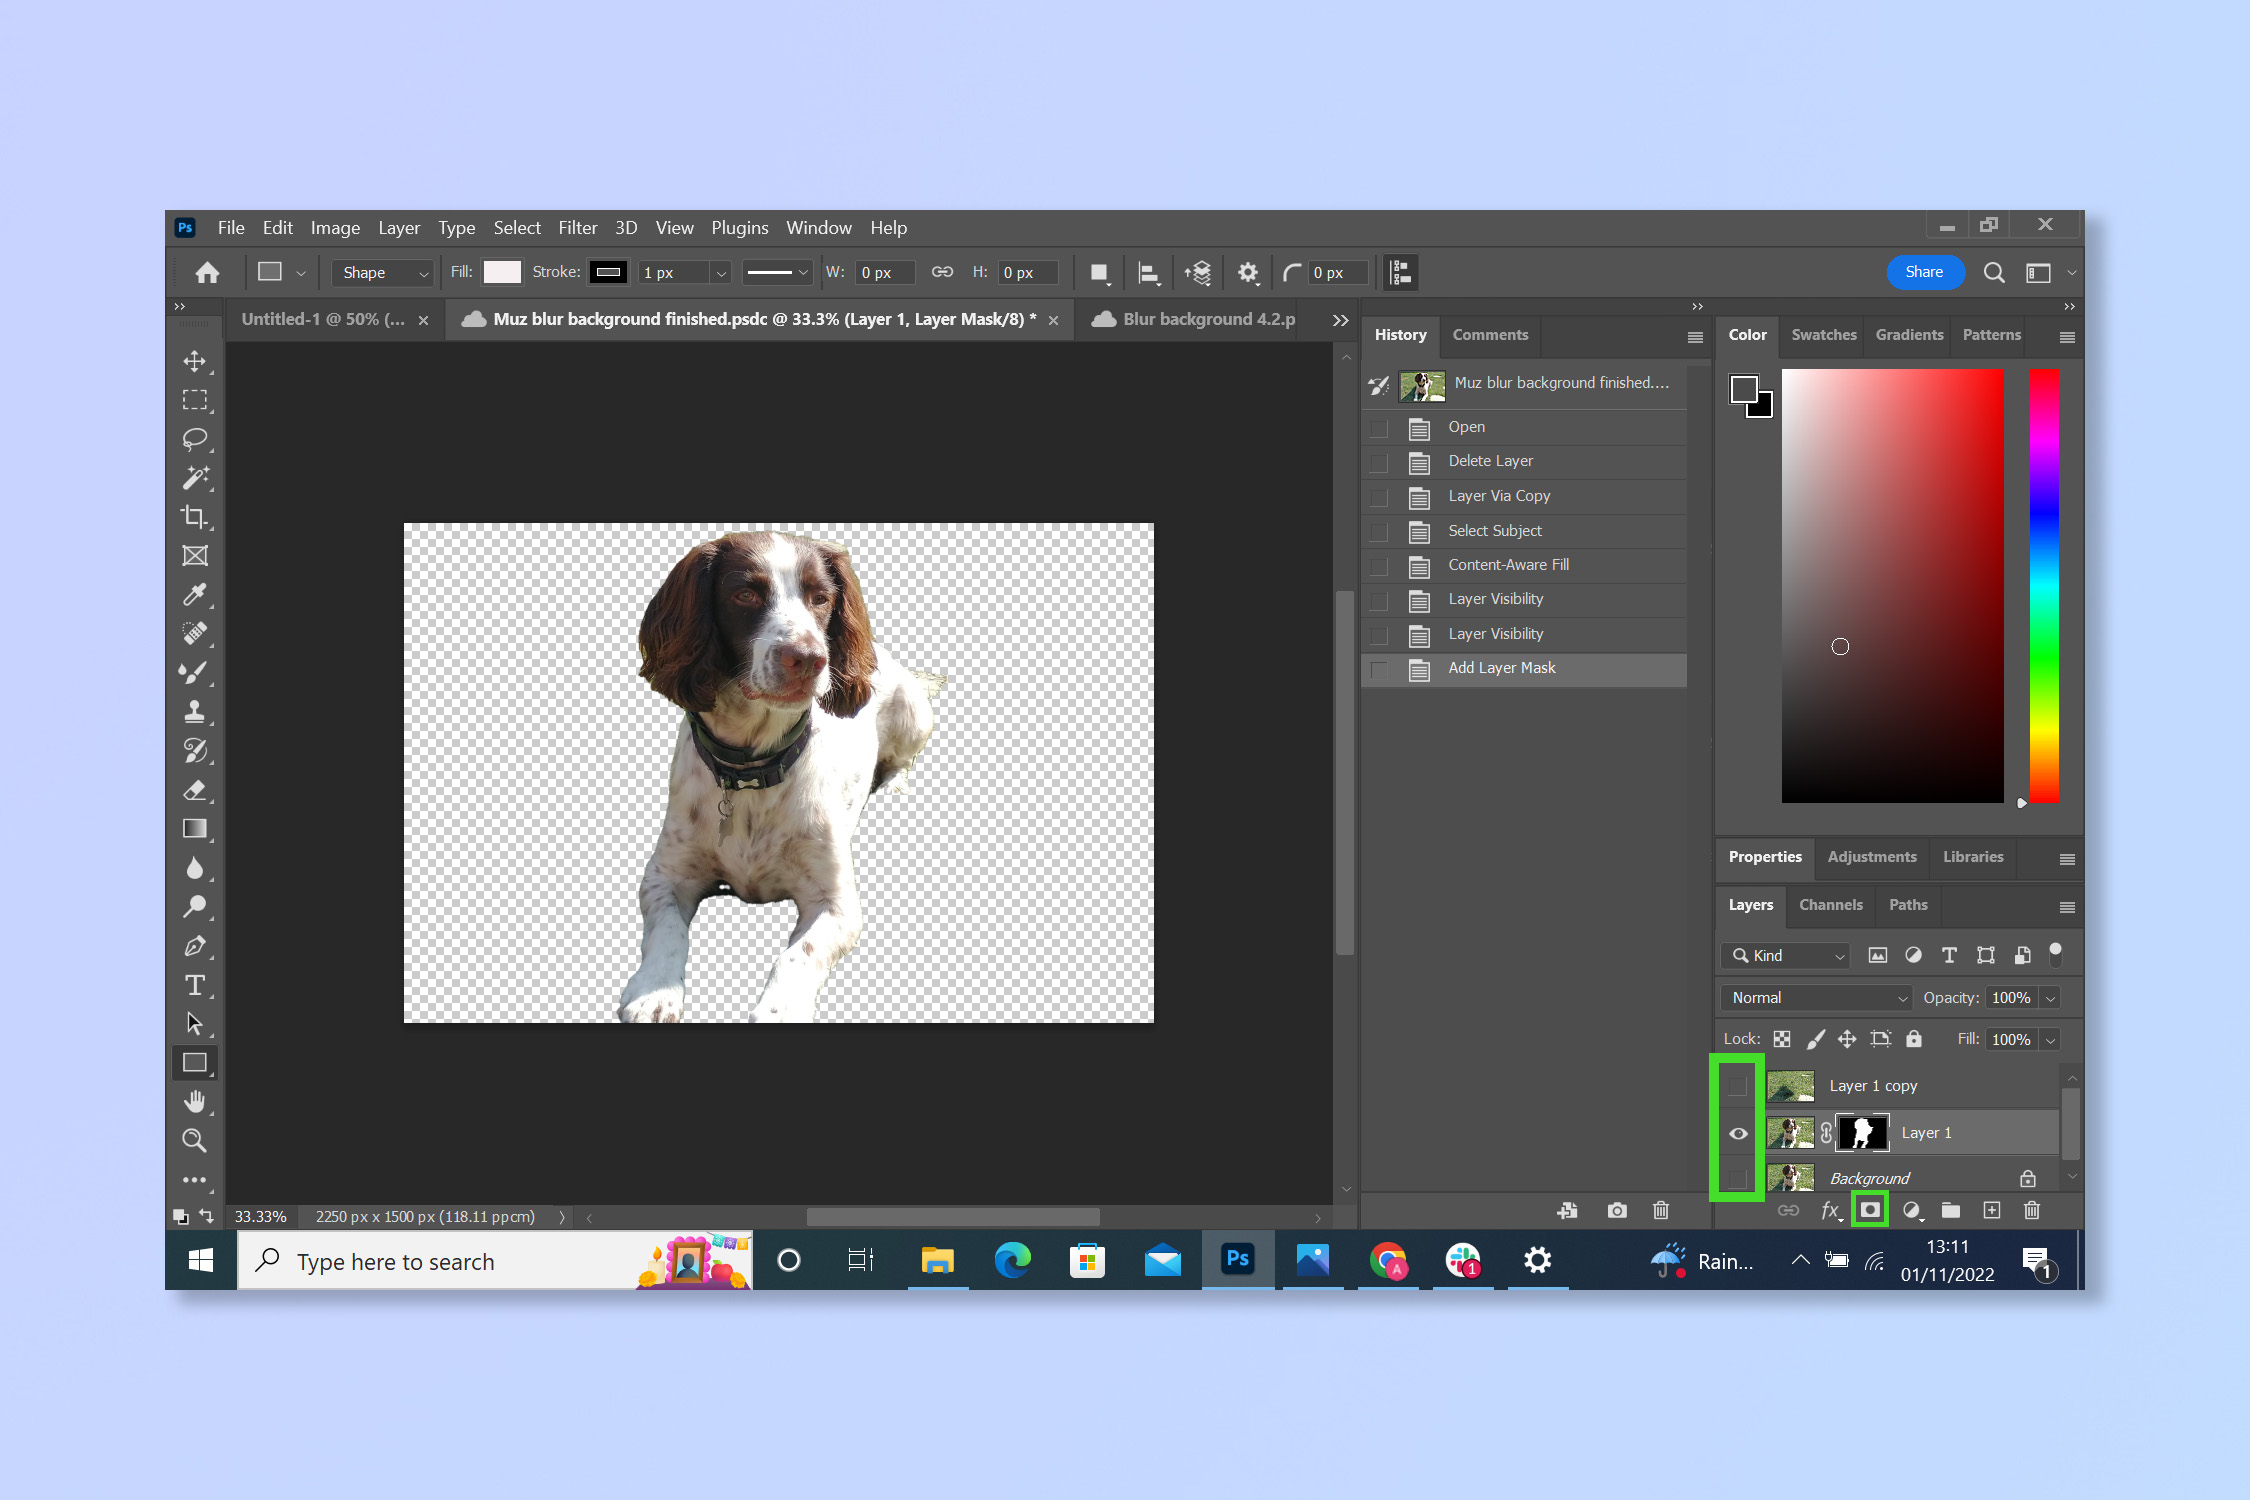
5. Disable the two background layers and then add a Layer Mask to your subject layer.
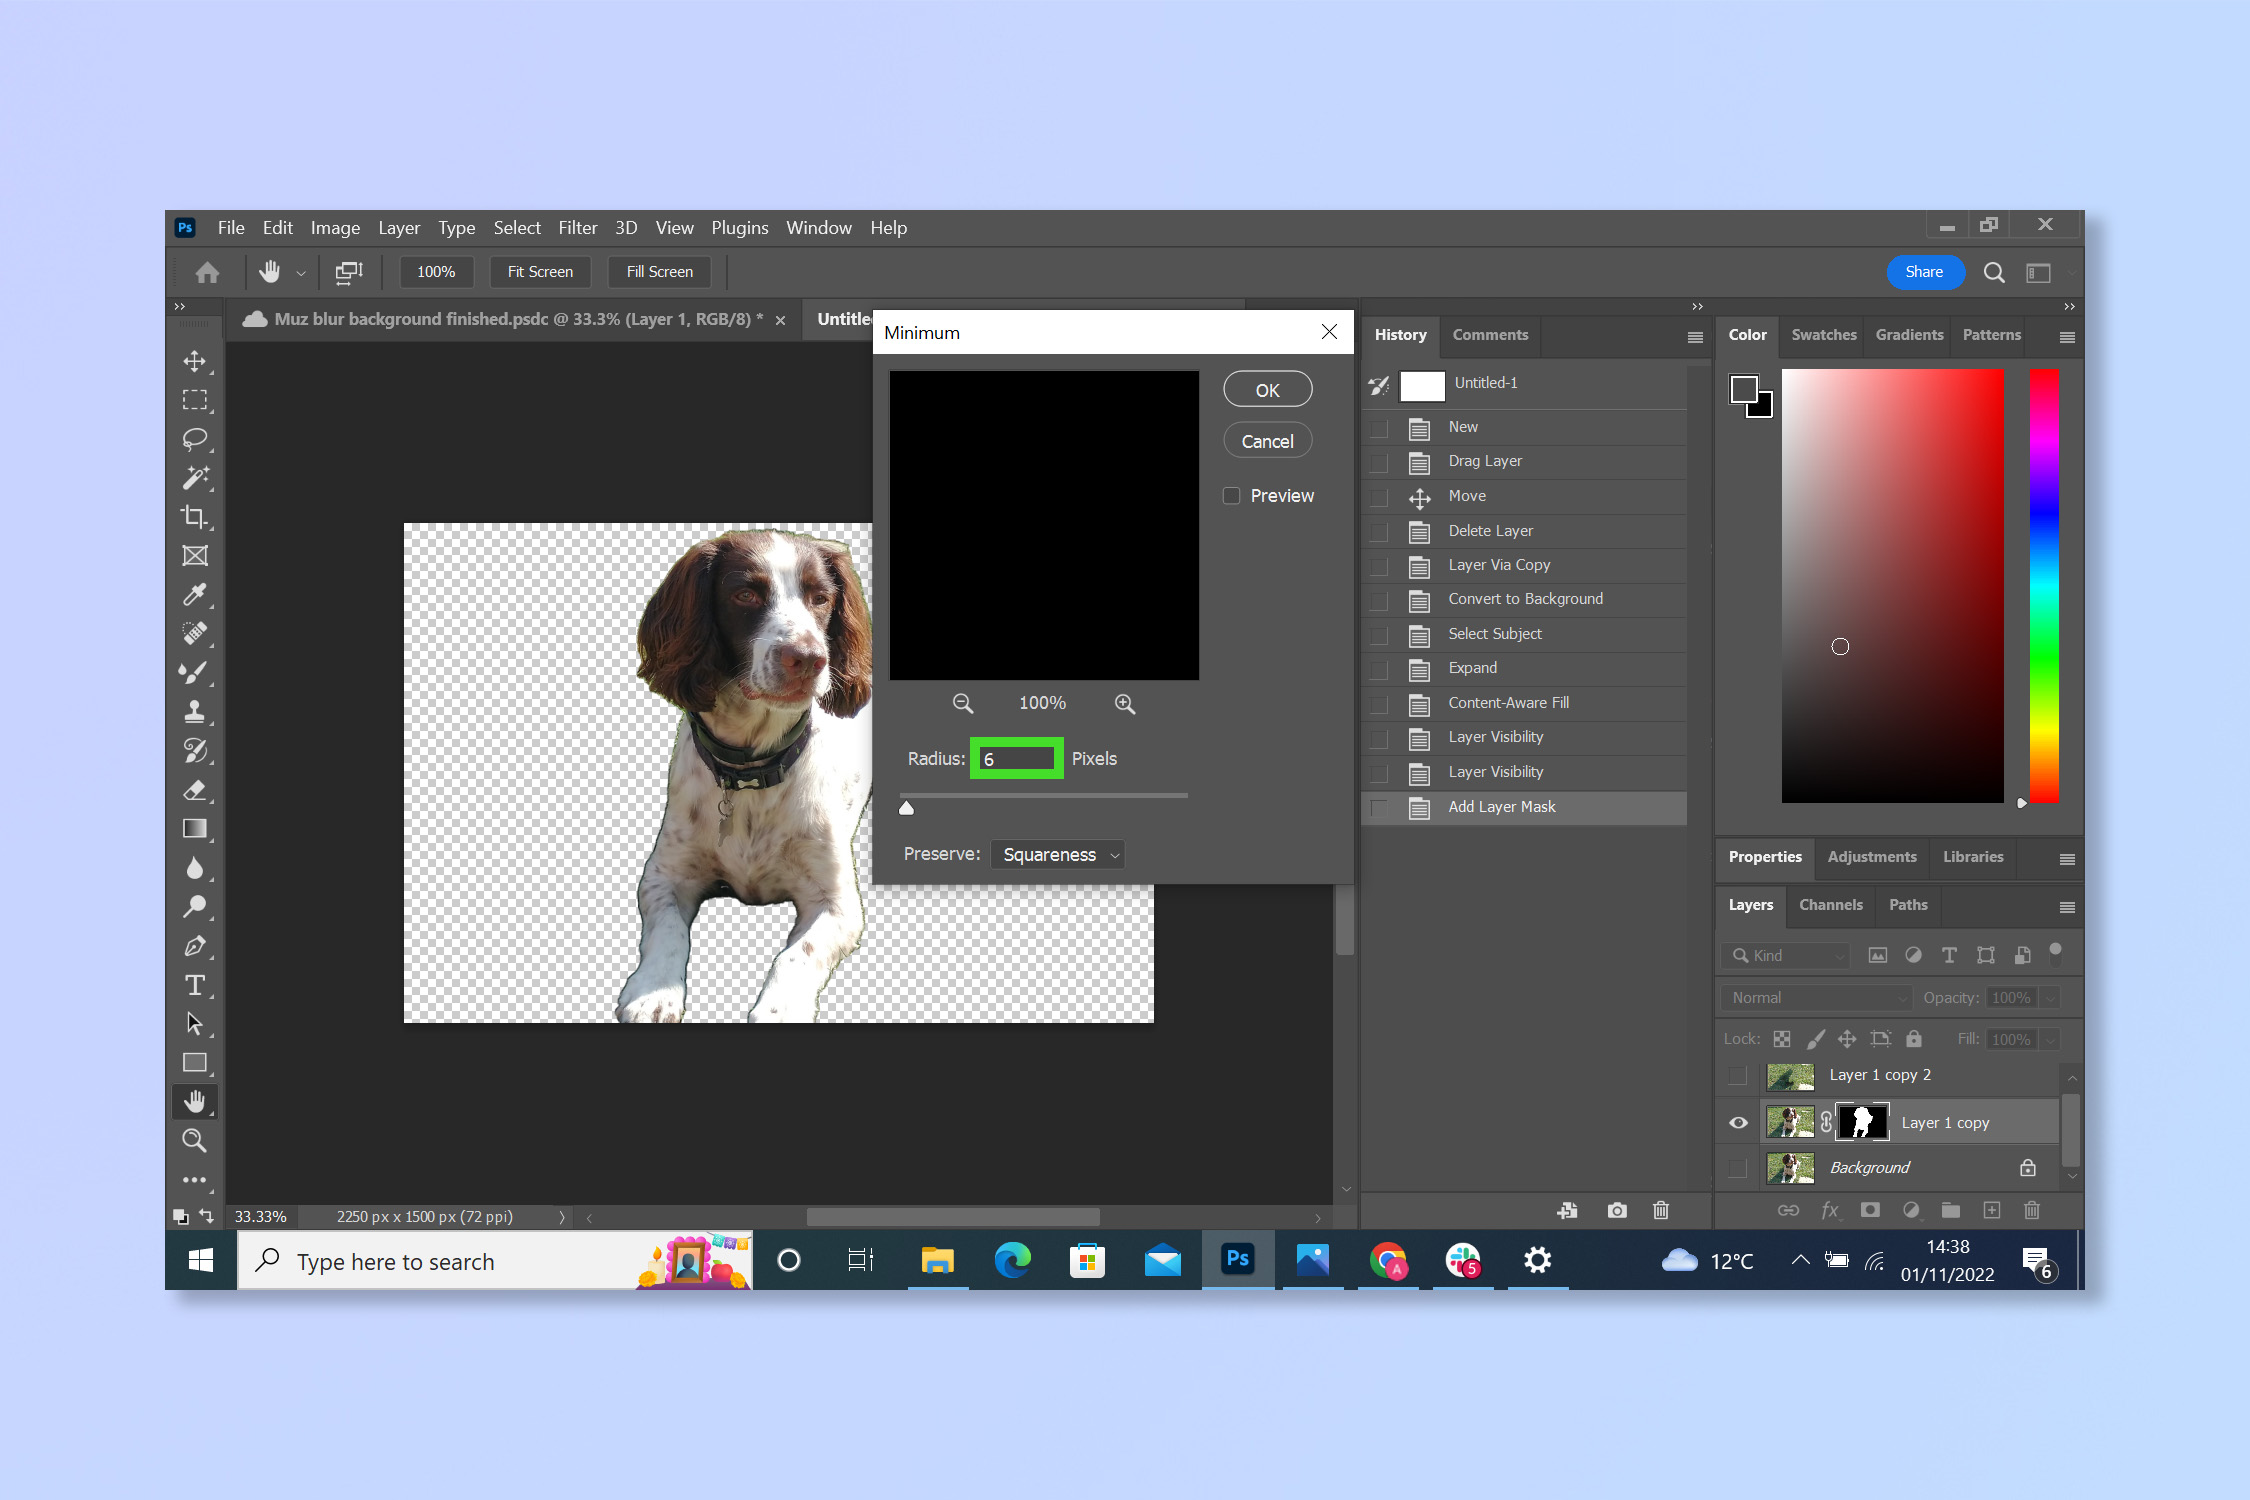
6. With the Layer Mask selected, choose Filter -> Other -> Minimum and contract the mask by one pixel more than you expanded by.
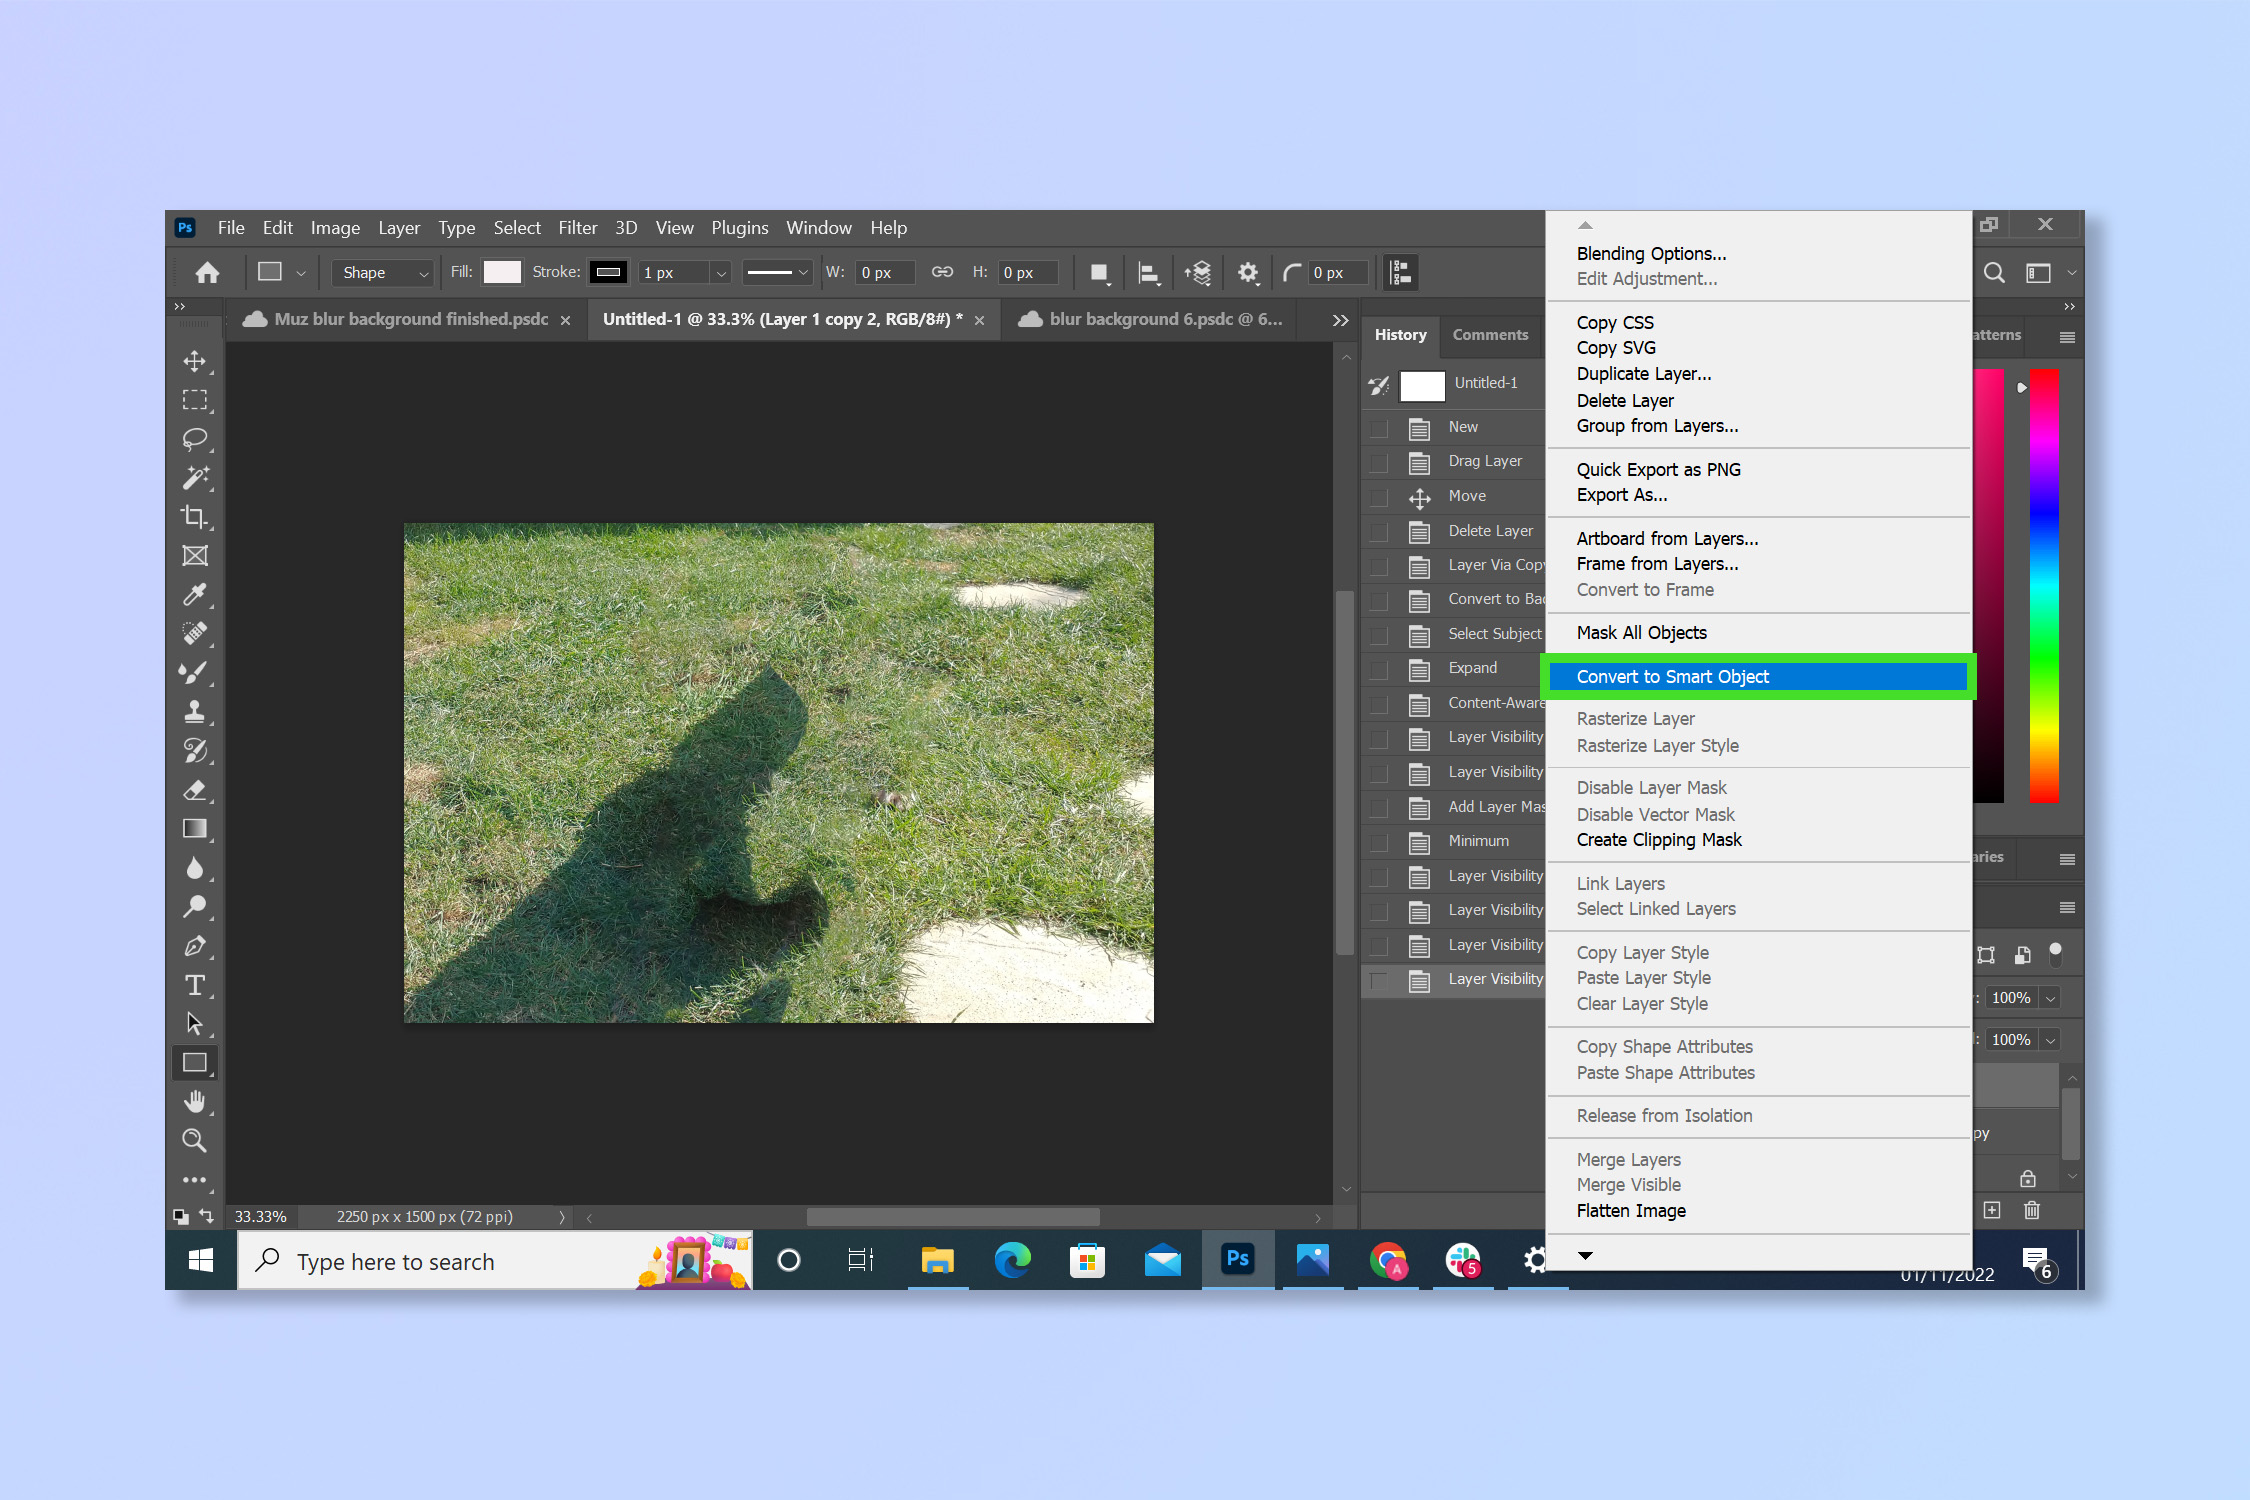
7. Convert the copy of your background layer into a smart object. Enable the subject layer.
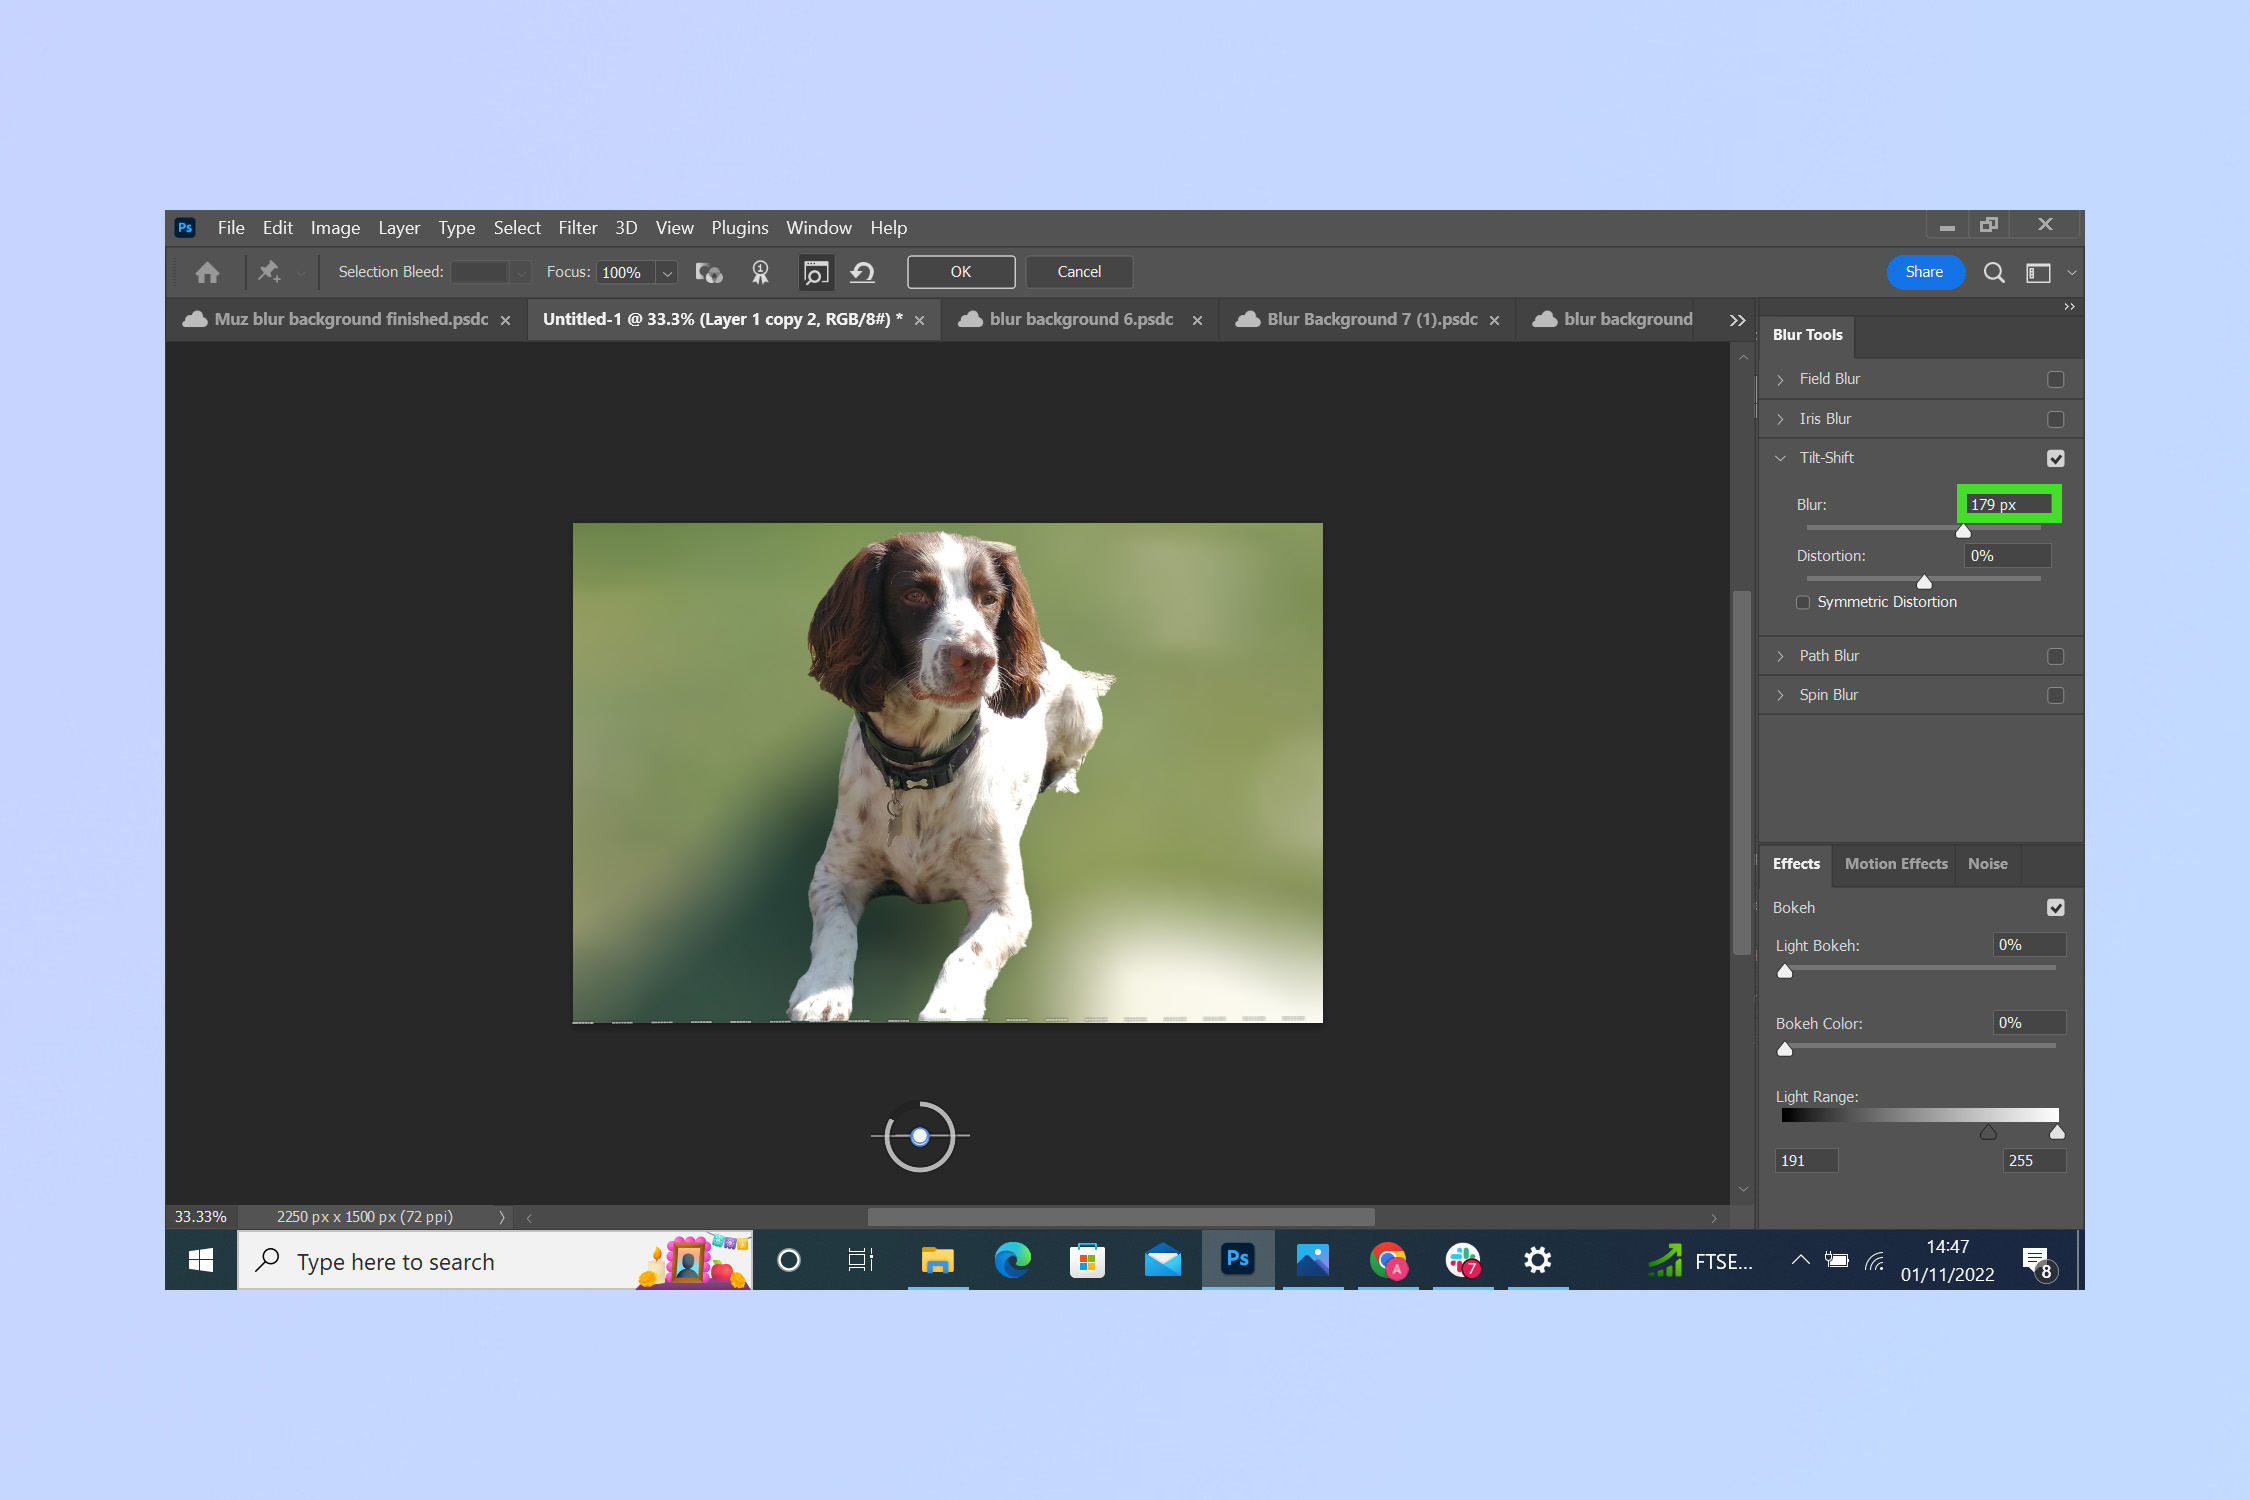
8. Select Filter -> Blur Gallery-> Tilt shift.
9. Adjust the blur’s thickness and position as you see fit.
1. First create a duplicate of your background layer. Simply select the layer and press CTRL J (or CMD J on Mac).
2. On the Properties menu of the newly created copy, scroll down and click Select a Subject.
3. To avoid cutting off the edges of your image, click on Select, then modify and then expand. Expand your image by five pixels or so and click OK.
4. On the Edit tab, select Content-Aware Fill. The subject of your image should now be bordered by a dotted line.
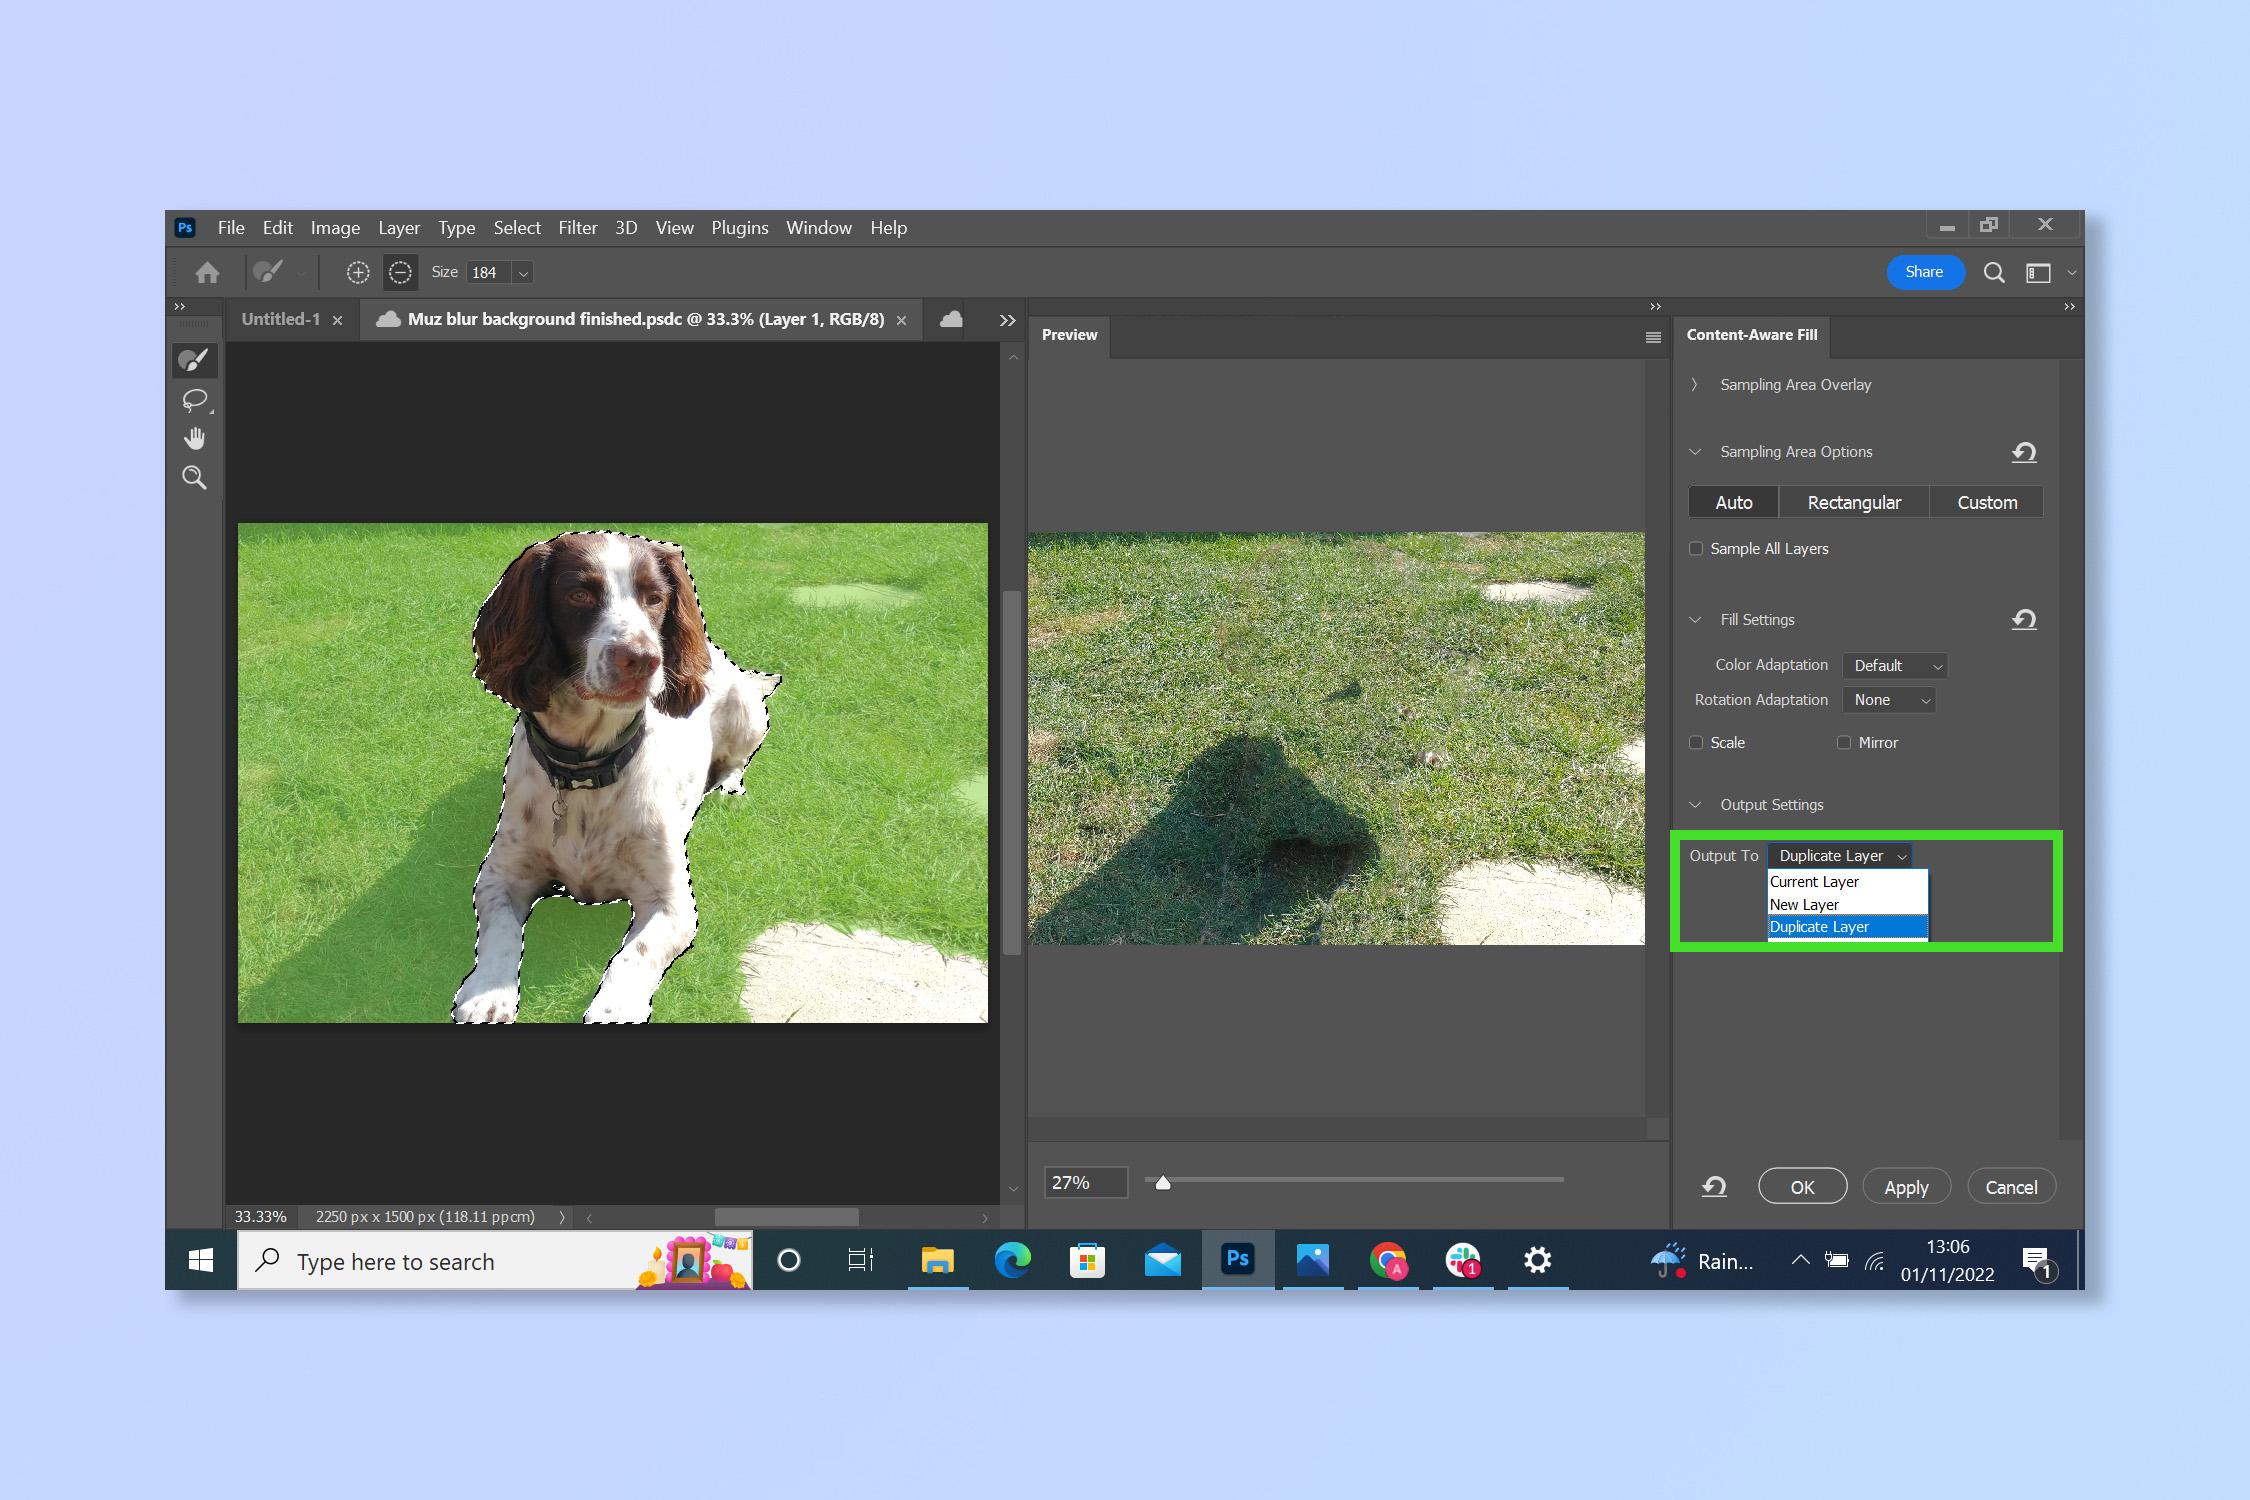
5. Make sure that the Output Settings are set to output to a Duplicate Layer, then click OK.
Sign up to get the BEST of Tom's Guide direct to your inbox.
Get instant access to breaking news, the hottest reviews, great deals and helpful tips.
6. Disable the two background layers by selecting the eye icon next to each. On your subject layer, add a Layer Mask.
7. With the Layer Mask selected, click the Filter tab, then select Other and then Minimum and contract the mask by one pixel more than you expanded by. The edges of the image should now be clean.
8. Right-click the copy of the background layer and convert it into a Smart Object. Enable the Subject Layer by selecting the eye again.
9. Select the Filter tab, then Blur Gallery and then select Tilt-shift.

10. Adjust the blur’s thickness with the slider and adjust the position by dragging the lines on the image.
And you’re all done! It's not a complicated process, but it's a very useful one, right? If something still doesn't look right after blurring the background you could even delete it and insert a whole new one if you learn how to add a background in Photoshop. If you're planning on doing a lot of Photoshop editing, check out the best monitors available. For those who are more au fait with their iPhone, learn how to edit photos on iPhone
Andy is a freelance writer with a passion for streaming and VPNs. Based in the U.K., he originally cut his teeth at Tom's Guide as a Trainee Writer before moving to cover all things tech and streaming at T3. Outside of work, his passions are movies, football (soccer) and Formula 1. He is also something of an amateur screenwriter having studied creative writing at university.
