How to add widgets to your Mac in macOS Sonoma
Here's how to add Widgets to your desktop in macOS Sonoma
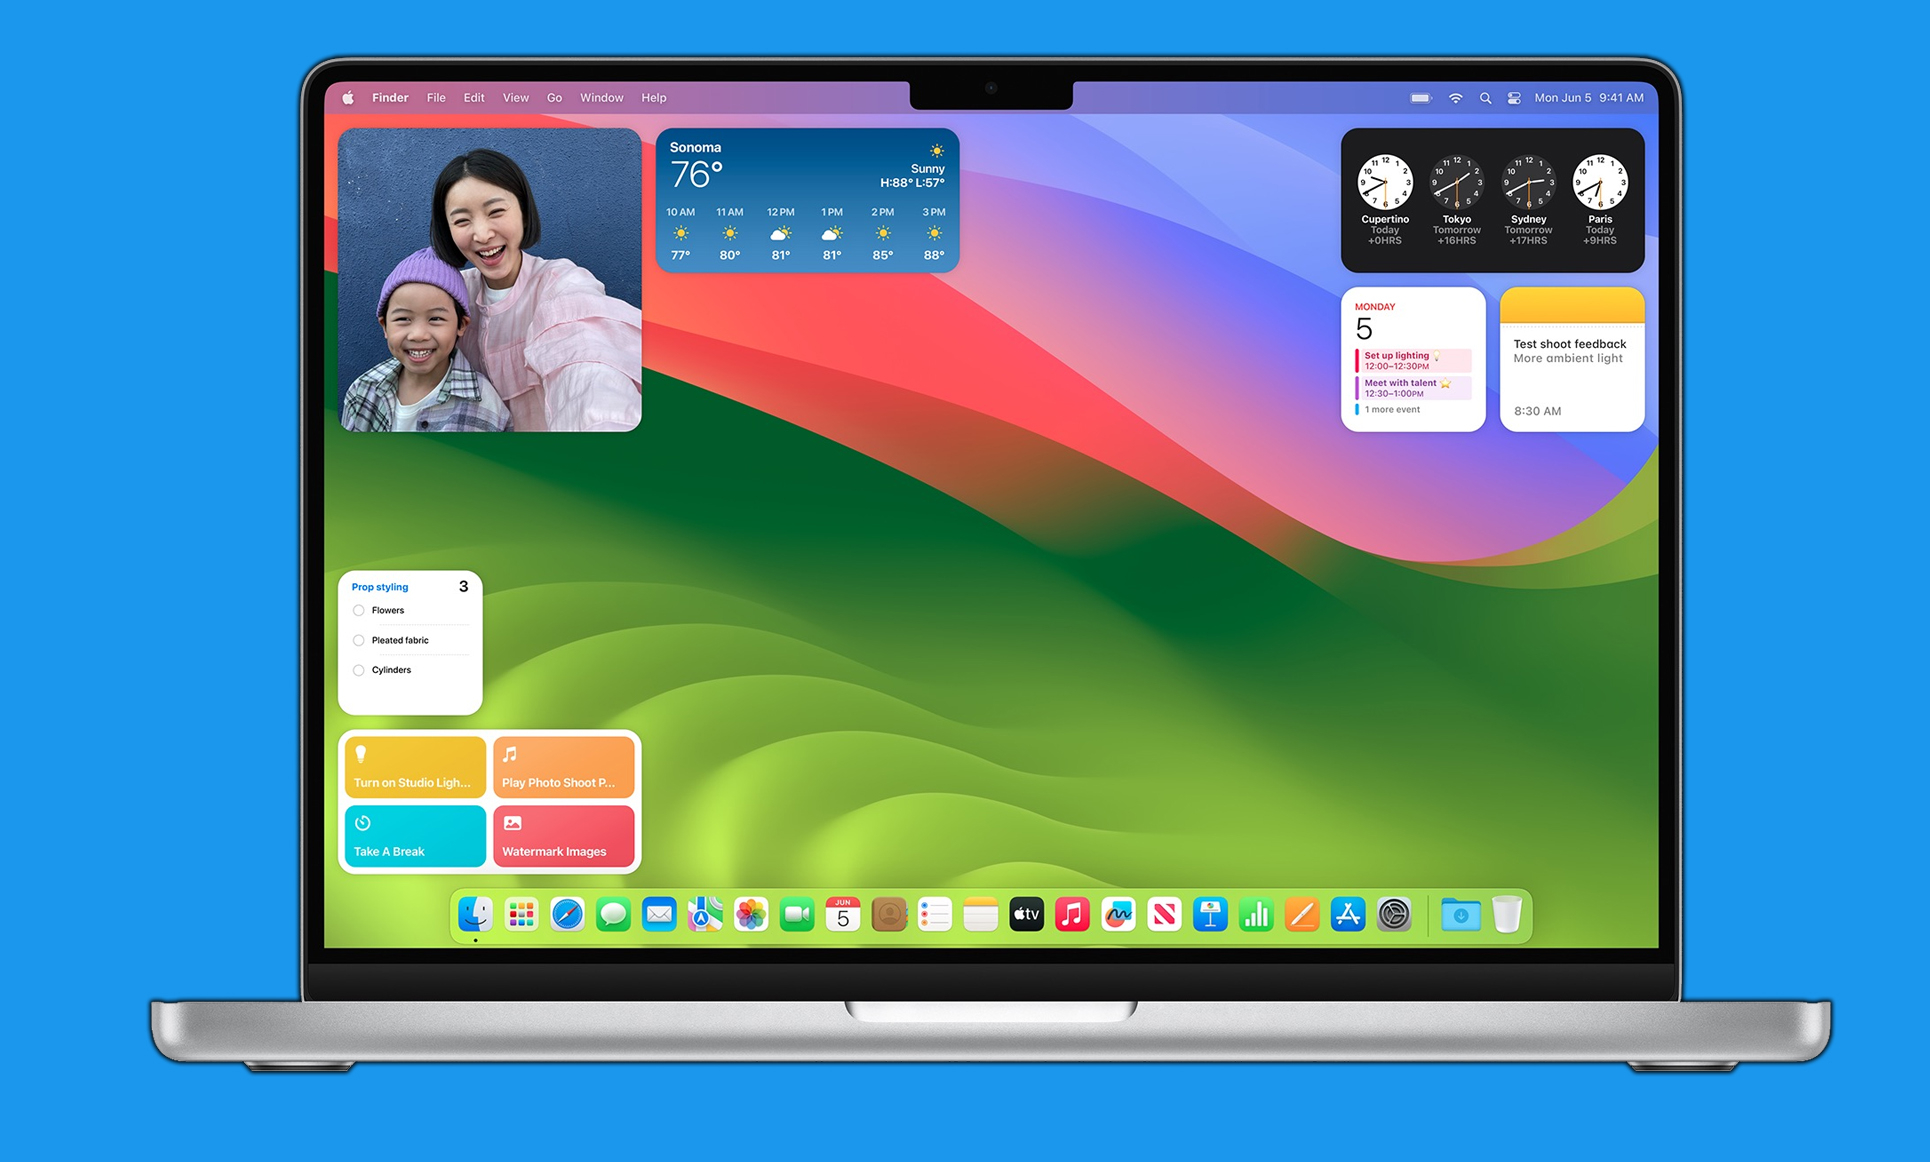
Mac users, rejoice: Apple's new macOS Sonoma update brings a slew of new features to supported Macs aimed at making your life a little easier.
Among this bumper crop of novelties are a loads of new Widgets you can add to your Mac's desktop to have easy access to things like a clock, a real-time weather indicator, a to-do list and more. It's basic stuff that you're likely used to if you've used an iPad or an iPhone, but the fact remains that these simple gizmos can often be big time-savers in the long run.
Sure, you could just keep your to-do list in a text document on your desktop and open it whenever you need to add a task or check something off, but having that list open on your desktop as an interactive widget you can click to check off tasks just feels better.
Below, I’ll walk you through how to access Widgets in macOS Sonoma and show you what you can do with this newfound power on the best MacBooks, the Mac mini, iMac and more.
How to add widgets in macOS Sonoma
- Open the Widgets menu
- Find a Widget you like
- Drag and drop it onto the desktop where you want it
- Profit
Read on to get detailed instructions for each step. Please note that you must have macOS Sonoma installed on your Mac to access these Widgets. If you don't, you can follow our guide to how to download the macOS Sonoma beta to get started.
1. Access the Widgets menu
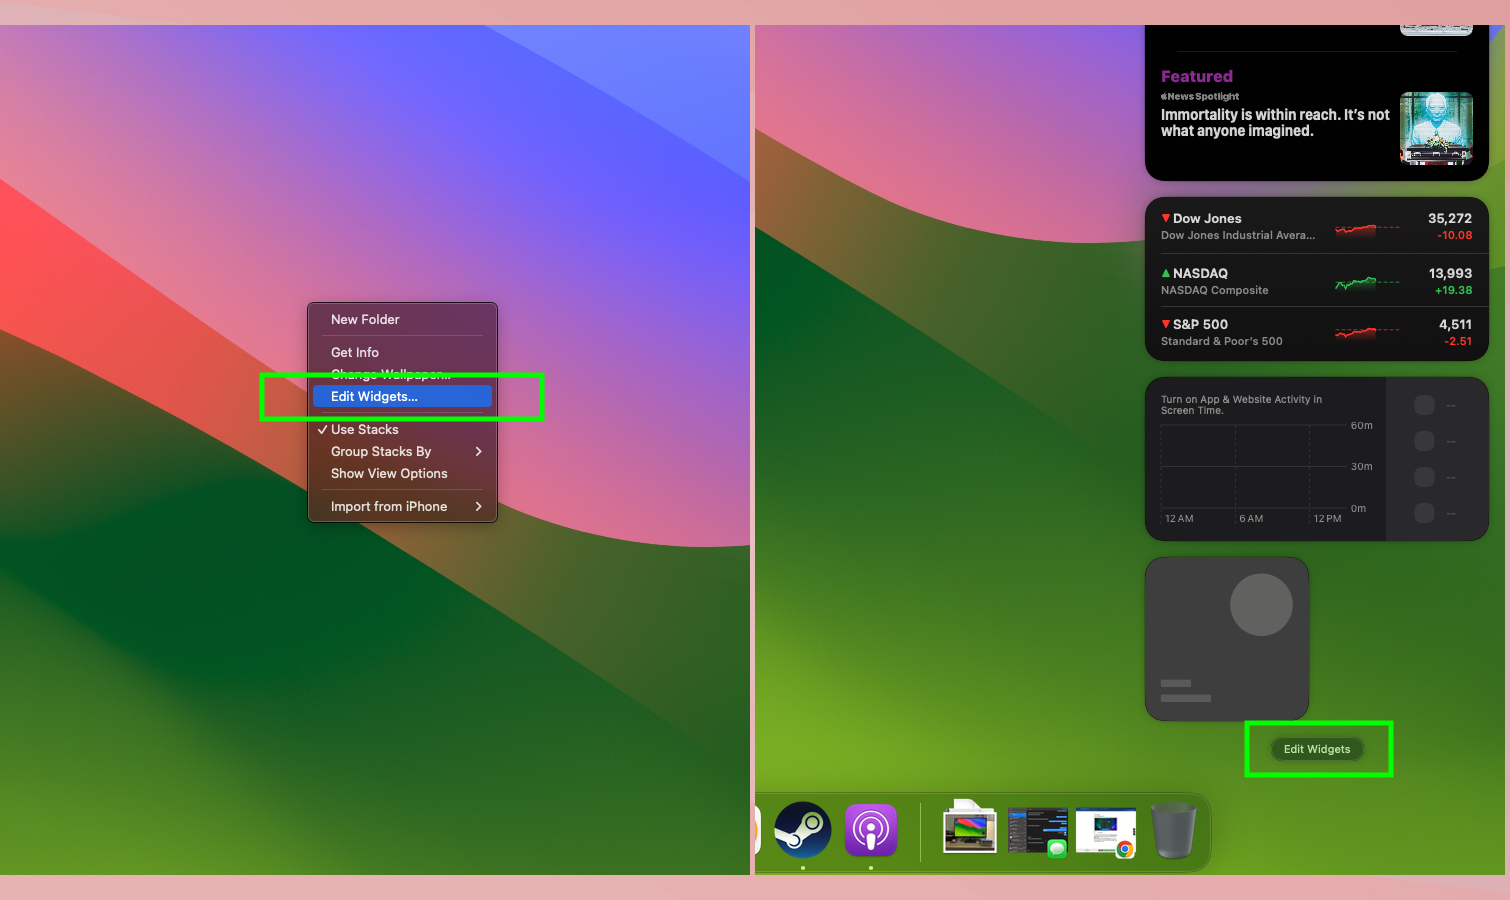
Accessing the macOS Sonoma Widgets menu is simple, and can be done in at least two ways. The first and easiest is to right-click anywhere on your Mac desktop to bring up the context menu, then click the "Edit Widgets" option.
Alternatively, you can click on the Notification Center in the top-right corner of your display to open the old macOS Widgets bin, which pops out from the right edge of the screen. You can then click "Edit Widgets" here to open the Widgets menu as well.
2. Find a Widget you like
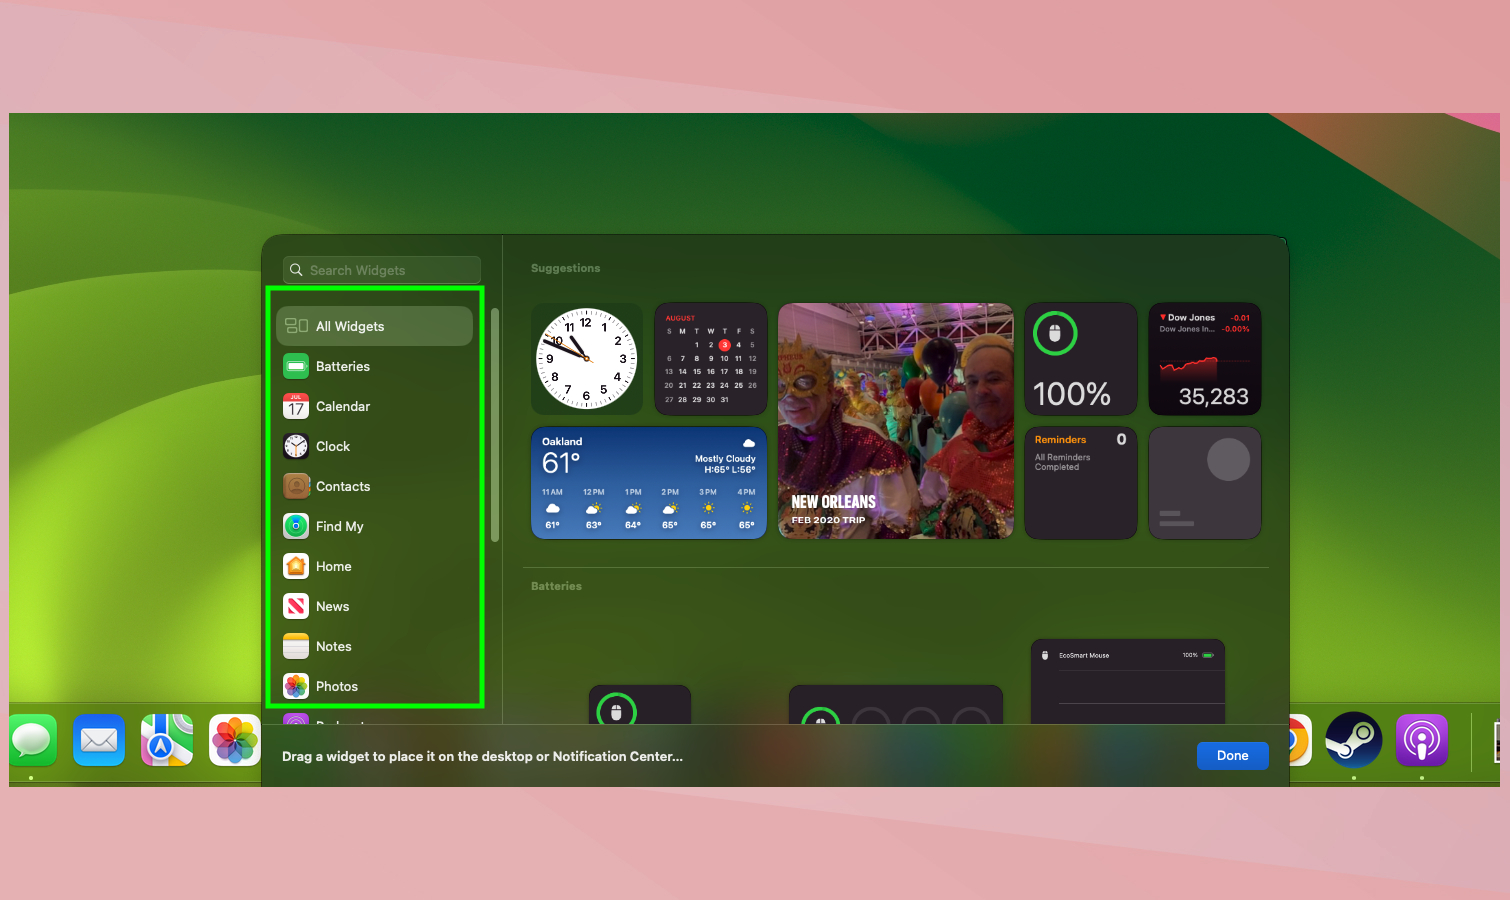
Welcome to the new macOS Sonoma Widgets menu, which should have popped up from the bottom of your screen. From here you can scroll through the list of available widgets and see the different ways in which each can be configured to appear on your desktop. To select one, simply find one you like and click on it.
3. Click and drag (or just click) to put it on your desktop
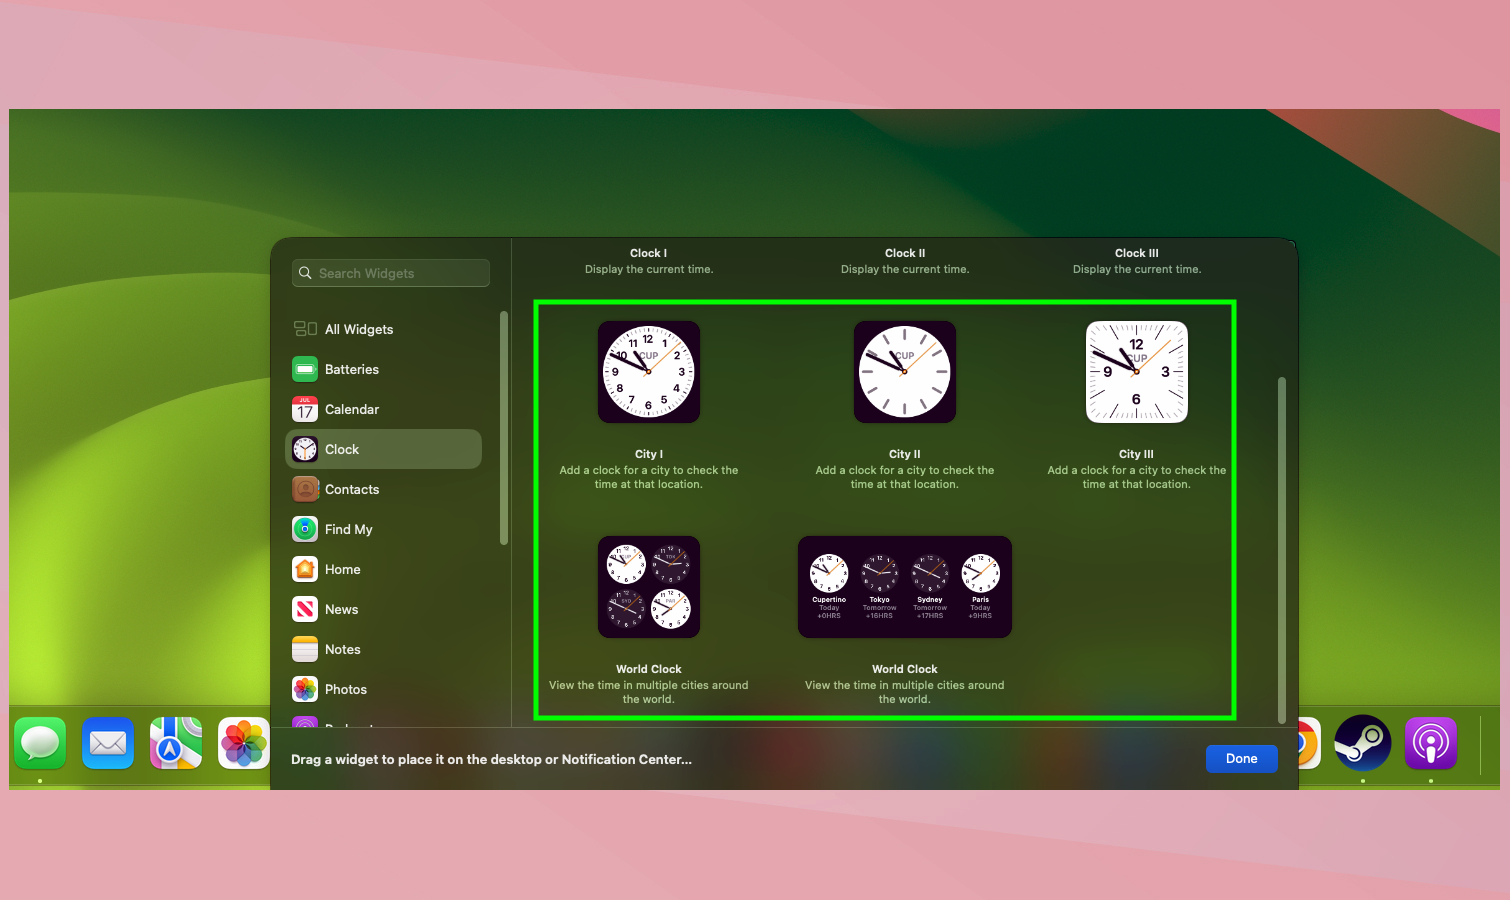
Click on a Widget you want to add in the lefthand menu and you'll see an array of options appear showing you how it could look on your desktop. Pick the look you like best and click it to add it your desktop, or drag it to put it exactly where you want it.
4. Profit
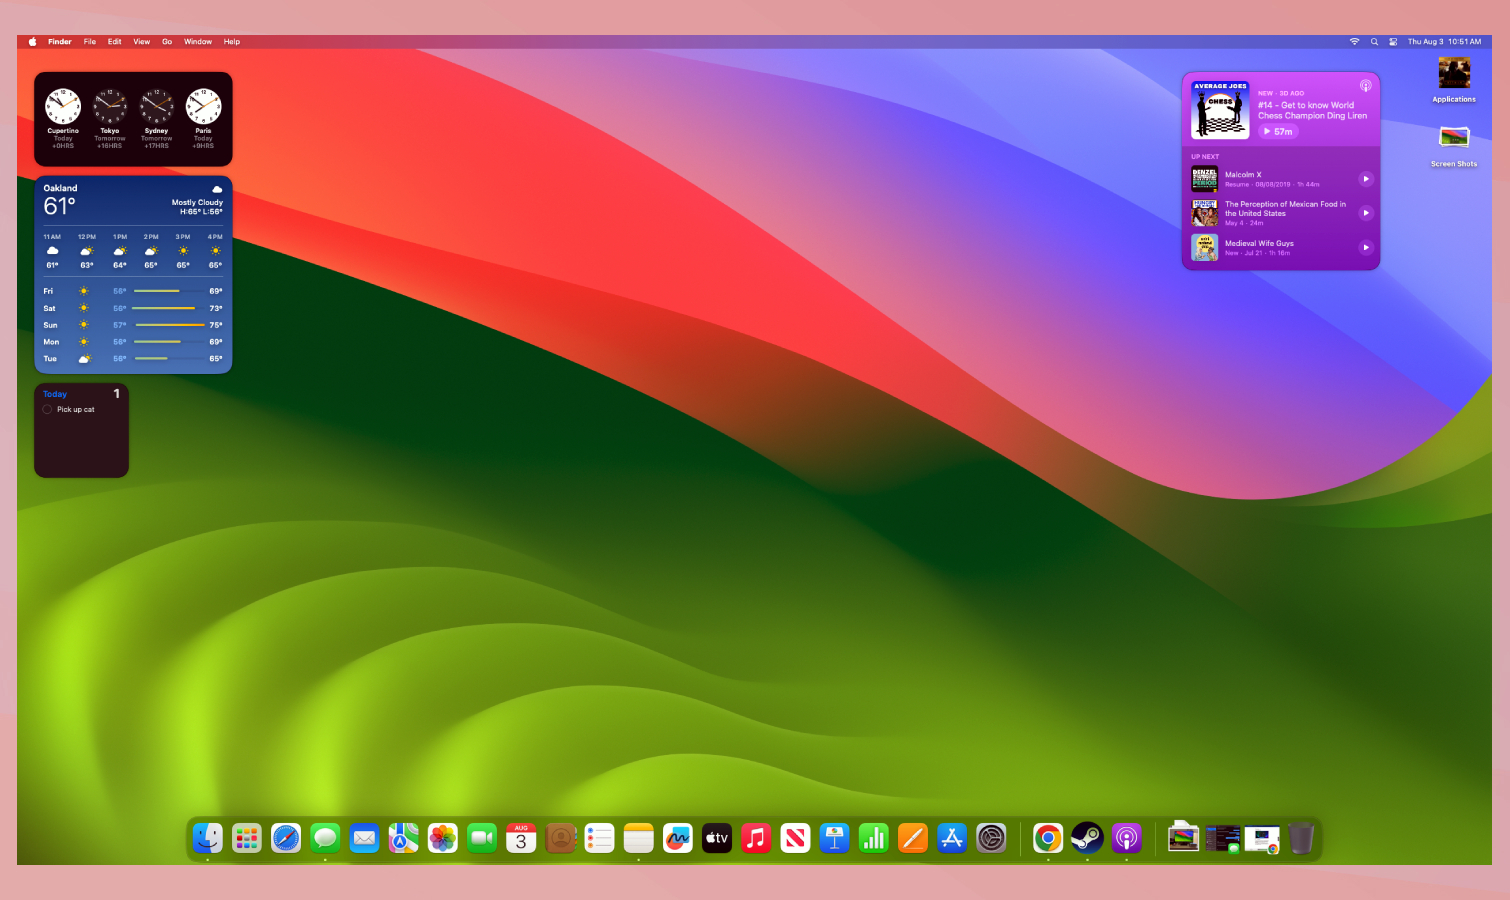
Congratulations, you've mastered the simple art of adding Widgets to your desktop! If you want to edit or remove Widgets on your desktop you can simply right-click them, or you can open the Widgets menu again to make all Widgets on your desktop deletable with one click.
You should start to reap the benefits right away, profiting from the potential increase in information at your fingertips. Never pull out your phone to peek at the weather or check an item off your to-do list again!
Want more tips on how to get more out of your Mac? We've got you covered. We can teach you lots of neat tricks even veteran Mac users might not know about, like how to select multiple files on Mac and how to rename multiple files on Mac — both of which come in real handy if you need to move large batches of files around quickly.
We also have guidse on how to show a file path on Mac and how to forget a Wi-Fi network on Mac, as well. And if your Mac is feeling a little sluggish these days, check out our guide to how to clear cache on Mac!
Sign up to get the BEST of Tom's Guide direct to your inbox.
Get instant access to breaking news, the hottest reviews, great deals and helpful tips.

Alex Wawro is a lifelong tech and games enthusiast with more than a decade of experience covering both for outlets like Game Developer, Black Hat, and PC World magazine. A lifelong PC builder, he currently serves as a senior editor at Tom's Guide covering all things computing, from laptops and desktops to keyboards and mice.
