How to add non-Steam games to Steam
Add non-Steam games to Steam with our step-by-step guide
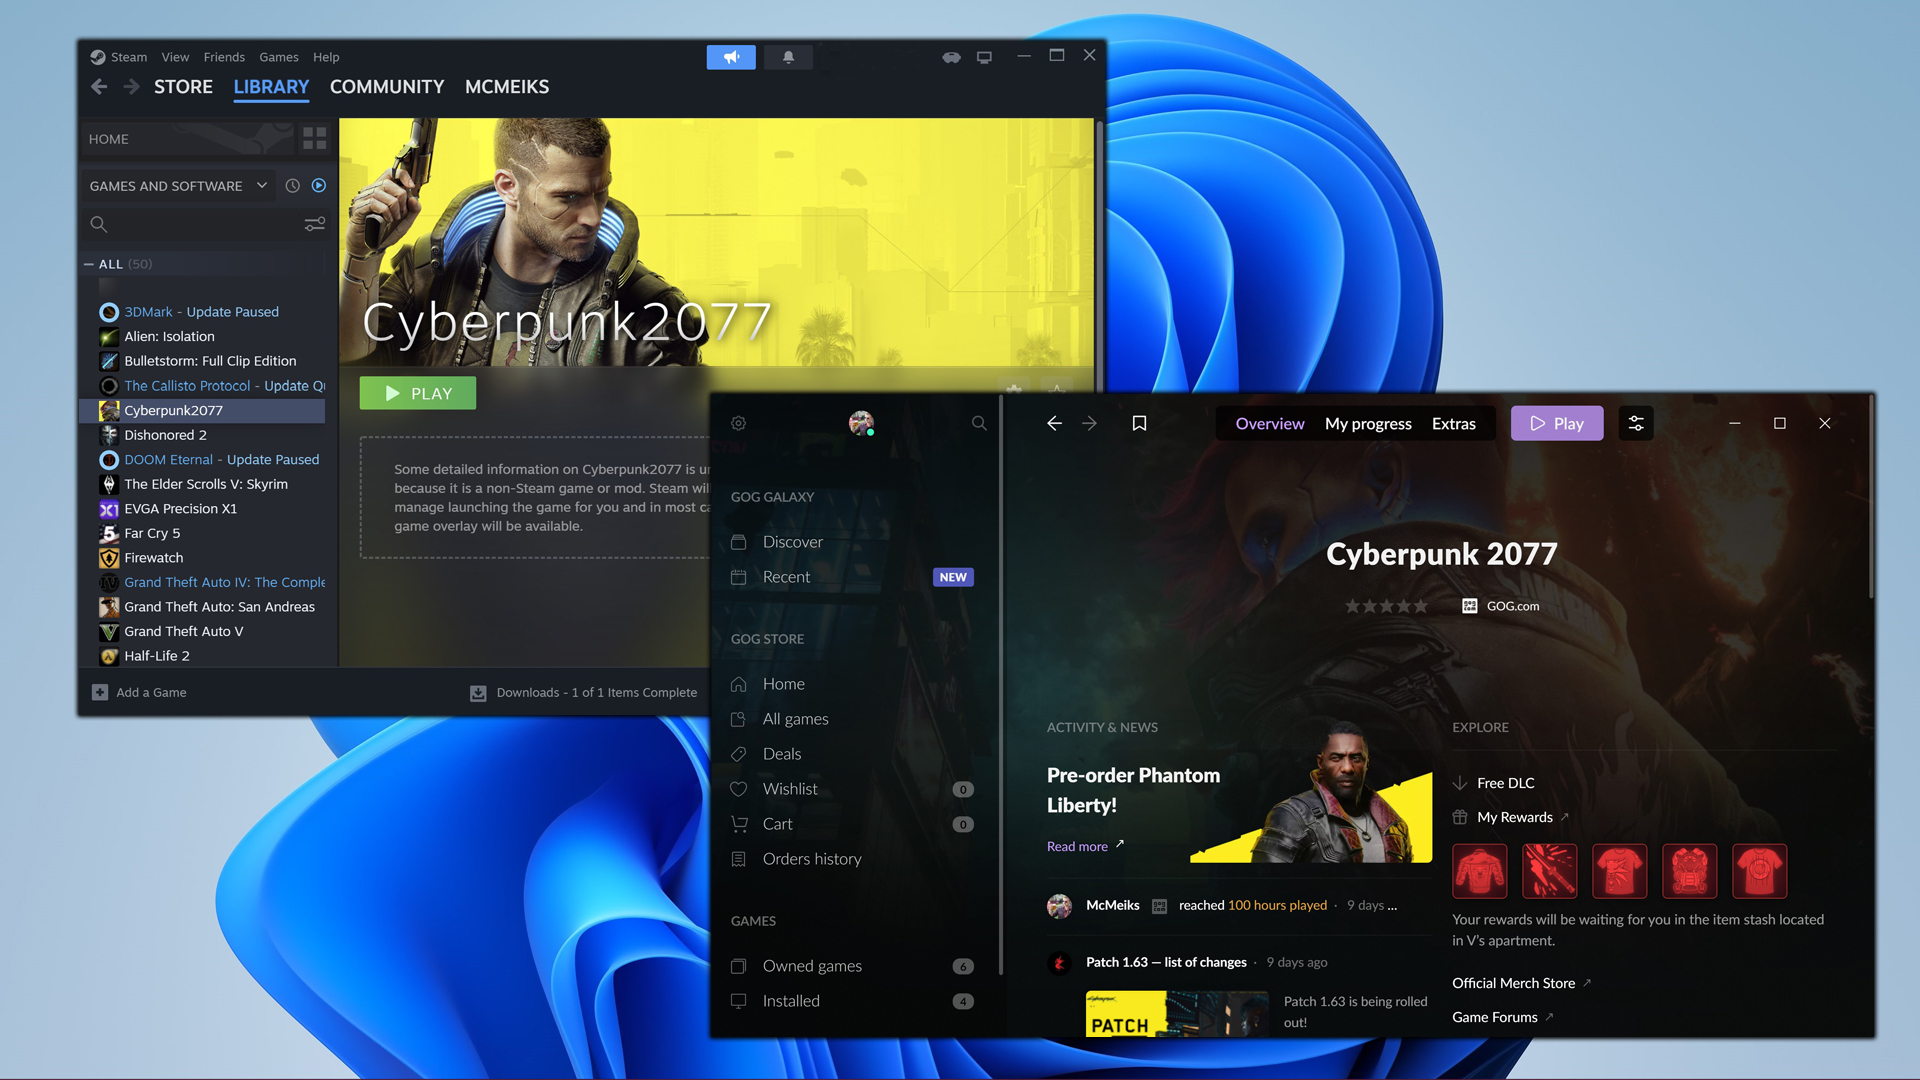
Want to add non-Steam games to Steam? Thankfully, it's a pain-free process that can be completed in seconds.
If you want to access the best PC games from other launchers and play them from your Steam library, we have an easy to follow guide for you.
Dedicated PC players normally have game libraries that stretch across a number of platforms. If you’re tired of going back and forth between launchers, be it GOG Galaxy, the Epic Games Store or Ubisoft Connect and want to access games from these apps through Steam, we’ve got you covered.
By following the steps below, you’ll quickly be able to add your favorite non-Steam games to Valve’s platform. After all, sometimes it’s just handy having all your favorite titles in the same place.
How to add non-Steam games to Steam
- Open Steam, then select the Games tab.
- Click ‘Add a Non-Steam game to my Steam Library’.
- Select Browse to find your non-Steam game.
- Find, select and open your game’s executable file.
- Select your game, then click ‘Add Select Programs’.
- Find your non-Steam game in your library, then play away!
Read on to see full illustrated instructions for each step.
1. Open Steam, then select the Games tab
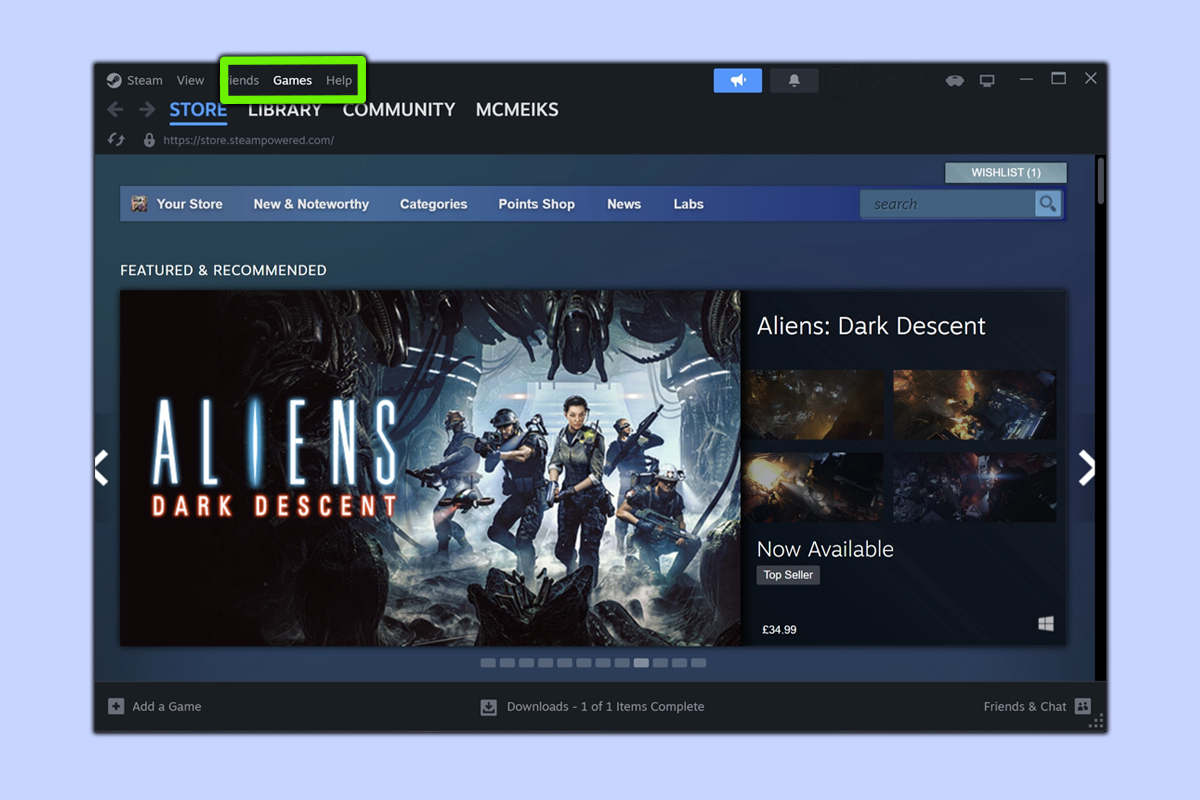
To start the process of adding a non-Steam game to Valve’s platform, open Steam, then select the Games tab that can usually be found just above your Library tab.
2. Click ‘Add a Non-Steam game to my Steam Library’
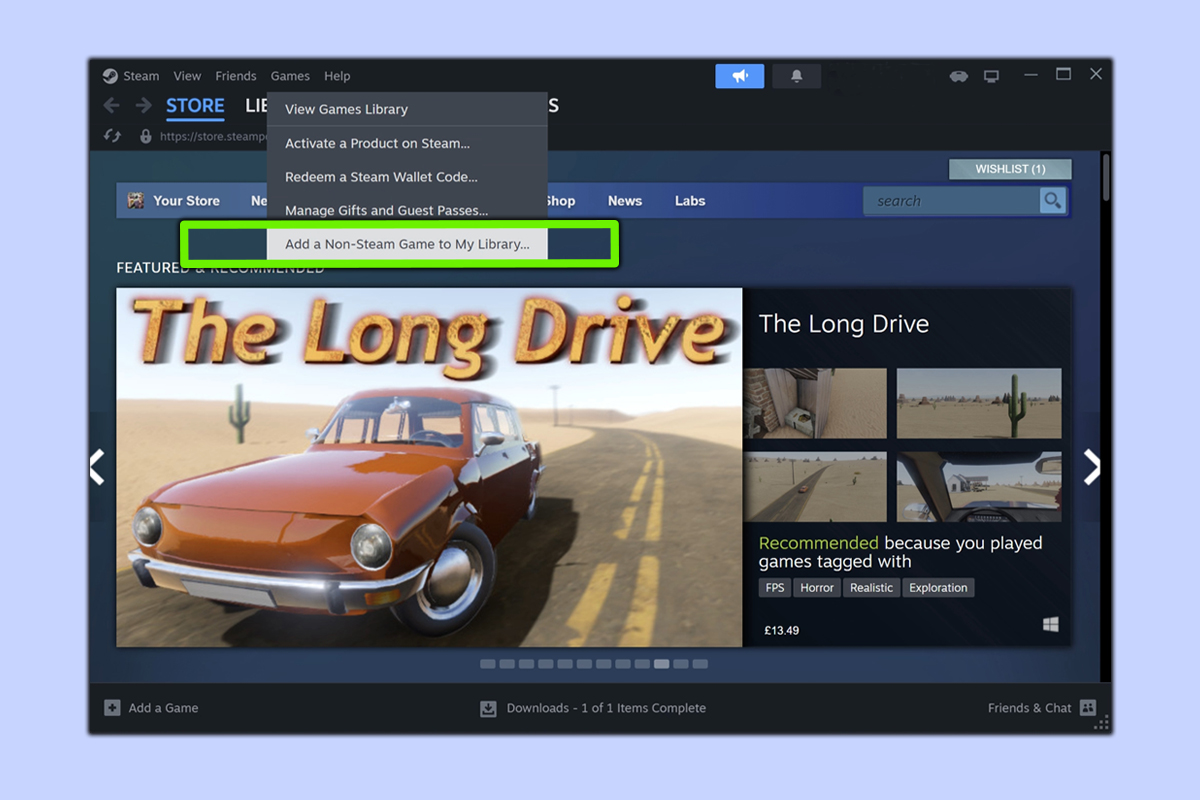
Select ‘Add a Non-Steam game to my Steam Library’ option and you’ll be taken to a menu that gives you a selection of programs to choose from.
3. Select Browse to find your non-Steam game
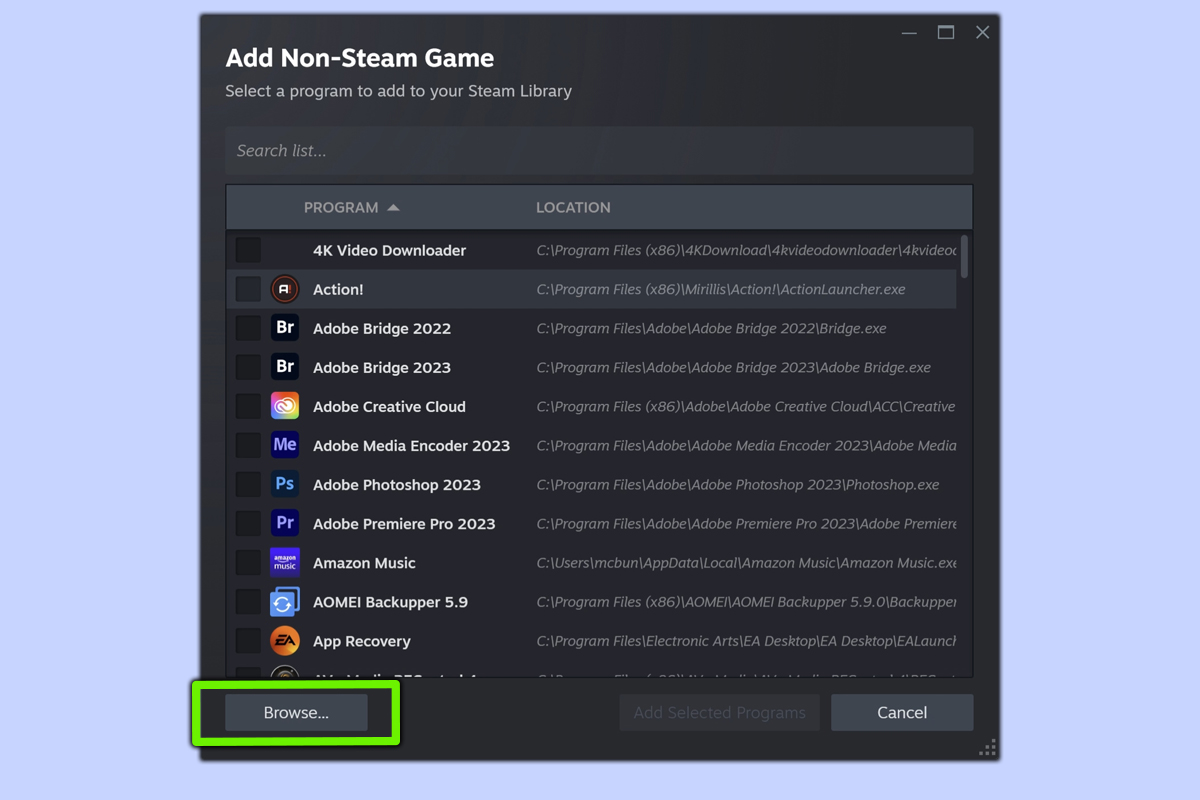
Once you get to the ‘Add Non-Steam Game’ menu, scroll down to the Browse button and click it.
4. Find, select and open your game’s executable file
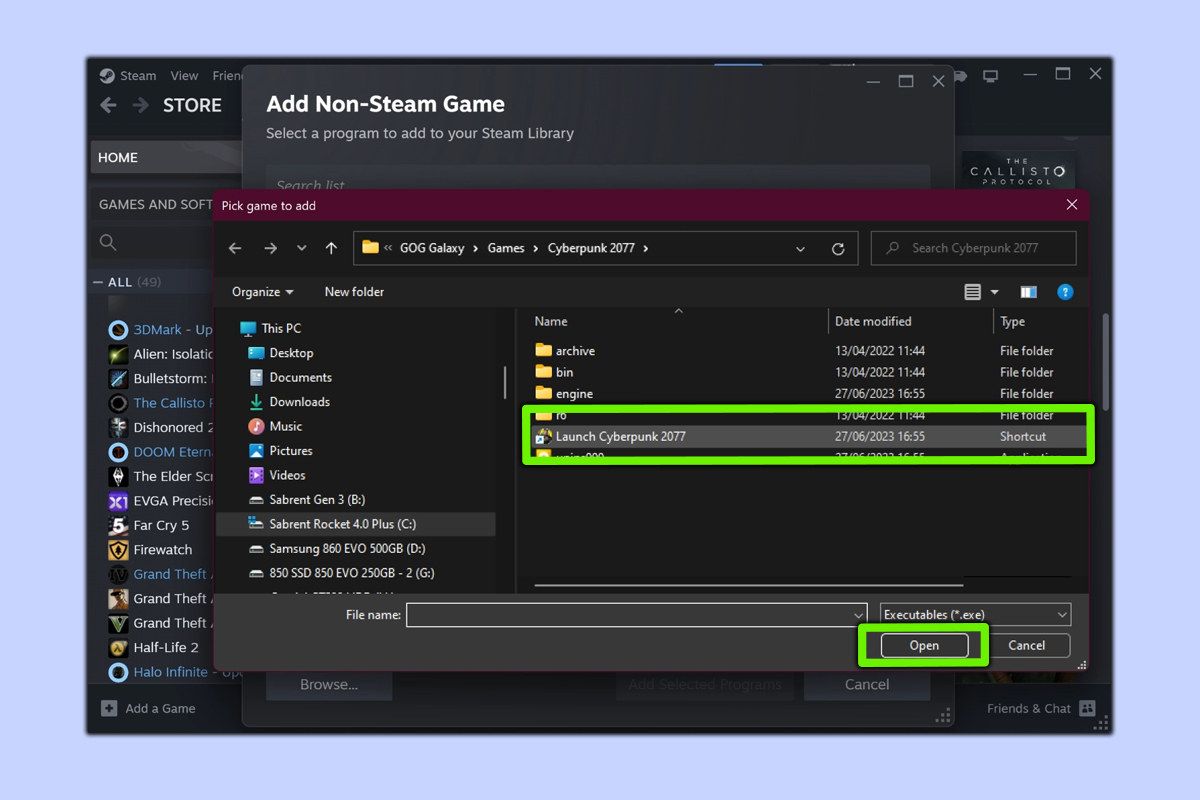
This is the trickiest step as we can’t precisely tell you where the game that you want to add to Steam is located; only you’ll know where you’ve installed the title you’re looking for. Once you do find your non-Steam game’s executable file, open it to proceed to the next step.
5. Select your game, then click ‘Add Select Programs’
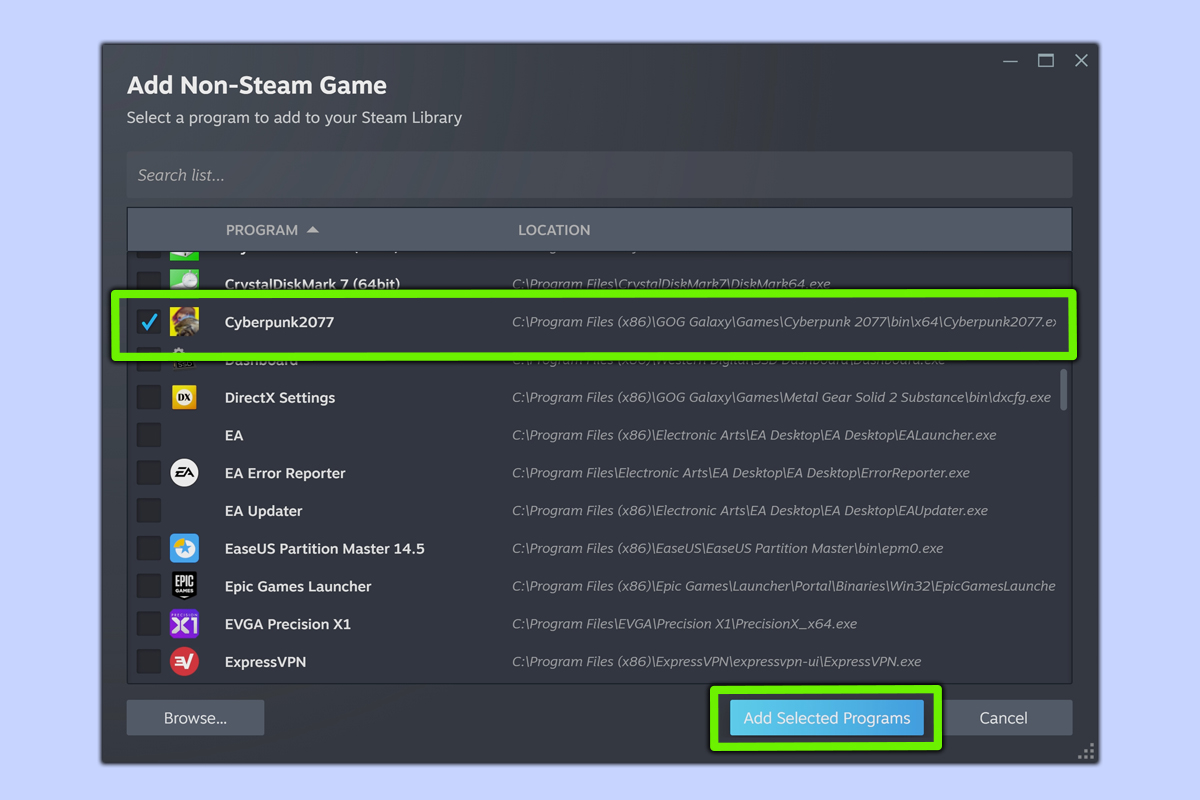
Once you’re back at the Add-Non Steam Game menu, ensure your game is selected in the Program list, then click ‘Add Selected Programs’.
6. Find your non-Steam game in your library, then play away!
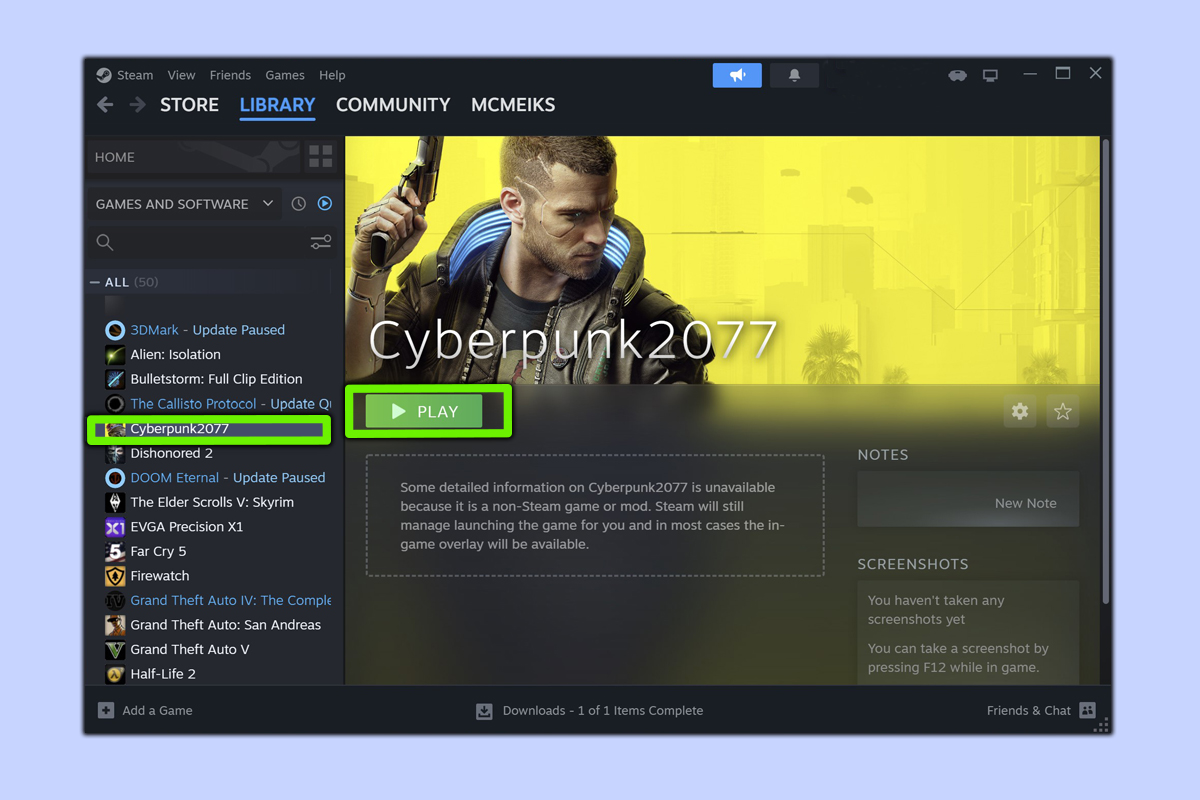
Navigate back to your Steam library and the non-Steam game you’ve just added will be in there, available to play as and when you want. Happy gaming!
By following the steps above, you can add as many non-Steam games to your Steam library as you want. Simple, right?
If you’re on the hunt for more PC-centric tutorials, check out how to get your Steam games on GOG. Annoyed by your taskbar refusing to budge? Read up on how to move the taskbar in Windows 11. And if you’re keen to take virtual snaps on your PC, don’t sleep on how to take screenshots in Windows 11.
Sign up to get the BEST of Tom's Guide direct to your inbox.
Get instant access to breaking news, the hottest reviews, great deals and helpful tips.
More from Tom's Guide

Dave is a computing editor at Tom’s Guide and covers everything from cutting edge laptops to ultrawide monitors. When he’s not worrying about dead pixels, Dave enjoys regularly rebuilding his PC for absolutely no reason at all. In a previous life, he worked as a video game journalist for 15 years, with bylines across GamesRadar+, PC Gamer and TechRadar. Despite owning a graphics card that costs roughly the same as your average used car, he still enjoys gaming on the go and is regularly glued to his Switch. Away from tech, most of Dave’s time is taken up by walking his husky, buying new TVs at an embarrassing rate and obsessing over his beloved Arsenal.
