How to add a background in Photoshop
Find out how to add a background in Photoshop in just a few steps
Knowing how to add a background in Photoshop is one of those skills that's required all the time when using the software. Perhaps you need to set a product photo against a clear white background, or maybe you want to frame a screenshot against a wider image to fit into specific sizing or image ratio requirements.
Whatever the reason, if you're a regular Photoshop user, you'll probably need to do this a lot. As a daily Photoshopper myself, I'd say it's probably my most-used basic skill and it's super easy to do for yourself. The issue is, however, that although Adobe Photoshop is one of the best photo editing software applications out there, even simple tasks like this one are often buried within its overwhelming mass of buttons and options. But don't worry, we're here to cut through all that and show you how it's done.
Here's how to add a background in Adobe Photoshop.
How to add a background in Photoshop
- Open Photoshop and load an image
- Convert the image to a layer (Layer > New Layer from Background)
- Resize the canvas to fit the background (Ctrl + Alt + C / Option + Cmd + C)
- Drag and drop an image as a background or create a new fill layer
- Resize your background to fit your canvas
- Move your image layer on top of your background layer
Read on to see detailed instructions for each step.
1. Open Adobe Photoshop, then click File, Open in the top toolbar and use your file explorer to select and load an image.
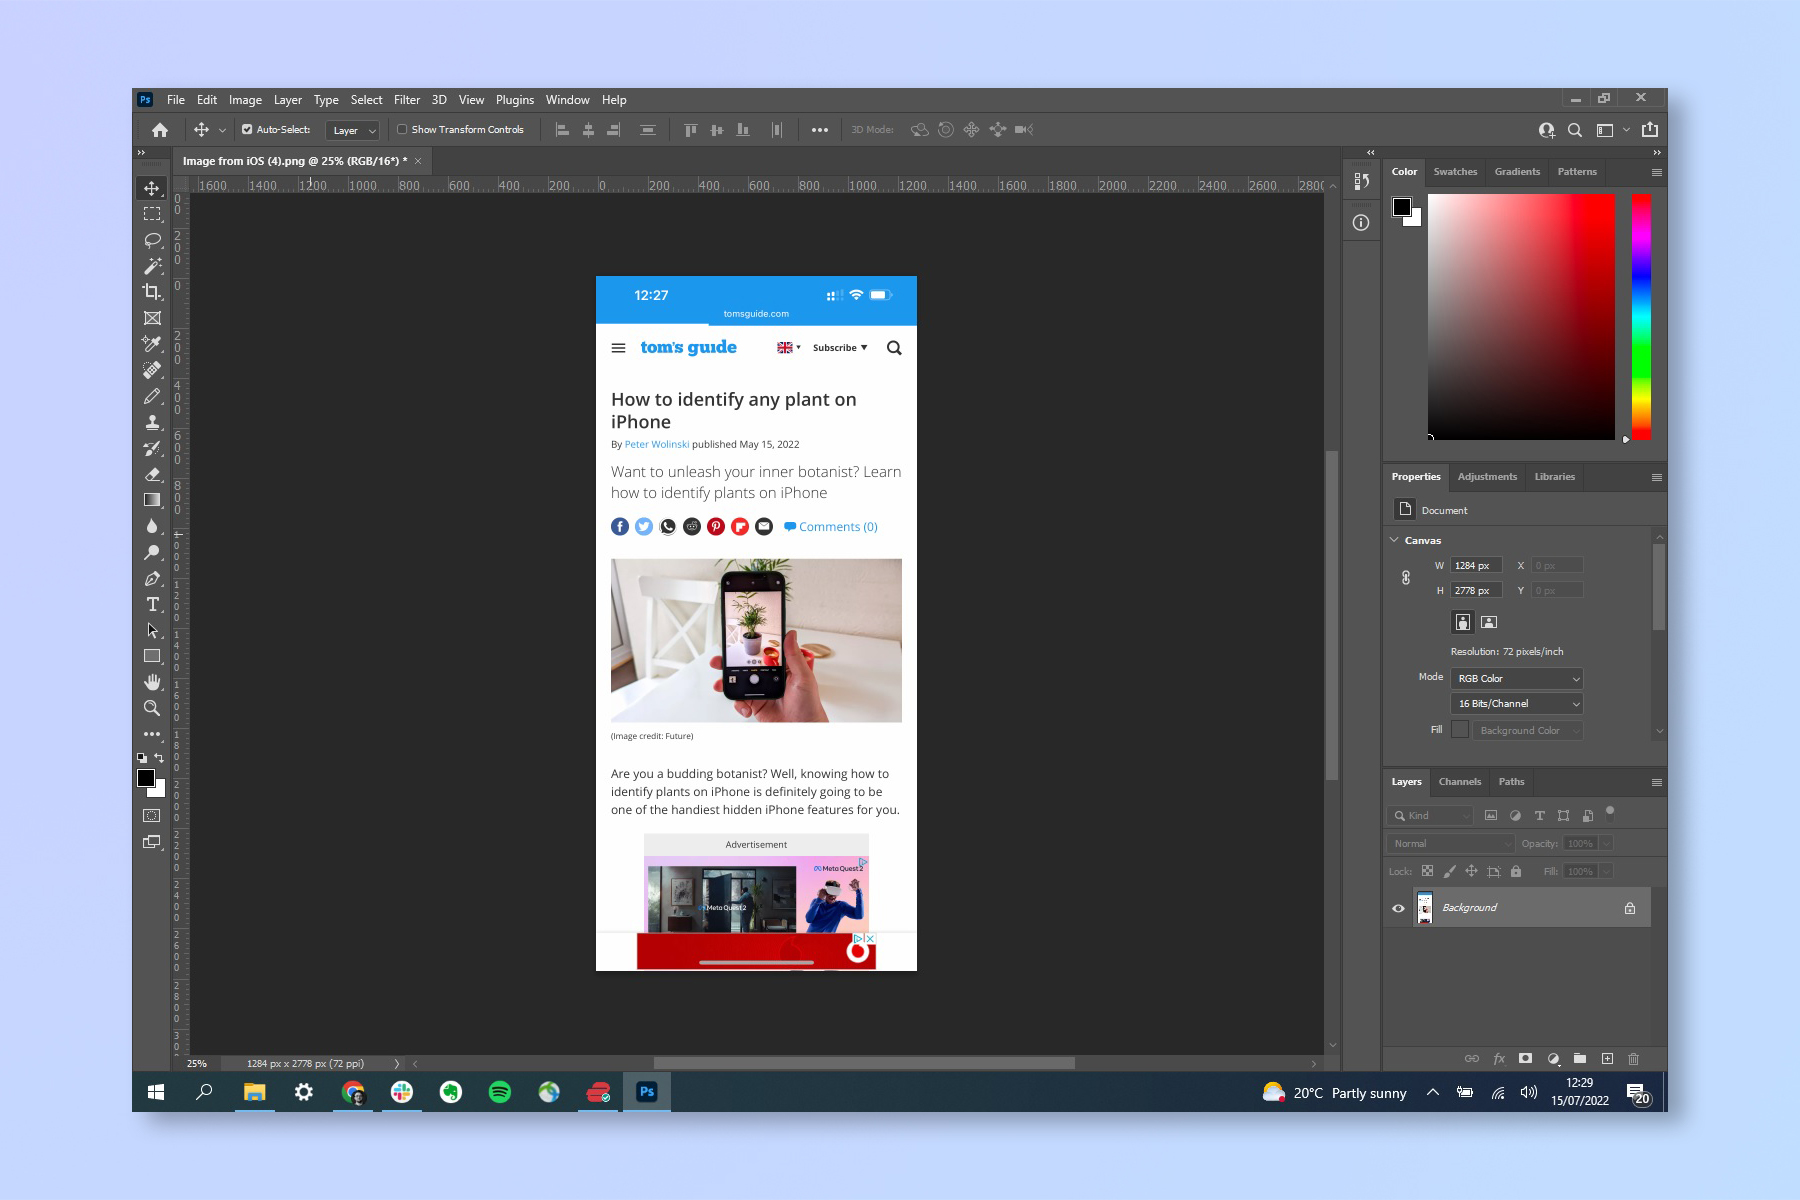
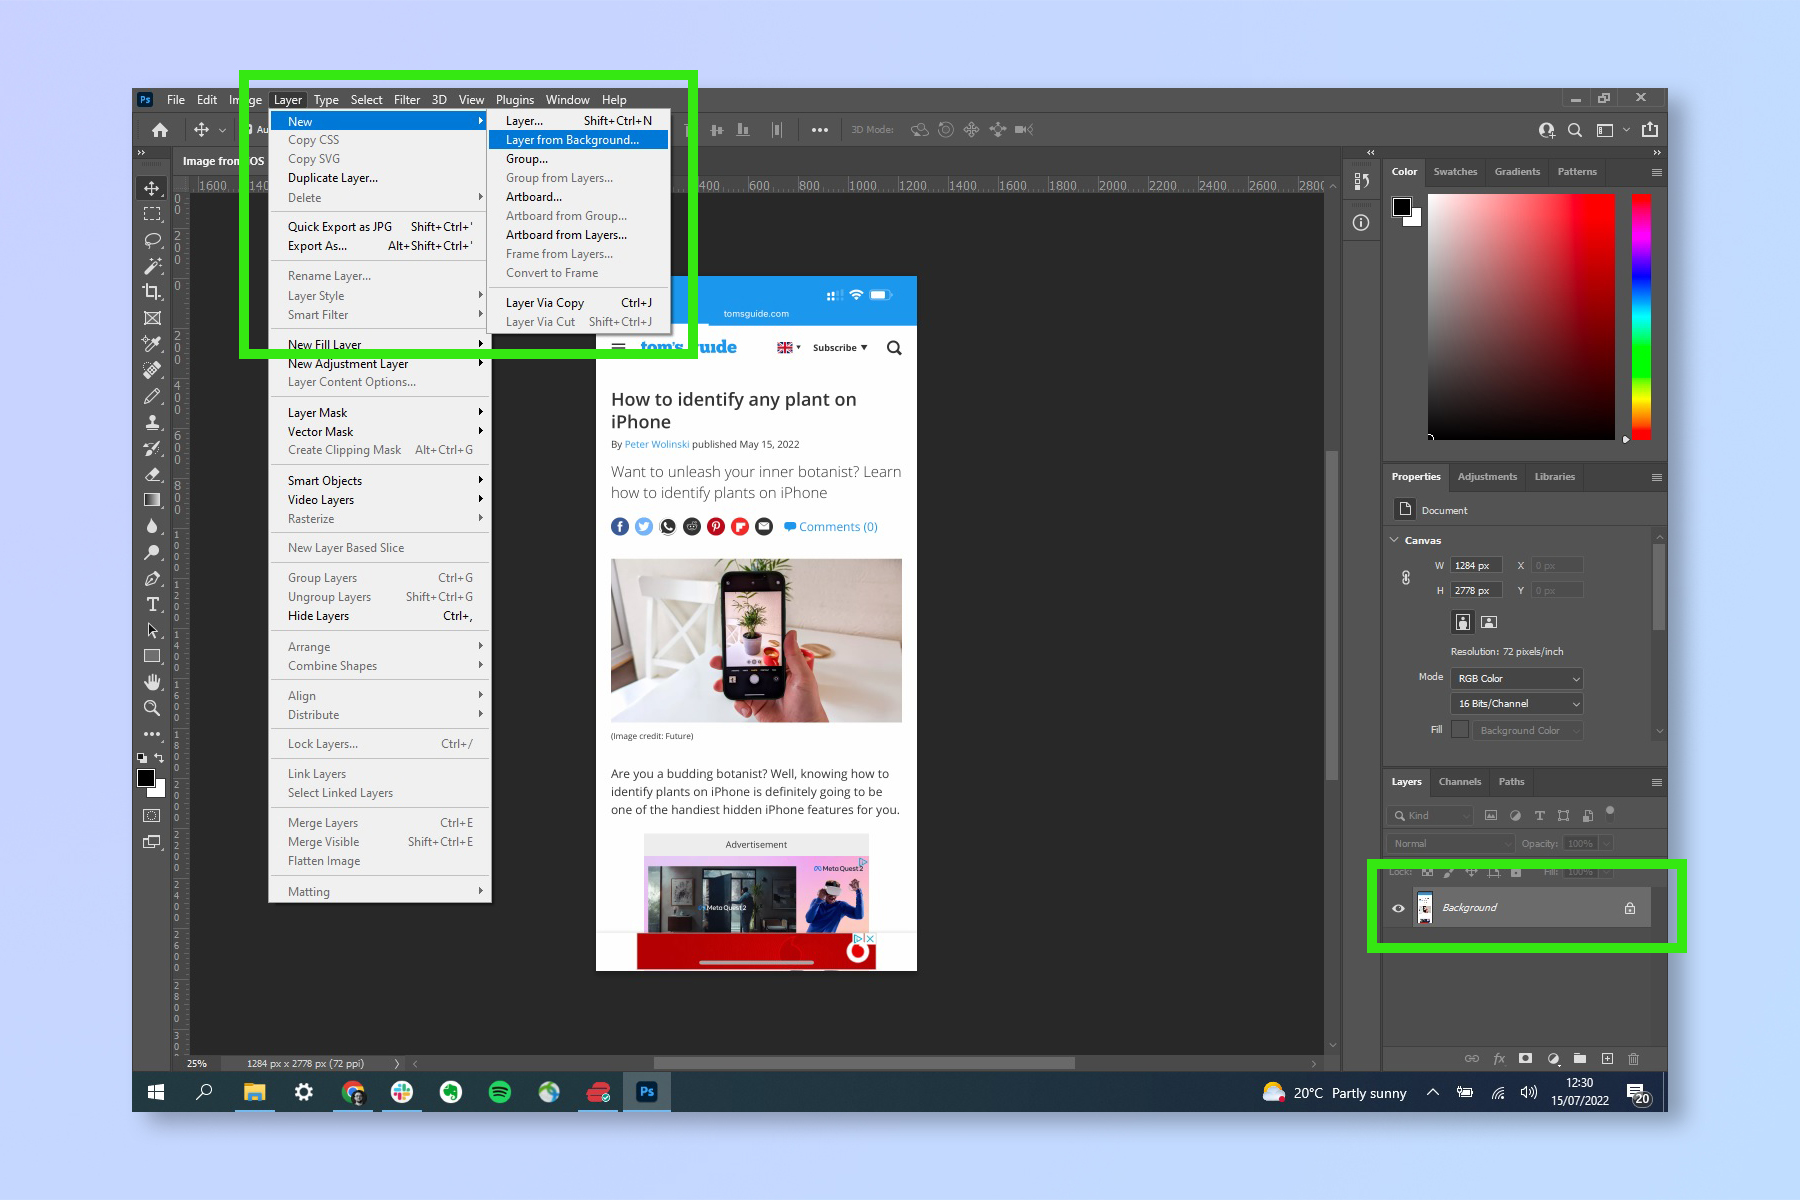
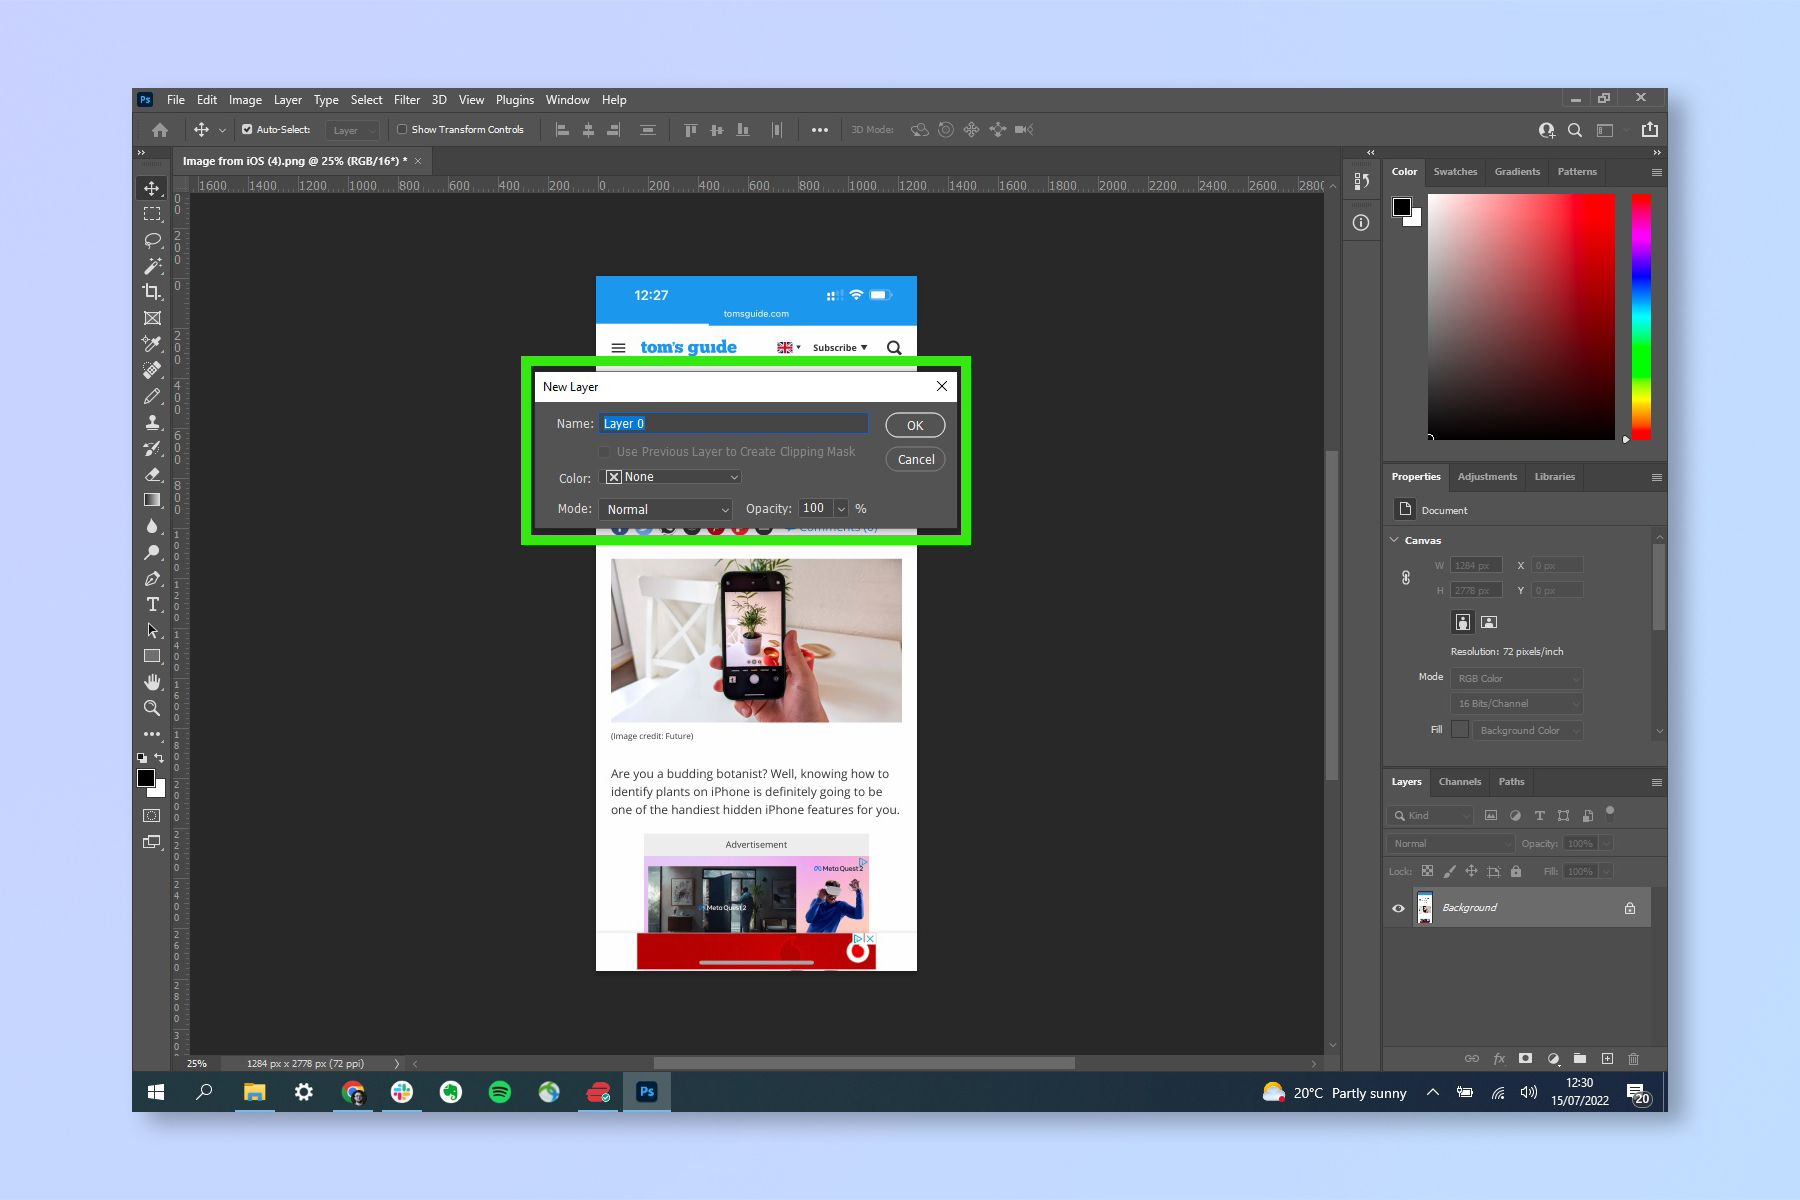
2. Check the layers box, which is bottom right by default. If your image loads as a layer, skip to step 3. If you see "Background" then we will need to convert the image to a layer. Click Layer in the top toolbar, select New, then click New layer from Background.
3. Rename your layer if you like, then hit OK.
Sign up to get the BEST of Tom's Guide direct to your inbox.
Get instant access to breaking news, the hottest reviews, great deals and helpful tips.
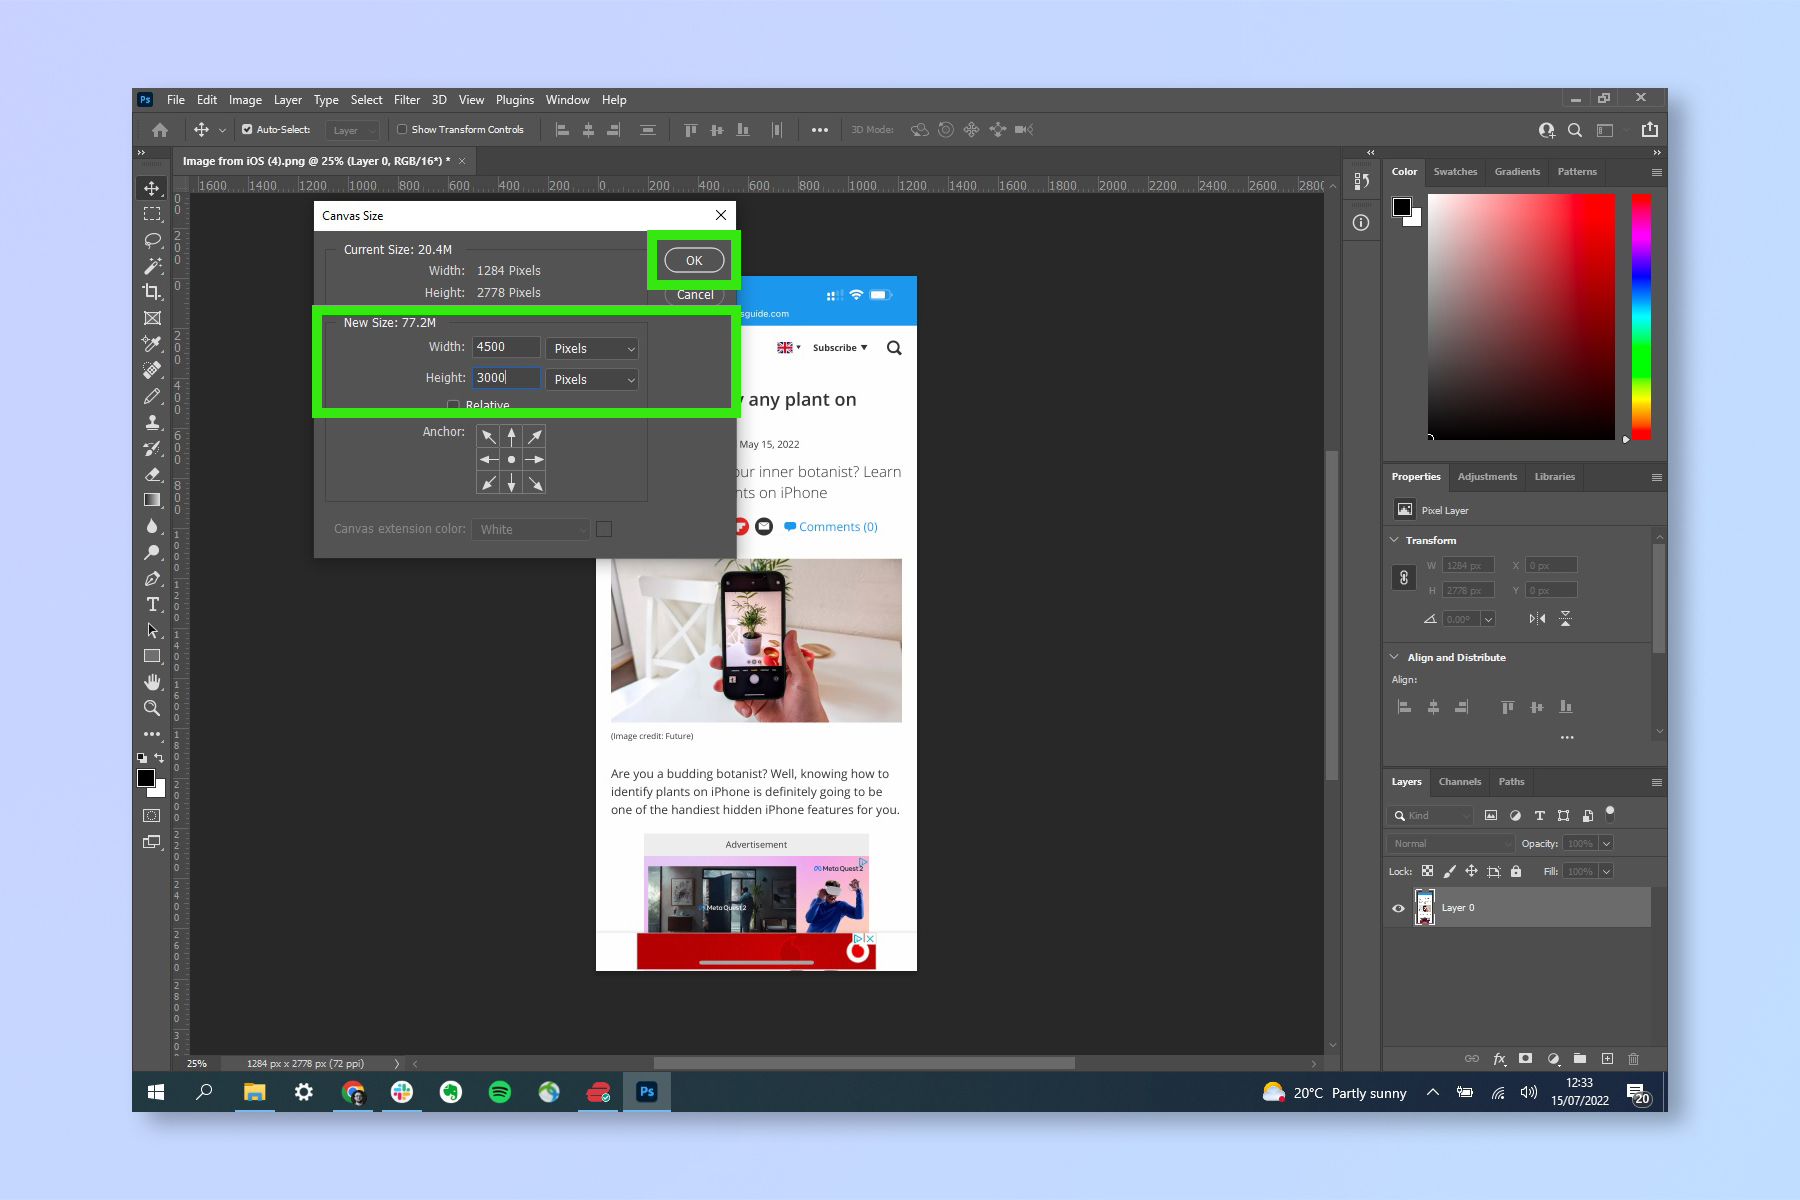
4. We now need to adjust the canvas size so there is room for a background. Press Ctrl + Alt + C (Windows) or Option + Cmd + C (Mac) to open the resize canvas window. Leave the Relative box unchecked if you know the size of canvas you want (i.e 4500 x 3000 pixels), and enter your canvas size in the width and height boxes.
Alternatively, check Relative to expand the canvas from its current size from a set point. Then enter the desired amounts in the width and height boxes. For example: if you wanted to extend the canvas 100 pixels vertically and 50 pixels horizontally, enter 100 in Width and 50 in Height. Leave the anchor point set in the middle square to ensure all additions are applied in an equal split on each side of the image.
Tap the dropdown arrow next to Pixels to select a different measurement, such as centimeters.
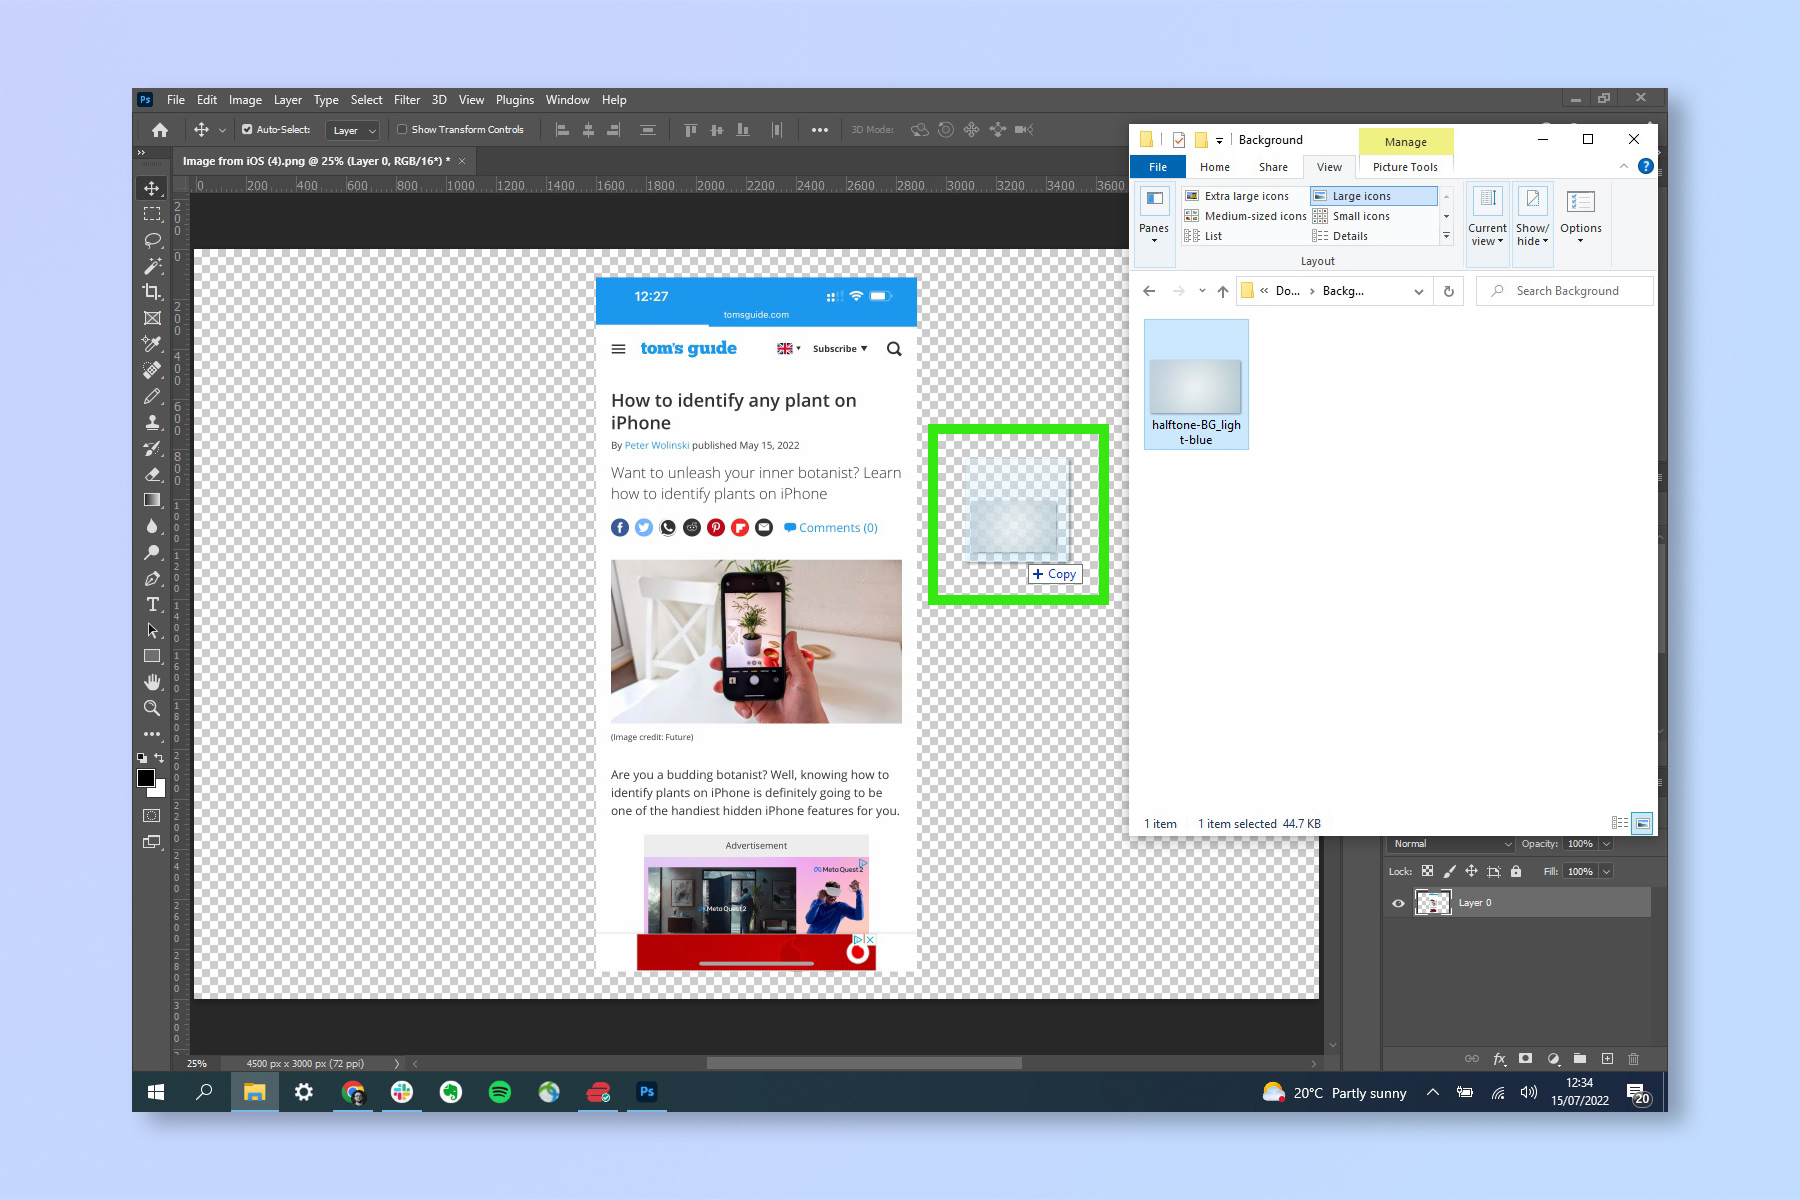
5. You'll now see that the canvas has expanded, with transparent space denoted by grey and white squares. To fill that space with a background image, drag and drop an image into the space.
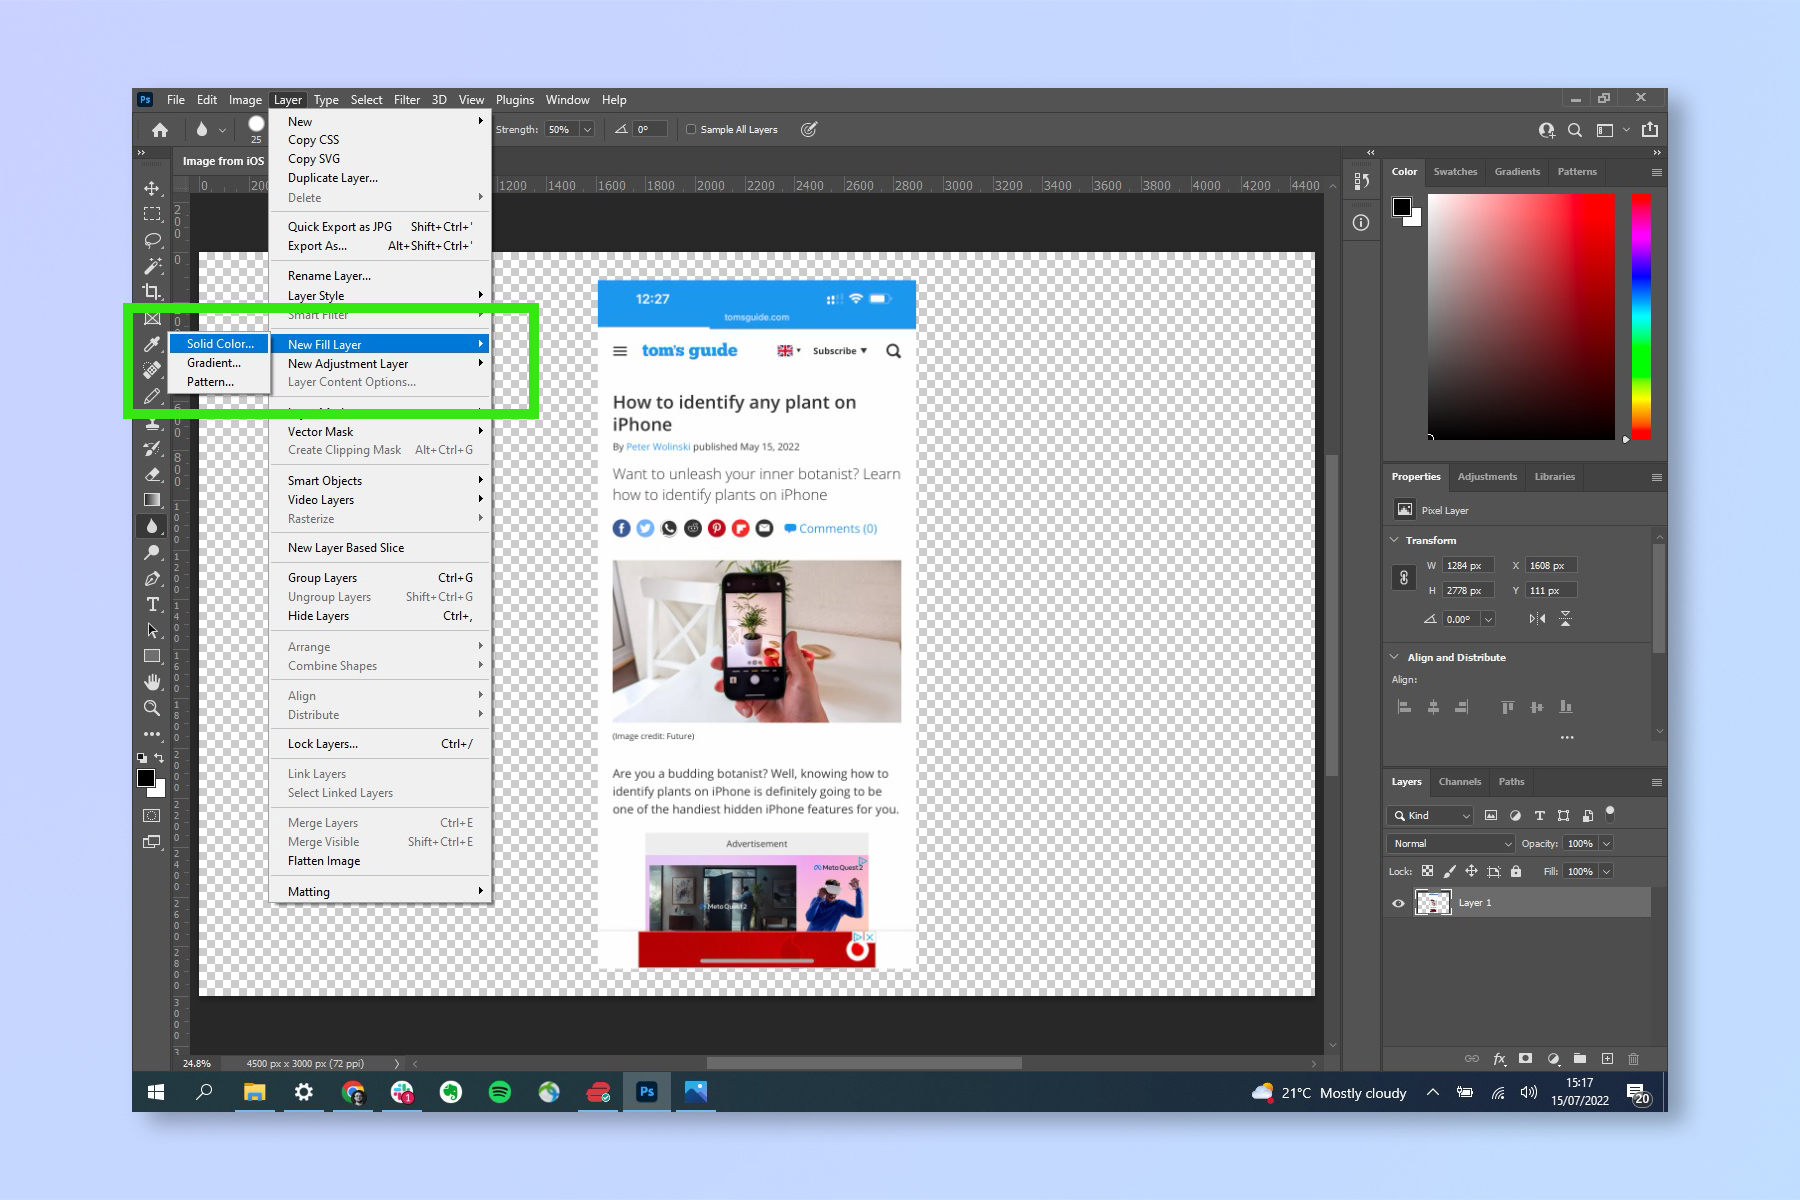
If you simply want a solid colour as your background, select Layer in the top tool bar, click New Fill Layer, then select Solid Color. If you want to, name your new fill layer and click OK. Then choose a color and click OK again. You can now skip to step 7.
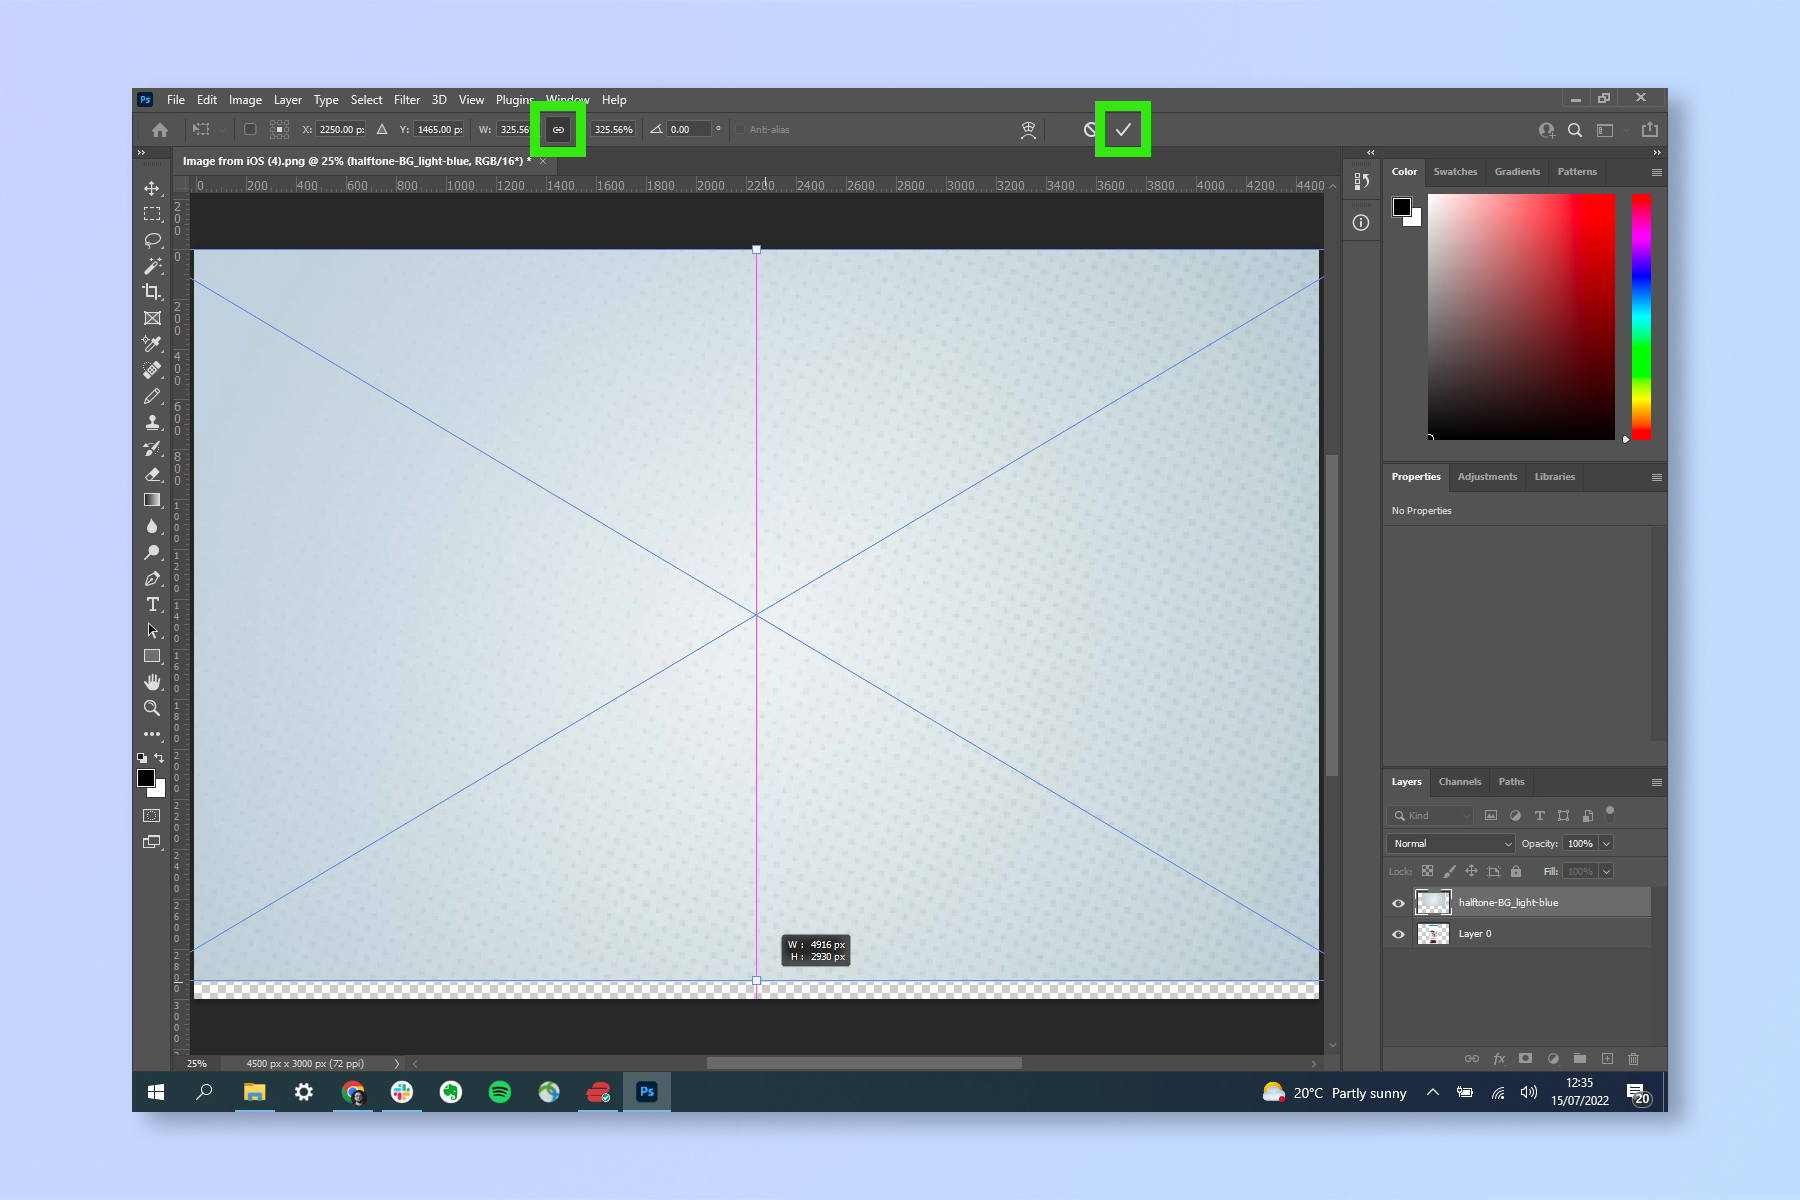
6. If you're using an image as a background, it may not be the exact size to fit your canvas. Drag the anchor points to fit the image. So that the image's correct ratio is maintained (which stops the image being stretched), ensure the ratio lock symbol is depressed, middle left of the image toolbar. Alternatively, hold shift as you resize the image using anchor points to ensure it is resized in ratio.
Once you're happy with the fitment, click the tick button on the right of the image toolbar.
7. Your background layer will be stacked above your original image. To move your image back to the top, click and hold its layer in the layer box, bottom right. Drag the image layer above the background layer.
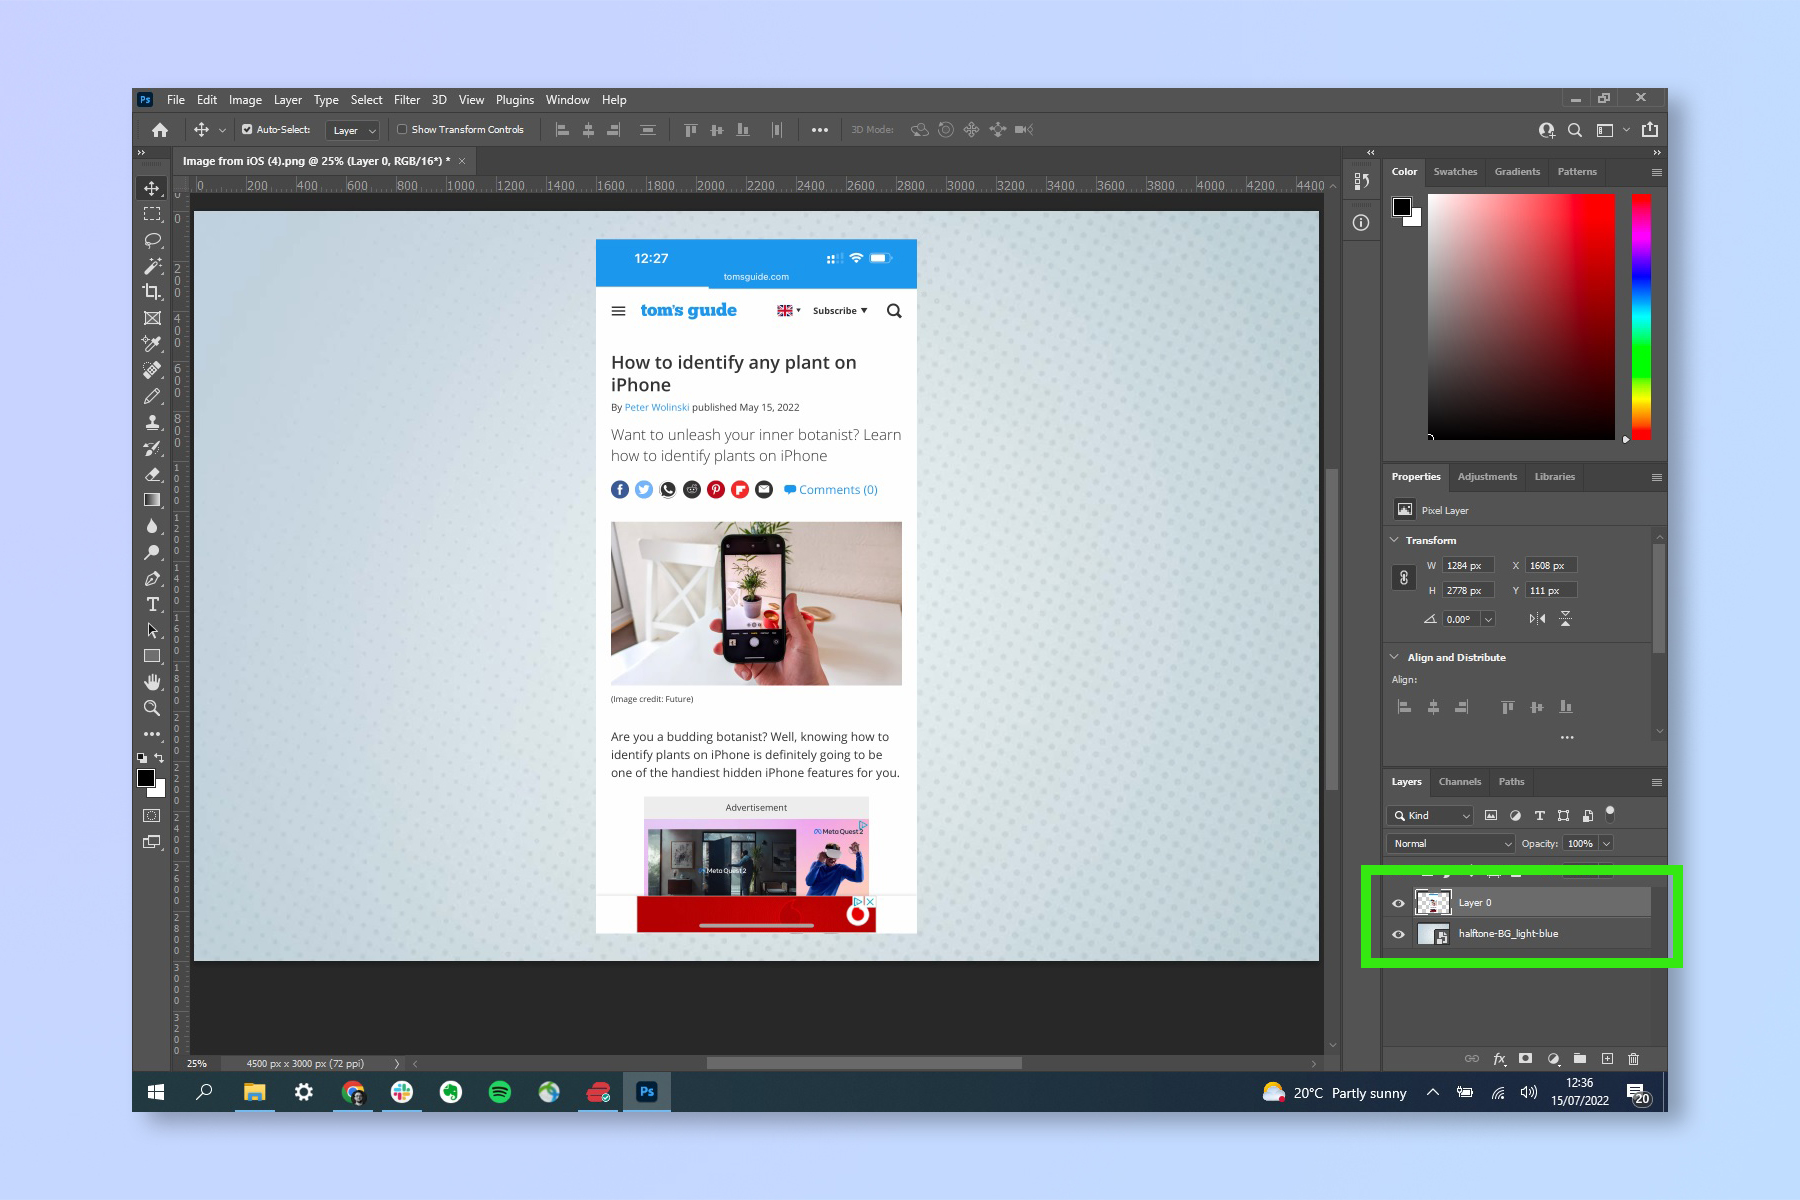
There you have it — you've now added a background to an image in Photoshop. From here, you can go on to add further elements to your image, or you can flatten and export it if you're done.
Now that you're finding your feet with Photoshop, you might want to read our other image editing tutorials. We have other Photoshop tutorials, so take the next step by learning how to remove a background in Photoshop, how to create a GIF in Photoshop, how to add a drop shadow in Photoshop and how to add a border in Photoshop. Adobe's editing suite isn't the only way to edit images though, so broaden your horizons by checking out our guides on how to edit images on iPhone, how to blur a photo's background on iPhone and how to edit videos on iPhone. Want to brush up on your photographic knowledge? Make a start by reading about optical zoom vs. digital zoom.

Peter is a Senior Editor at Tom's Guide, heading up the site's Reviews team and Cameras section. As a writer, he covers topics including tech, photography, gaming, hardware, motoring and food & drink. Outside of work, he's an avid photographer, specialising in architectural and portrait photography. When he's not snapping away on his beloved Fujifilm camera, he can usually be found telling everyone about his greyhounds, riding his motorcycle, squeezing as many FPS as possible out of PC games, and perfecting his espresso shots.
