Continuity Camera: How to use your iPhone as a webcam in macOS Ventura
Using Continuity Camera on macOS Ventura is easy — we show you how.
Continuity Camera is getting a major upgrade on macOS Ventura that turns your iPhone into a webcam. This will be especially useful to people who have a MacBook with a low-quality 720p camera and would prefer to use their iPhone's higher-quality camera. So long as your MacBook and iPhone are updated to macOS Ventura and iOS 16 (respectively), you can try this feature yourself.
Using your iPhone as a webcam for your MacBook is relatively easy. Below, we'll provide a step-by-step guide on the process. We'll also show you how to enable Desk View, which is another big feature on macOS 13.
This is how to use your iPhone as a webcam in macOS Ventura.
How to use your iPhone as a webcam on macOS Ventura
As mentioned above, you’ll need macOS Ventura and iOS 16 installed on your compatible MacBook and iPhone (respectively). Our guides on how to download the macOS Ventura public beta and how to download the iOS 16 public beta will get you started.
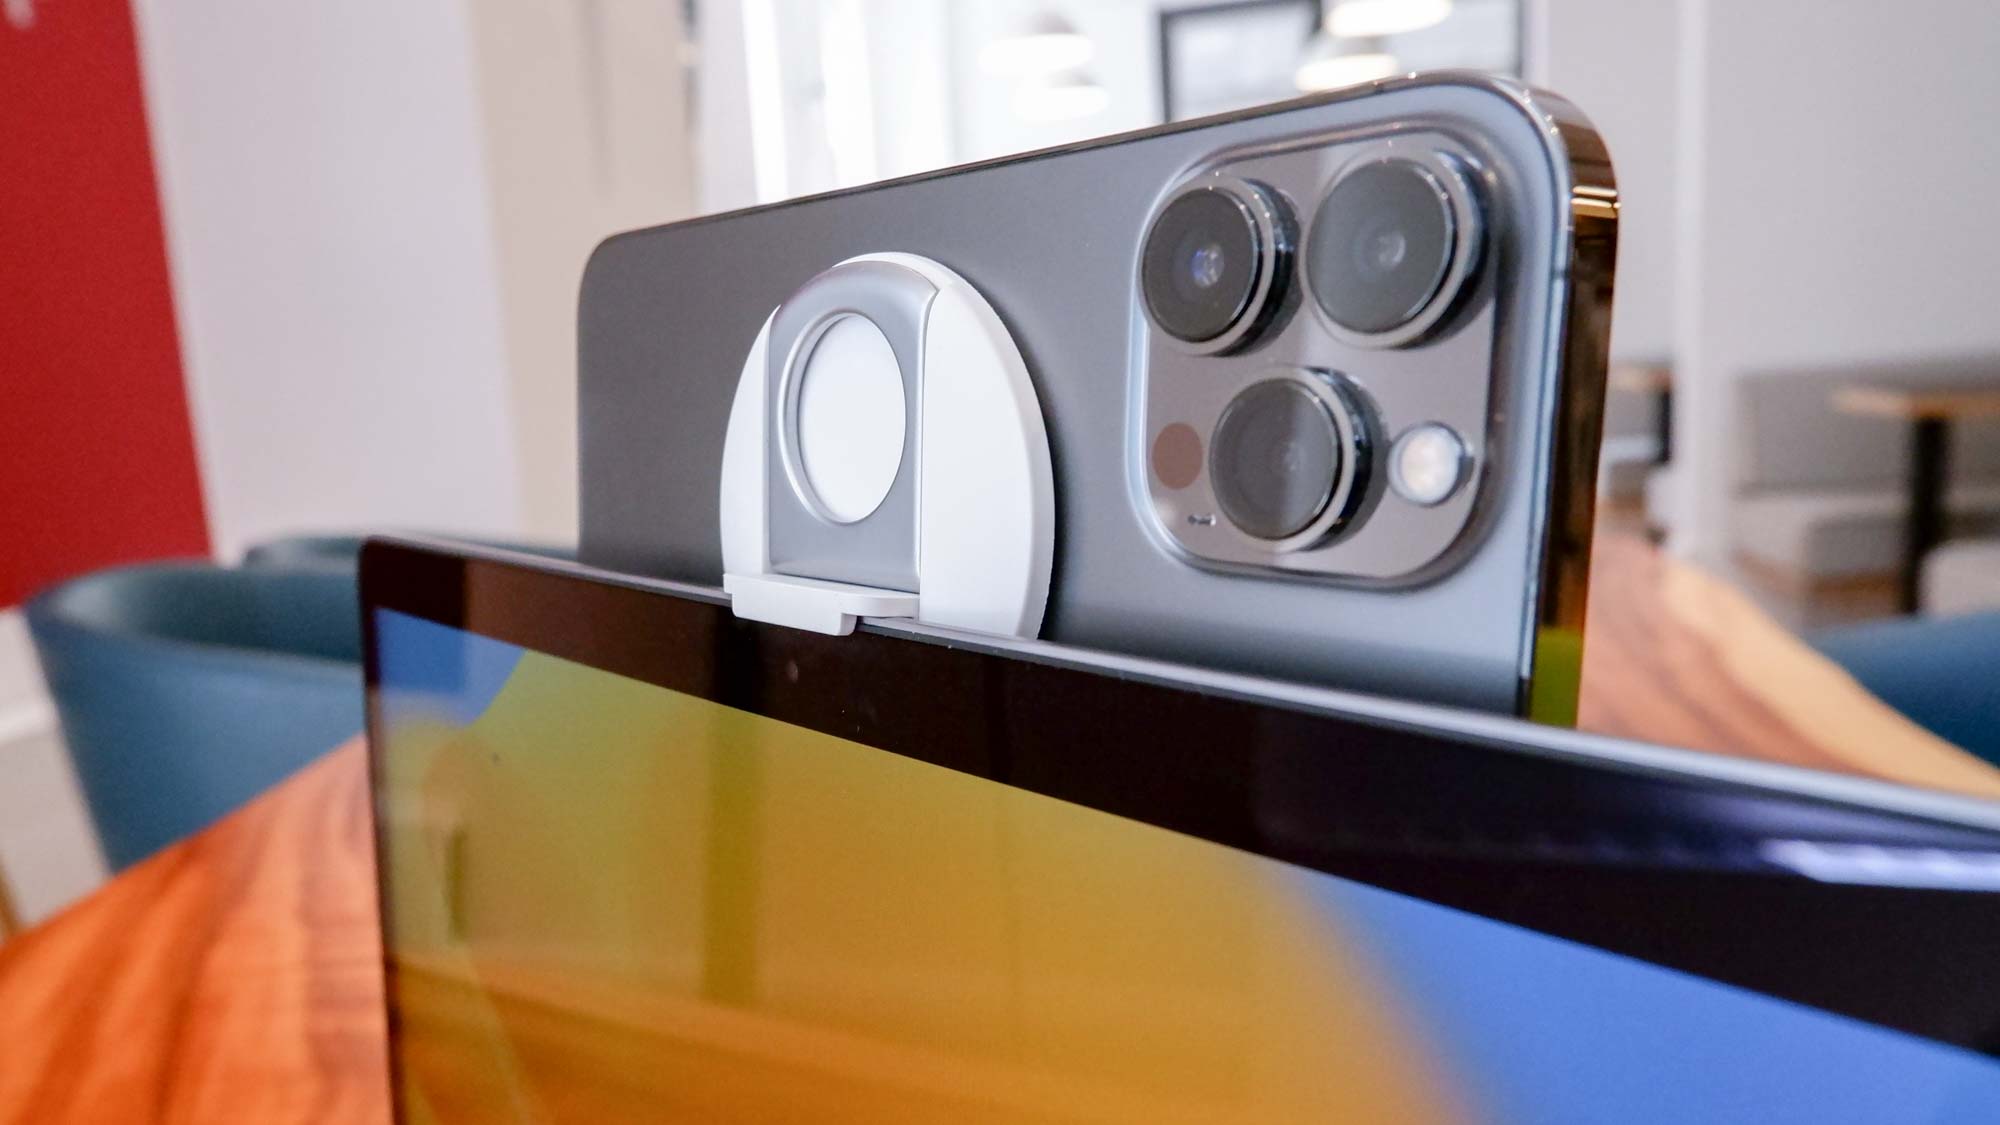
We recently tested a prototype of the Belkin iPhone mount for MacBook peripheral. First revealed during WWDC 2022, this product complements the updated Continuity Camera. It’s a great product that makes it easy to place an iPhone on a MacBook. At time of publication the Belkin mount isn't yet on sale; if it still isn't when you're reading this, you can also refer to our best iPhone tripods list to find a suitable holder.
Though we use Apple's FaceTime program in this how-to, the process outlined below works for any video conferencing program – including Google Meets, Zoom, Discord and more.
1. Open a video conferencing program on your MacBook. If you’re using macOS Ventura for the first time, you’ll be greeted with a screen that explains how Continuity Camera functions.
Sign up to get the BEST of Tom's Guide direct to your inbox.
Get instant access to breaking news, the hottest reviews, great deals and helpful tips.
2. After that, move the cursor to the menu bar along the top of your Mac’s screen. Then click on Camera.
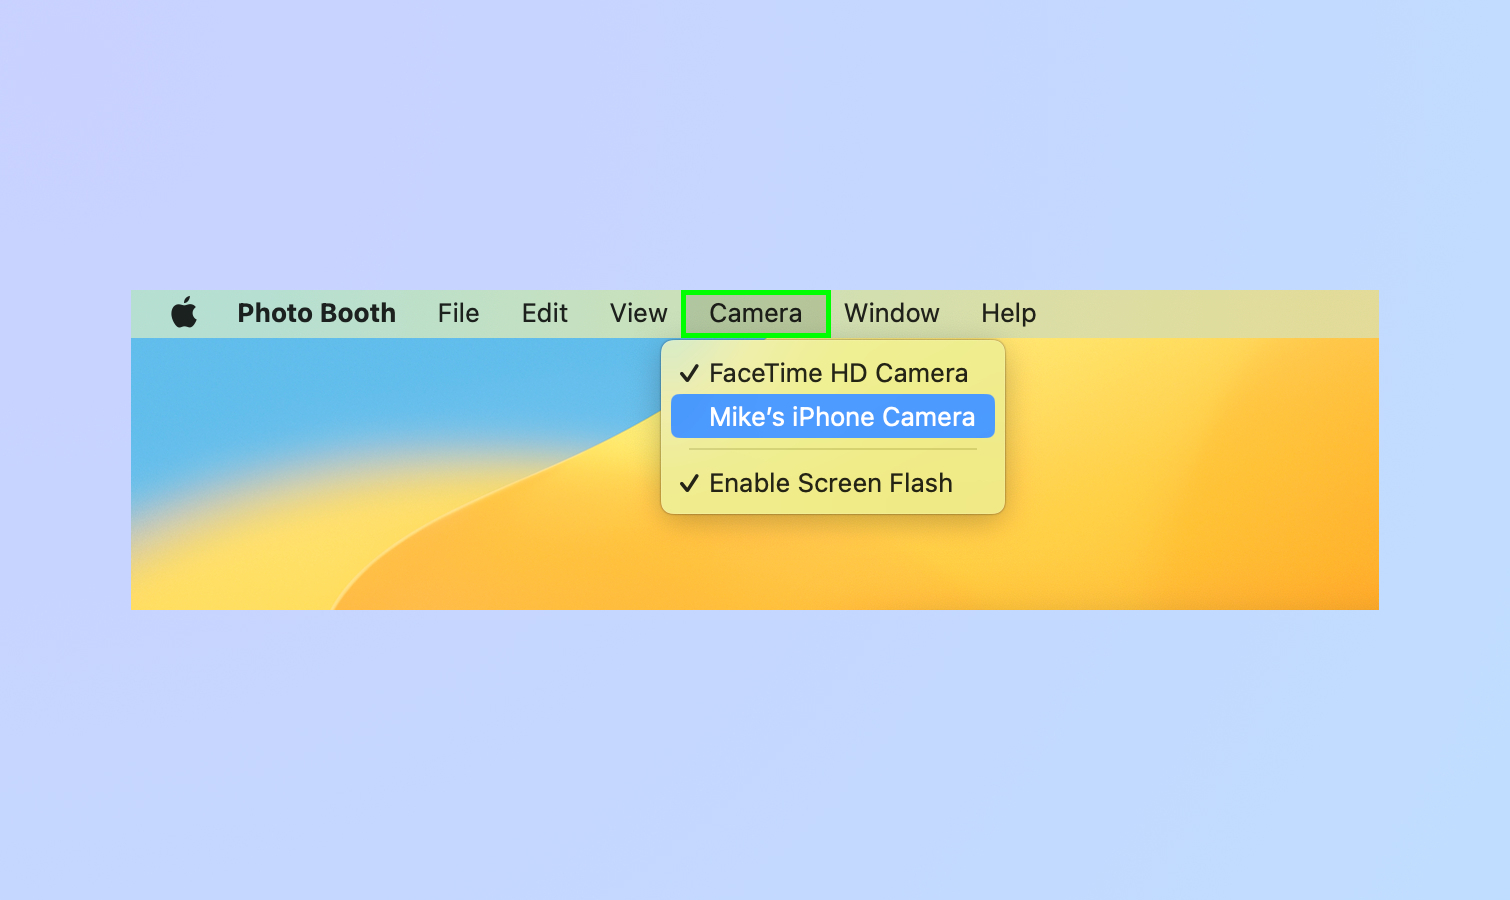
3. You’ll see a drop-down menu listing available cameras. Select your iPhone from the list.
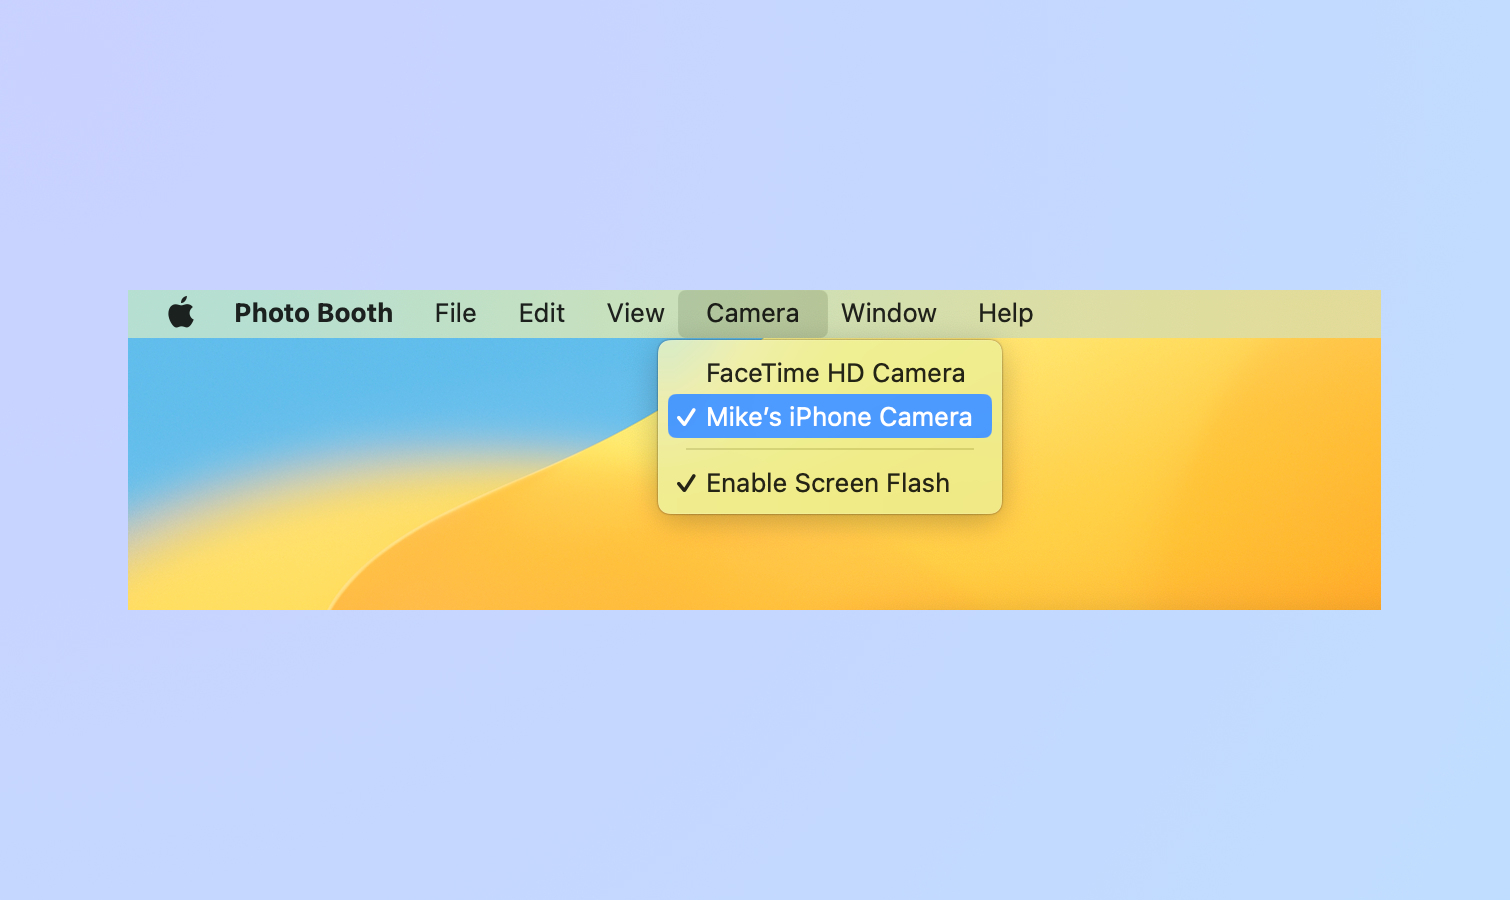
The difference in quality between the MacBook Pro M2’s 720p camera and the iPhone 13 Pro Max’s 12-megapixel camera is staggering.
How to use Desk View on macOS Ventura
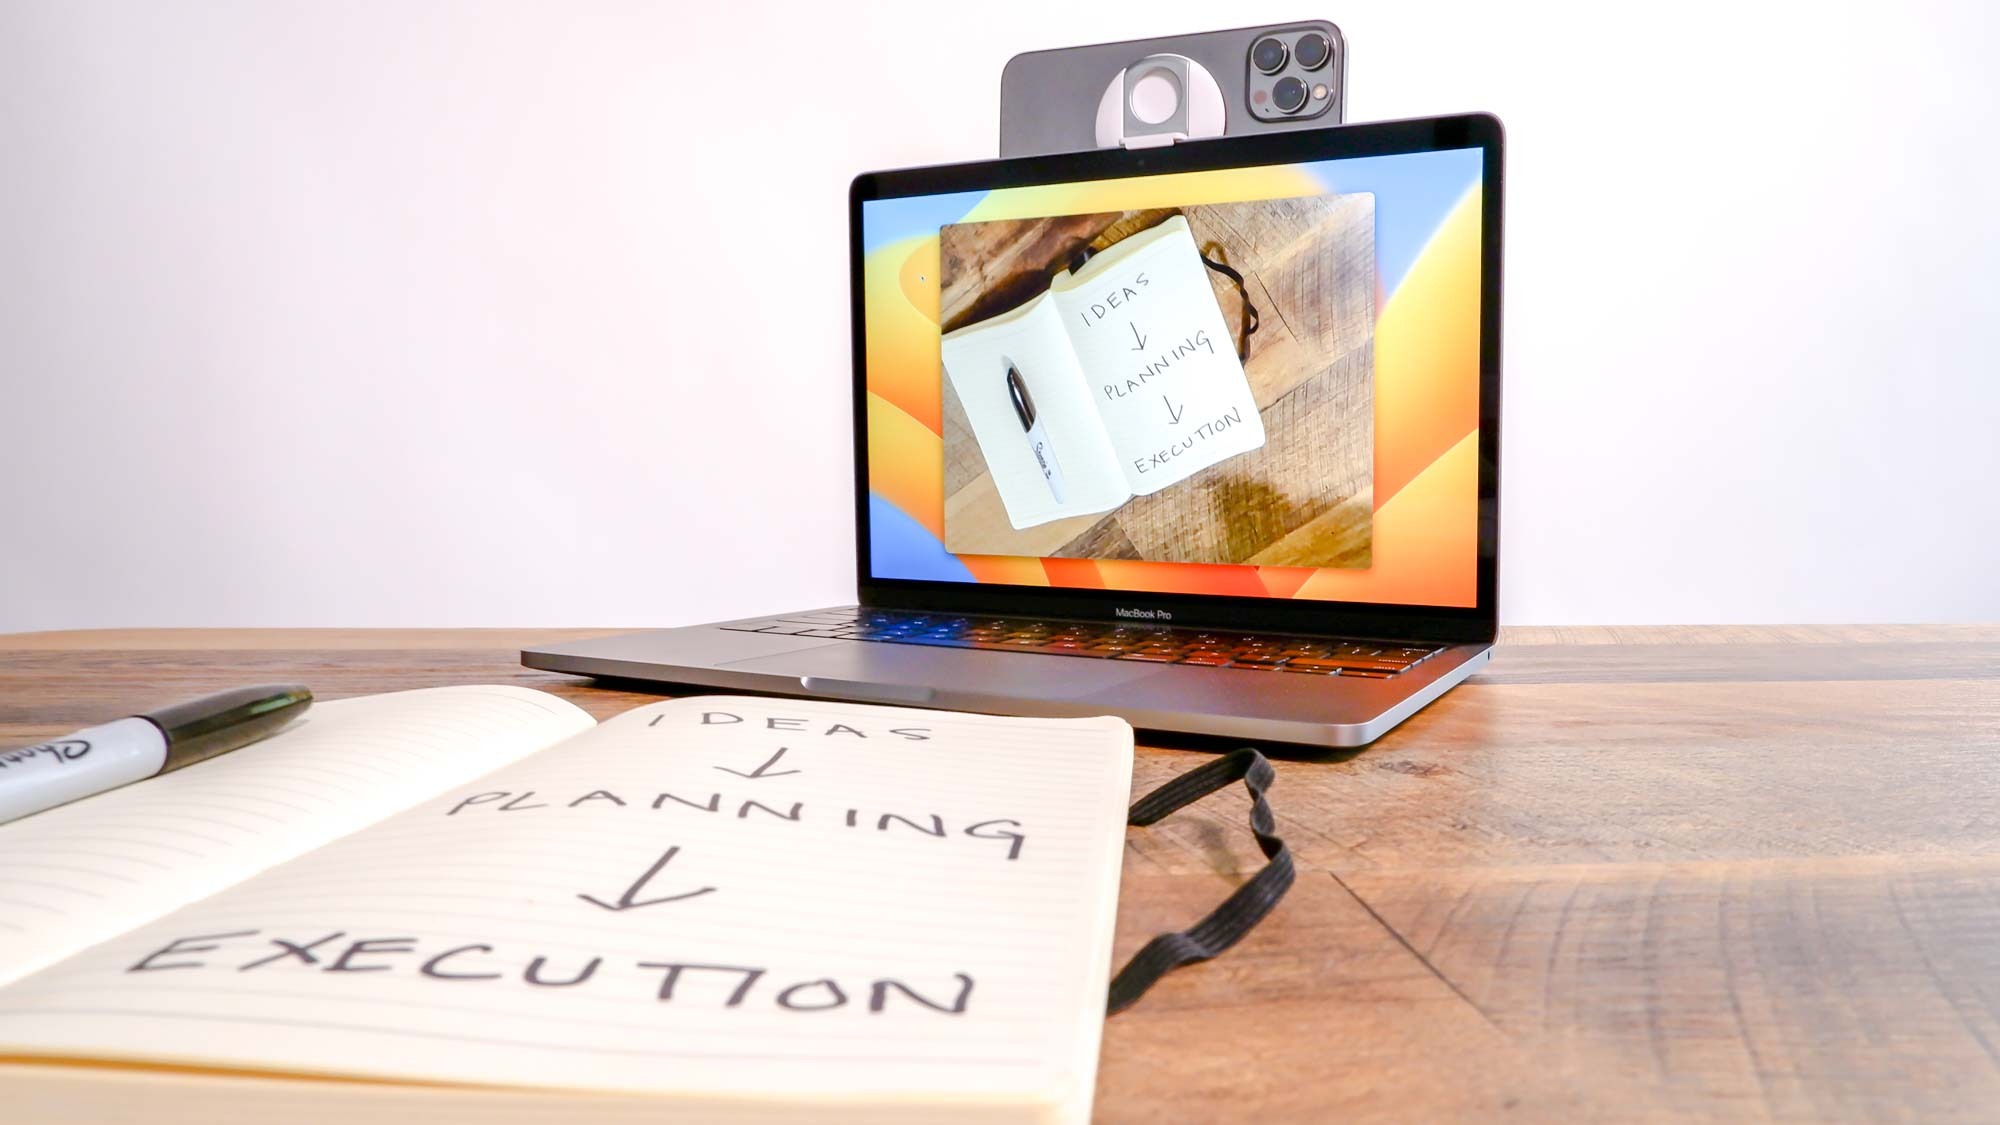
Desk View is easily the coolest thing about the updated Continuity Camera. When enabled, this feature uses the iPhone's ultrawide lens to display a live view of what's on your desk. Using Desk View is also a very straightforward affair.
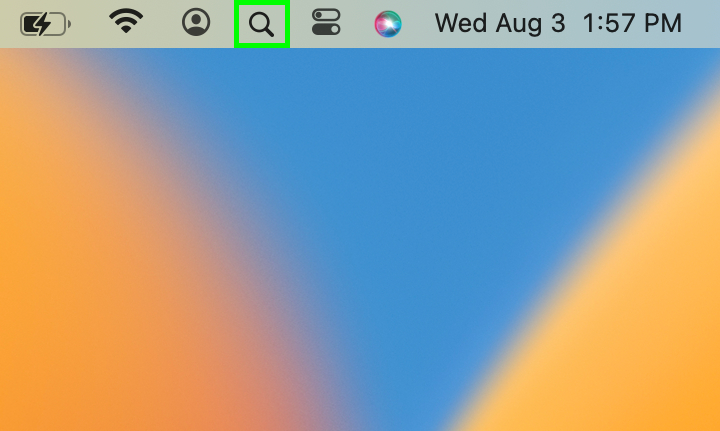
1. Click on the Spotlight icon located in the menu bar.
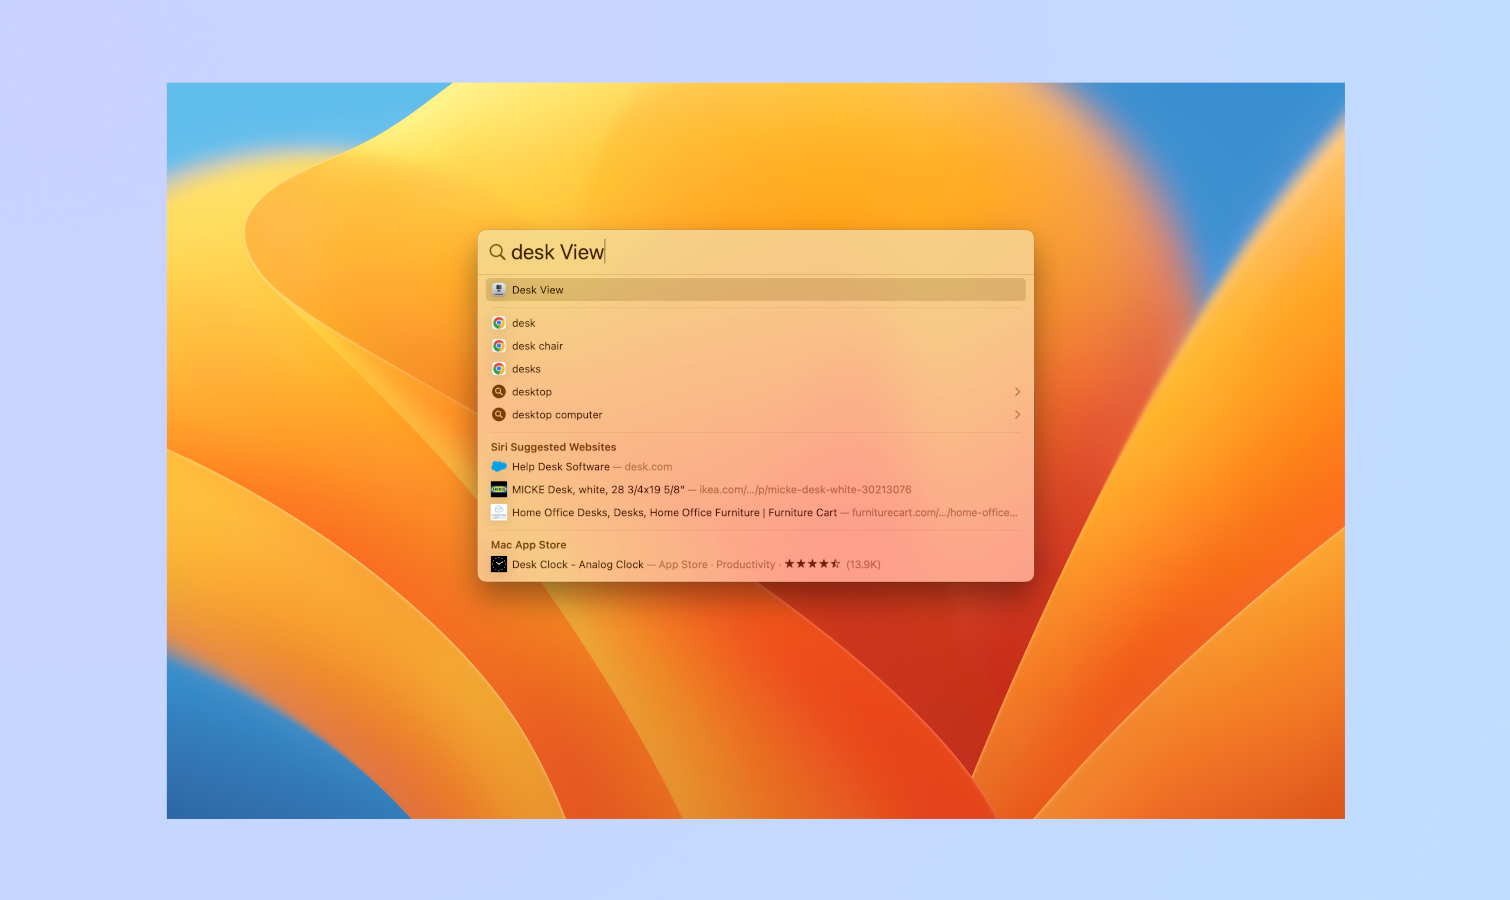
2. In the menu that pops up, type Desk View. Click on Desk View from the drop-down menu to enable it.
You'll see whatever's in front of your Mac show up on the screen, captured by the iPhone's ultrawide camera.
That’s it! Enjoy the bewildered and shocked looks on people's when you show them Desk View.
For more Mac-themed guides, make sure you read how to right click on Mac, how to edit a PDF on Mac and how to clear cache on Mac.
And if you like the sound of having a more versatile Mac camera, take a look at this removable camera module patent for Apple laptops.

Tony is a computing writer at Tom’s Guide covering laptops, tablets, Windows, and iOS. During his off-hours, Tony enjoys reading comic books, playing video games, reading speculative fiction novels, and spending too much time on X/Twitter. His non-nerdy pursuits involve attending Hard Rock/Heavy Metal concerts and going to NYC bars with friends and colleagues. His work has appeared in publications such as Laptop Mag, PC Mag, and various independent gaming sites.
