Pickleball: The rules, the benefits and 5 exercises to improve your game
Pickleball-curious? Here’s your guide to this trendy game
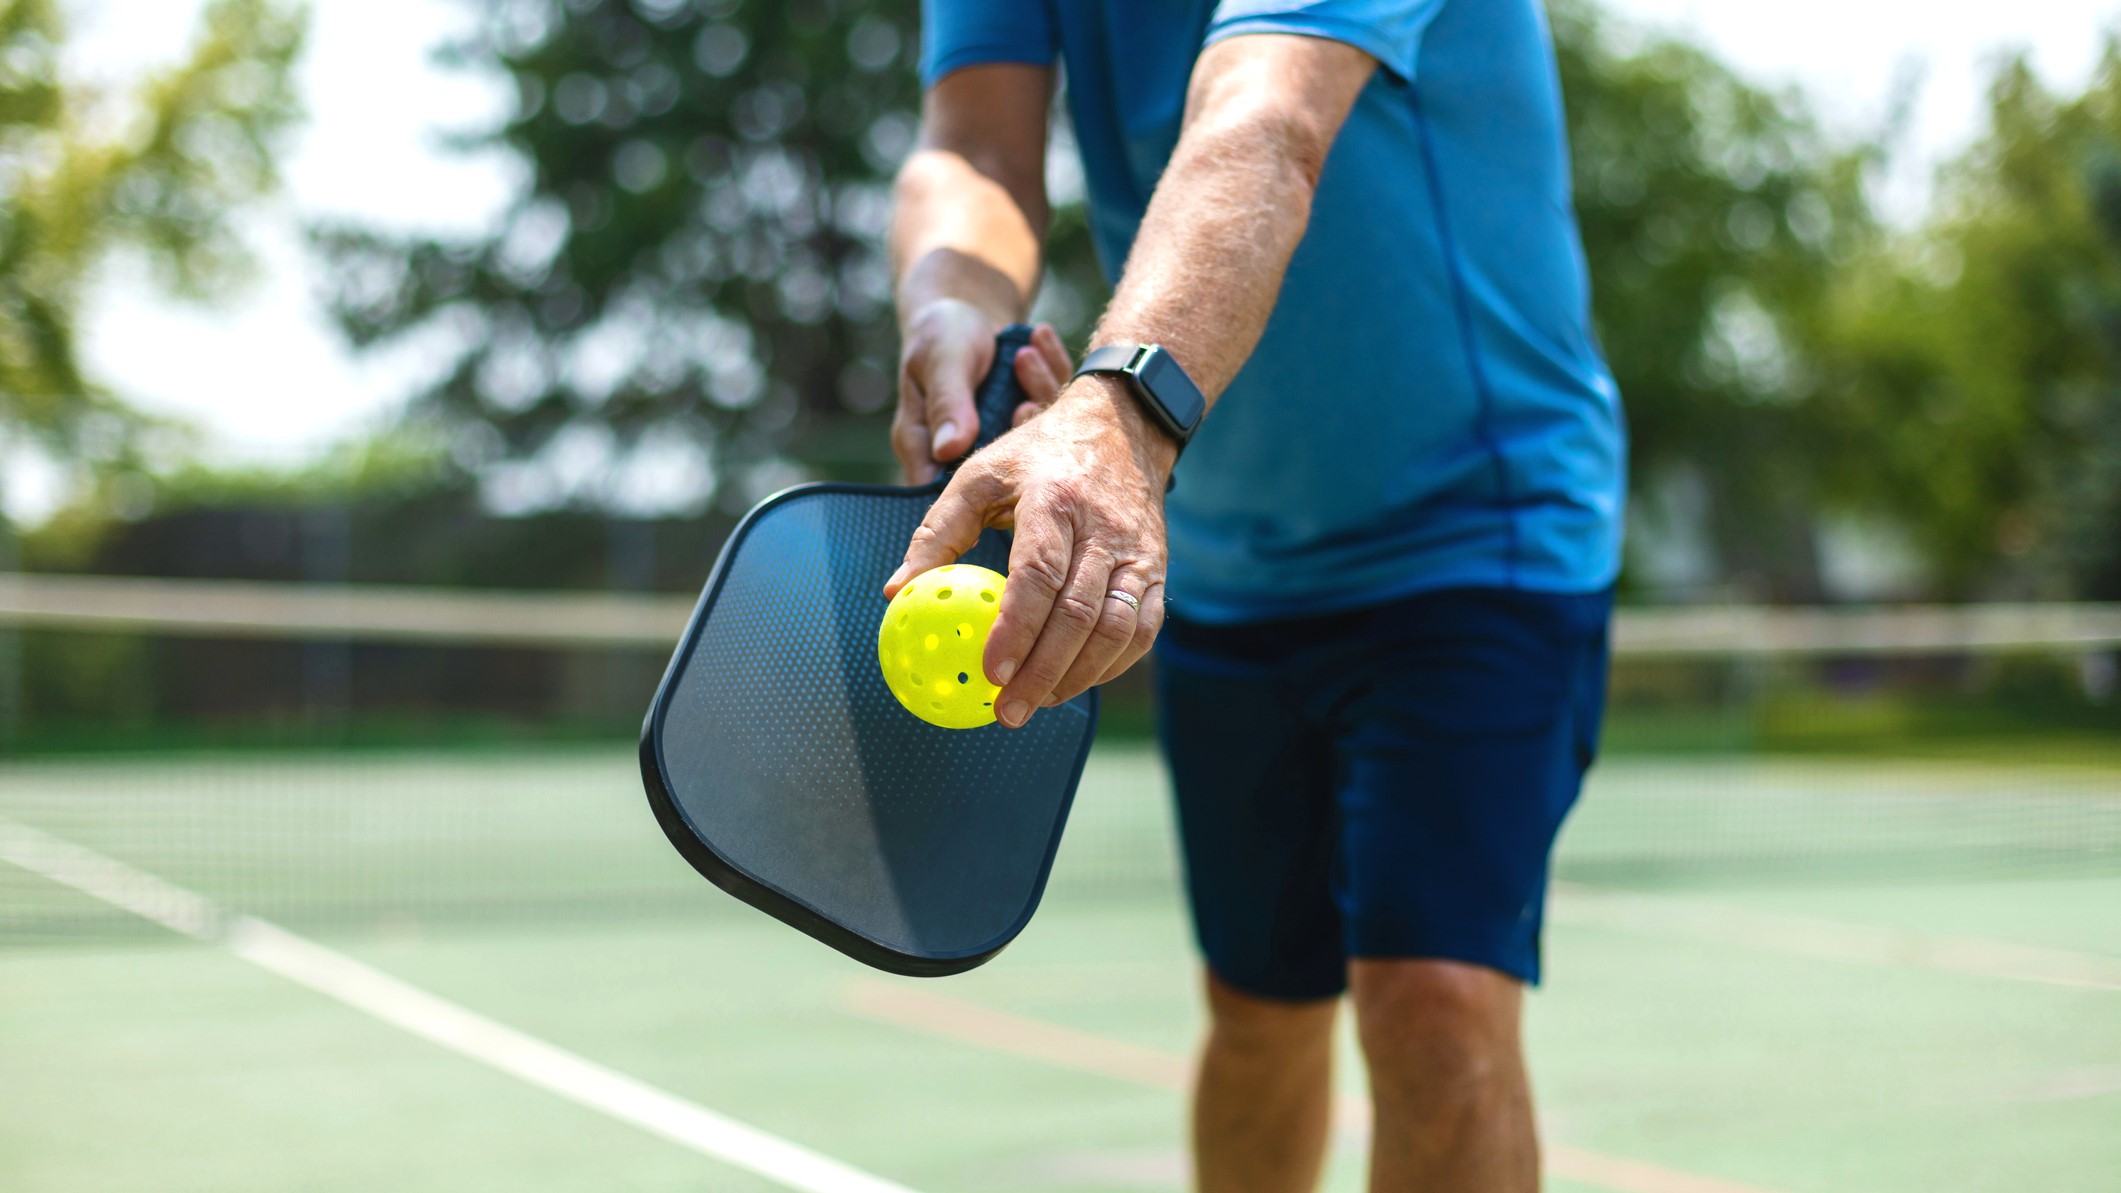
Hearing the word “pickleball” used to elicit images of retirees enjoying a leisurely day on the courts. But this tennis/badminton/ping-pong hybrid isn’t just for the grandparents — pickleball is a fun, accessible, and easy-to-learn game that can be a catalyst for a more active lifestyle.
Pickleball has seen a huge surge in popularity over the last few years, thanks to a younger generation that has fully embraced the historically quirky sport. In fact, pickleball has become so en vogue that game devotees and playground parents have often clashed in turf wars over precious New York City park real estate.
So what is it about pickleball that has attracted everyone from 75-year-old grandpas to 20-year-old undergrads? Here are the rules and benefits of the game, and a few exercises that will improve your performance the next time you step into the “kitchen.”
Pickleball: The rules
Pickleball is played on a 44 foot by 20 foot court, separated by a net that measures 34 inches high in the center and 36 inches high at the ends. Each side of the court is separated into left and right “service areas” that measure 15 feet by 10 feet, along with a 7 foot by 20 foot zone closest to the net known as the “kitchen.” If there are no pickleball-devoted courts in your area, you can always purchase a portable pickleball set and tape out the court yourself.
Pickleball can be played as either singles (1 player per team) or doubles (2 players per team), although doubles is far more common. The serving team is decided through a coin toss or another fair method. The first serve of the game is made from the right service area, diagonally crosscourt, with an underhand serve or a drop serve (bouncing the ball once before hitting it). Contact with the ball must be below the server’s waist, and the ball must clear both the net and the receiving team’s kitchen.
The ball must bounce once in the receiving player’s service area before it can be returned. Then, the returned ball must bounce once in the serving team’s service area before it can be played. This is known as the “two bounce rule.” After the ball has bounced twice — once as a serve, and once as a returned serve — teams can either volley the ball (hit the ball without letting it bounce first) or return it after a bounce. However, no volleys can be made while standing in the kitchen.
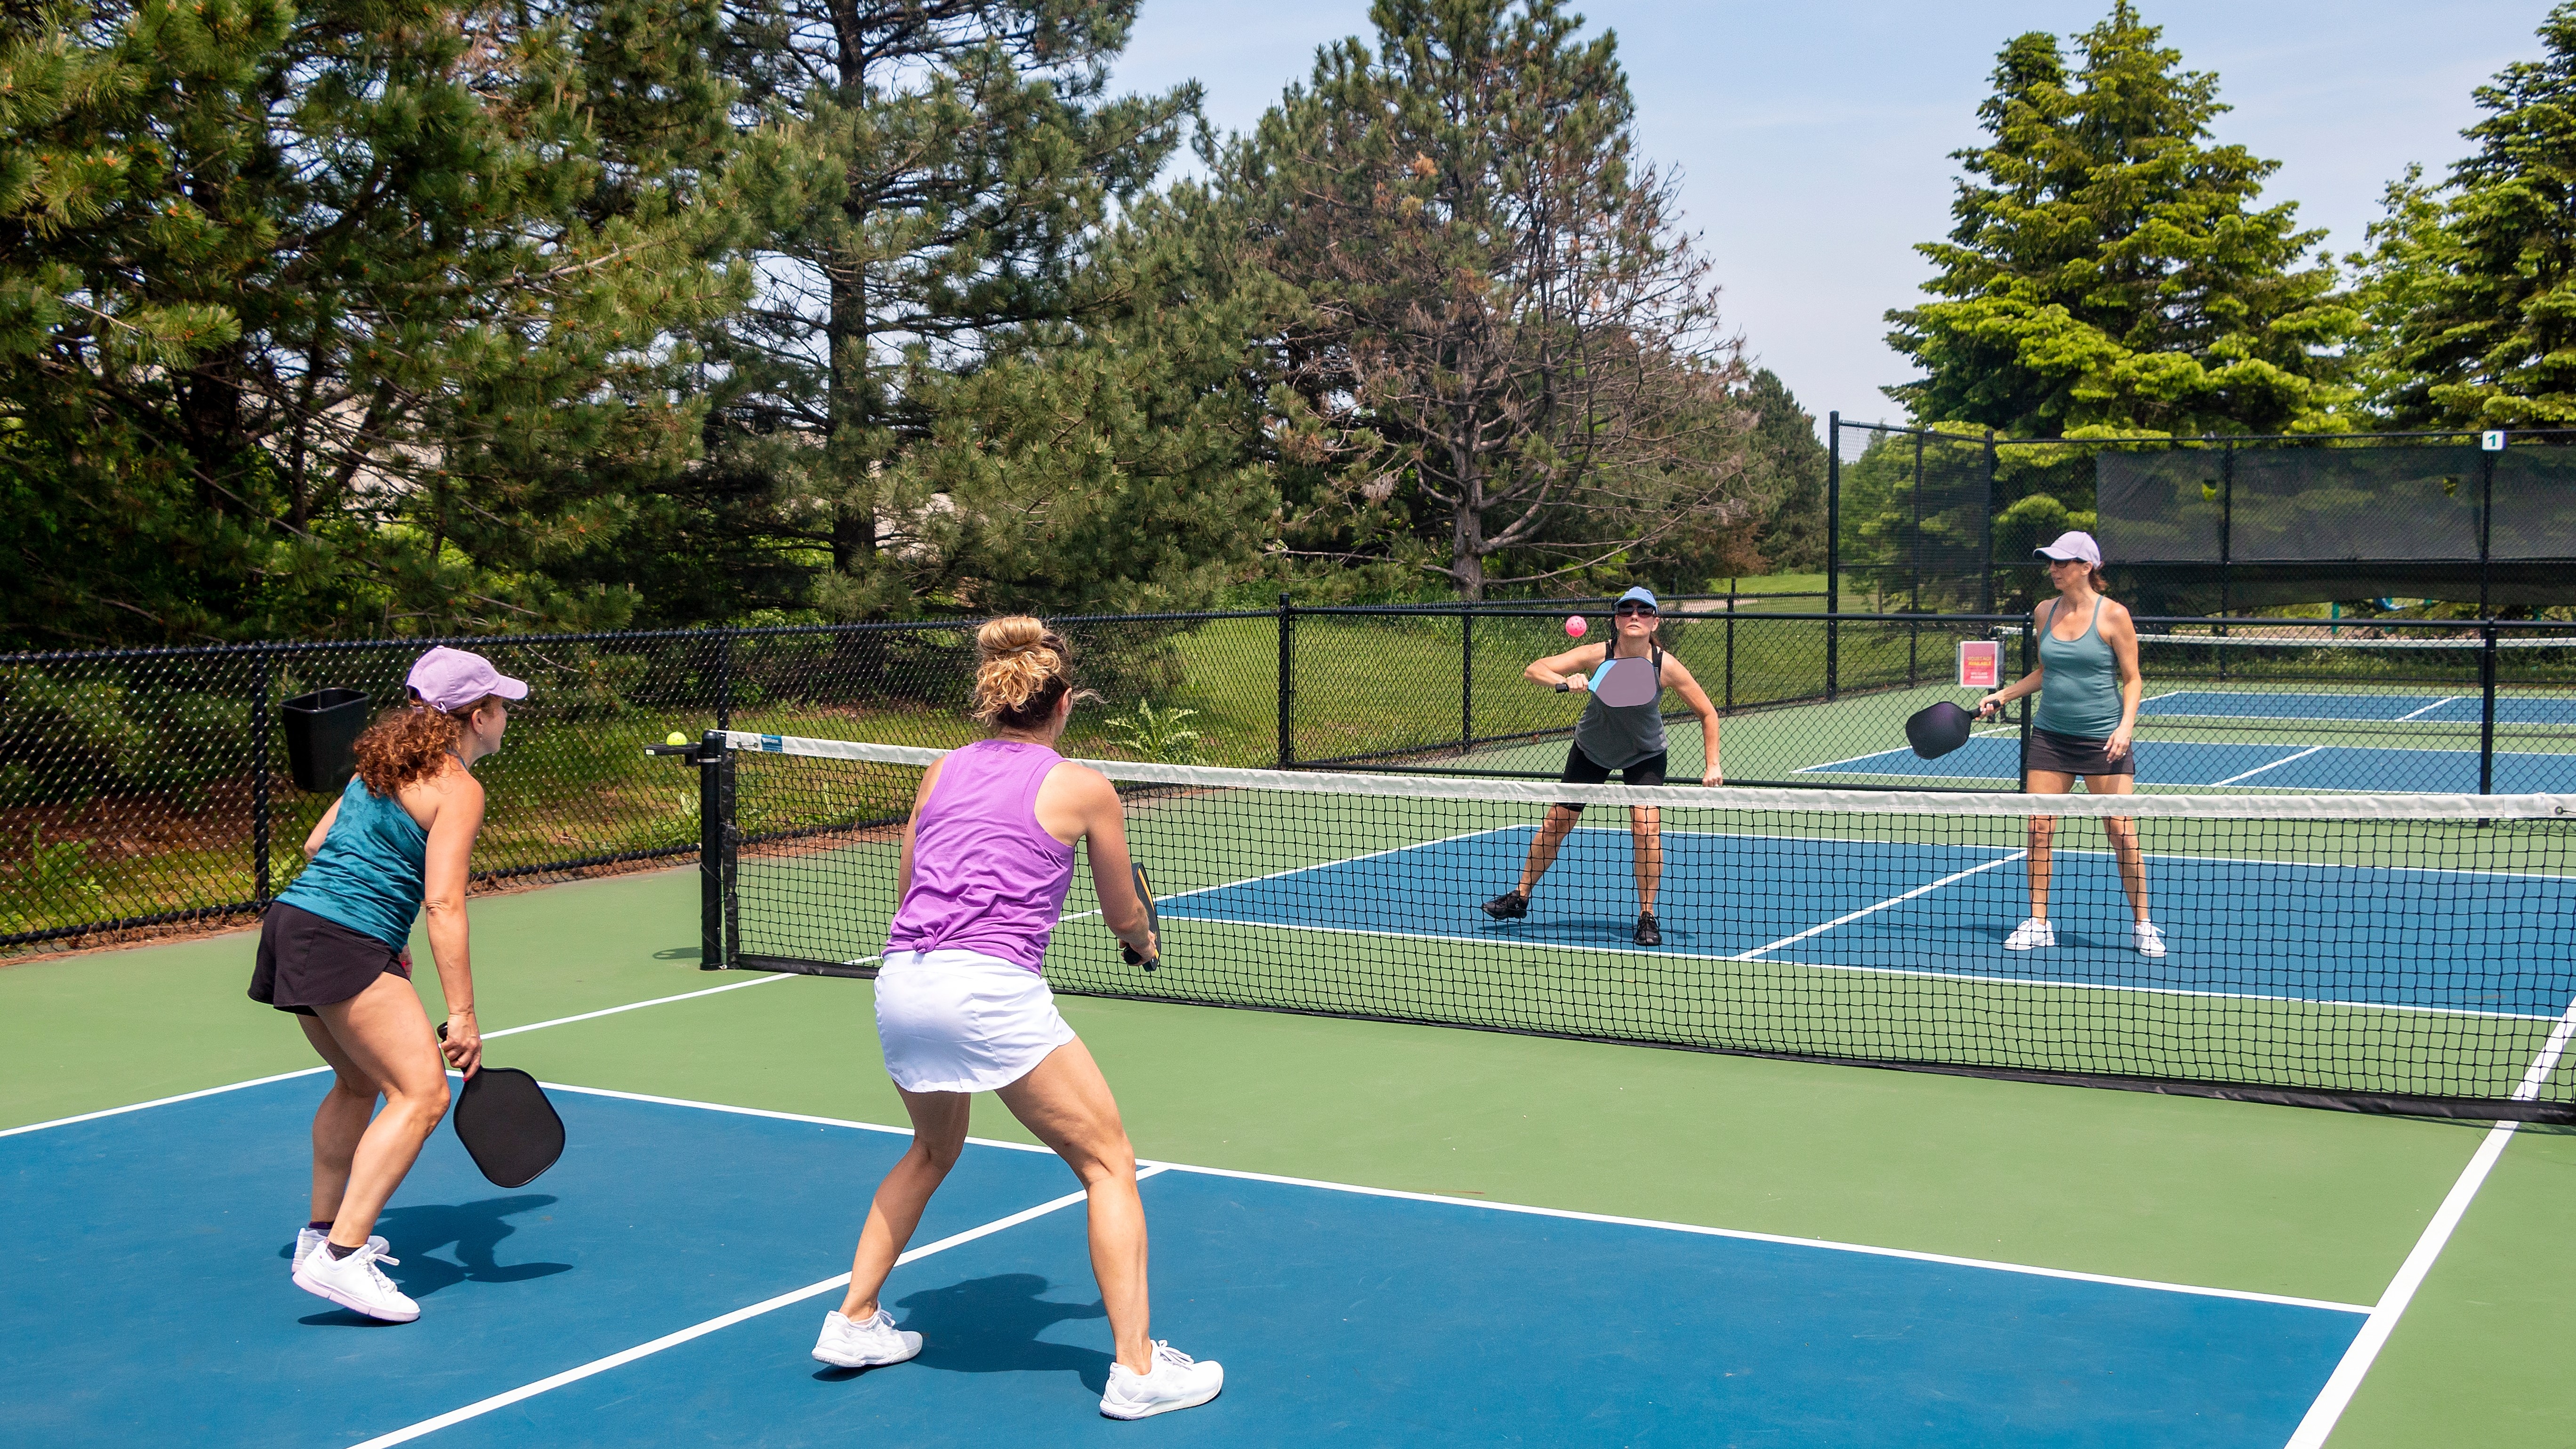
The ball is hit back and forth between the two teams (called a “rally”) until one team makes a “fault.” Faults include letting the ball bounce twice before a hit, hitting the ball into the net, hitting a volley while standing in the kitchen (or stepping into the kitchen after hitting a volley), or hitting a ball out of bounds. Bounces within or on the lines of the court are considered “in.”
Sign up to get the BEST of Tom's Guide direct to your inbox.
Get instant access to breaking news, the hottest reviews, great deals and helpful tips.
Points in pickleball can only be scored by the serving team. So if the returning team commits a fault and loses the rally, the serving team gets one point. The serving team’s players then switch service areas, and the same player serves again — this time from the other side.
If the serving team commits a fault and loses the rally, the serve moves to the second player on the serving team (except in the case of the game’s first serve, in which case the serve automatically moves to the opposing team). If the serving team faults again, the serve moves to the opposing team — this is called a “side out”. After a side out, the player in the opposing team’s right service area will serve.
Scoring in doubles pickleball includes three numbers that are stated out loud by the serving player with each serve - the first number is the serving team’s score, the second is the receiving team’s score, and the third is the service turn (remember, each player on the serving team serves the ball until their team commits a fault, with the exception of the first serve of the game). So for example, a score of “8-4-1” would mean the serving team has 8 points, the receiving team has 4 points, and the serving team’s first player is serving. A score of “8-5-2” would mean the serving team has 8 points, the receiving team has 5 points, and the serving team’s second player is serving. In singles pickleball, only two numbers are called - the serving player’s score, and the receiving player’s score.
Games are played until one team gets 11 points, winning by at least 2 points. So for example, if the score is 11-10, the game will continue until one team has a lead of 2 points.
Pickleball: The benefits
Aside from just being fun to play, pickleball has several important benefits to your overall health.
As is the case with any racquet sport, pickleball helps improve hand-eye coordination, balance, flexibility, and reaction time. Since these are qualities that sometimes degenerate with age, playing pickleball is a great way to stay sharp, quick, and stable — certainly for seniors, but for all age groups as well.
Since the courts are much smaller than ones found in tennis, pickleball is a more accessible form of cardiovascular activity for those who have underlying health considerations, and for those who are deconditioned or newer to exercise. While the game does involve plenty of movement, you won’t have to sprint across court in order to return a serve.
Mental health is as important as physical health, and playing pickleball provides an enjoyable way to get some mood-boosting endorphins, and an opportunity to socialize with friends (and, perhaps, make some new ones).
Pickleball: 5 Exercises to improve your game
Pickleball requires strength and stability in your whole body — in order to improve your game, you’ll want to make sure your workout regimen incorporates a variety of exercises for your upper body, lower body, and core. Here are 5 exercises to try before your next drop serve:
1. Goblet Squat
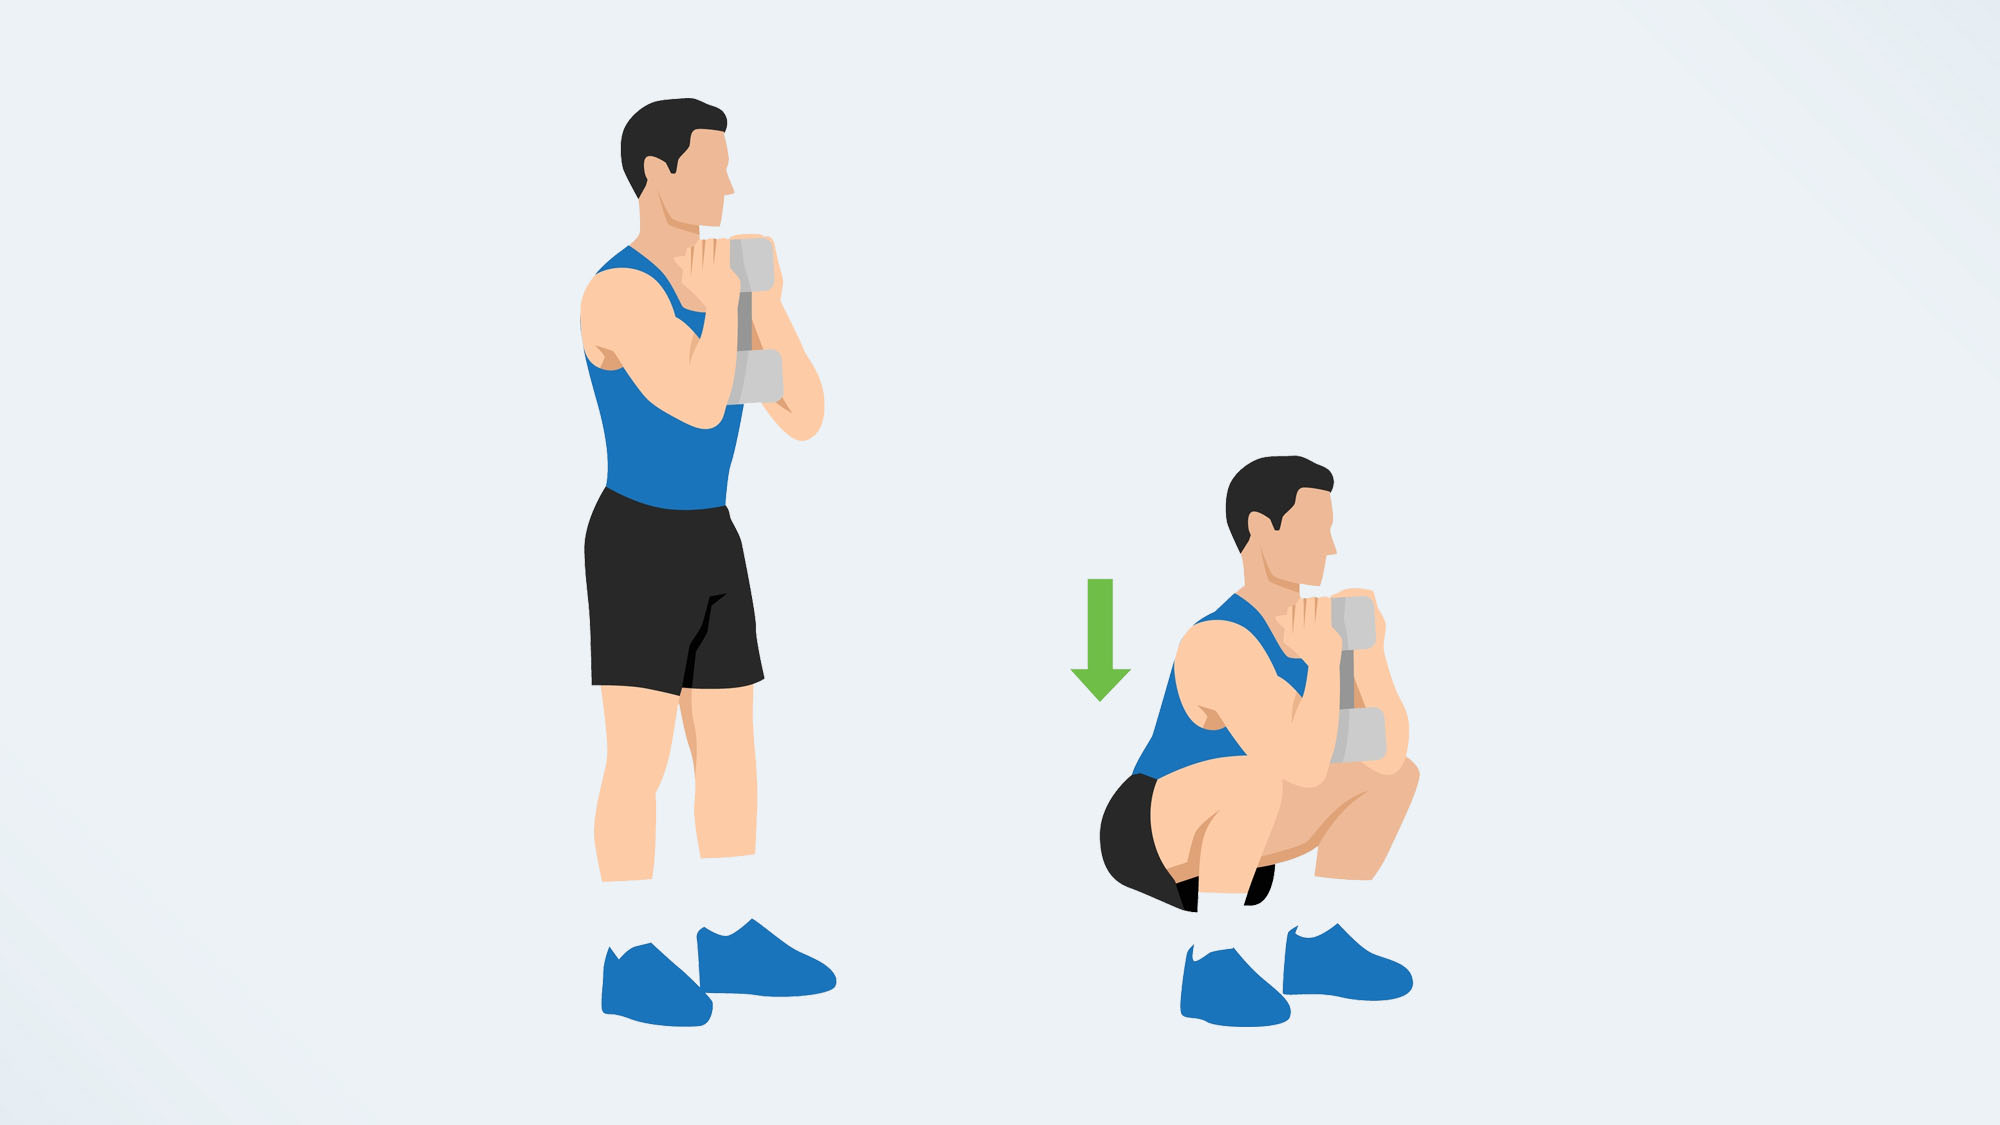
To perform the goblet squat, select a moderately heavy dumbbell or kettlebell. Hold it a few inches away from the center of your chest. Keeping the shoulders relaxed, the core engaged, and the spine neutral, aim your hips behind you as if you were about to sit down in a chair. Bend your knees and slowly lower your hips toward the floor. Once you’ve reached the end of your range of motion, stand back up to the starting position. Be sure to keep your core engaged and your spine neutral throughout the entirety of the movement. Continue for a set of 10 repetitions, or until you reach fatigue.
If you find you’re reaching fatigue before the end of your set, consider dropping to a lighter weight. If you’re performing the full set easily, consider choosing a heavier weight. Here's more on how to do a squat and the variations to try.
2. Planks
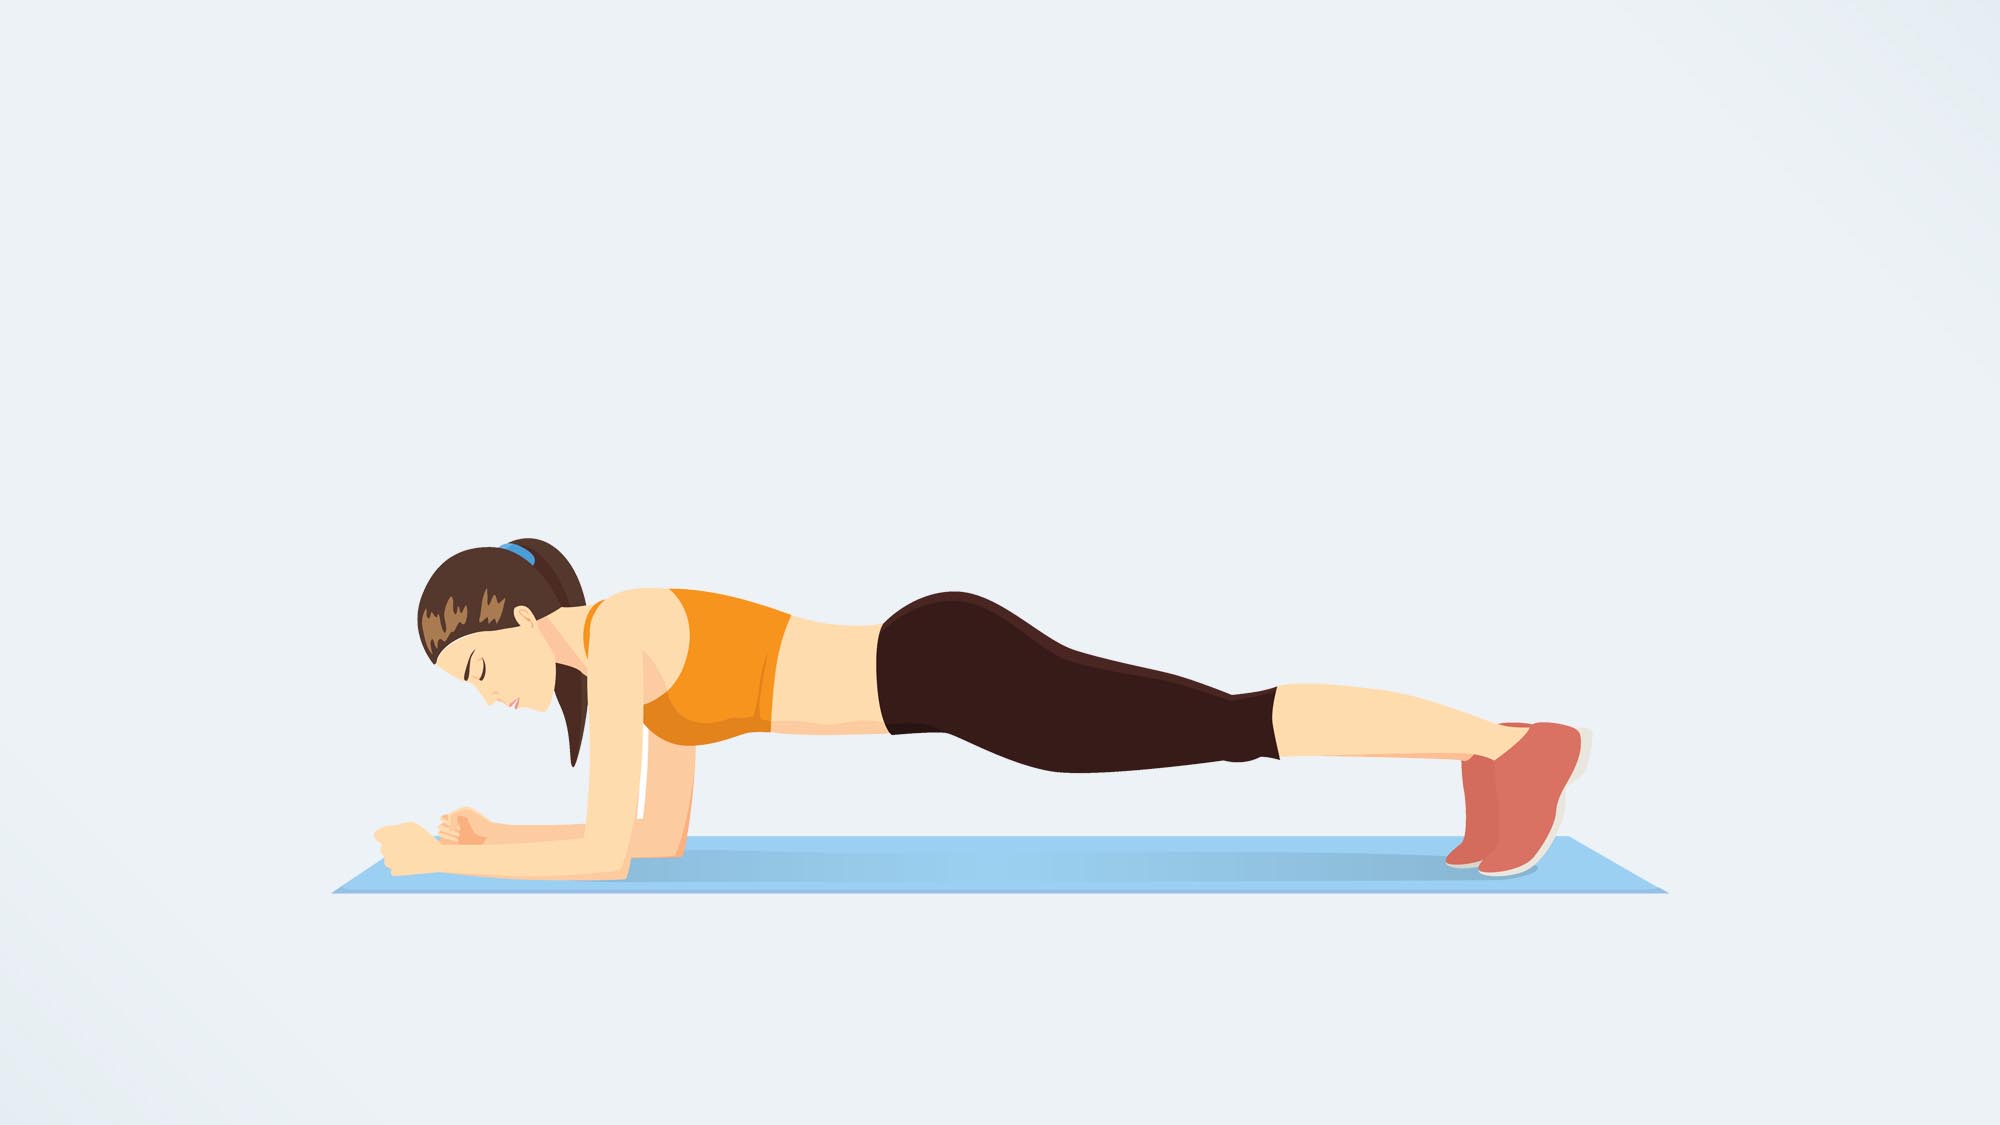
To perform the plank, come to a prone position (on all fours) on the floor or a mat. Step your feet behind you and plant your toes into the floor, about hip-width apart. Place your elbows directly underneath your shoulders, with your forearms on the floor. Keep your spine neutral and torso parallel to the floor — don’t allow your lower back or chest to sink towards the floor, or your hips to rise into the air. Hold in this position for 30 seconds, or until you reach fatigue.
If you’re finding it hard to keep your form for the full 30 seconds, consider a modified plank — bend at the knees, place them down on the mat, and continue to hold for the full 30 seconds. You can also perform the plank with your upper body braced against a surface other than the floor, like a table or the wall. If a 30-second plank feels easy, increase your time in 15-second increments. Inspired? Here are 19 of the best plank variations to attempt.
3. Deadlifts
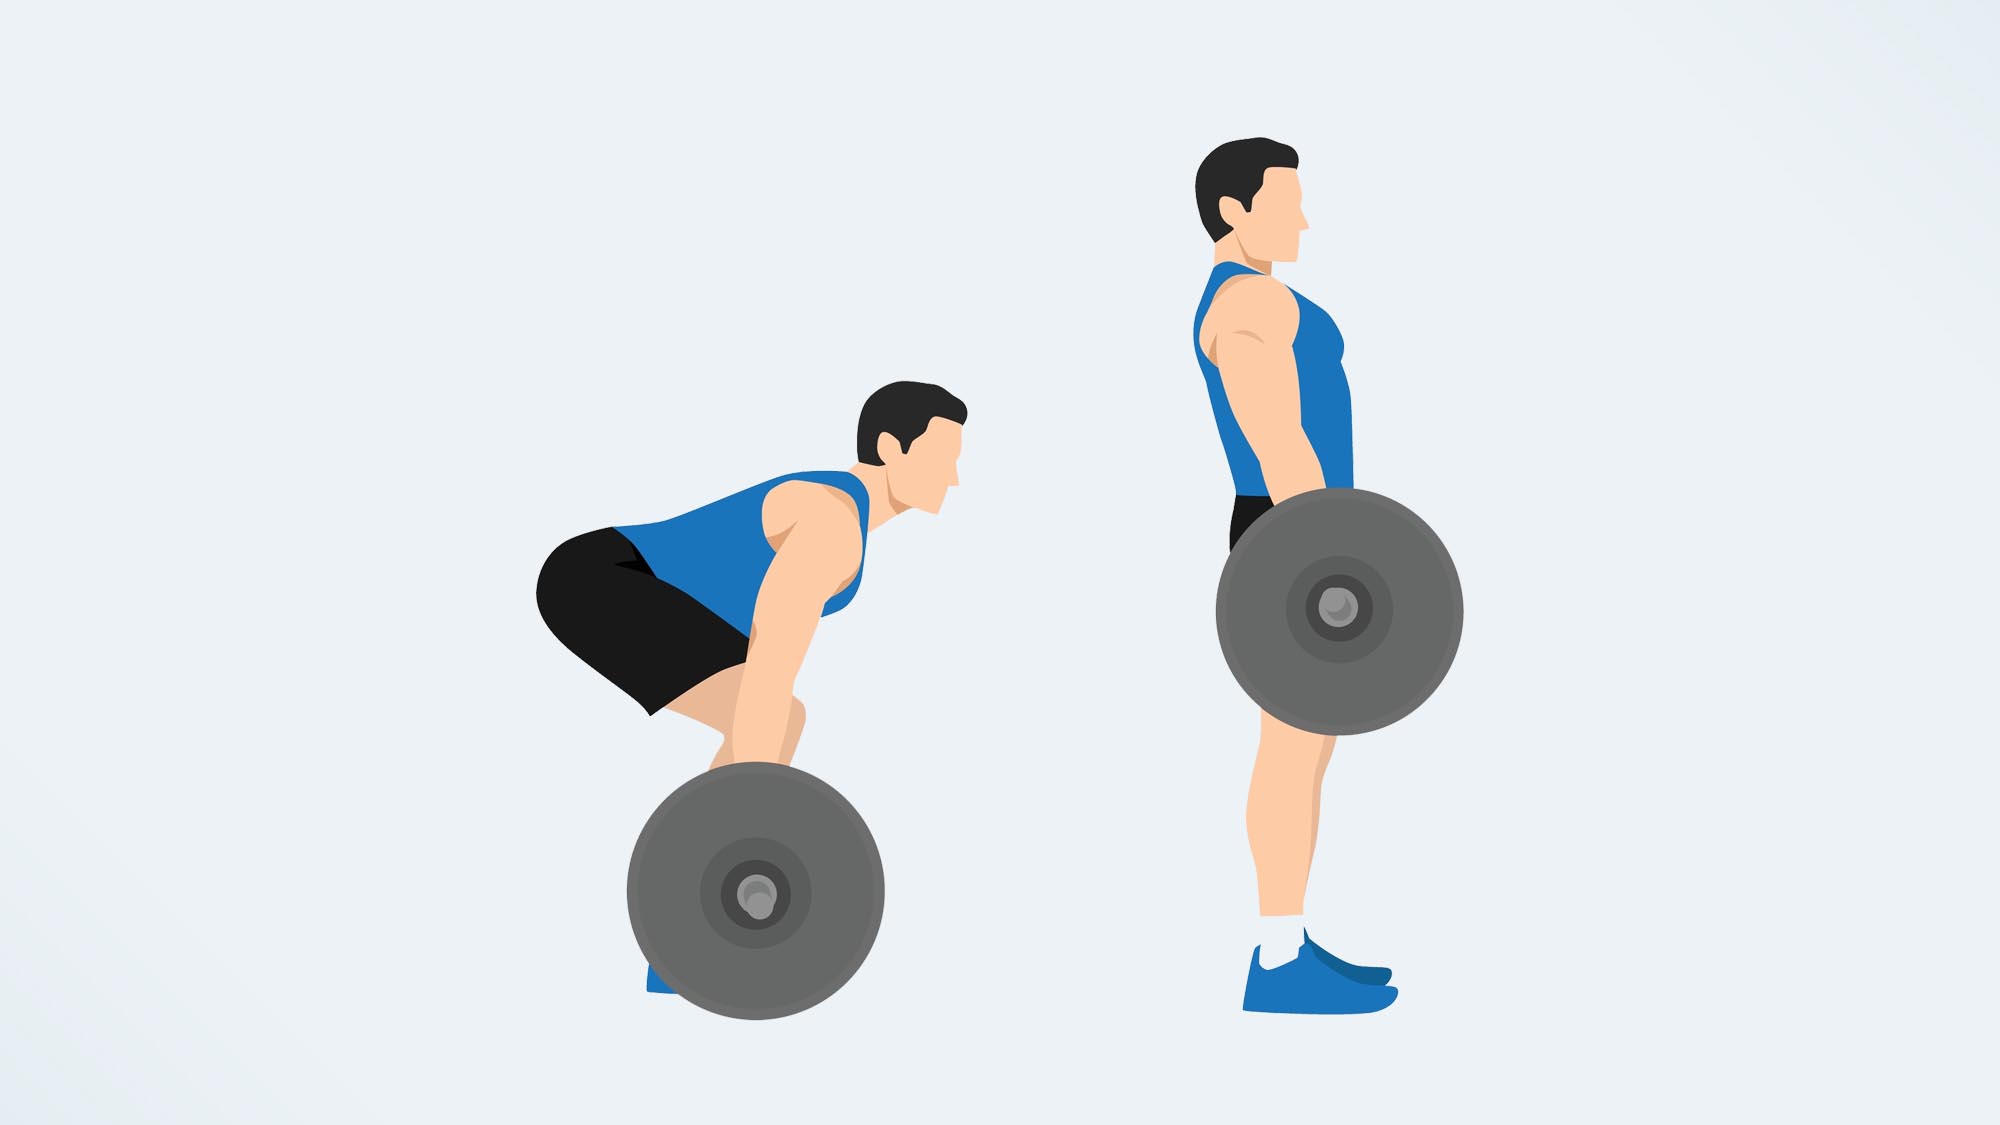
To perform the deadlift, select two moderately heavy dumbbells or kettlebells, or a barbell, and hold them in front of you. Keep the core engaged and the spine neutral. Hinge at the hips and set them back, aiming your tailbone to the wall behind you. Be sure to keep your spine neutral — don’t allow any arching through your back. Continue aiming your tailbone behind you and lowering the weights toward the floor. Once your spine is in a parallel position to the floor, squeeze your glutes and slowly stand back up to the starting position. Continue for a set of 10 repetitions, or until you reach fatigue.
The deadlift may look relatively simple, but getting the form just right can be tricky. If you’ve never tried deadlifting before, you may want to seek guidance from a certified personal trainer. If you’re a deadlifting pro and want to up the ante, try a one-leg deadlift — as you lower the weight towards the floor, allow one leg to rise from the floor, parallel to the ceiling. This will not only challenge your strength, but also help to improve your balance!
4. Dumbbell chest press
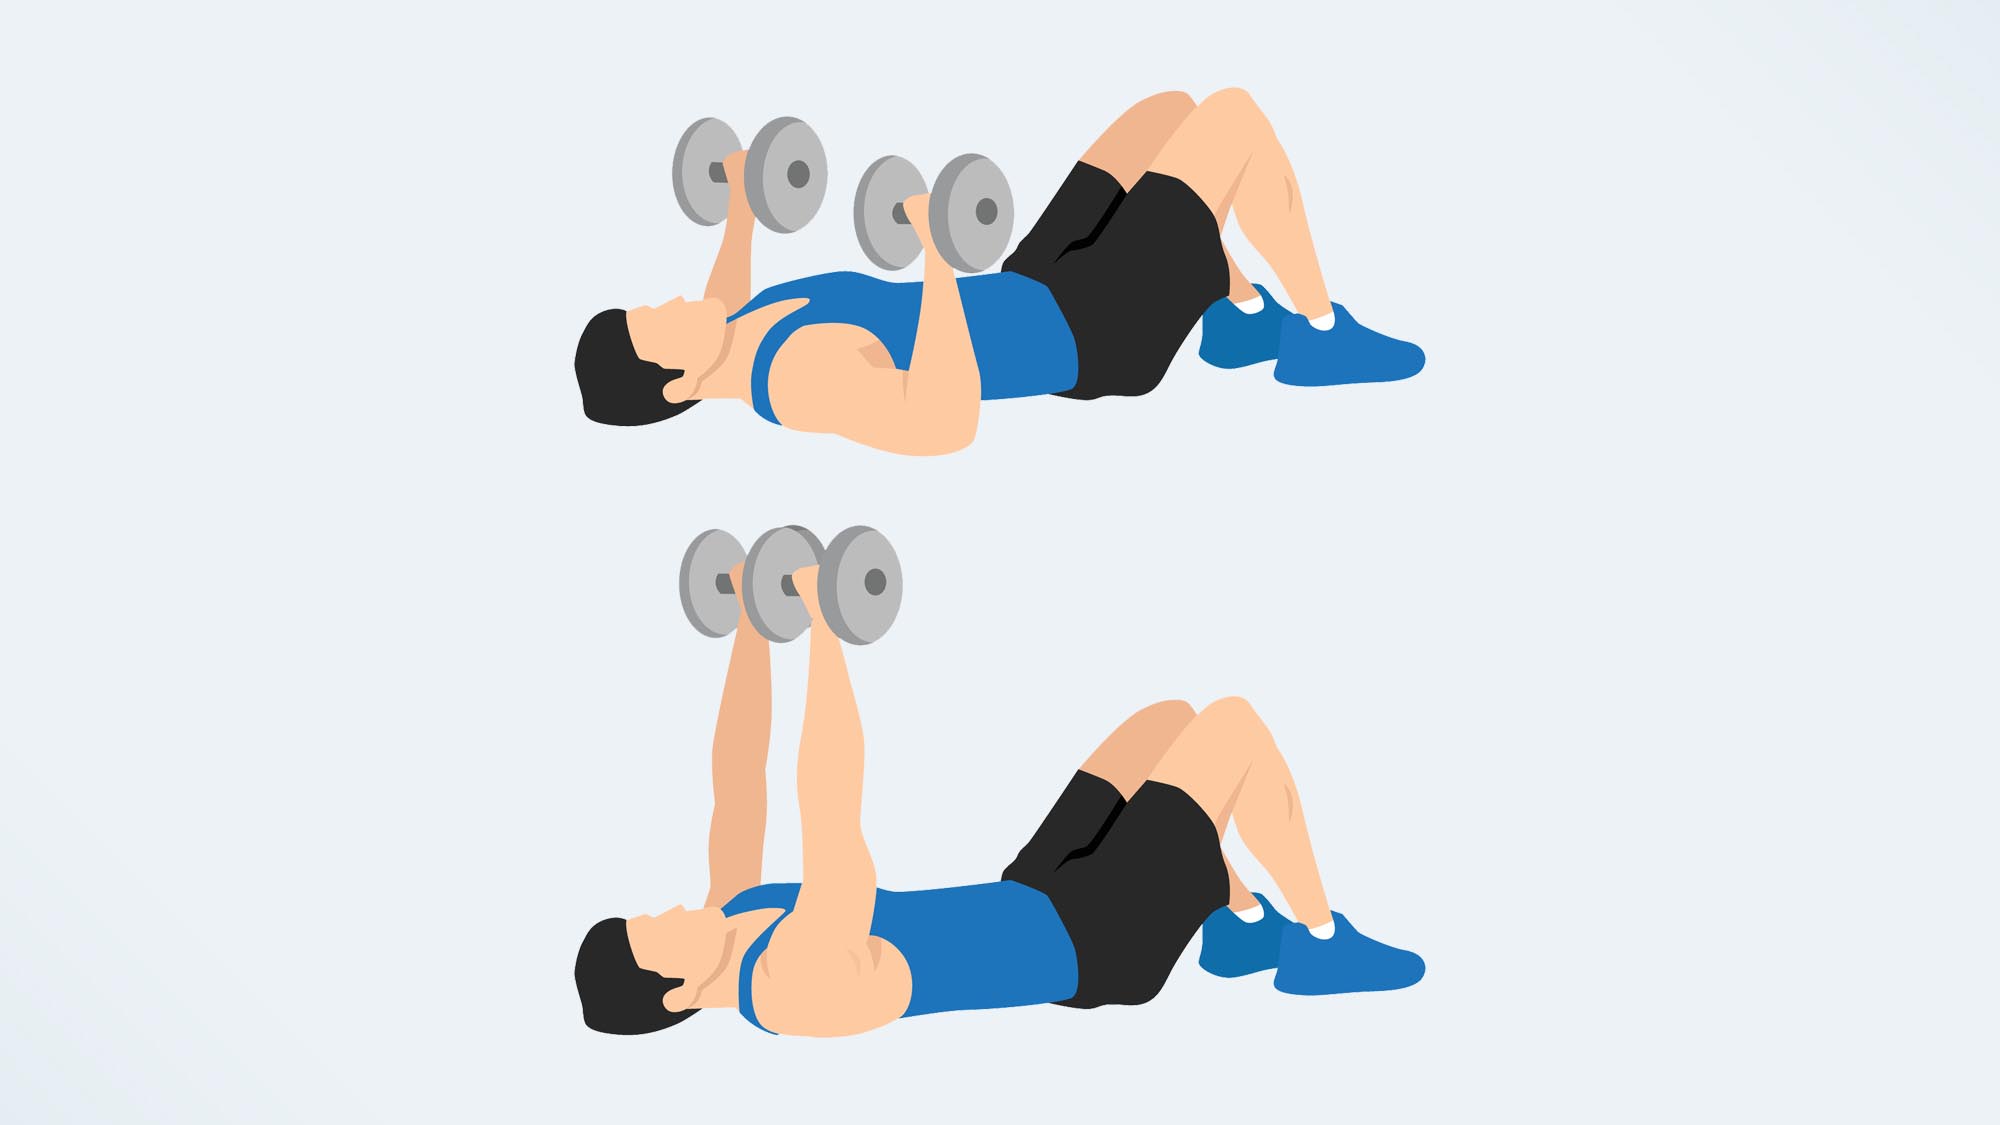
To perform the dumbbell chest press, select two moderately heavy dumbbells and take a seat at the edge of a weight bench (if you don’t have access to a weight bench, you can perform the chest press on the floor). Slowly lie back on the bench, holding the dumbbells with your wrists aligned over your elbows, your elbows bent in a right angle and aligned slightly in front of the shoulder joint, and your knuckles facing the wall behind you. Keeping your core engaged and your spine neutral, press the dumbbells towards the ceiling, squeezing the muscles in your chest. Once you’ve reached the end of your range, slowly lower the weights down to the starting position. Continue for a set of 10 repetitions, or until you reach fatigue.
If you’re finding it hard to complete a full set, consider dropping to a lighter weight. If 10 reps feels easy, select a heavier weight.
5. Bird dogs
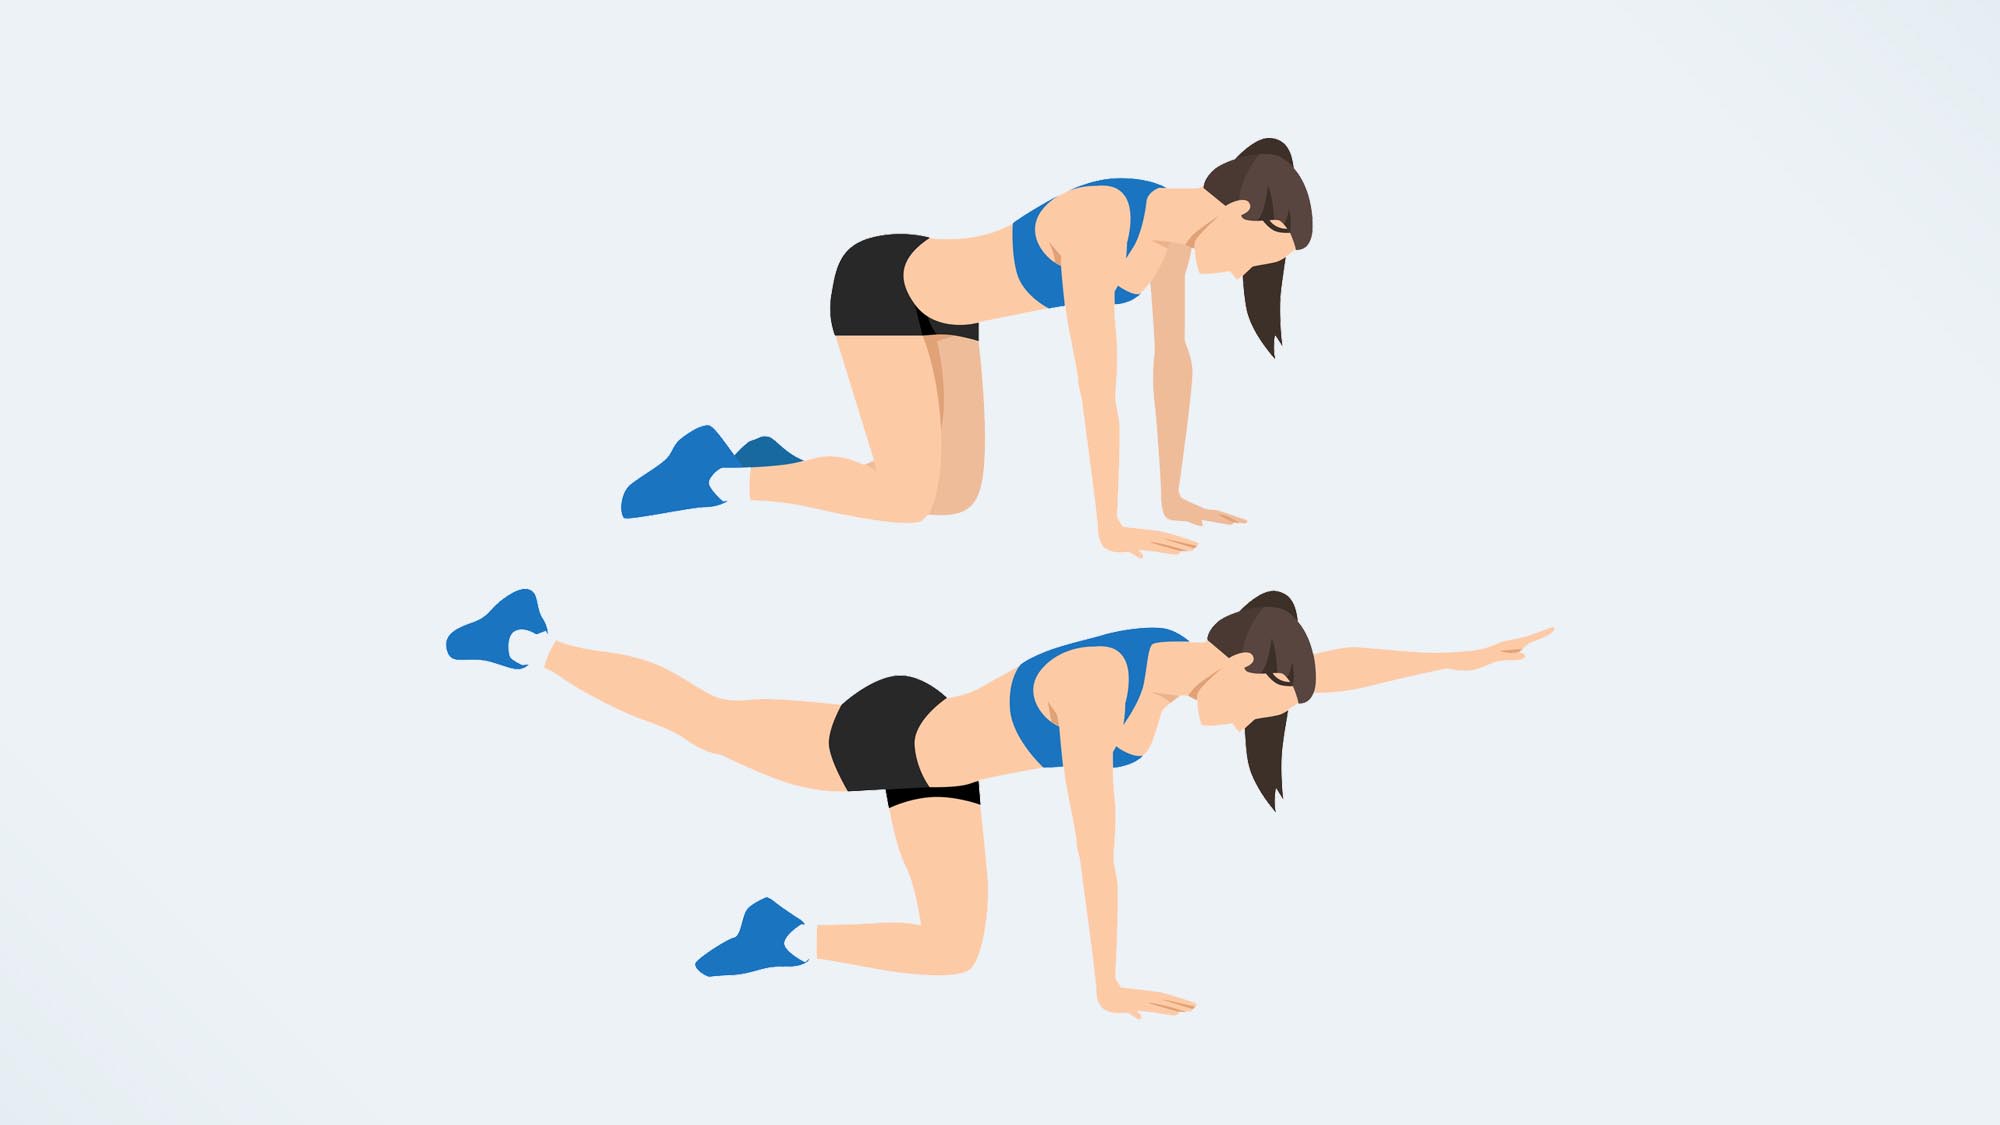
To perform the bird dog, come to the floor or mat in a prone position (on all fours). Pull your belly button towards your spine, and keep your spine in a neutral position — don’t allow your lower back or chest to sink towards the floor or arch towards the ceiling. Slowly lift your right arm and left leg parallel to the floor. Hold for 1-2 seconds, then return to the starting position. Continue for a set of 10 repetitions, and then perform the exercise on the other side.
When you’re ready to amp it up, try alternating between the two sides as you perform the exercise. Read what happened when this fitness writer did 50 bird dogs every day for a week.
More from Tom's Guide
Jennifer Rizzuto is a freelance writer and certified personal trainer based in Long Island, NY. She covers various fitness-related topics and reviews for Tom's Guide. She also writes sketch comedy and short films, and performs frequently as an actor, singer, and improviser. When she's not writing, working out, or performing, you'll find her trying to convince her husband to get a dog.

