How to set up a VPN on iPhone
VPN setup made easy on iPhone with our how-to guide.

A virtual private network (VPN) is a great way to unlock geo-specific content and keep your internet activity hidden from prying eyes, whether that be your internet provider, hackers or the government.
iPhone VPN apps are offered by just about every one of the best VPN providers nowadays, so that you can enhance both the privacy or your desktop or laptop as well as your mobile device when you’re out and about. The best will come with not only a simplified interface optimised for iPhone but also the same functions as the desktop version.
In our step-by-step guide, we’ll show you how to download and install an iPhone VPN to optimise your internet security. For this article, we’ll be using ExpressVPN as an example, but the process will be more or less the same for any VPN.
- Setup VPN: our comprehensive guide for all devices
- Here's exactly how to change region on Netflix

Download and install an iPhone VPN
Although you could go straight to the App Store and search for the ExpressVPN app, going directly via the website will ensure you download the official app and not a copycat app, which could pose a security risk to your phone and personal data
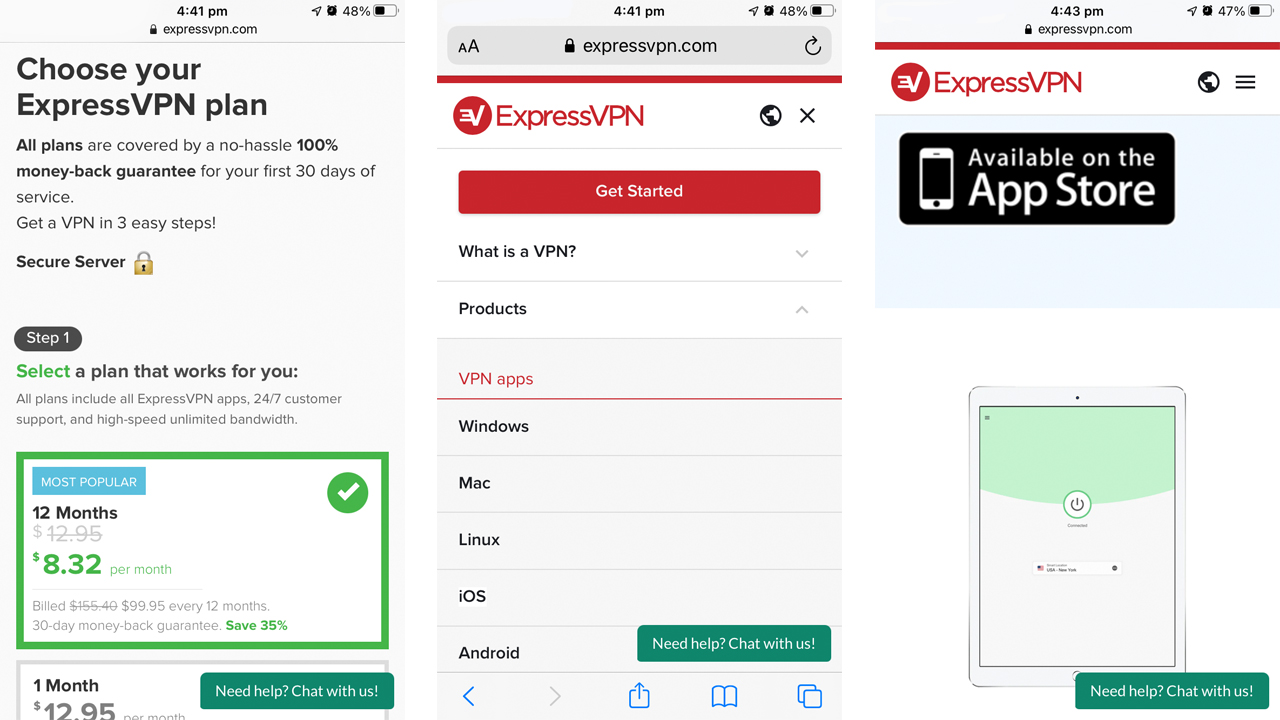
If you want to download ExpressVPN on your iPhone, the first thing to do is choose a plan from its website. The great thing about ExpressVPN is that it offers a no-fuss 30-day money-back guarantee if you’re not happy.
Once you’ve signed up to the service, you should log in to the website. After that, the best way to download the iOS app is to go to the ExpressVPN website on your iPhone. When you’re there, click on the three lines in the top-right corner of your screen to bring up the website’s menu. Tap on the arrow next to ‘Products’ and then tap on ‘iOS.’
Now you’re on ExpressVPN’s specific webpage for iPhone users, all you have to do is scroll down until you see the black and white ‘Available on the App Store’ logo, which is about a third of the way down the page.
Sign up to get the BEST of Tom's Guide direct to your inbox.
Get instant access to breaking news, the hottest reviews, great deals and helpful tips.
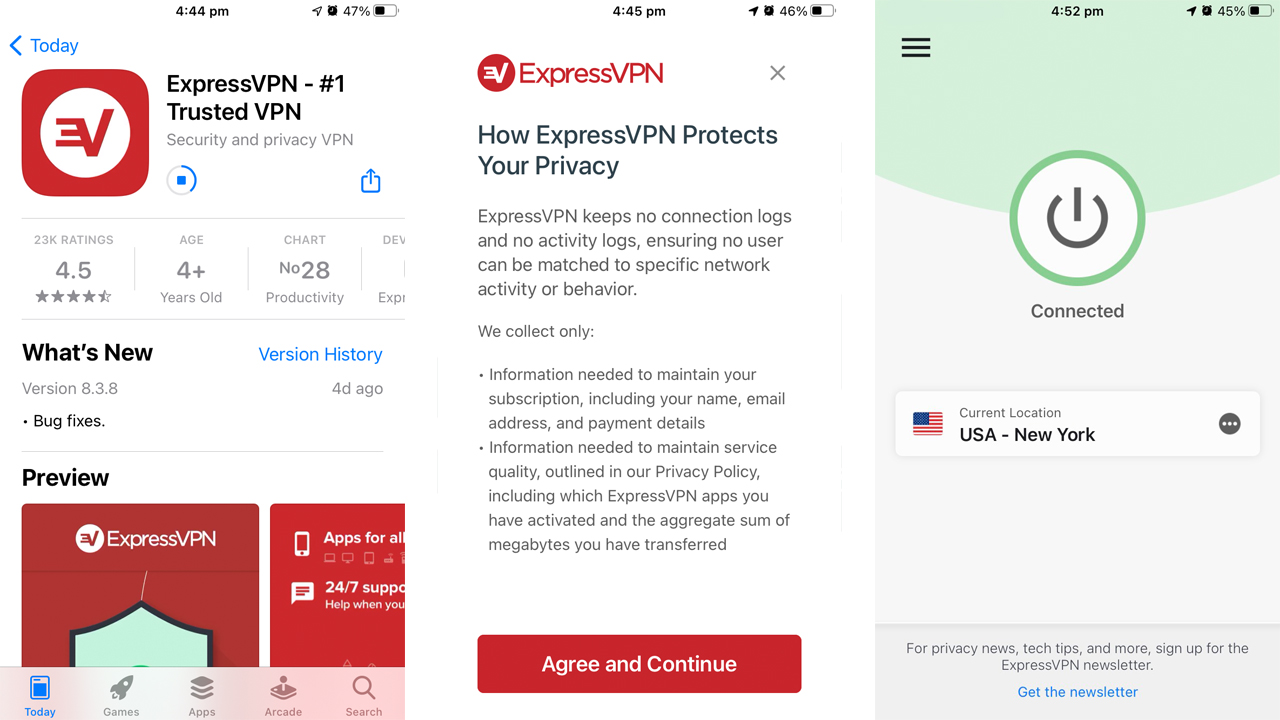
Click the logo and the App Store will come up on your screen. Once it’s loaded, click ‘Get’ next to the ExpressVPN logo and confirm the download with your Touch ID, Face ID, or Apple ID password.
How to set up an iPhone VPN
Now that you’ve downloaded the ExpressVPN app, you need to set it up for your phone.
Firstly, log in to your ExpressVPN account by entering the relevant email address and password. You’ll then see a statement which outlines the company’s privacy policy in regards to your data. To continue, push ‘Agree and Continue.’ Once you’ve agreed, you’ll be asked to set up ExpressVPN on your phone, click ‘Continue.’
ExpressVPN will then ask if you’d like the app to notify you of announcements and alerts. To continue, simply tap your preference. If you choose to accept notifications, another pop-up will appear. Click ‘Accept’ to continue.
Following this, a pop-up notification will appear stating, ‘ExpressVPN Would Like to Add VPN Configurations.’ Tap ‘Allow,’ and you’ll be asked to confirm your selection by using either your Touch ID, Face ID, or passcode.
Finally, you’ll be asked if you’d like to help improve ExpressVPN by sharing anonymous data and analytic reports with the company. Select your preference to finish the setup.

How to activate your iPhone VPN
To activate the VPN, simply tap the on button. By default, ExpressVPN will use its Smart Location function to choose the best server location, which in turn optimises your user experience. If, however, you’d like to change your server location, simply tap on ‘Current Location’ and select your preferred server.
What’s the best VPN for iPhone?
While different VPNs have unique pros and cons, ExpressVPN is currently our top-rated iPhone VPN. It offers outstanding privacy and has strong connection speeds and support for some of the most popular streaming services.
Even though there are slightly cheaper options, ExpressVPN more than justifies its price tag with a strong set of features and servers located in more than 94 countries. You’ll also be able to stream content from tons of services all over the world, and what’s more, Tom’s Guide readers can now claim three months free on any annual plan.
Thomas Johnson is a freelance journalist whose passion and fascination with technology has led him here. He contributes to Future titles, such as Tech Radar, Tom’s Guide, IT Pro Portal and Creative Bloq. He’s also a self-confessed film snob and is the Editor of Salty Popcorn, a bi-weekly Substack dedicated to movie news, reviews and trivia.


