This 30-day ab challenge will strengthen and sculpt your core in just a month
Get a strong and conditioned core with this month-long program

There’s no better way to spend a month than building a stronger core.
Your abdominal muscles have many responsibilities, from stabilizing your whole body, to flexing and extending your spine, to keeping your internal organs in place. The stronger they are, the better you’ll be able to run, jump, and move through life.
So roll out your mat and jump into this 30-day ab challenge. Whether you’re a seasoned pro when it comes to core work, or the only sit-up you’ve ever done has been to get out of bed, this month-long program will leave you with rock-solid abdominals.
What are your abdominal muscles?
Your abdominals are a group of muscles that include your transverse abdominis (the deepest muscles in your torso, attached to your spine and pelvis), the rectus abdominis (the more superficial “six-pack” muscles of your core), the internal and external obliques (located on the sides of your trunk), and the pyramidalis (a small triangular muscle located in your pelvis).
How to complete the 30-day ab challenge
The following month-long program is progressive, meaning it starts with basic but fundamental concepts and then gets more advanced as the days pass. If you’re no stranger to the mat, resist the urge to skip past the “easier” days — awareness and control in the deepest abdominal muscles are essential components of building a stronger core (even if you’ve already achieved that “six pack”).
Each week will feature 3-4 different exercises. Don’t be afraid to modify certain exercises as needed, trying the standard form once you’ve built up the appropriate strength — it’s a great way to measure your progress!
The same goes for listed repetitions and times — if you find you’re fatiguing far before you’ve reached the end of the set, reduce the reps or time. If you breeze through without breaking a sweat, increase your reps or time.
Sign up to get the BEST of Tom's Guide direct to your inbox.
Get instant access to breaking news, the hottest reviews, great deals and helpful tips.
Week 1 — Building a strong foundation
You learn to walk before you learn to run, so we’re learning to “walk” by working on the foundations of our core. The first seven days in our 30-day ab challenge is all about the transverse abdominis, or TVA. Also known as the “corset” muscle, the TVA is responsible for protecting and stabilizing the spine. If your TVA is weak, you’re more likely to experience back pain and other injuries — even if you’ve got a relatively strong rectus abdominis.
As you progress to the later weeks, it’s always a good idea to come back to these beginning exercises from time to time. They can even be used as a warm-up before your regular routine.
The exercises:
1. Diaphragmatic breathing with pelvic floor activation
To perform diaphragmatic breathing with pelvic floor activation, lie on your back with your knees bent and feet flat on the floor. Keep your spine neutral — don’t allow your lower back to arch excessively. Place both hands on your stomach, framing your belly button. Inhale deeply, allowing your ribs and stomach to expand. Keep your breathing low in the belly — your chest and shoulders should remain still. Exhale, drawing your ribs towards the center of your body and your belly button towards your spine. Engage your pelvic floor muscles — this will feel like you’re stopping the flow of urine. Hold this engagement for 10 seconds. Continue for as many repetitions as the program below dictates.
2. Hollow body hold
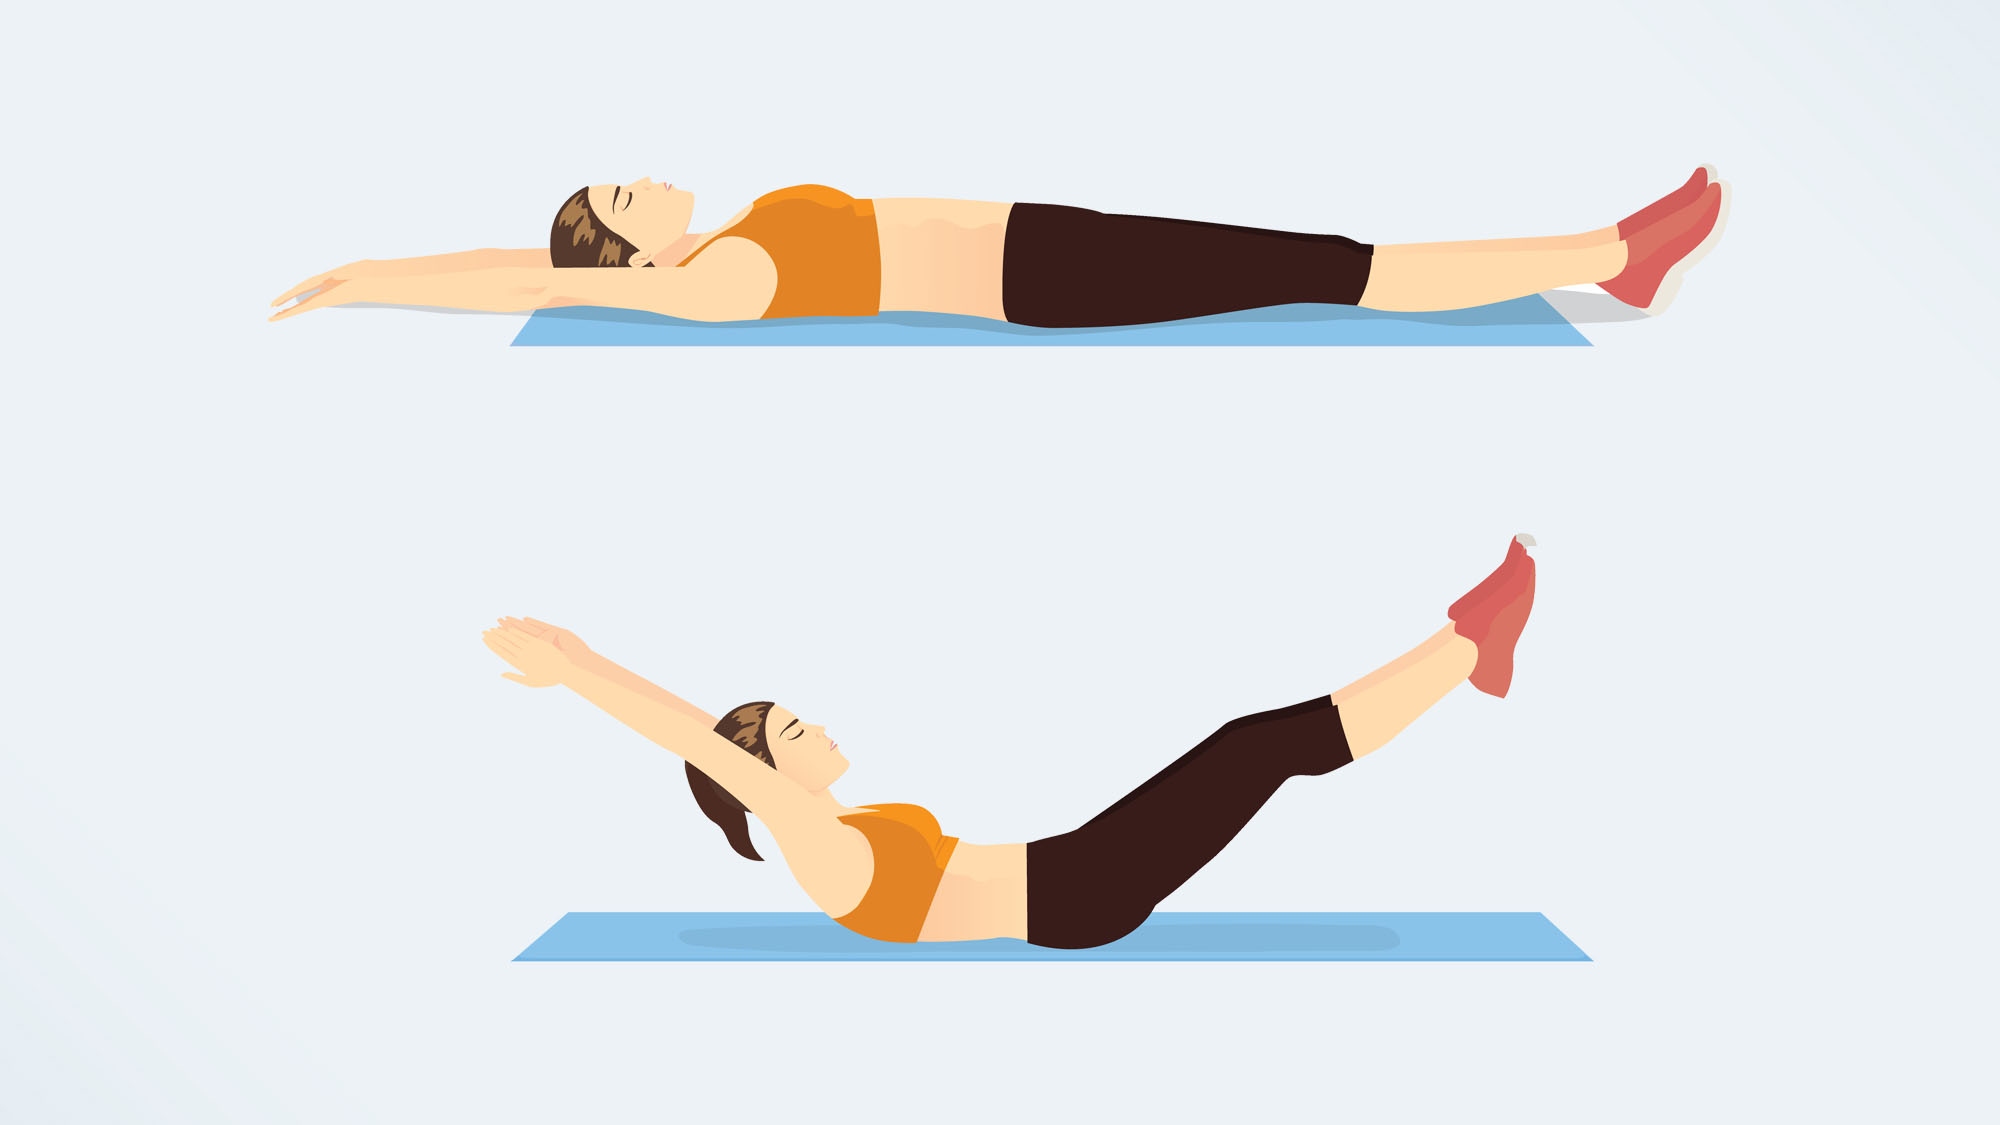
To perform the hollow body hold, lie on your back with your knees bent and feet flat on the floor. Place both of your hands behind the back of your head and keep your lower back in a neutral position. Inhale, expanding the rib cage and allowing the belly button to rise towards the ceiling. Exhale and draw your abdominals in, lifting your head and shoulders off the mat and bringing your knees to a tabletop position. Hold in this position for as many seconds as the program below dictates.
If a tabletop position causes pain in your lower back, keep your feet on the ground as you hold. Once the hollow body hold starts to feel easy, try the exercise with your legs straight and your arms extended behind your head.
3. Heel taps
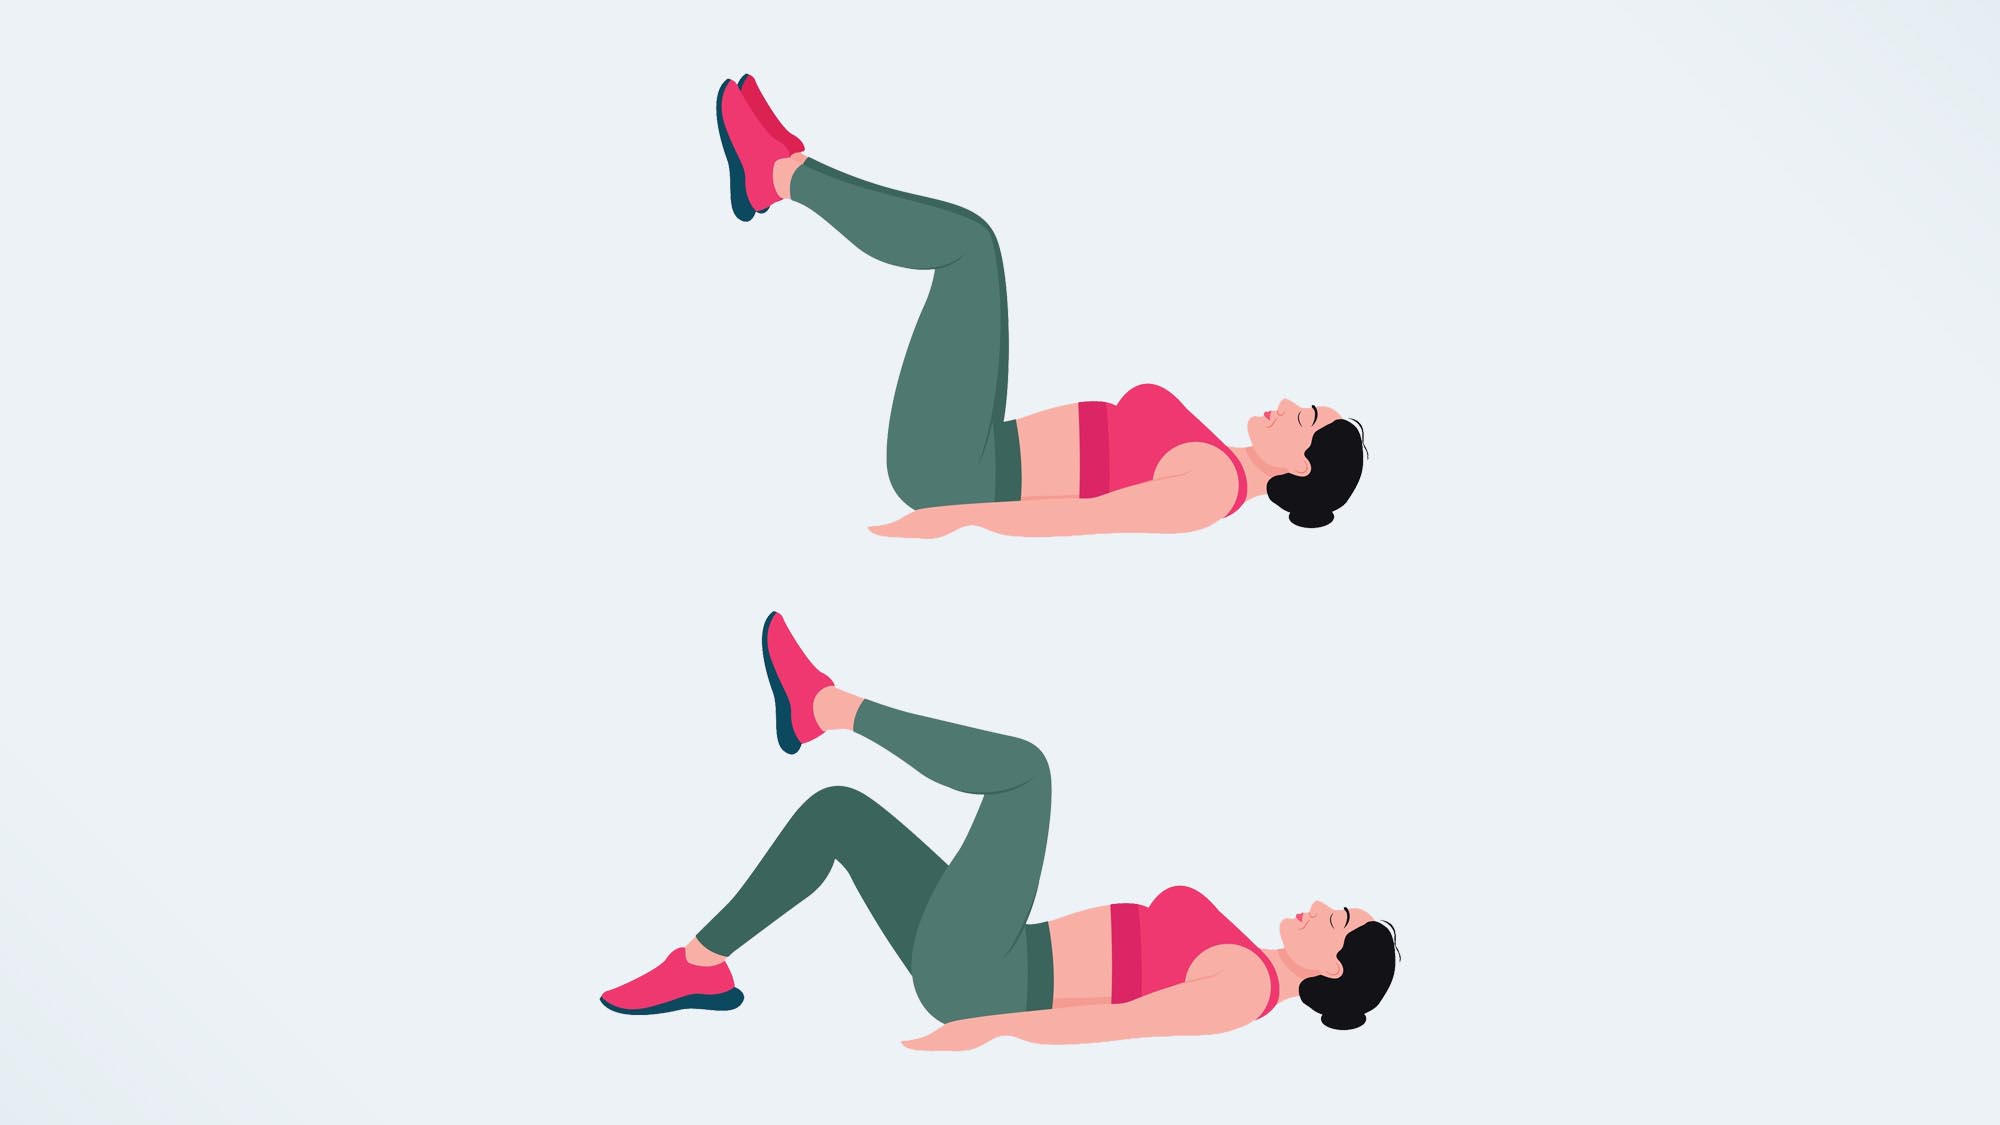
To perform heel taps, lie on your back with your knees bent, feet flat on the floor, and lower back neutral. Without allowing the lower back to arch excessively, slowly lift your legs to a tabletop position with your knees aligned directly over your hips and your shins parallel to the ceiling. Keeping the core engaged and the belly button drawn in towards your spine, lower your left heel to the floor. Slowly lift it back to the starting position. Lower your right heel to the floor, and slowly lift it back to the starting position. Continue alternating between your left and right legs for as many repetitions as the program below dictates.
The last day of this week calls for bilateral heel taps, which involves dropping both your left and right heels toward the floor at the same time. Try this more challenging option if you’ve mastered alternating heel taps, but don’t allow your lower back to come out of alignment. If you find that happening, perform alternating heel taps instead.
The schedule:
DAY 1:
Diaphragmatic breathing, 10 breaths
Hollow body hold, 15 seconds
DAY 2:
Diaphragmatic breathing, 10 breaths
Hollow body hold, 15 seconds
DAY 3:
Rest
DAY 4:
Diaphragmatic breathing, 10 breaths
Hollow body hold, 30 seconds
Alternating heel taps, 10 repetitions each leg
DAY 5:
Diaphragmatic breathing, 10 breaths
Hollow body hold, 30 seconds
Alternating heel taps, 10 repetitions each leg
DAY 6:
Rest
DAY 7:
Diaphragmatic breathing, 10 breaths
Hollow body hold, 30 seconds
Bilateral heel taps (lower both legs at the same time), 10 repetitions
Week 2 — Improving Stability

After a week of working on awareness and endurance in the deepest abdominal muscles, it’s time to put those muscles to the test. The next seven days in our 30-day challenge is geared toward continuing to improve abdominal stability and deep core strength, this time with some more challenging exercises.
The exercises:
1. Plank
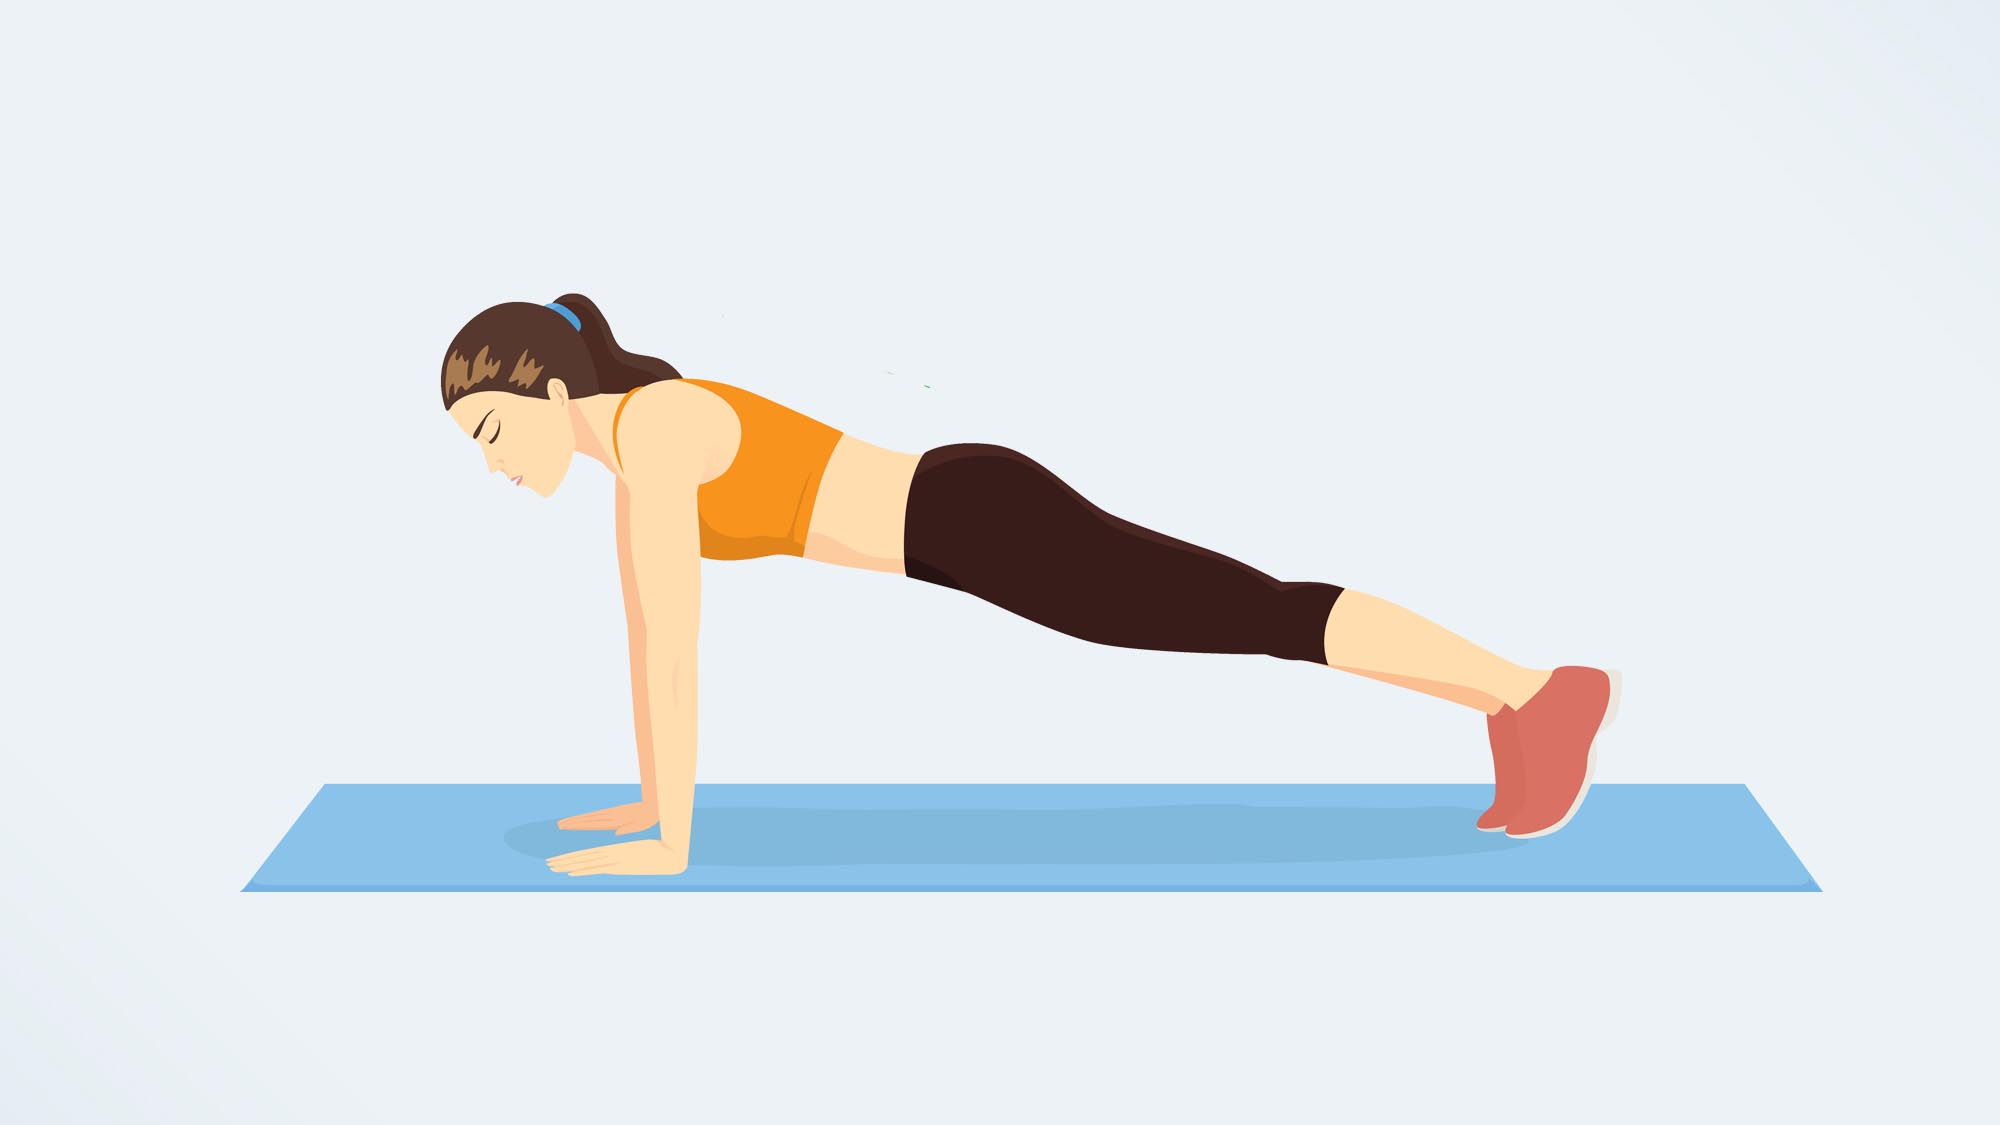
To perform the plank, come to all fours on the floor with your hands aligned directly under your shoulders and your knees aligned directly under your hips. Step your feet behind and plant your toes into the floor, about hip width apart. Come to your elbows, aligning them directly underneath your shoulders with your forearms on the floor. Your spine should remain neutral and your torso should parallel to the floor. Keep your core engaged. Don’t allow your lower back to arch excessively, or your hips to rise into the air. Hold in this position for as many seconds as the program below dictates.
The plank can be modified if you’re having trouble keeping correct form — bend at the knees, place them down on the floor, and hold this position for the specified time. You can also perform the plank with your upper body braced against a surface other than the floor, like a table or the wall.
Here's more on the best plank variations to add to your routine.
2. Side plank
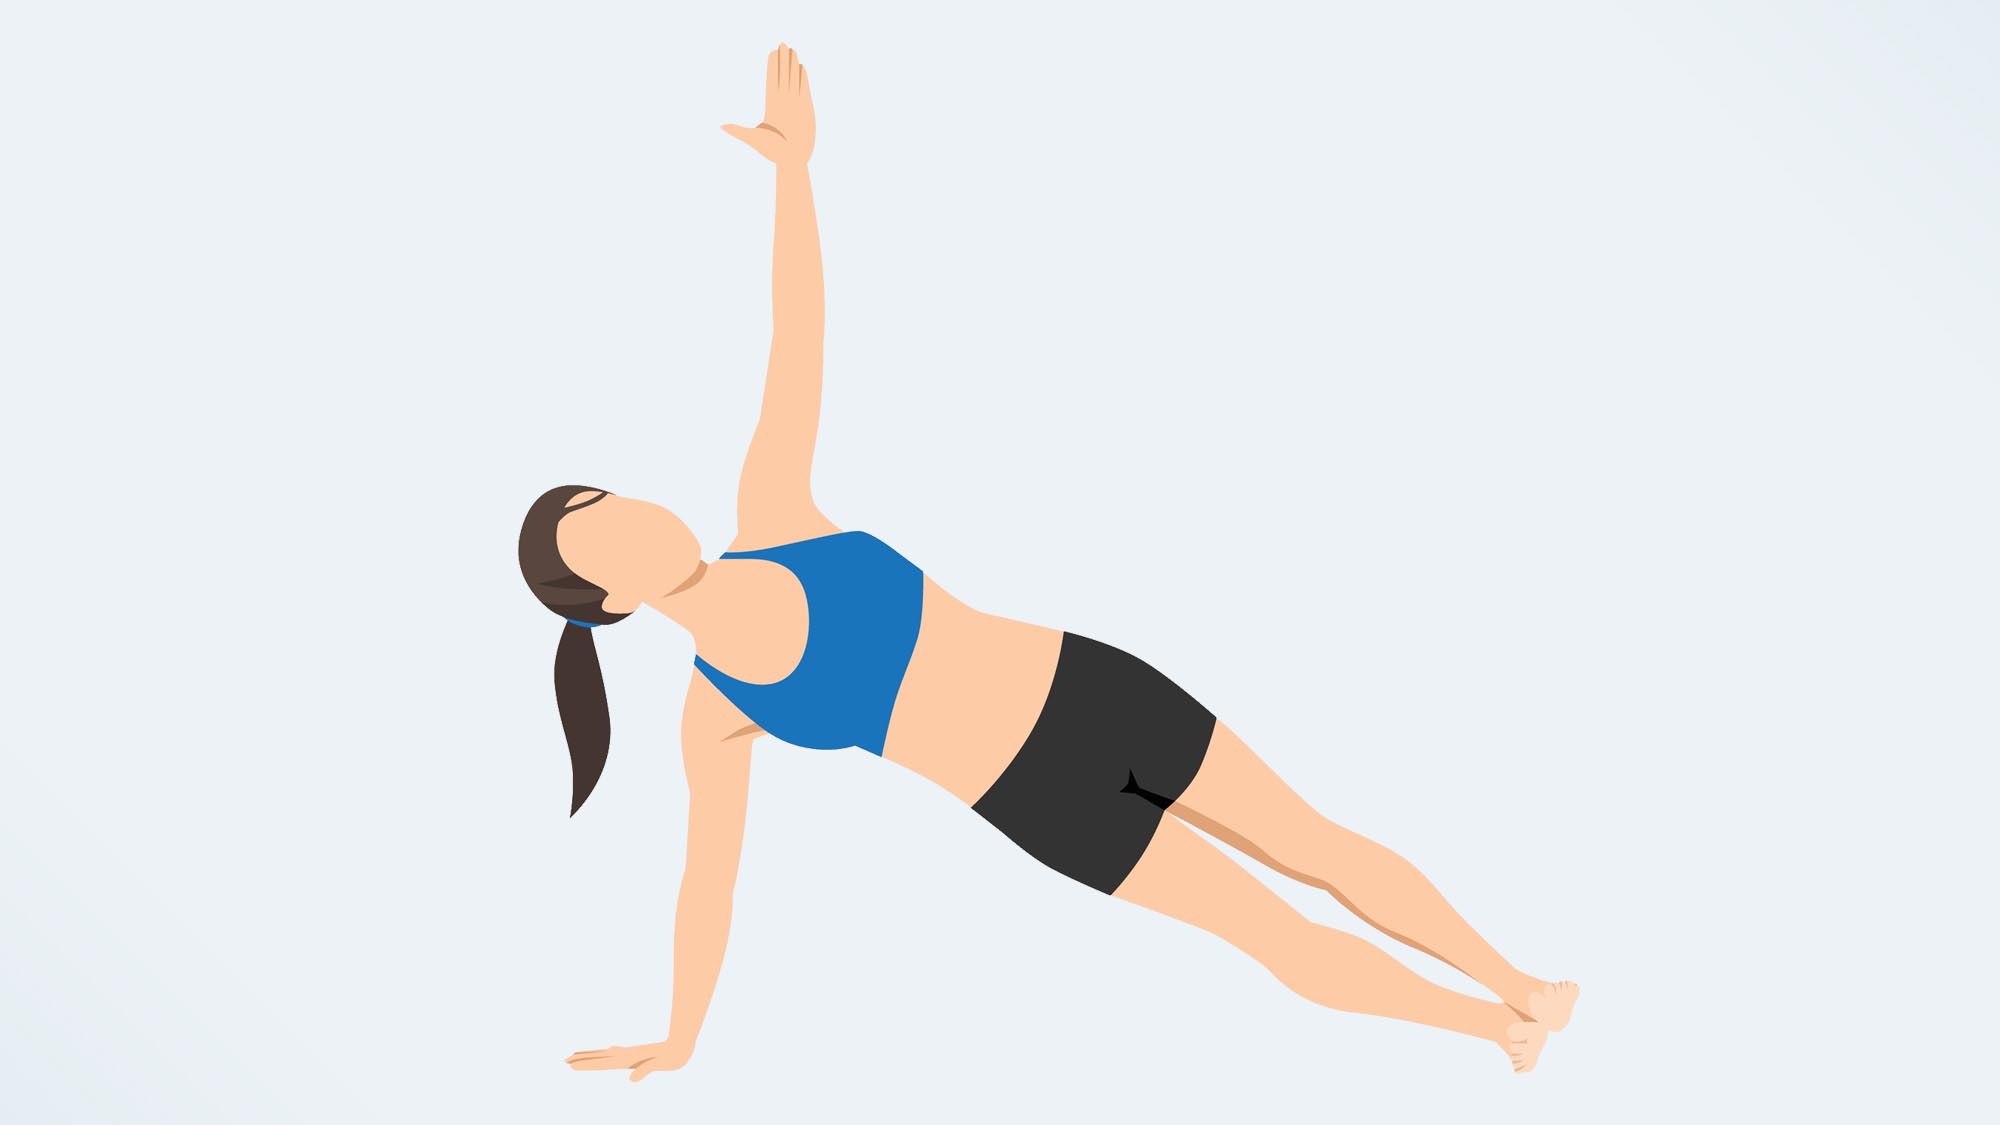
To perform the side plank, lie on your left side on the floor. Place your left elbow on the floor, aligned directly underneath your left shoulder. Elongate both of your legs, with your right foot resting directly on top of your left. Place your right hand on the floor in front of you for support, and slowly lift your hips off the ground. Once you feel stable, remove your right hand from the floor and rest it on your right hip, or elongate your right arm into the air. Keep your core engaged. Hold in this position for as many seconds as the program below dictates, and then repeat on the right side
There are several ways to modify the side plank, if needed:
- Keep your right hand on the floor as you hold the side plank position
- Bend both knees and keep them on the floor, instead of rising to your feet
- Place one foot on the floor in front of the other, giving yourself a wider base of support
3. Deadbugs
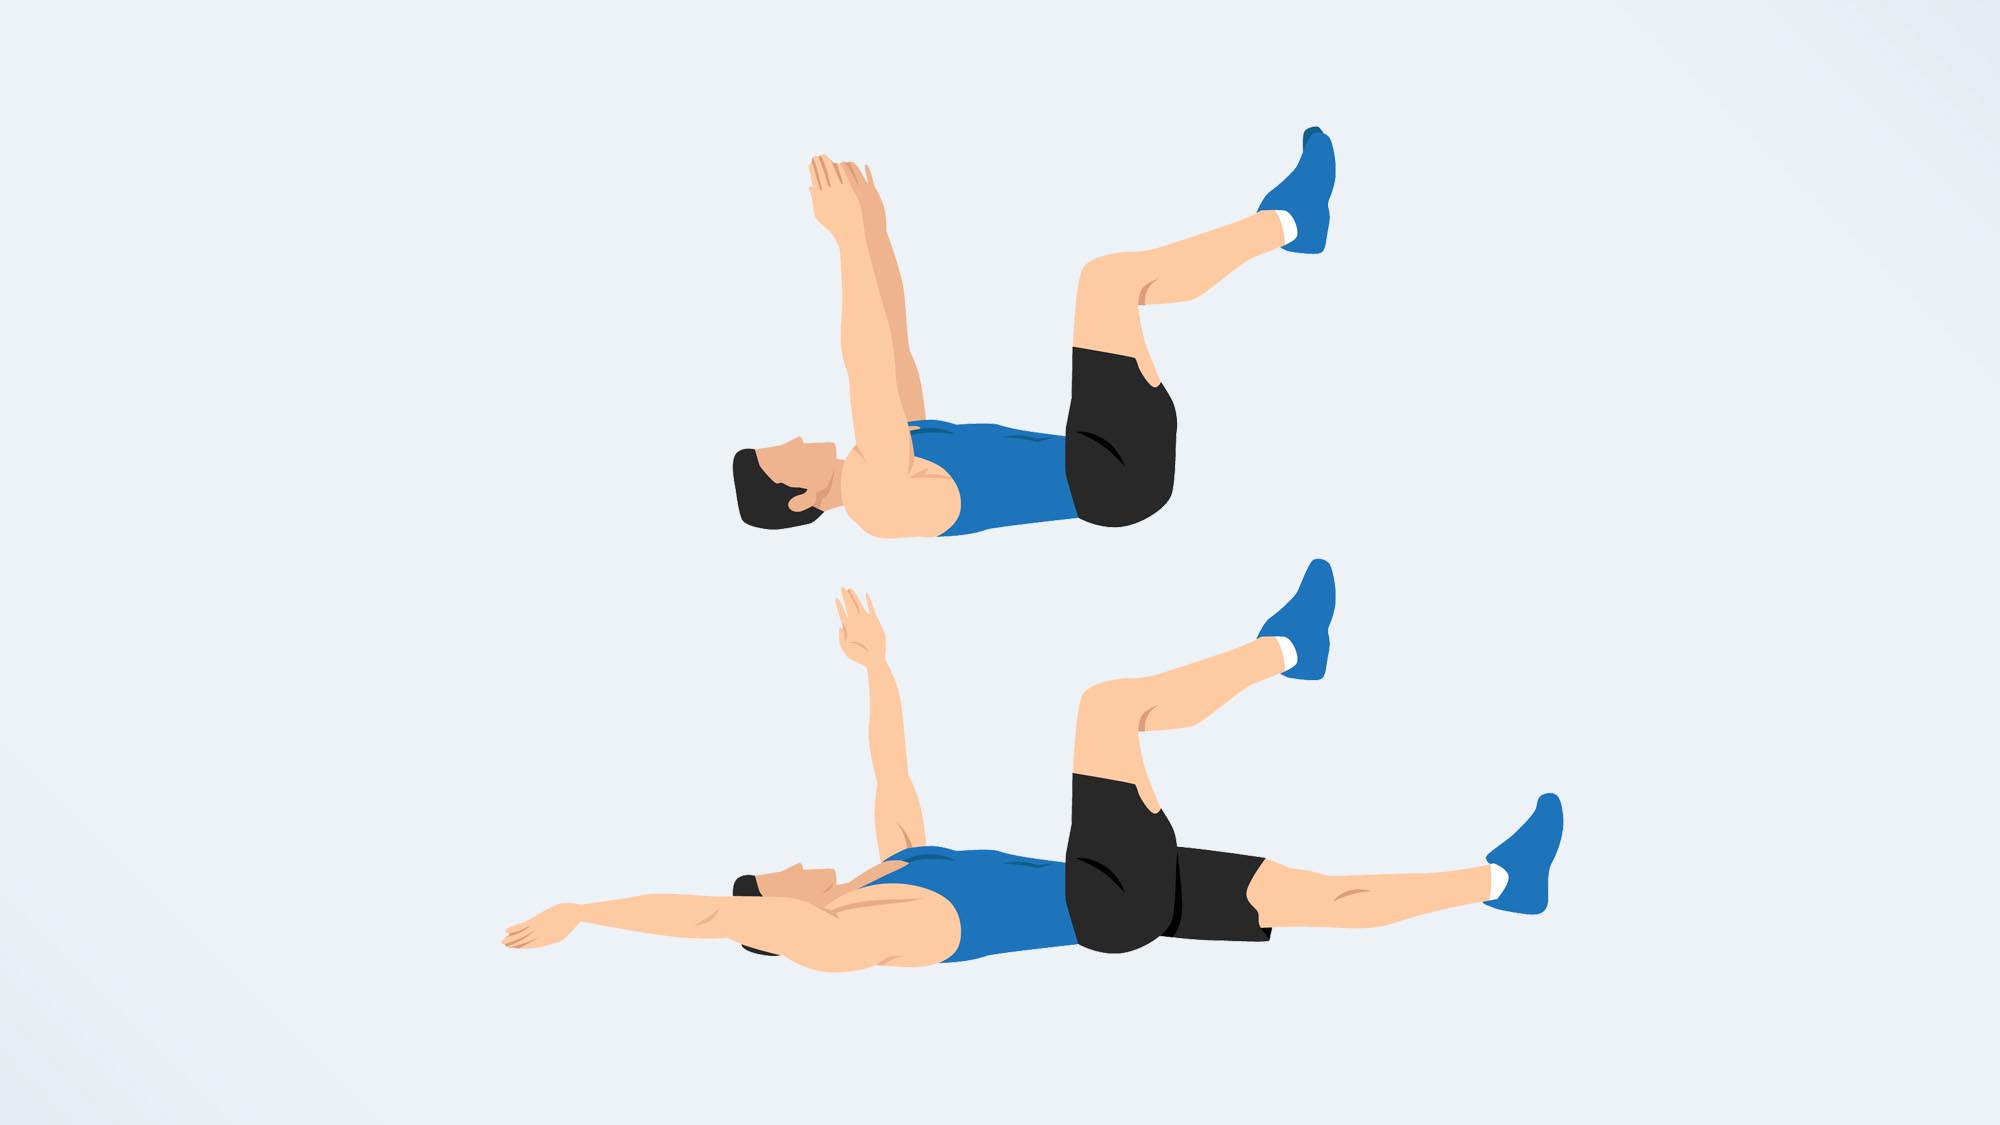
To perform dead bugs, lie on your back with a neutral spine, bent knees, and feet flat on the floor. Slowly lift your legs to a tabletop position, with your knees aligned directly over your hips and your shins parallel to the ceiling. Raise both arms straight in the air, so that your wrists, shoulders, and elbows are in direct alignment. With your core engaged, slowly lower your right foot and your left arm toward the floor at the same time. Raise them back to the starting position, and repeat the same motion with your left foot and right arm. Don’t allow the lower back to arch. Alternate between the two sides for as many repetitions as the program below dictates.
If coordinating the two sides feels difficult at first, practice the upper body and lower body portions of the exercise separately. Here's more on how to do a dead bug with perfect form, and what happened when our fitness editor did 100 dead bugs a day for a week.
4. Birddogs
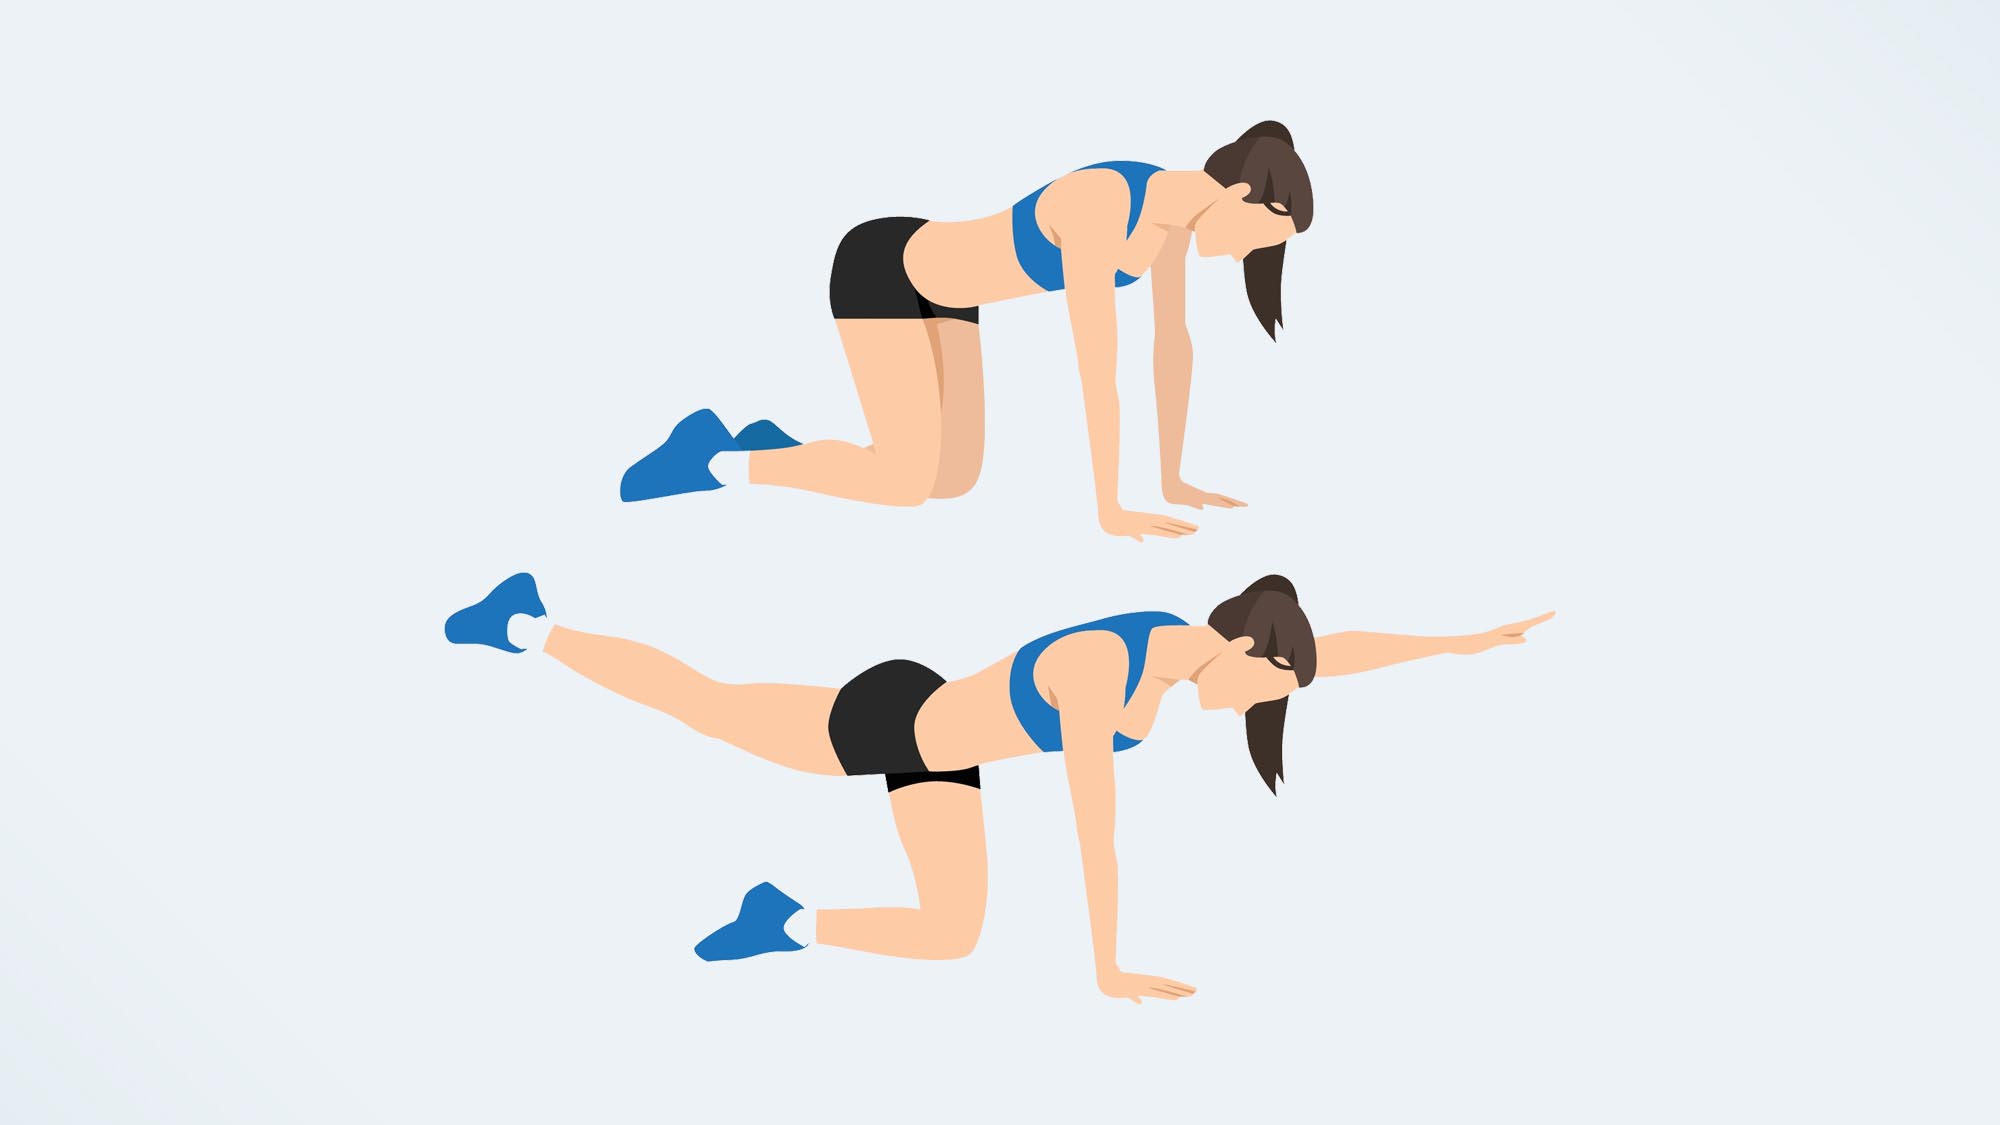
To perform birddogs, come to the floor on all fours with your hands directly underneath your shoulders and your knees directly underneath your hips. Engage your core and keep your lower back in a neutral position — don’t let the spine to sink towards the floor or arch towards the ceiling. Lift your right arm and left leg parallel to the floor with control. Hold for 1-2 seconds, then return to the starting position. Repeat the same motion with your left arm and right leg. Alternate between the two sides for as many repetitions as the program below dictates.
Like the deadbug, you can practice the birddog by performing the upper body and lower body portions of the exercise separately.
The schedule:
DAY 8:
Plank, 30 seconds
Side plank, 15 seconds each side
DAY 9:
Plank, 30 seconds
Side plank, 15 seconds each side
Deadbugs, 10 repetitions each side
DAY 10:
Rest
DAY 11:
Plank, 30 seconds
Side plank, 30 seconds each side
Deadbugs, 10 repetitions each side
Birddogs, 10 repetitions each side
DAY 12:
Plank, 45 seconds
Side plank, 30 seconds each side
Deadbugs, 12 repetitions each side
Birddogs, 10 repetitions each side
DAY 13:
Rest
DAY 14:
Plank, 45-60 seconds
Side plank, 30 seconds each side
Deadbugs, 12 repetitions on each side
Birddogs, 12 repetitions on each side
Week 3 — Finding your “six pack.”

Now that we’ve built a stable foundation, we can focus on exercises that target the rectus abdominis (or “six-pack” muscles) and the obliques. Keep in mind that while a “visible six-pack” is an aesthetic goal for many gym rats, muscle definition has more to do with your body composition than it does with your actual strength levels. Here's more on how to calculate your body fat percentage, and why it matters. In other words – just because you can’t see your abdominals doesn’t mean they aren’t strong.
The exercises:
1. Tabletop crunches
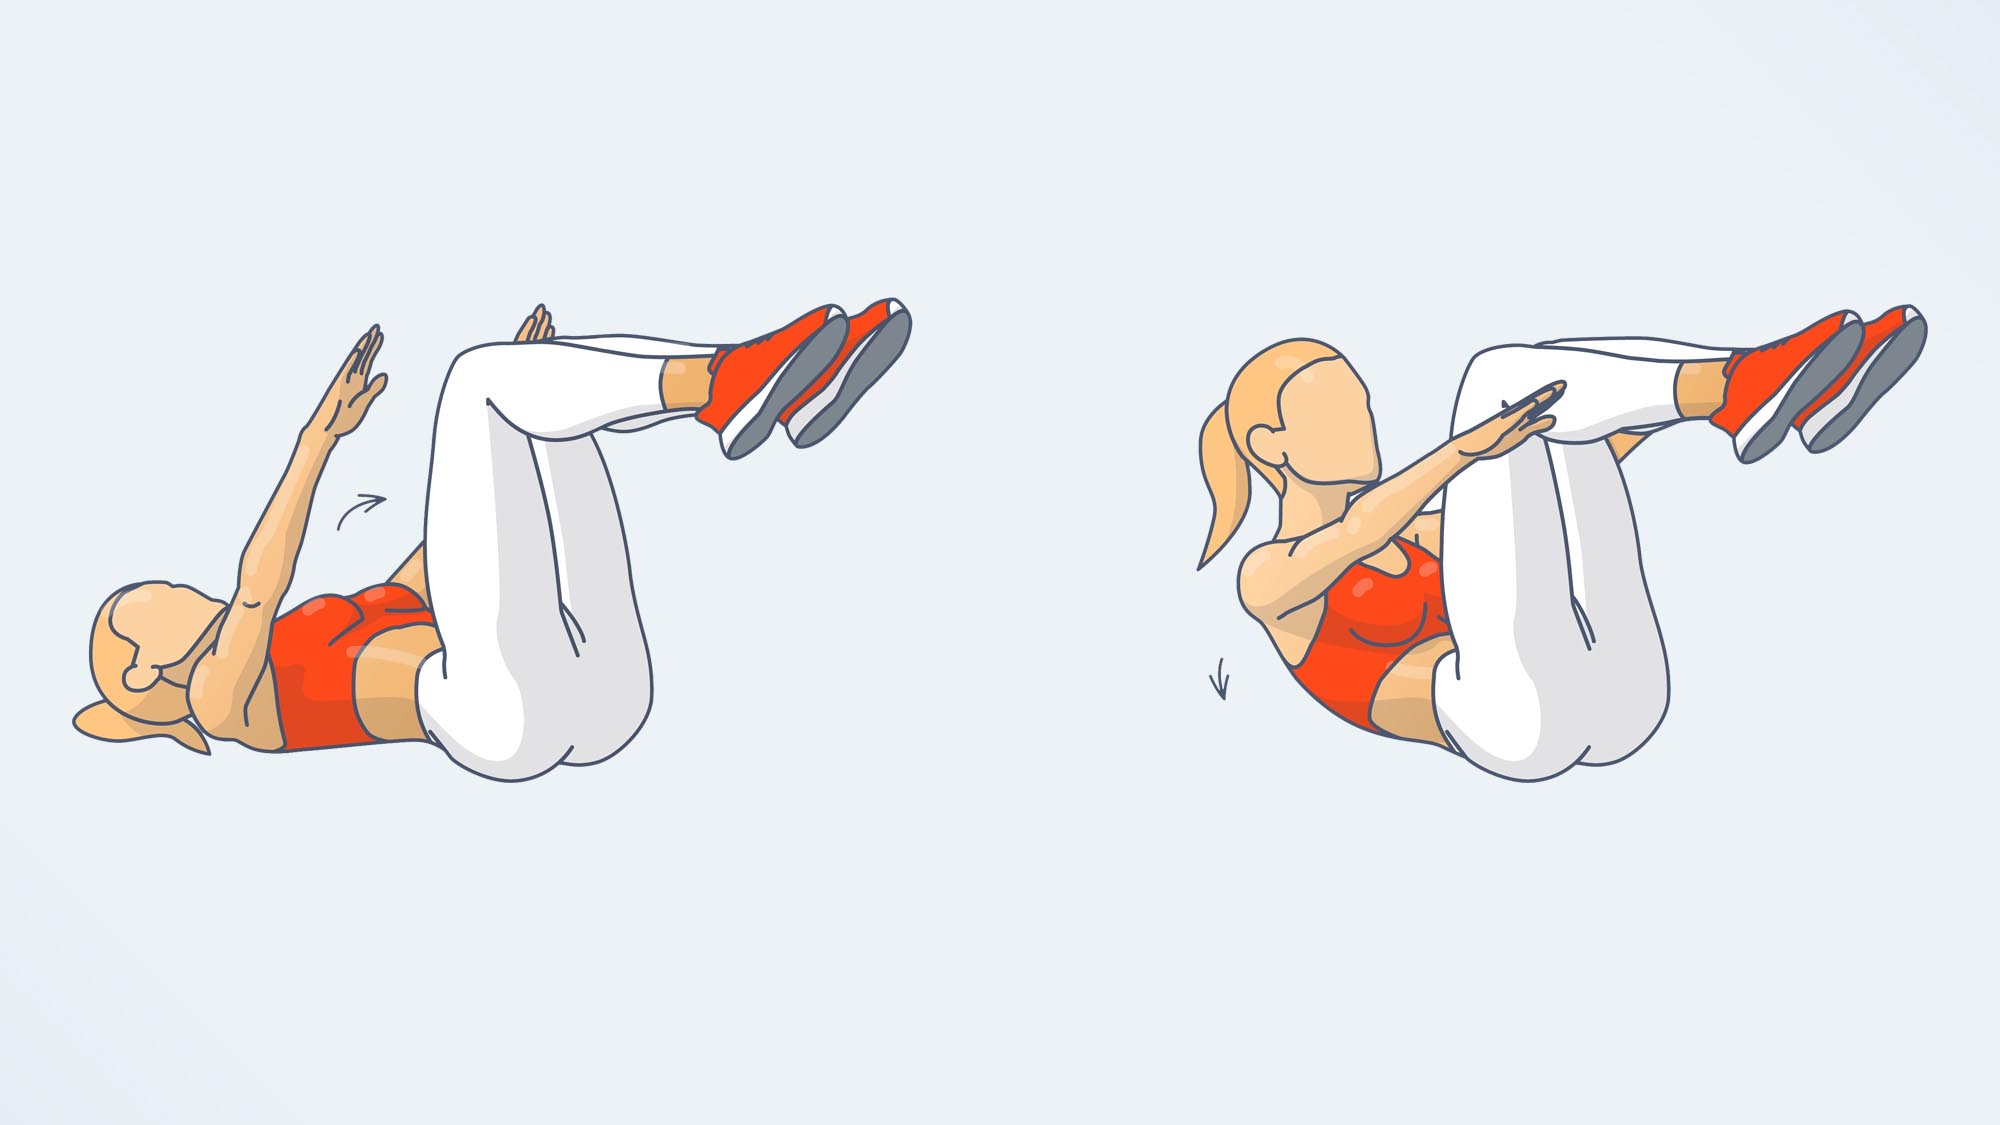
To perform tabletop crunches, lie on your back with a neutral spine and feet flat on the floor. Engage your abdominals and lift your legs to a tabletop position with your knees over your hips, your shins parallel to the ceiling, and your feet relaxed. Place both hands behind the back of your head, squeeze your abdominals, and lift your head and shoulders off of the floor. Avoid pulling your head with your hands — use your abdominals to control the motion. Slowly lower your head and shoulders back down to the floor. Continue for as many repetitions as the program below dictates.
If your lower back arches excessively when lifting your legs off the ground, keep your feet planted on the floor when you perform the crunch.
2. Scissor kicks
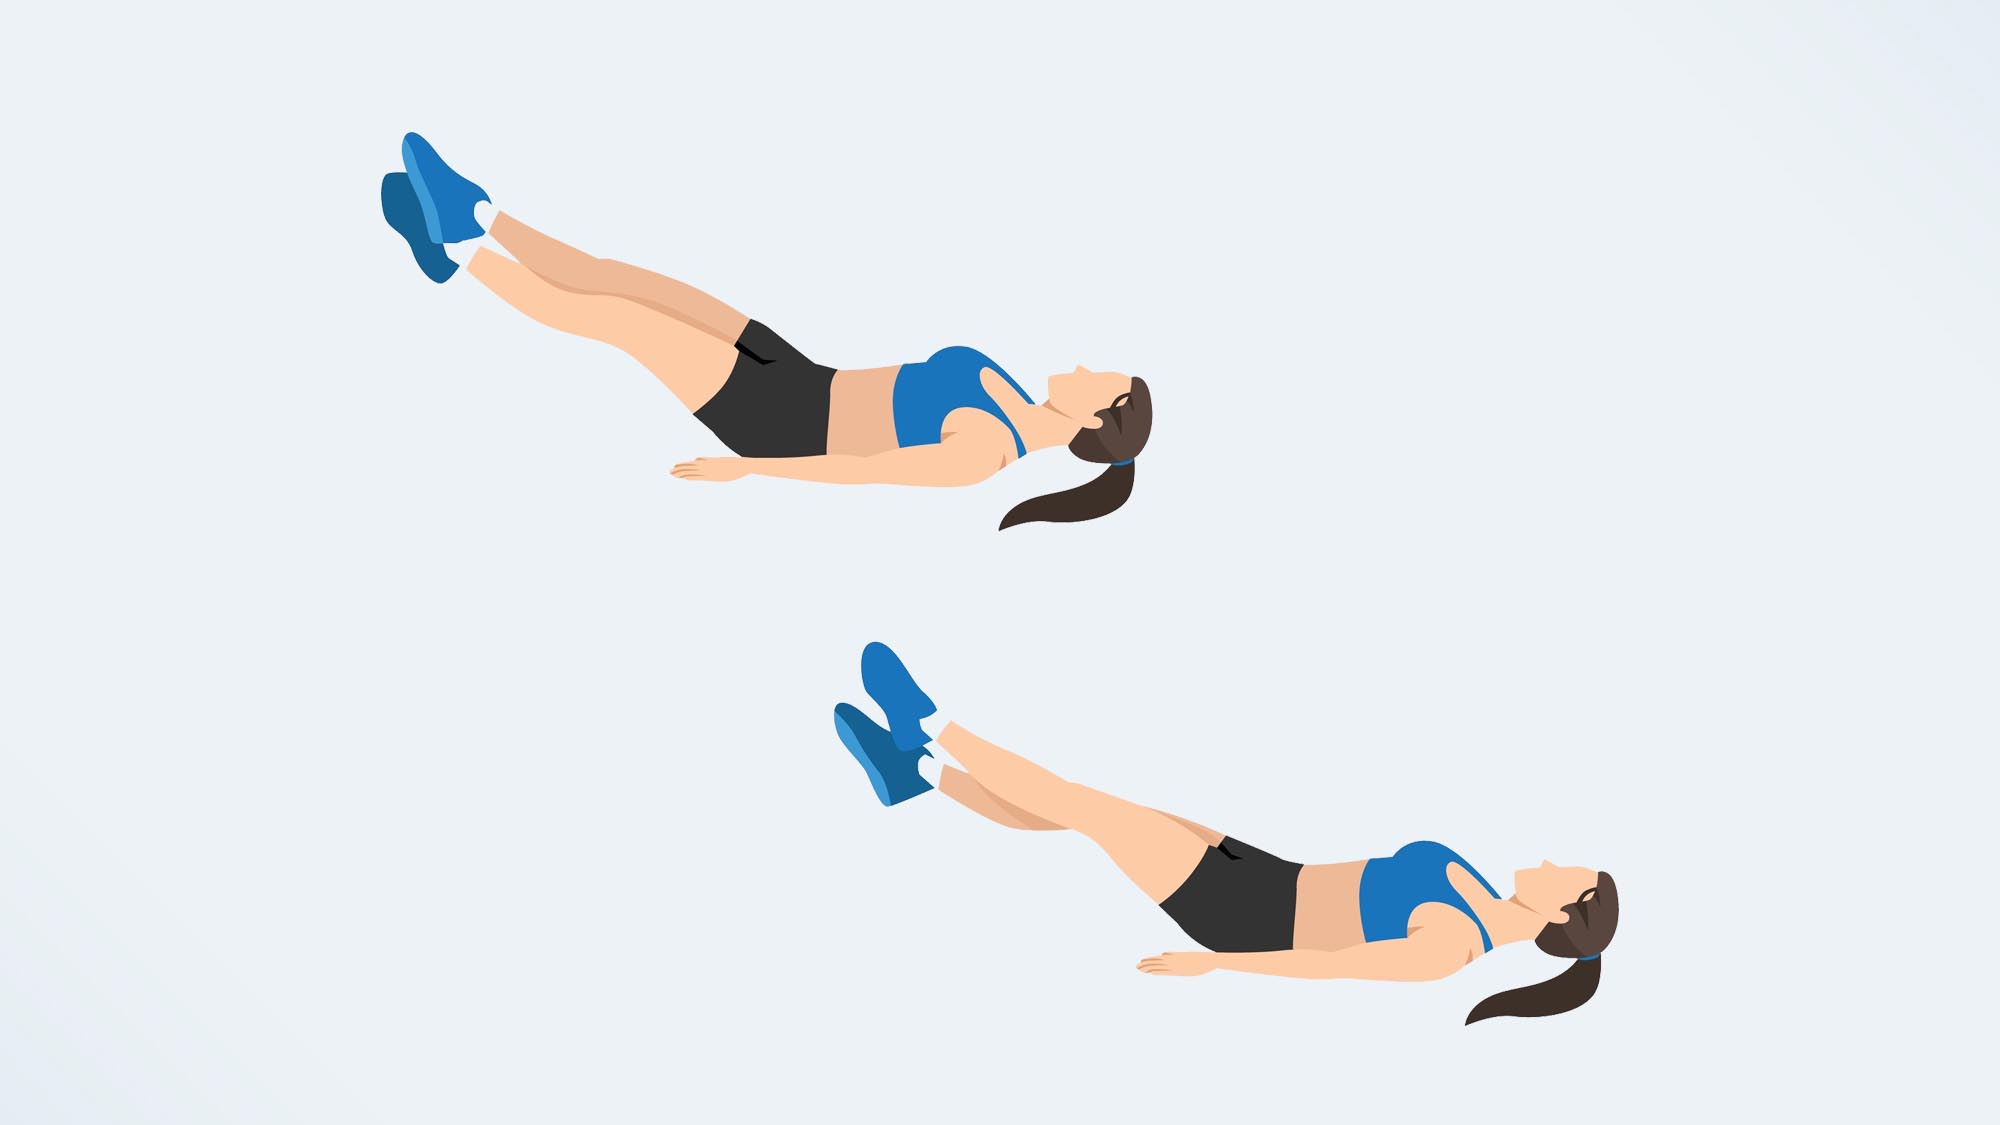
To perform scissor kicks, lie on your back with your legs extended and your hands by your side. Engage your core and slowly lift both of your legs a few inches off the floor. Drop your left heel towards the ground while raising your right heel towards the ceiling. Switch legs, lowering your right heel and raising your left. Continue for as many repetitions as the program below dictates.
Your hands can also be placed underneath your lower back for support. If the exercise causes pain in the lower back, or if your lower back begins to arch excessively, bend the knees and continue the exercise. You can also choose to substitute scissor kicks for alternating heel taps, if desired.
3. Bicycle crunches
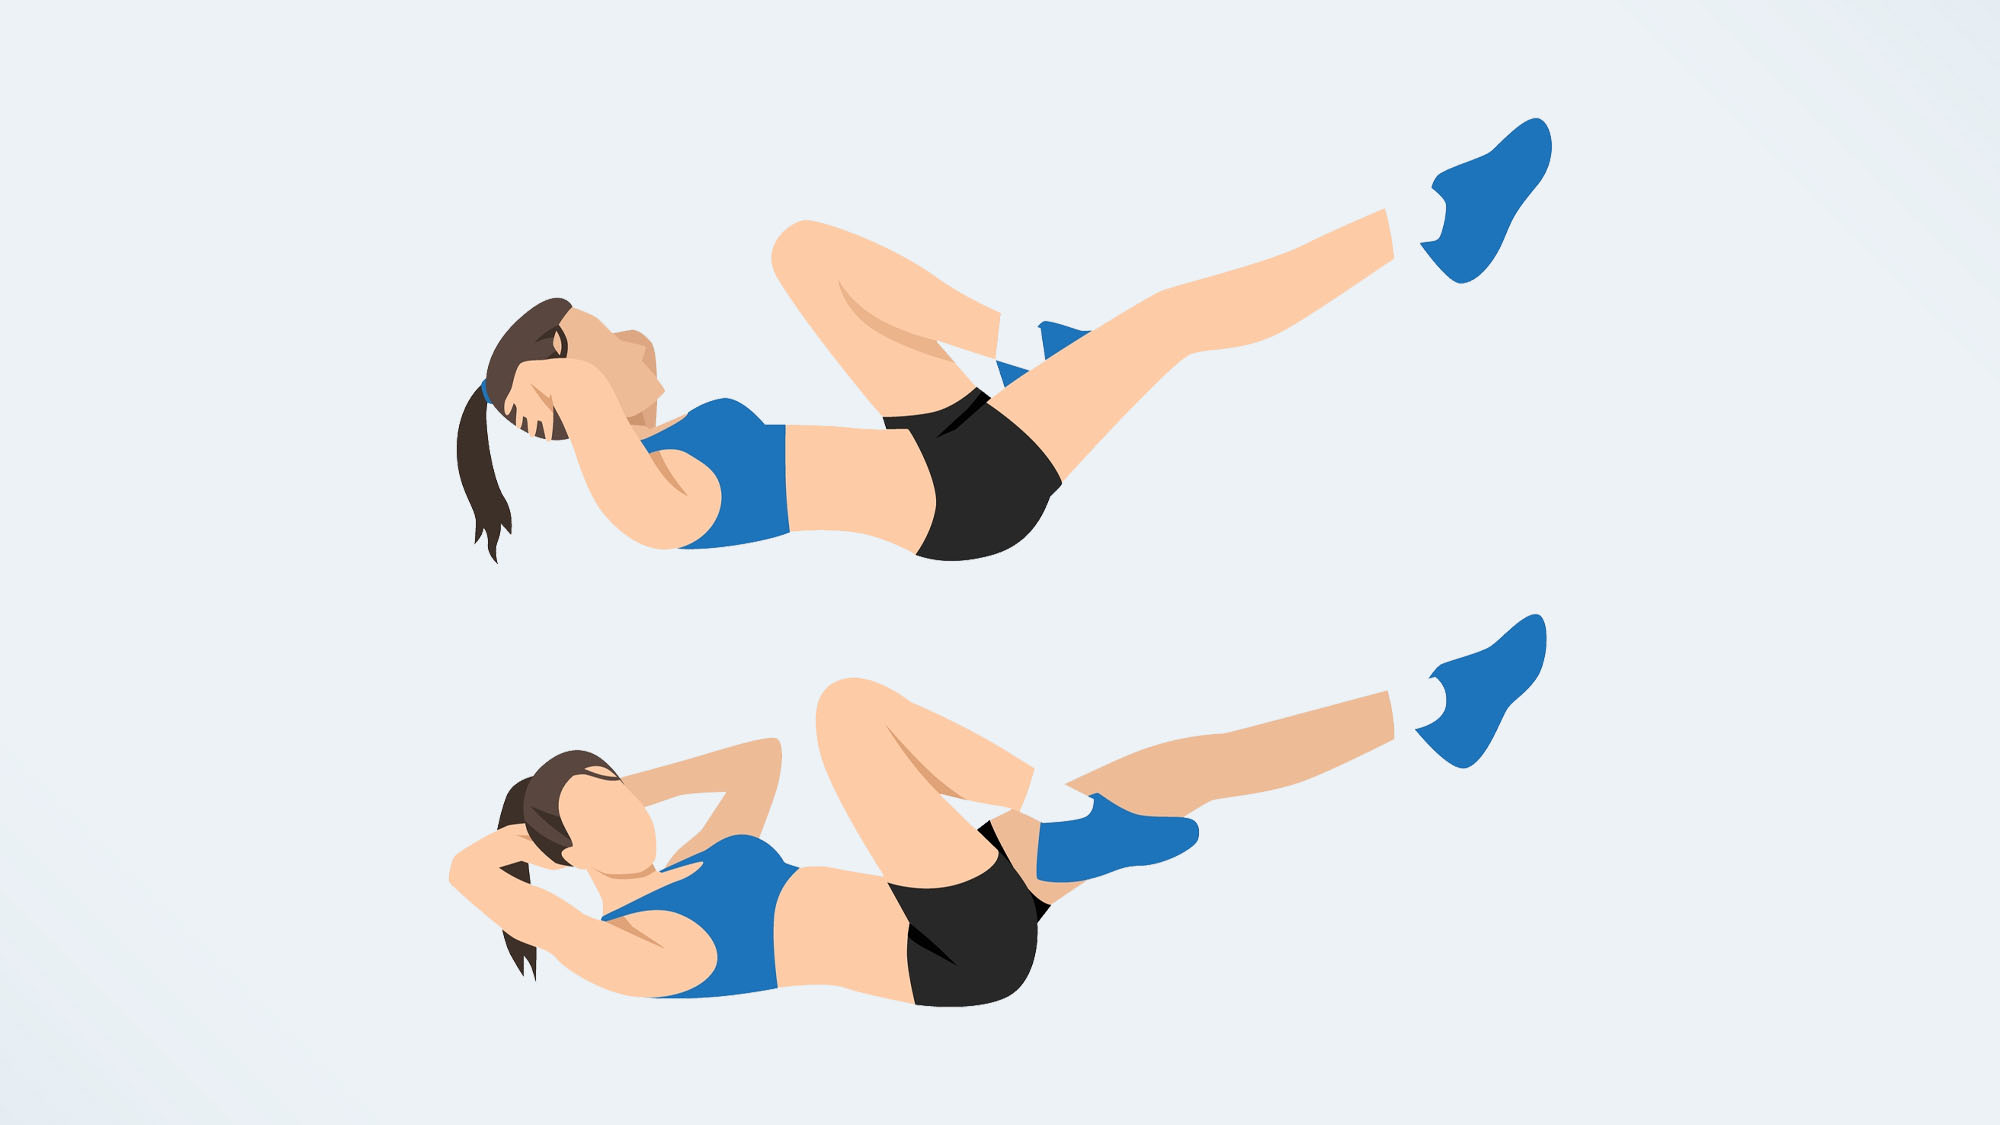
To perform bicycle crunches, lie on your back with a neutral spine and feet flat on the floor. Place both hands behind the back of your head. Engage your core and lift both legs to a tabletop position with your knees aligned over your hips and your shins parallel to the ceiling. Squeeze your abdominals and lift your head and shoulders off the ground. Draw your left knee in and aim your right elbow towards it, rotating slightly through your torso while elongating your right leg. Switch directions, drawing your right knee in and aiming your left elbow towards it, rotating through your torso, while elongating your left leg. Continue alternating between the two sides for as many repetitions as the program below dictates.
If your lower back arches excessively, place both feet on the floor, lift the knee towards the opposite elbow, and then place your foot back down onto the floor.
Here's more on how to do bicycle crunches with perfect form, and variations to try.
4. Mountain climbers
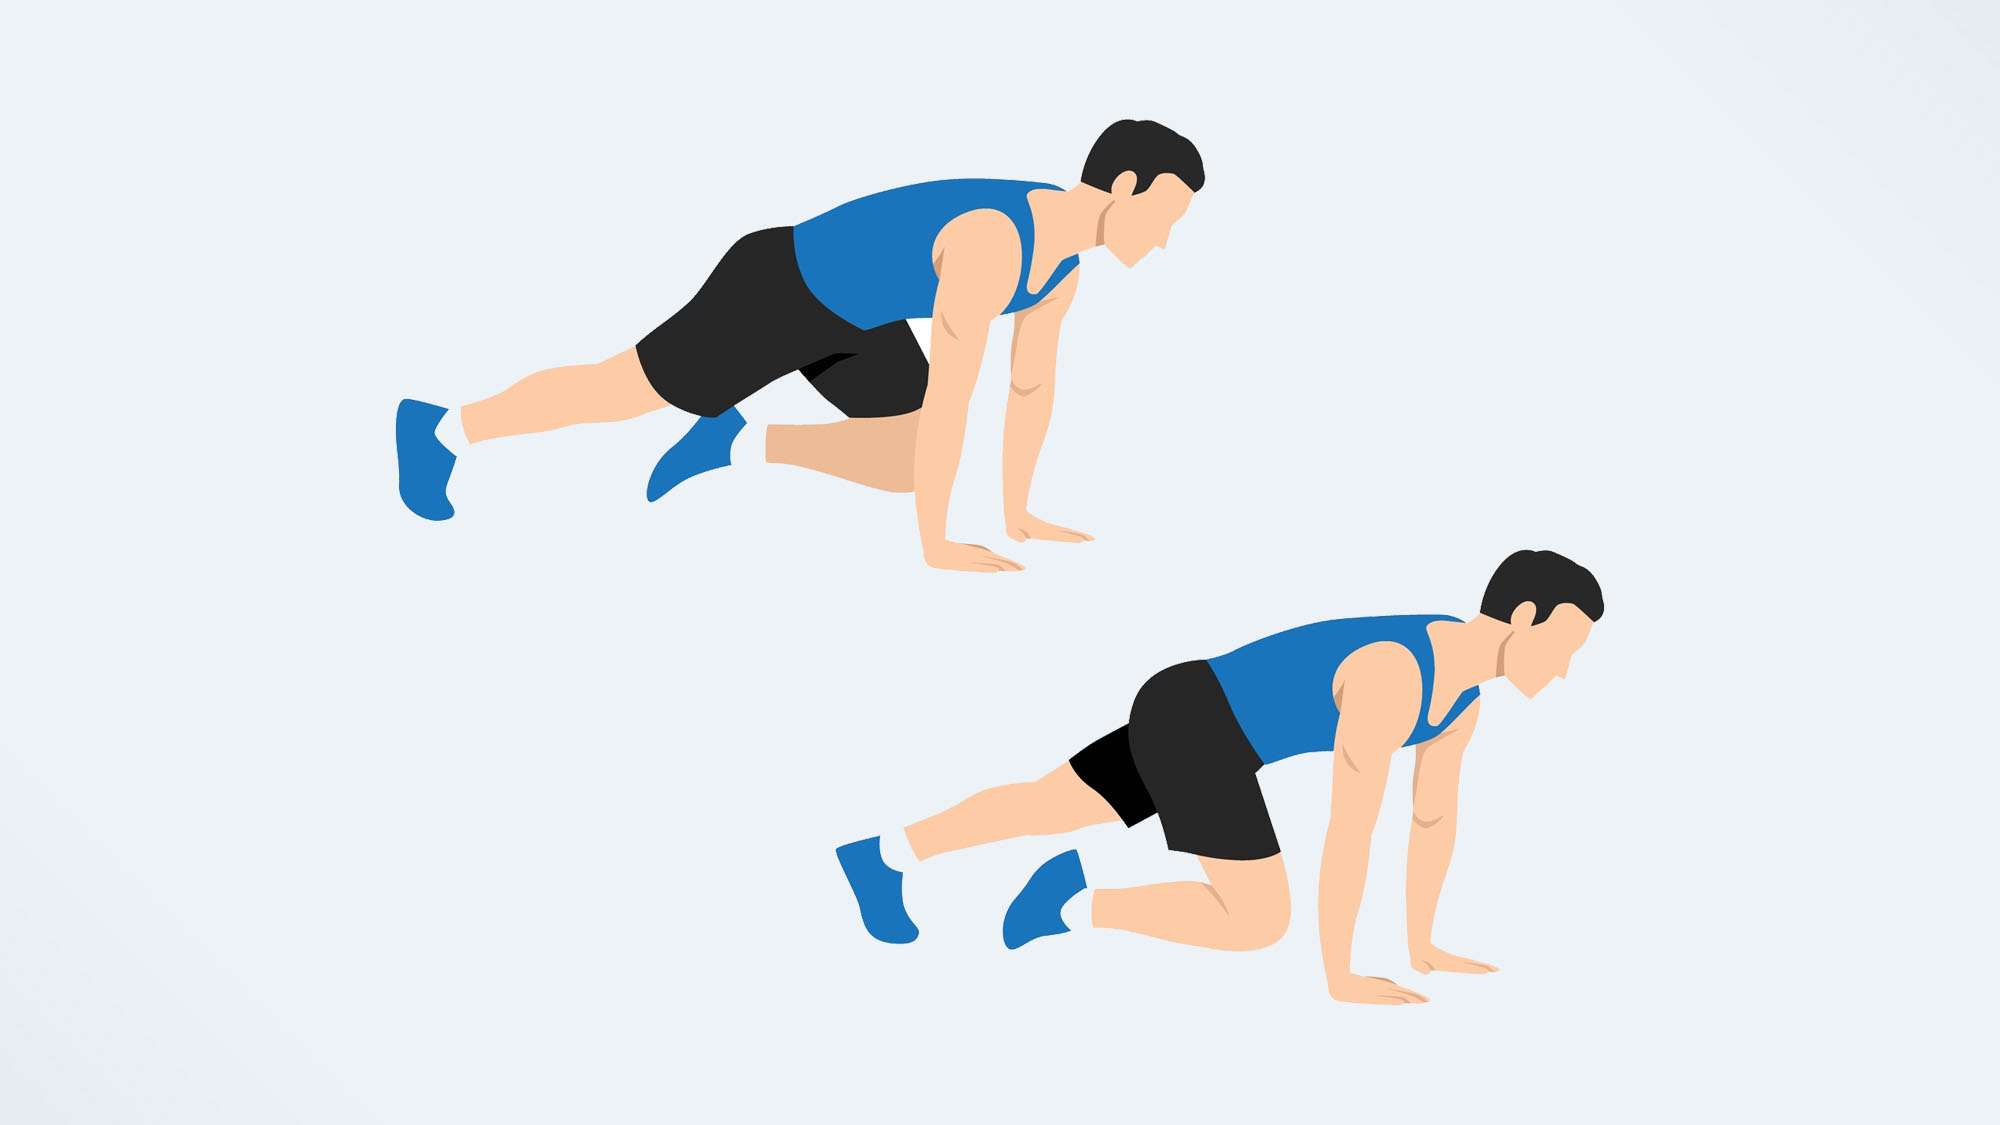
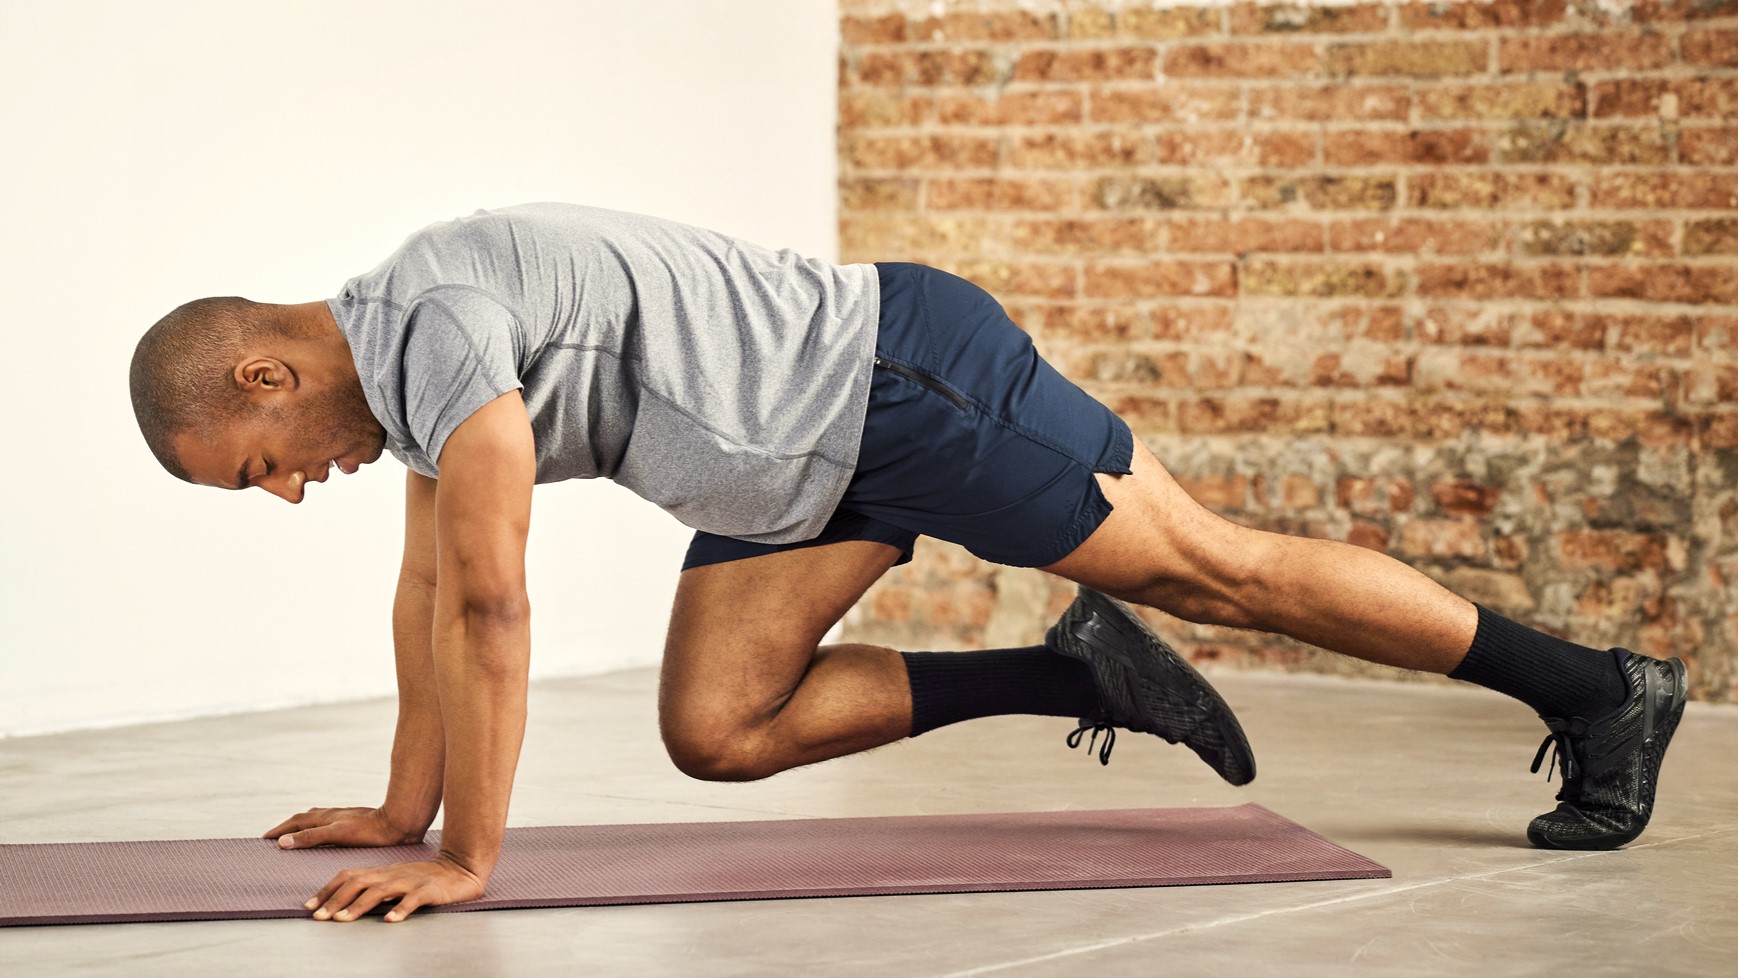
To perform mountain climbers, come to all fours with your hands aligned underneath your shoulders and your knees aligned underneath your hips. Step your feet back behind you and plant your toes into the floor, about hip-width apart. Keep your shoulders aligned directly over your wrists. Keep your spine neutral and engage your core. Draw your left knee towards the center of your chest, keeping your hips as still as possible. Hold this position for 1-2 seconds, then place the left foot back behind you. Repeat with the right knee. Alternate between the two sides for as many repetitions as the program below dictates.
If your hips rise towards the ceiling, try performing the exercise on an elevated surface — place your hands on a chair, table, or wall instead of the floor. Here's more on how to do mountain climbers with perfect form.
The schedule
DAY 15:
Tabletop crunches, 15 repetitions
Scissor kicks, 12 repetitions each leg
DAY 16:
Tabletop crunches, 15 repetitions
Scissor kicks, 12 repetitions each leg
Bicycle crunches, 12 repetitions each side
DAY 17:
Rest
DAY 18:
Tabletop crunches, 20 repetitions
Scissor kicks, 15 repetitions each leg
Bicycle crunches, 12 repetitions each side
DAY 19:
Tabletop crunches, 20 repetitions
Scissor kicks, 15 repetitions each leg
Bicycle crunches, 15 repetitions each side
Mountain climbers, 10 repetitions each leg
DAY 20:
Rest
DAY 21:
Tabletop crunches, 25 repetitions
Scissor kicks, 20 repetitions each leg
Bicycle crunches, 15 repetitions each side
Mountain climbers, 10 repetitions each leg
Week 4+ — Kicking it up a notch

You’ve spent plenty of time on the mat at this point, so now it’s time to challenge your abdominals with some advanced movements. A few of the exercises in these final days use weights, either as an optional progression or a necessity. If you don’t have access to a kettlebell, dumbbell, medicine ball, or another weight source, consider using a heavy household object instead.
The exercises:
1. Sit up
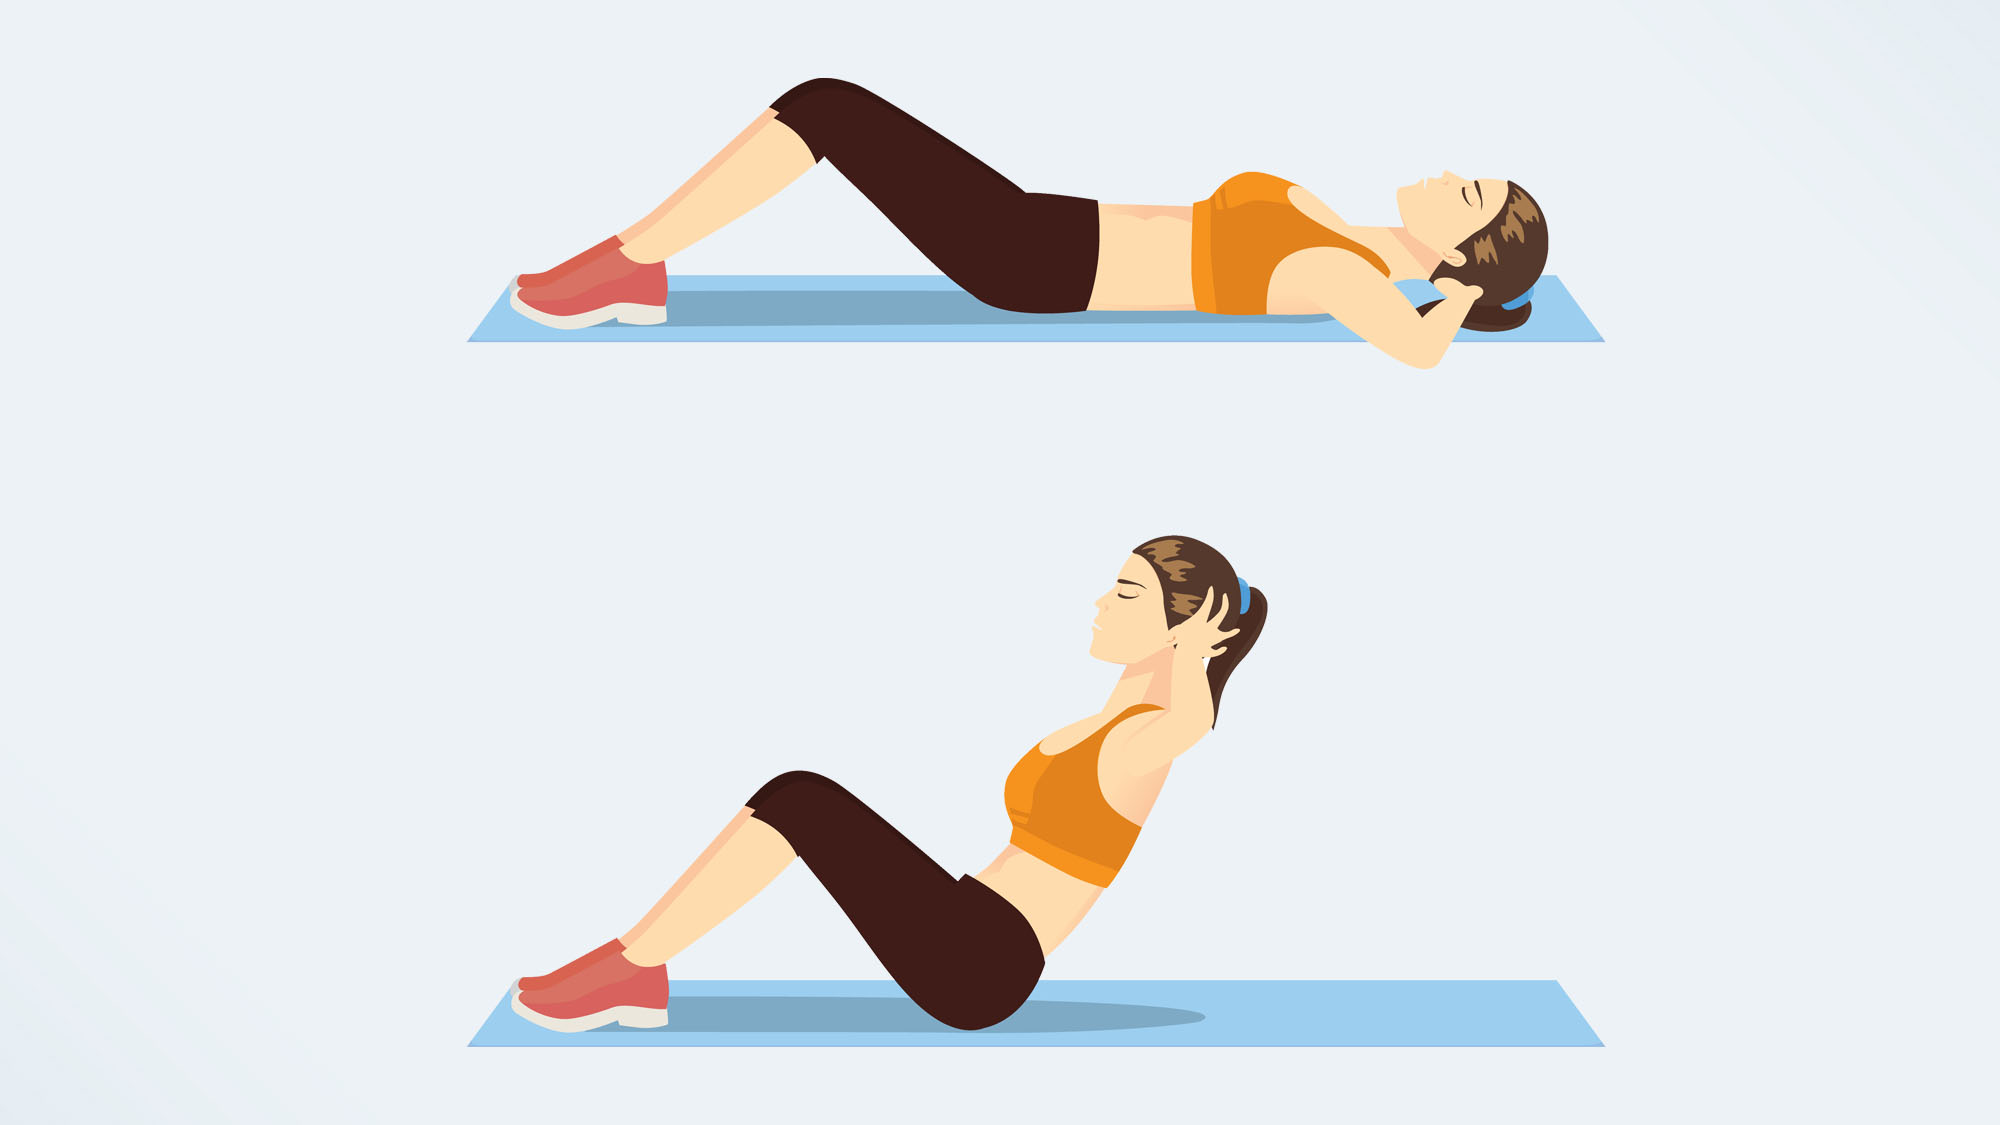
To perform the sit up, lie on your back with a neutral spine and your feet flat on the floor. Place your hands behind the back of your head, or cross your arms at your chest. Squeeze your abdominals and slowly lift your head, shoulders, and torso off the floor until you’ve reached a seated position. Lower back down to the floor with control. Continue for as many repetitions as the program dictates.
Sit ups can be quite difficult, especially in the first few attempts. If you find you’re using too much momentum to complete the exercise, or feel like you're “hiking” yourself off of the floor, place your feet underneath a stable surface like a couch or bed for some leverage. You can also substitute the sit up for crunches while you continue to build strength.
As week 4 progresses, weighted sit ups are included as an option. If you’re feeling up for the challenge, grab a weight source like a dumbbell, kettlebell or medicine ball and hold it at your chest as you perform the exercise.
2. Plank twist
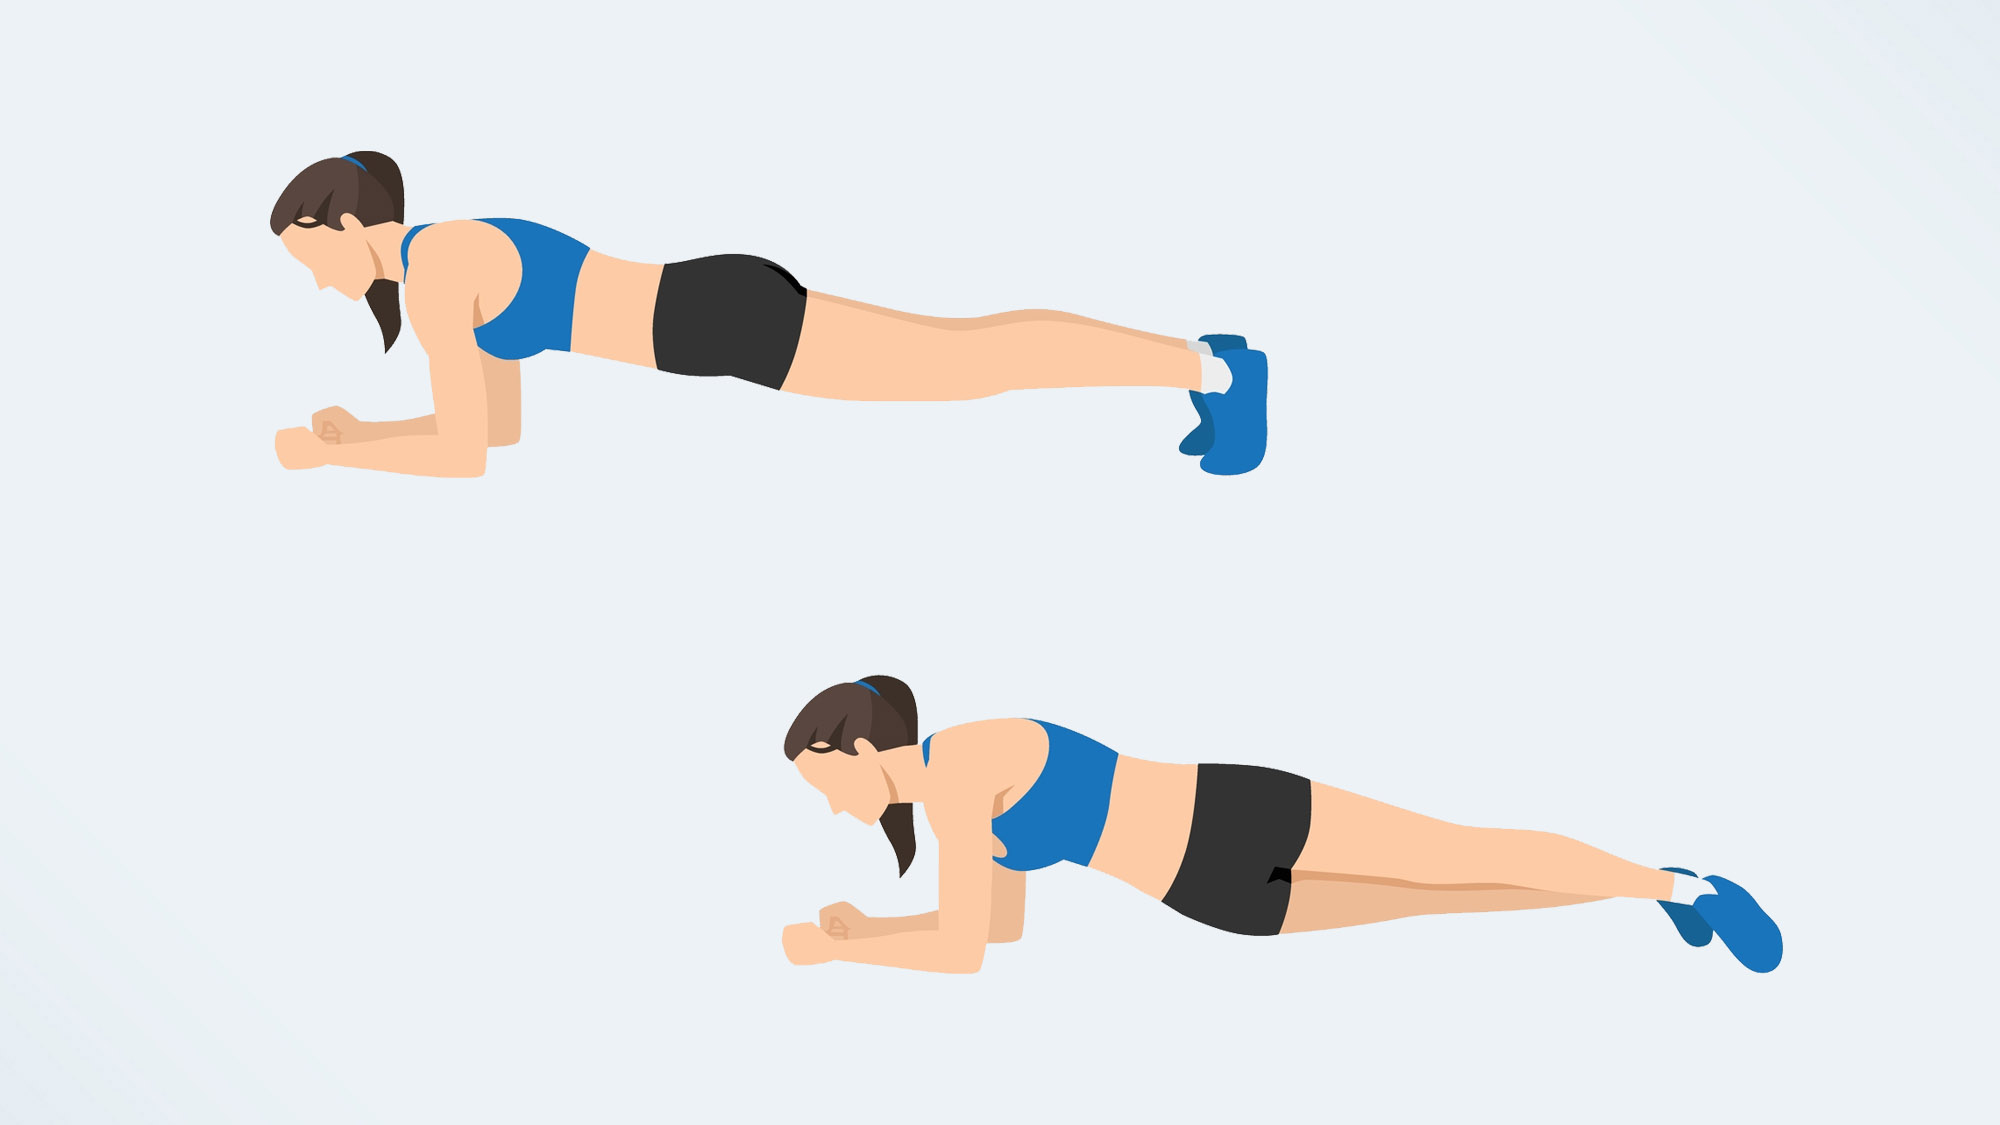
To perform the plank twist, come to the floor on all fours with your hands aligned underneath your shoulders and your knees aligned underneath your hips. Step your feet behind and plant your toes into the floor. Come down to your elbows and align them directly underneath your shoulders, with your forearms on the floor. Keep your core engaged, your spine neutral, and your torso parallel to the floor. Slowly lower your hips to your left side, keeping your right elbow and right toes firmly planted on the ground. Lift your hips back up to a neutral position. Lower your hips to your right side, keeping your left elbow and left toes planted. Lift your hips back to the starting position. Continue alternating between the two sides for as many repetitions as the program below dictates.
If your hips raise towards the ceiling or your lower back arches excessively, perform a modified plank twist with your knees on the ground.
3. V-sit
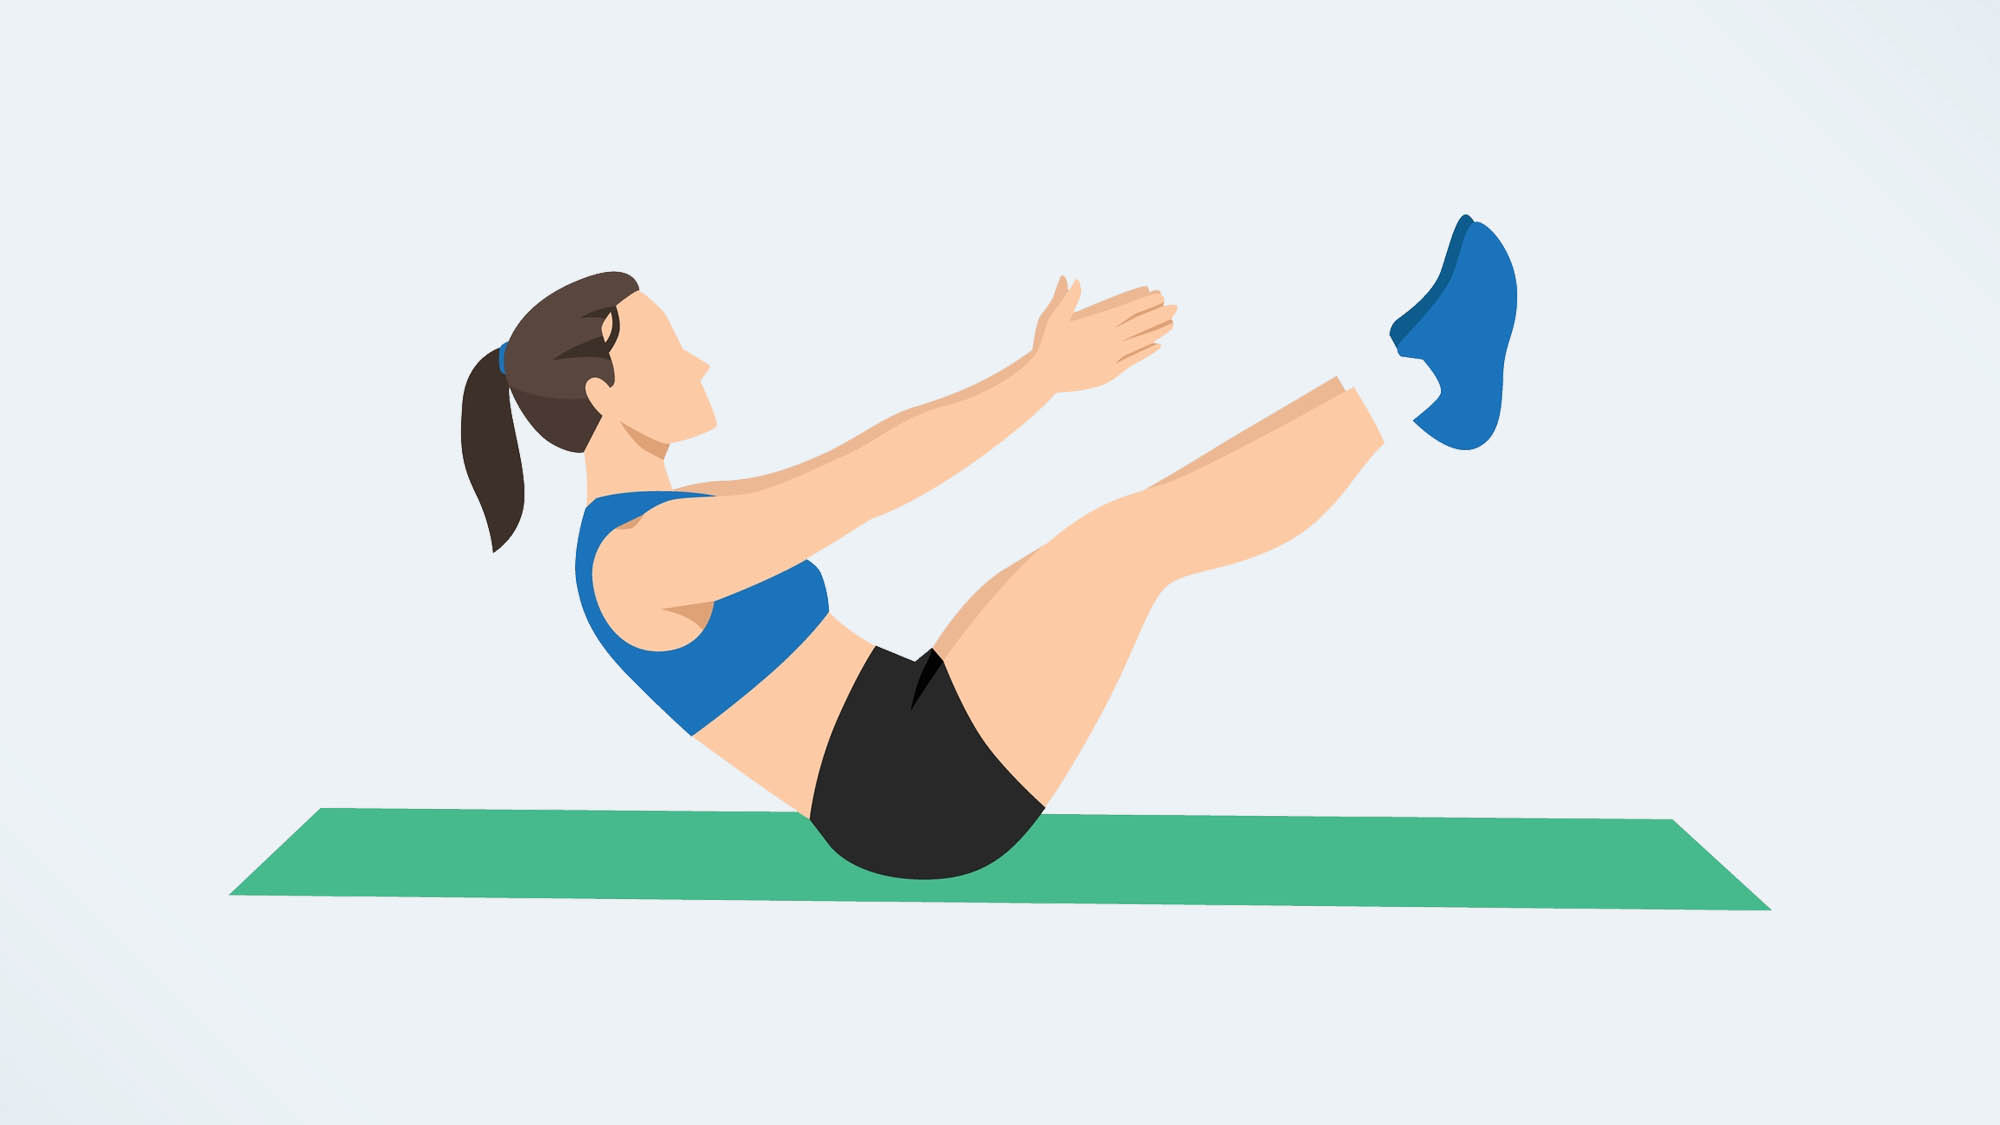
To perform the V-sit, lie on your back with your legs extended and your spine neutral. Keep your hands by your side. Engaging your core, slowly lift your legs to a 45 degree angle while you lift your head, shoulders, and torso off of the floor. Balance on your tailbone as you reach your fingertips to the wall in front of you. Hold in this “V” position for 2-3 seconds. Slowly lower yourself back down to the starting position. Continue for as many repetitions as the program below dictates.
V-sits are another incredibly difficult exercise that may take a bit of practice to really master. You can modify the movement by bending at the knees as you come up to a seated “V” position.
4. Front squat
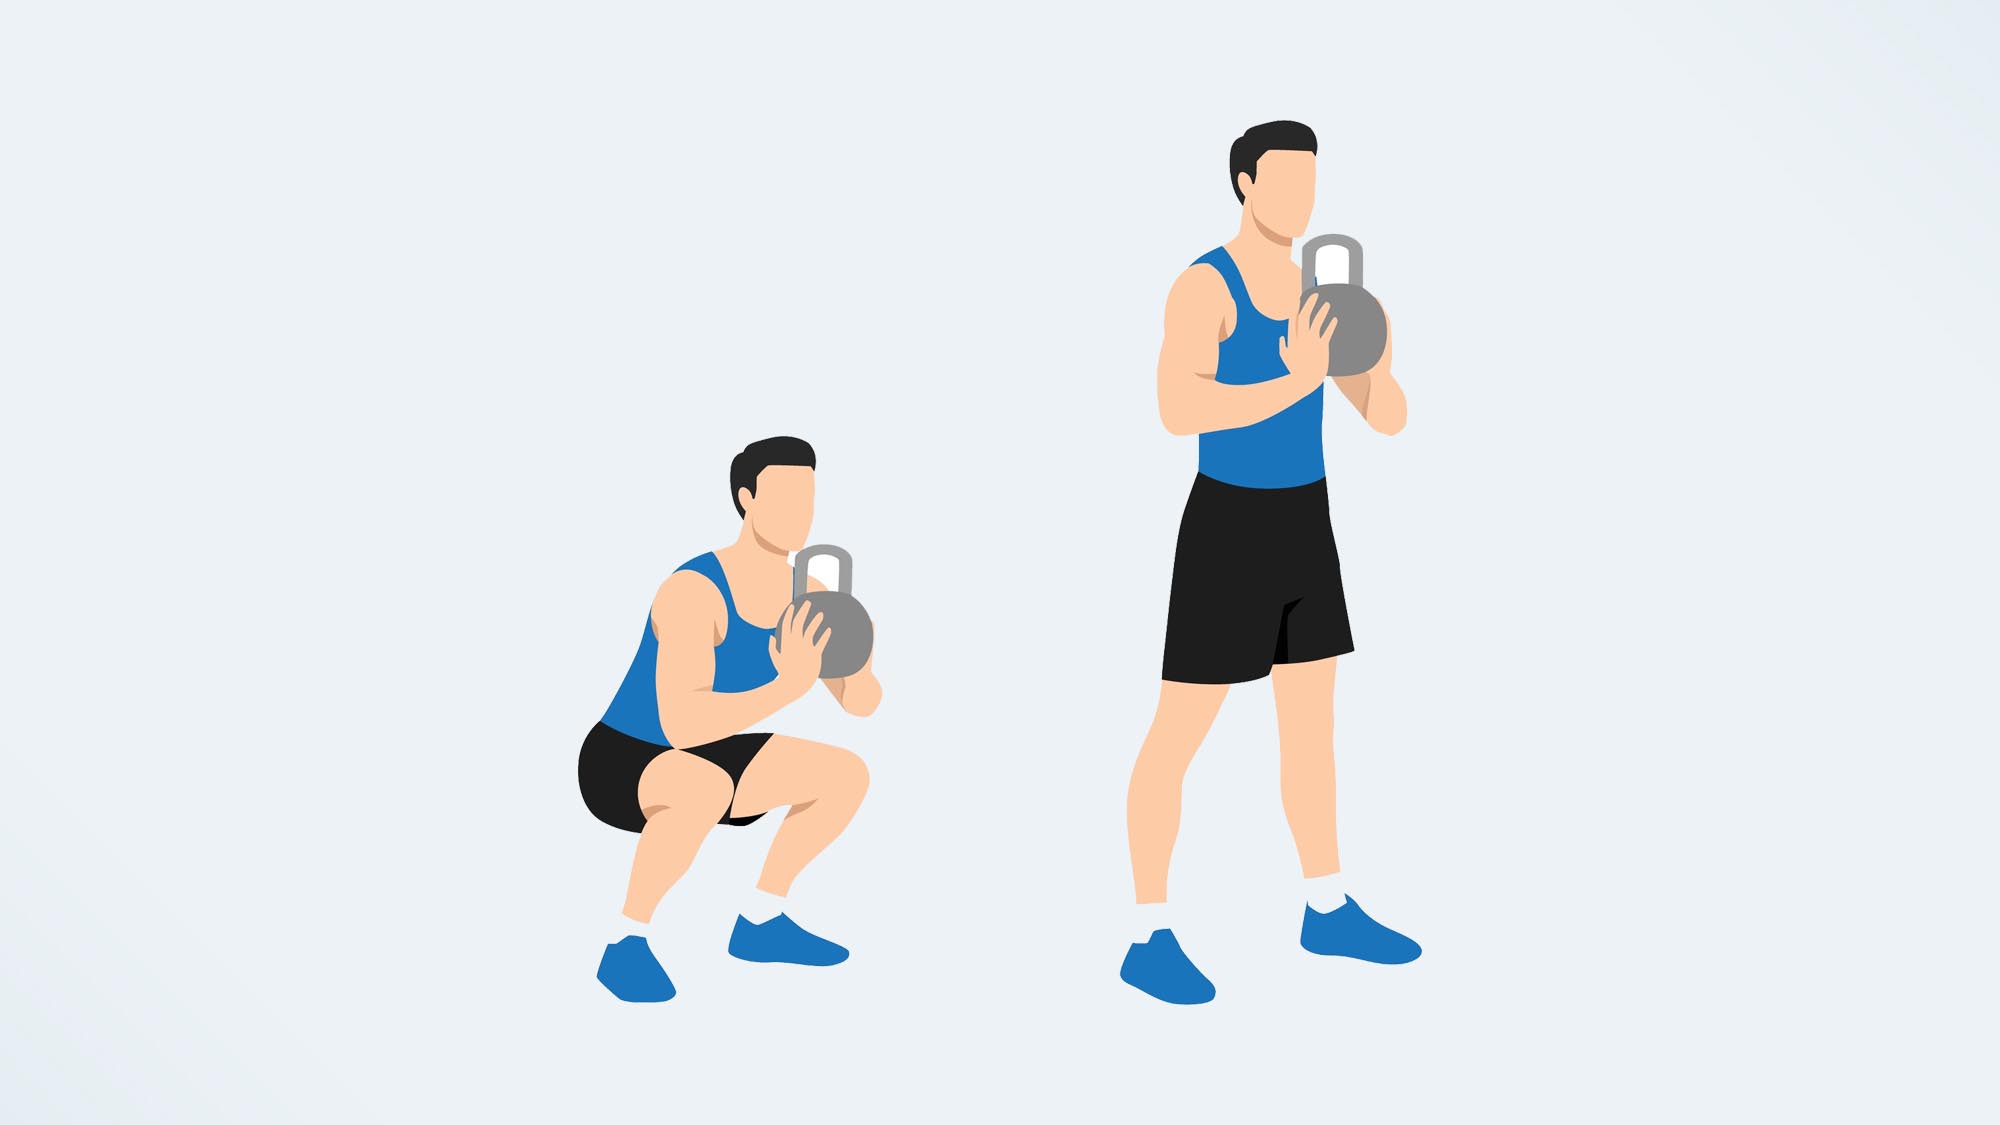
To perform the front squat, select a moderately heavy dumbbell, kettlebell, medicine ball, or other weight source and hold it about 2-3 inches away from the center of your chest. Stand with your feet slightly wider than hip-width apart. Engage your core. Set your hips back as if you were about to sit down in a chair. Bend your knees and aim your tailbone towards the floor, keeping your spine neutral and your core engaged. Once you’ve reached the bottom of your range, press through the bottoms of your feet and stand tall. Continue for as many repetitions as the program below dictates.
While the front squat may look like a lower body exercise (and your legs will definitely reap the benefits), your core has to work hard as well. Place a chair behind you and come to a seated position before standing back up if the standard form feels too challenging.
The schedule
DAY 22:
Sit up, 10 repetitions
Plank twists, 10 repetitions each side
DAY 23:
Sit up, 10 repetitions
Plank twist, 10 repetitions each side
DAY 24:
Rest
DAY 25:
Sit up, 10 repetitions
Plank twist, 10 repetitions each side
V-sits, 5 repetitions
DAY 26:
Sit up, 12 repetitions
Plank twist, 12 repetitions
V-sit, 5 repetitions
DAY 27:
Rest
DAY 28:
Sit up or weighted sit up, 12 repetitions
Plank twist, 12 repetitions
V-sit, 6 repetitions
Front squat, 10 repetitions
DAY 29:
Sit up or weighted sit up, 12 repetitions
Plank twist, 12 repetitions
V-sit, 6 repetitions
Front squat, 10 repetitions
DAY 30:
Sit up or weighted sit up, 12 repetitions
Plank twist, 15 repetitions each side
V-sit, 7 repetitions
Front squat, 12 repetitions
More from Tom's Guide
Jennifer Rizzuto is a freelance writer and certified personal trainer based in Long Island, NY. She covers various fitness-related topics and reviews for Tom's Guide. She also writes sketch comedy and short films, and performs frequently as an actor, singer, and improviser. When she's not writing, working out, or performing, you'll find her trying to convince her husband to get a dog.

