The Pixel’s AI Magic Eraser just got copied on Windows 11 — how and when you can use it
Generative erase will tidy up photos in seconds

Microsoft has announced that its Photos app for Windows 11 and Windows 10 will soon get a Generative erase feature. Leveraging the power of AI, Generative erase will let users selectively erase elements in their image.
Generative erase isn't entirely new, and instead builds on the Spot fix feature that already existed in the Photos app, this time utilizing AI for a smoother, more realistic end result. According to Microsoft, this should make Generative erase much better for touching up large sections of an image.
The feature joins a range of image editing tools that have already been added to the Photos app, including background removal and background blur.

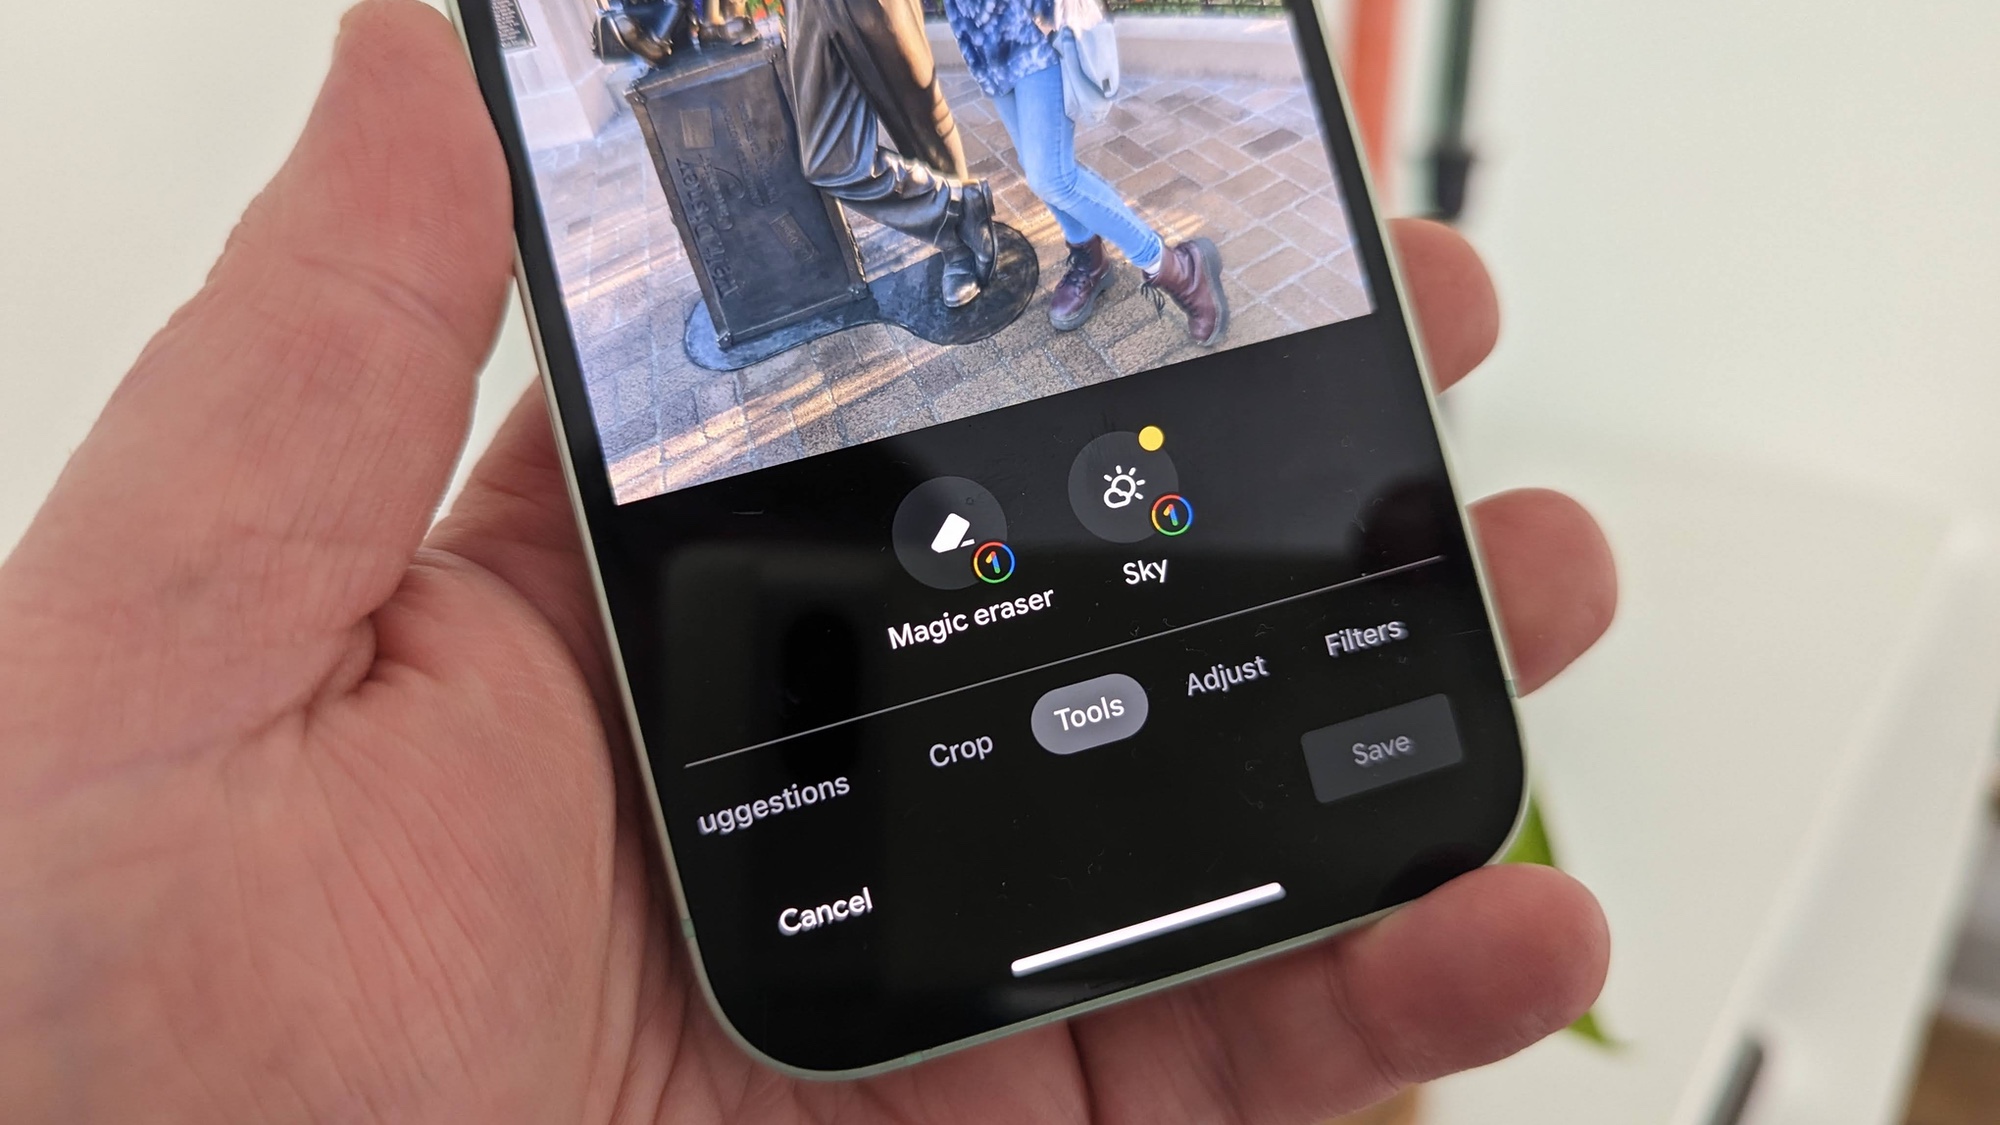
If all this sounds a little familiar, well, that's because it is: Generative erase will essentially do the same job as Google's Magic Eraser that launched way back in 2022 with the Pixel 6 and Pixel 6 Pro, and is available on iPhones via the Google Photos app.
How to get Generative eraser in Microsoft Photos
Generative eraser started rolling out yesterday (February 22nd), so you should start to see the feature appear in the Photos app soon. It'll work on Windows 11 and Windows 10, as well as Arm64 devices. You'll need to be running Microsoft Photos version 2024.11020.21001.0 or later.

We checked our Windows 11 machine today and couldn't see the feature or the update. If the same is true for you, head to the Photos app page in the Microsoft Store to check if an app update is available. It'll likely just be a case of waiting until the update rolls out to you.
How to use Generative erase in Microsoft photos
Once you do get access to Generative erase, using it is pretty straight forward. Here's how it works.
Sign up to get the BEST of Tom's Guide direct to your inbox.
Get instant access to breaking news, the hottest reviews, great deals and helpful tips.
1. Open an image in Photos and hit the Edit button

First up, open an image in the Photos app and hit the Edit button at the top.
2. Click Erase and toggle auto apply (optional)

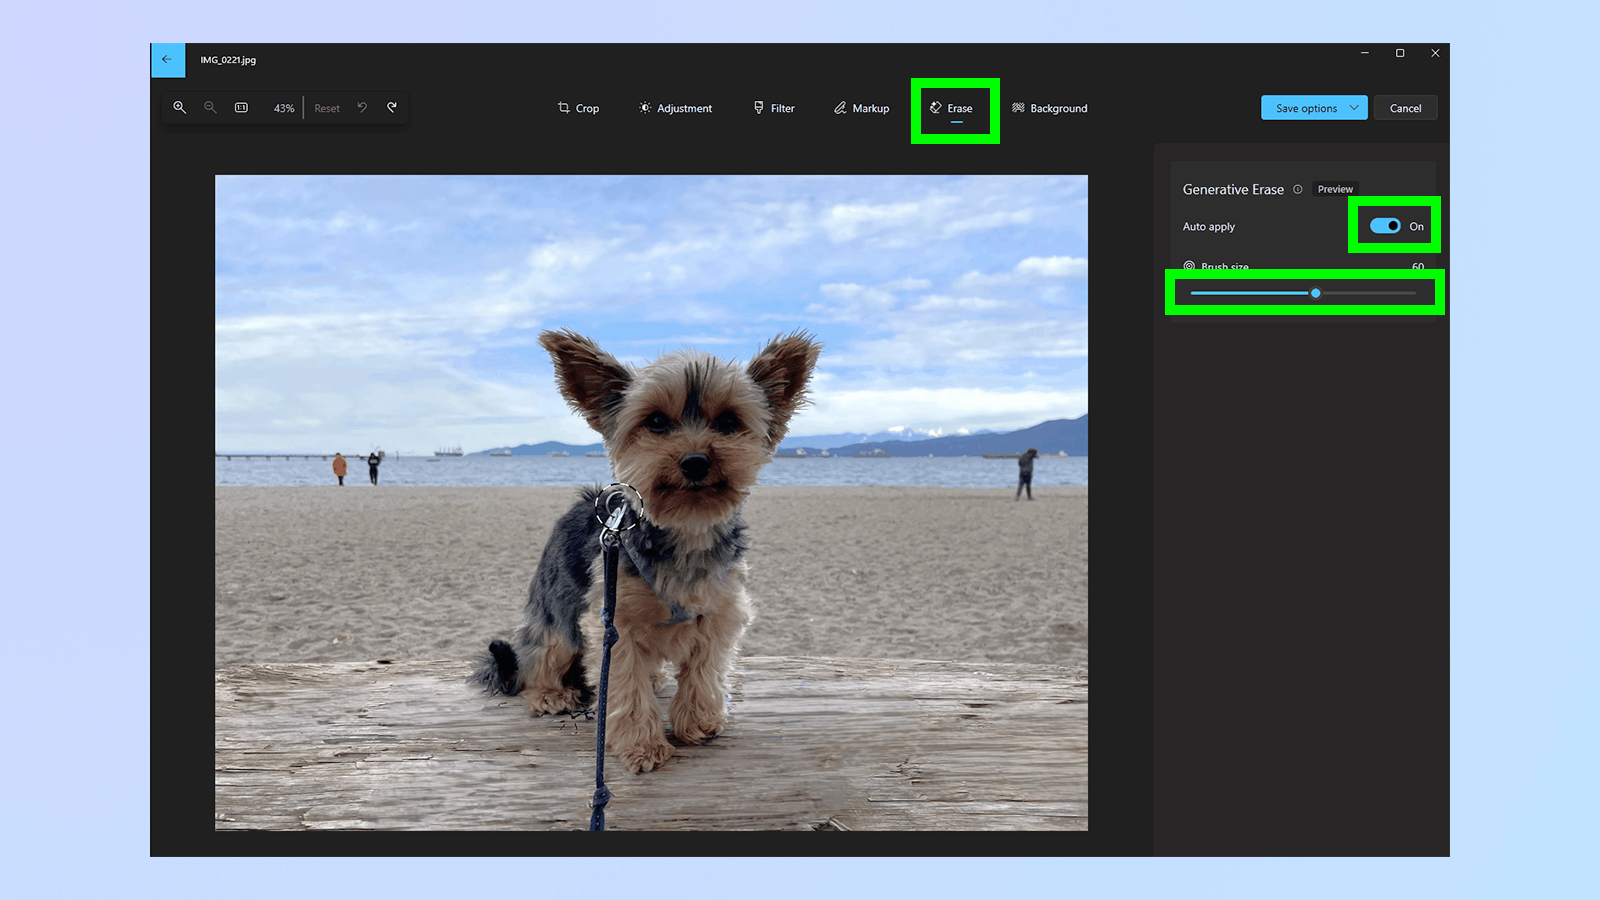
Now select Erase at the top. On the right hand side, toggle on Auto apply if you want the app to erase elements for you. If you're going to do it manually, adjust the brush size using the slider to the size you want.
3. Paint whatever you want to erase

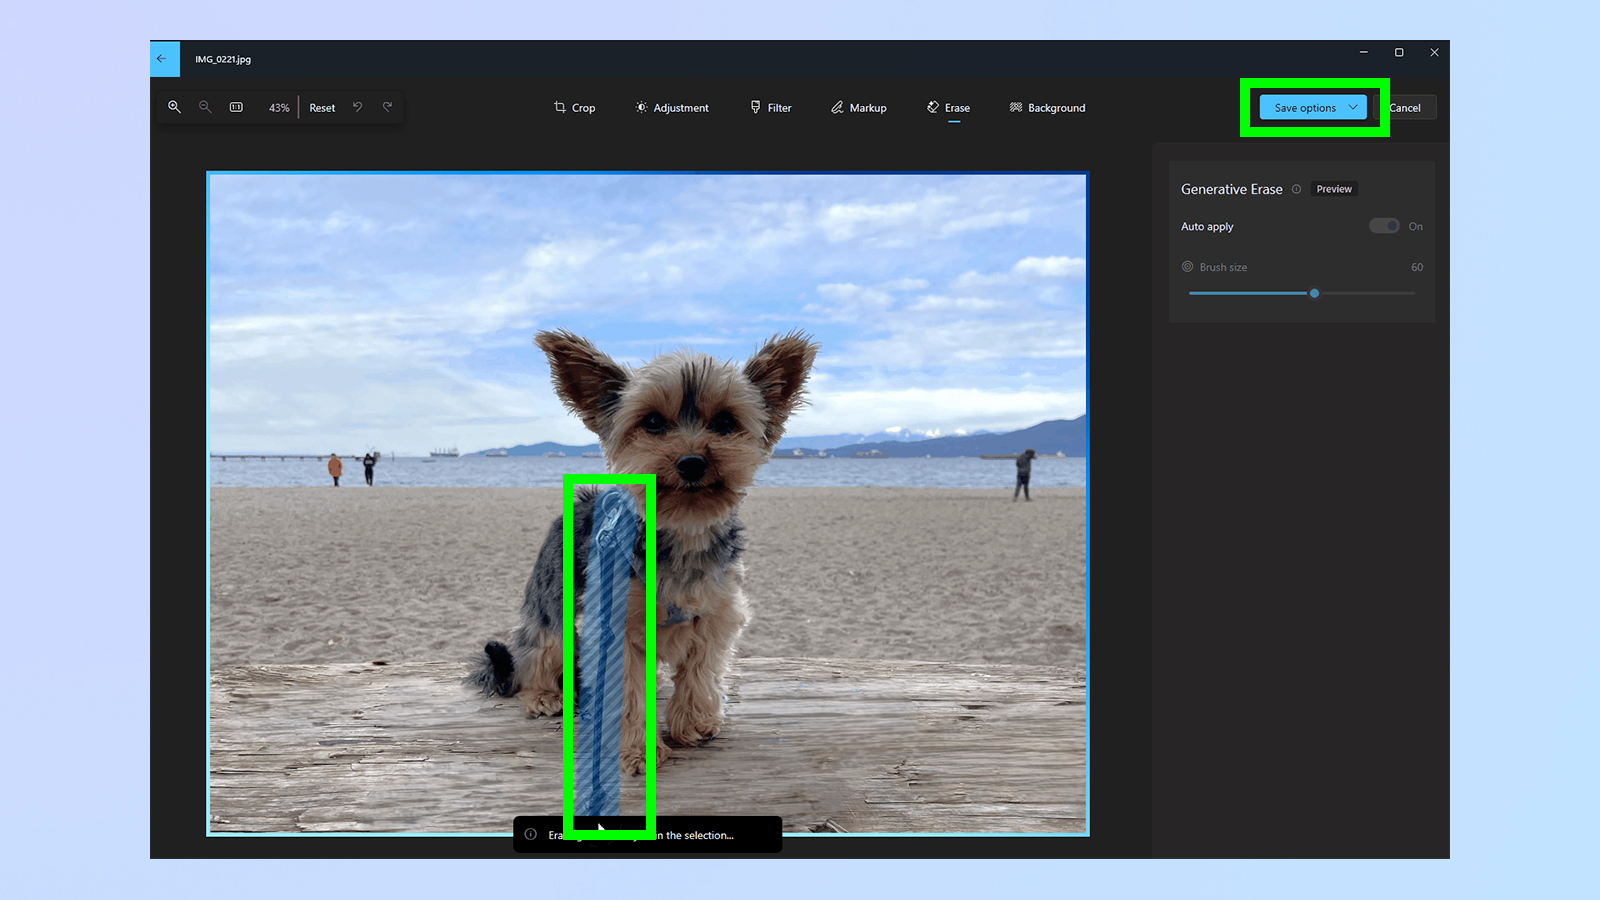
Now simply click and hold to paint over any elements you want to erase and watch as they disappear. Click save once you're happy.
More from Tom's Guide
- Google is changing its login page but don't worry: you're not being scammed
- Delete these malicious Play Store apps from your Android phone now!
- StabilityAI reveals Stable Diffusion 3 — and it's a giant leap for AI

Peter is a Senior Editor at Tom's Guide, heading up the site's Reviews team and Cameras section. As a writer, he covers topics including tech, photography, gaming, hardware, motoring and food & drink. Outside of work, he's an avid photographer, specialising in architectural and portrait photography. When he's not snapping away on his beloved Fujifilm camera, he can usually be found telling everyone about his greyhounds, riding his motorcycle, squeezing as many FPS as possible out of PC games, and perfecting his espresso shots.


