How to enable Windows Recall — it's now possible to try the controversial Copilot feature
Here's how to retrace your steps on your Copilot+ PC
After months of delays and backlash, Windows Recall is finally set to arrive on all Microsoft Copilot+ PCs. It's one of the many AI features Windows 11 has to offer, allowing you to retrace your steps through snapshots.
Recall can track down any words, photos, or links you've forgotten, lost, or accidentally closed, as these can be retrieved with a simple search through the tool. Handy, right? Yes, but it's controversial for good reason, which is why many commenters recommended turning off Windows Recall.
Now, Recall returns with major updates to security and privacy. In fact, it isn't automatically enabled on a Copilot+ PC; anyone looking to give it a go will need to opt in and enable it on their devices.
If you're interested in giving Microsoft's contentious Windows Recall feature a try, there's an easy way to turn it on. Don't fret; if you're not a fan of it, you can turn it off just as easily.
Note: Windows Recall is currently only available to Copilot+ PCs through the Windows Insider Program in the Dev Channel. Until it arrives, you can try it out by heading to Settings > Windows Update > Windows Insider Program, then click Get Started.
1. Open Windows Settings
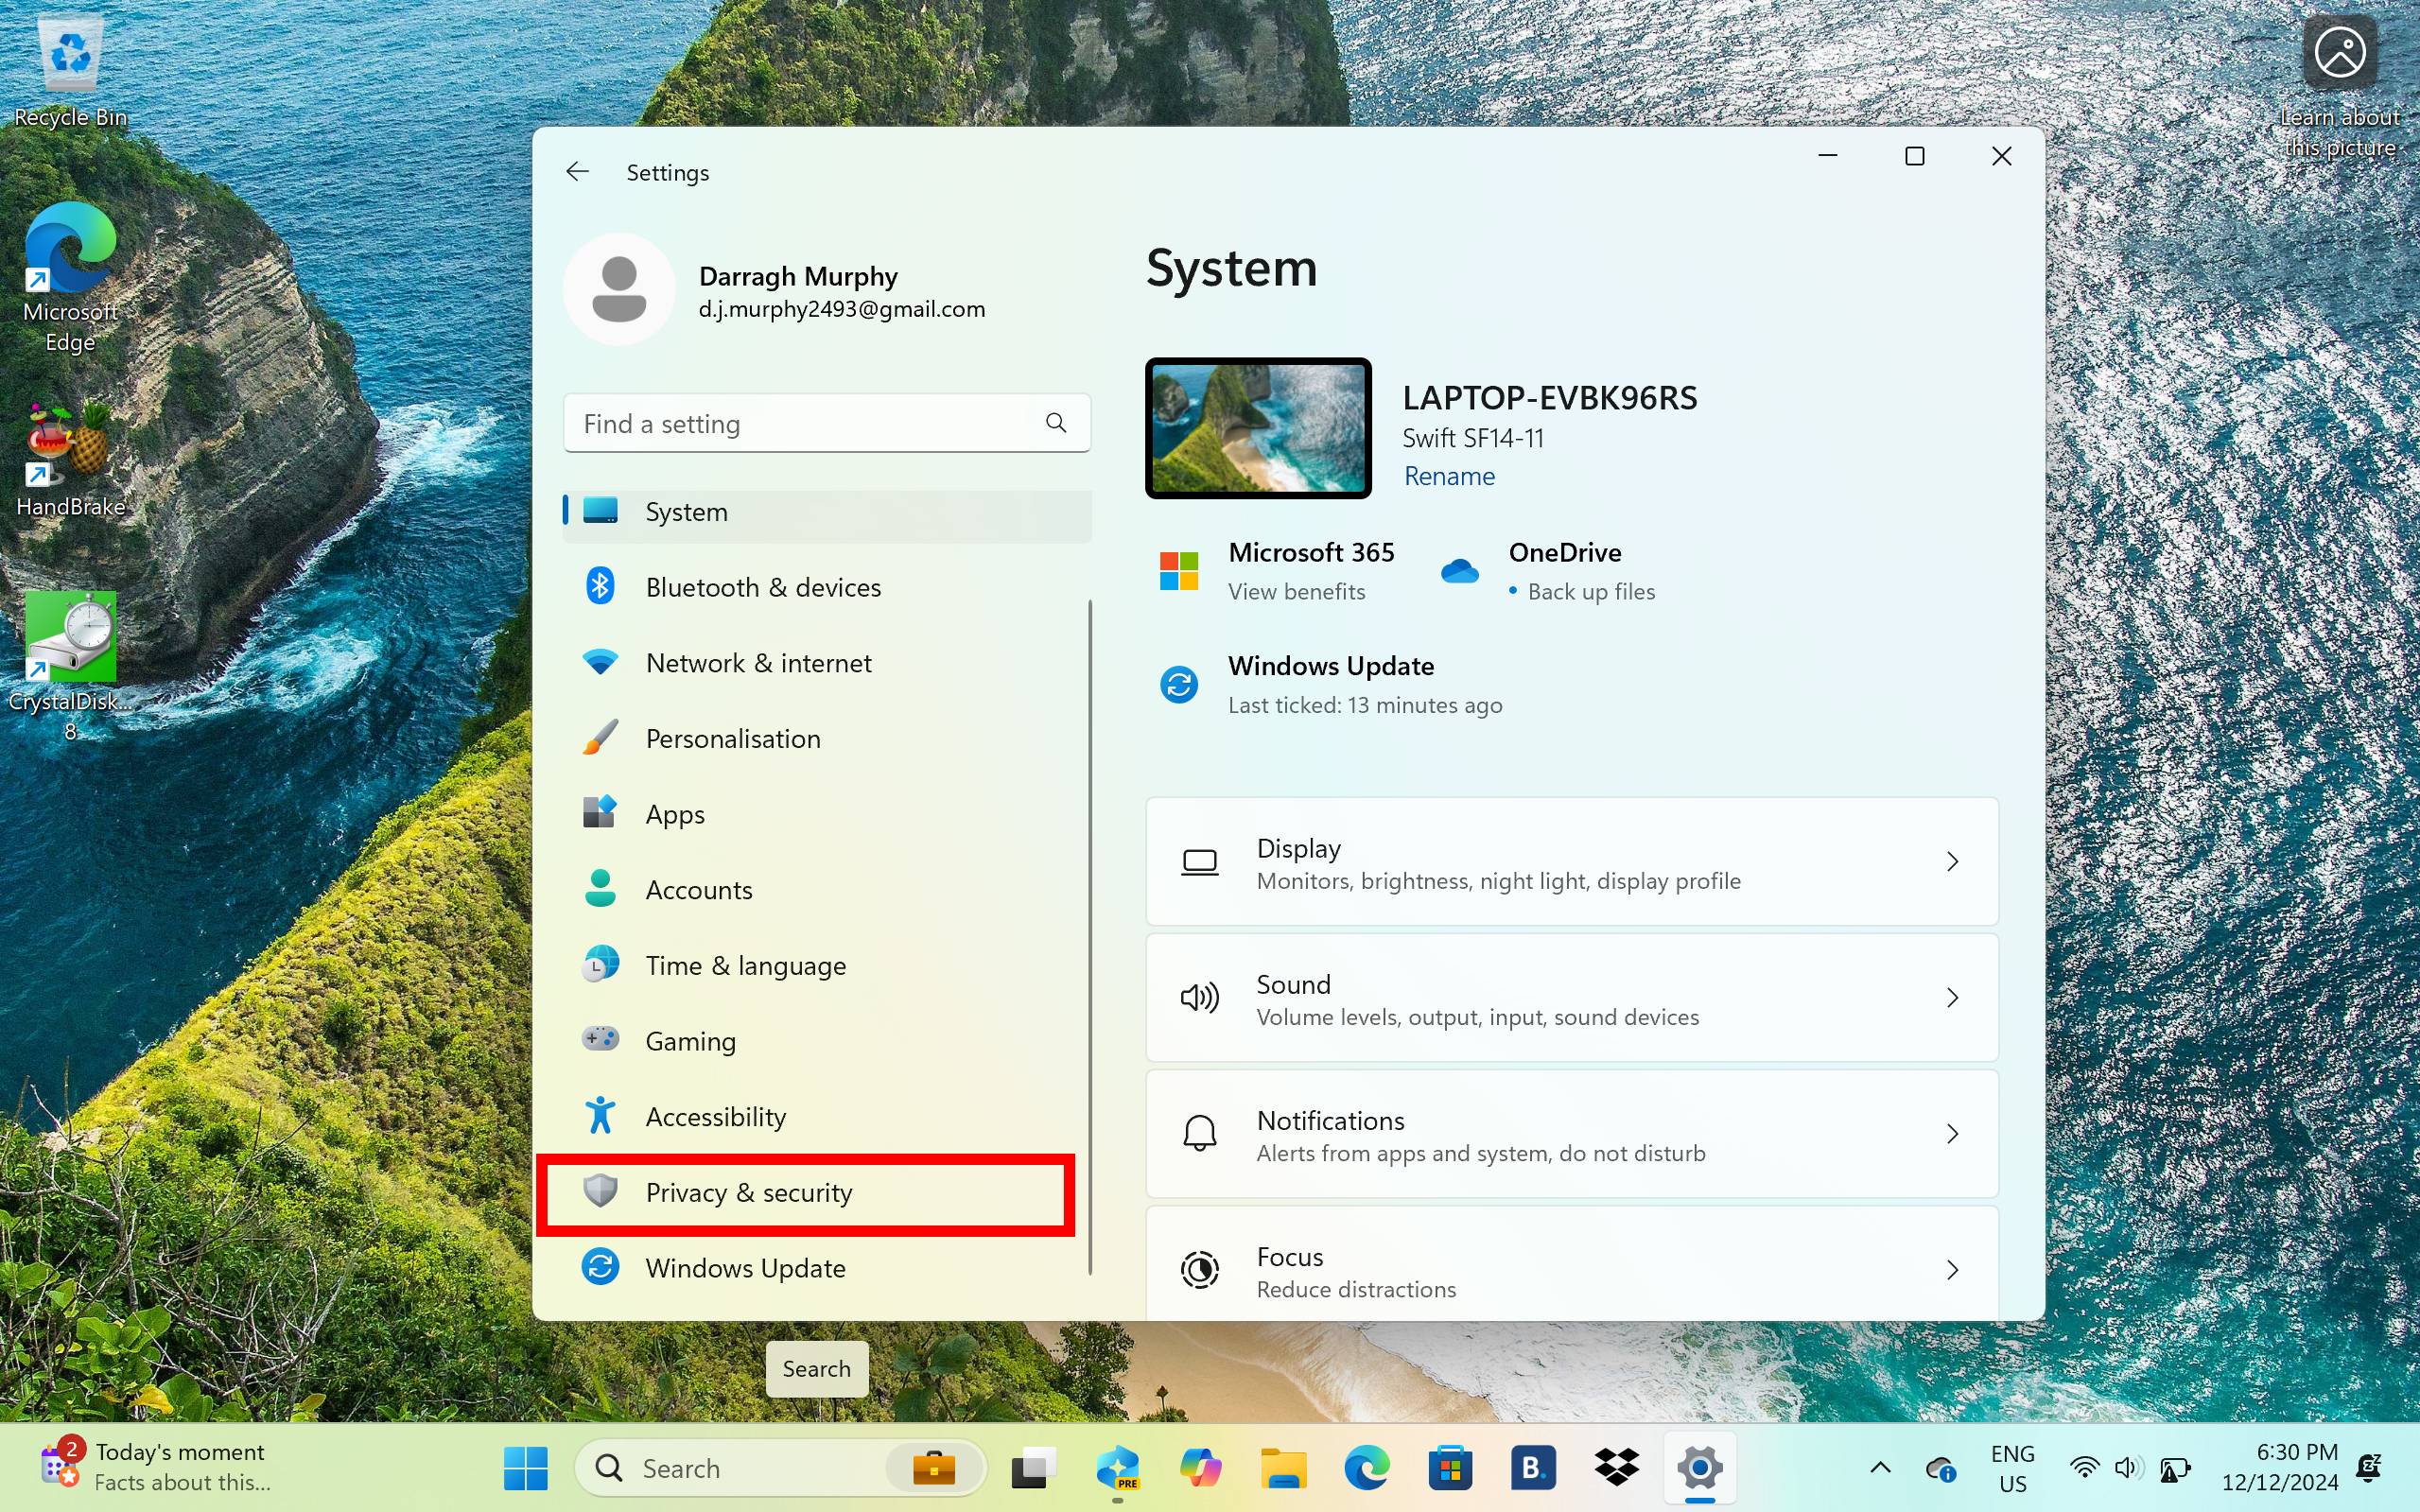
There are two ways to enable Windows Recall. The first is to opt in as soon as you boot up your PC, which will turn on the feature once you log in. Alternatively, you can also enable Recall by heading into Windows Settings.
Once you're logged in, open Settings. You can find the Settings app by typing in "Settings" in the search box along the taskbar.
2. Got to Privacy & Security > Recall & Snapshots
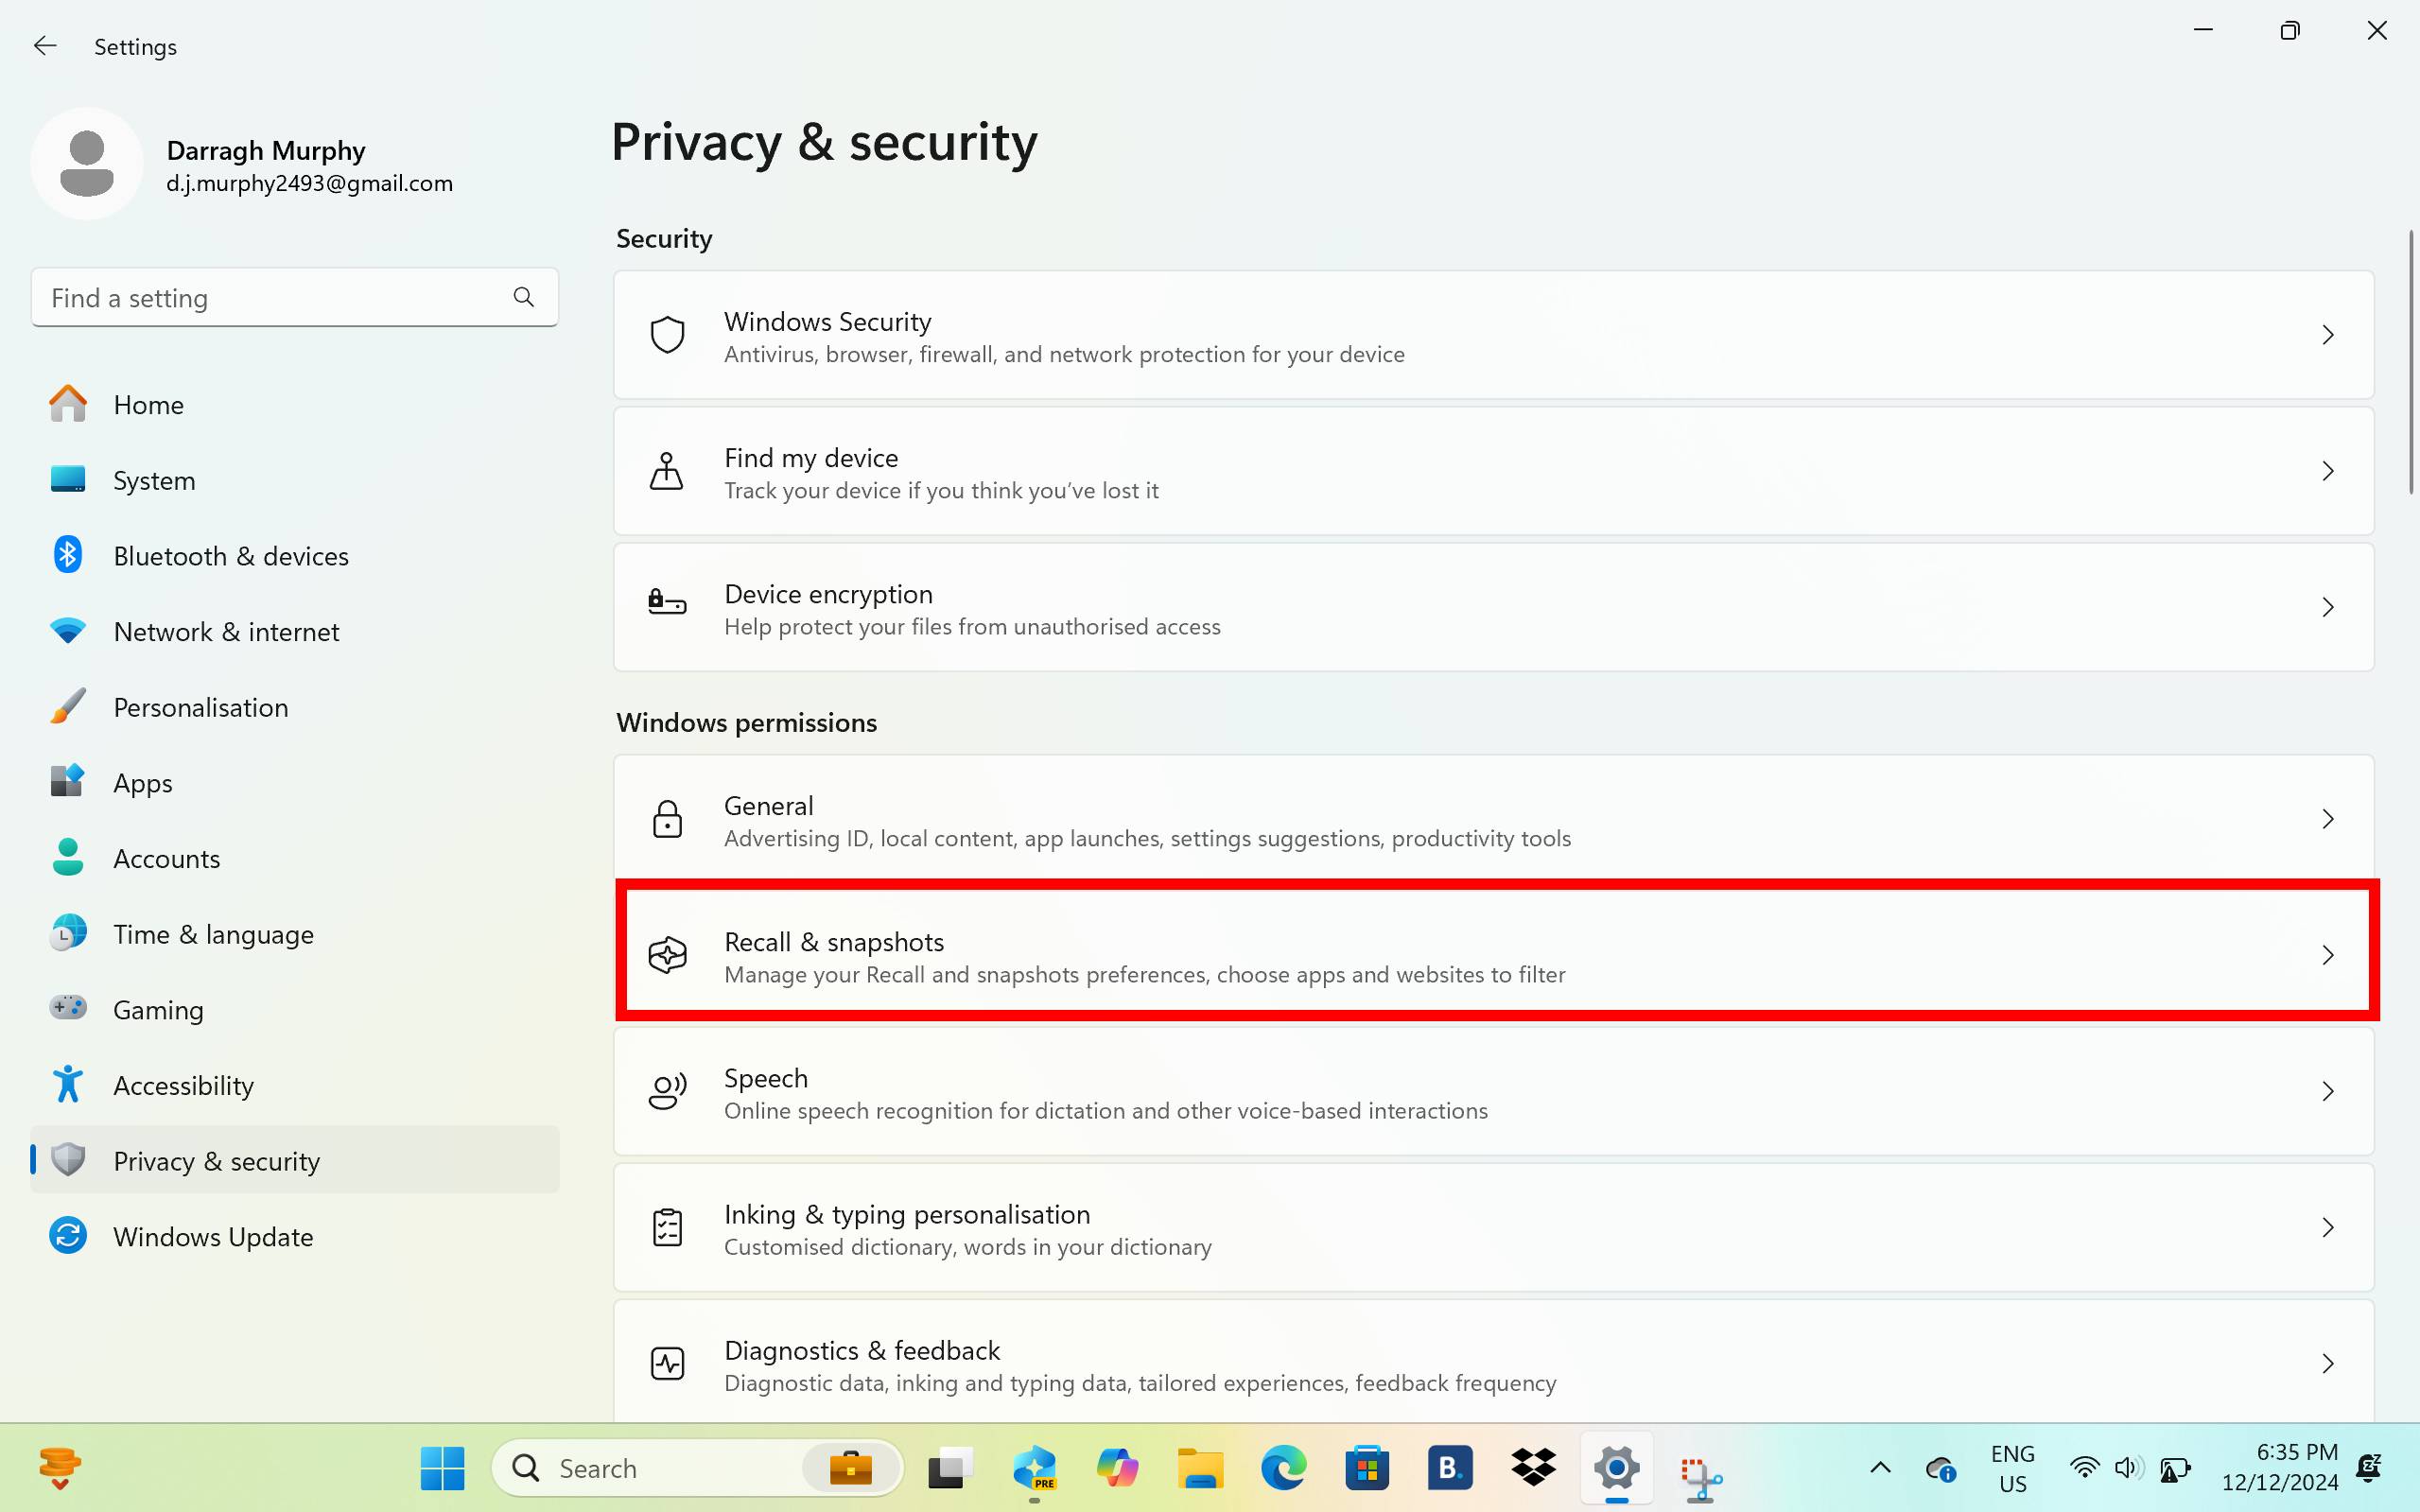
Next, head into Privacy & security by selecting it in the sidebar.
3. Turn on Snapshots
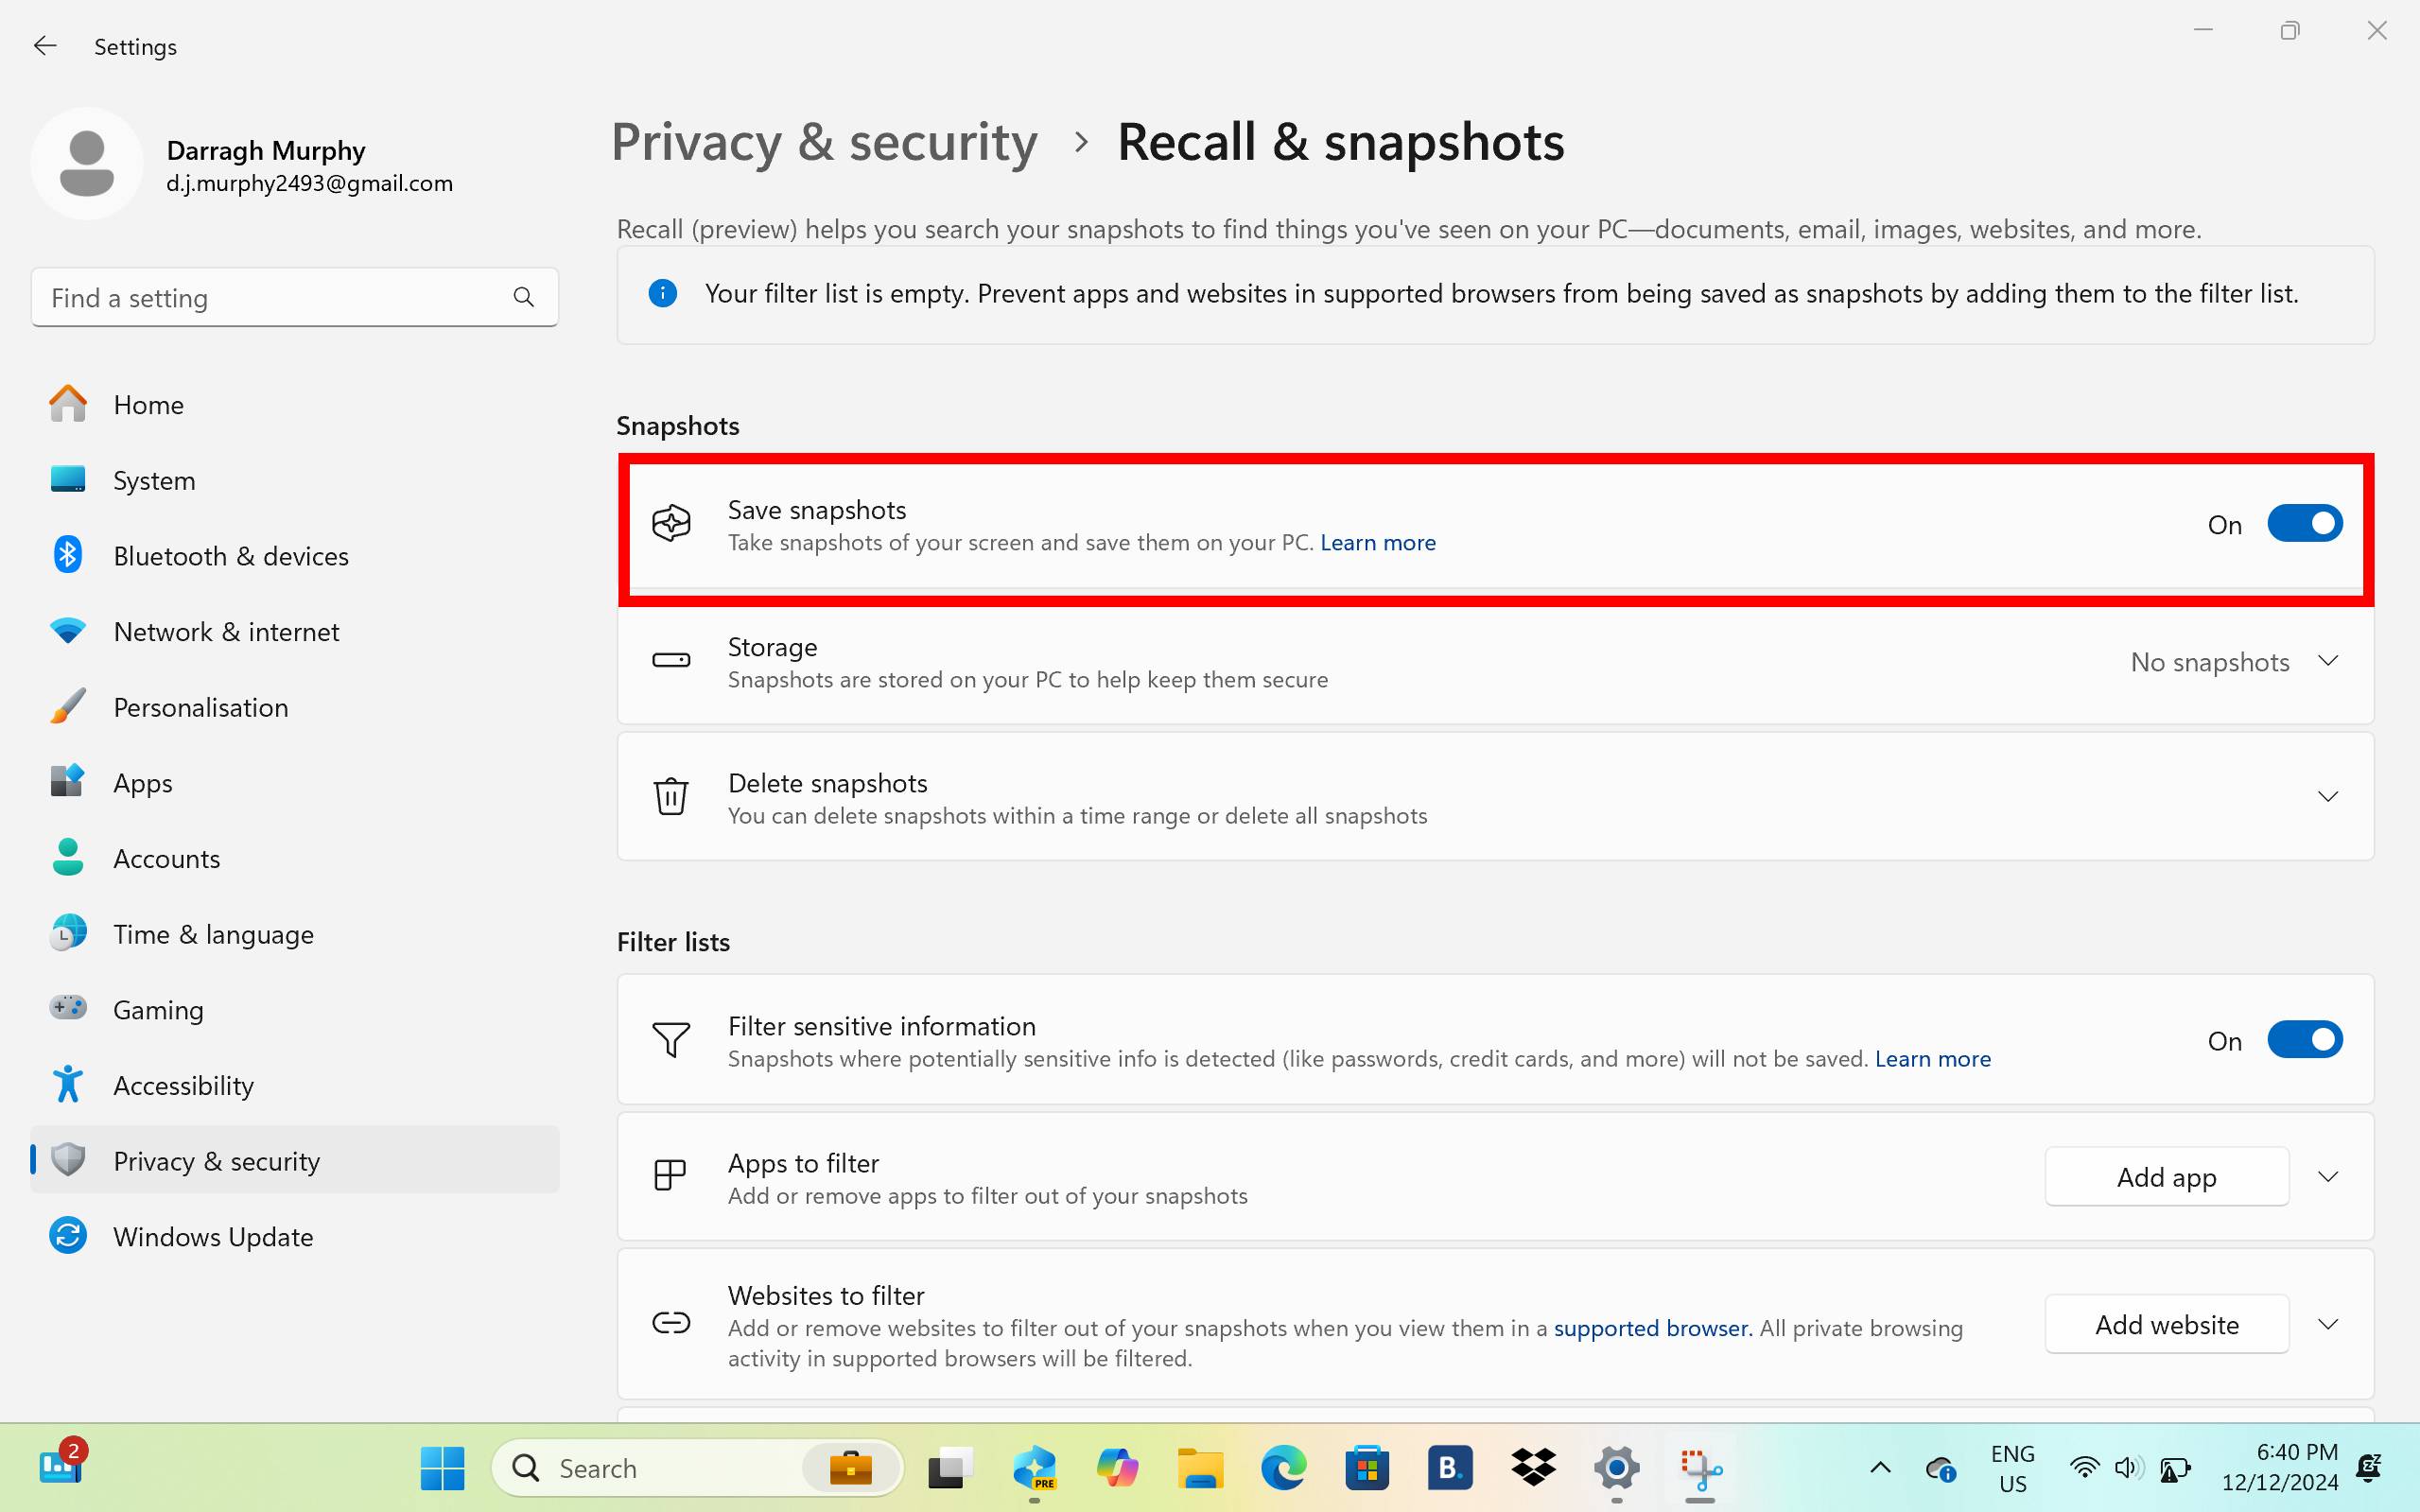
Once here, all you need to do is toggle the Save snapshot switch. Now, Windows Recall will be switched on. If you haven't already, your PC will ask you to sign up to Windows Hello, which is essential to use the Recall feature. You can use facial recognition or a PIN, and these will be used every time you open the Recall app.
4. Open Recall
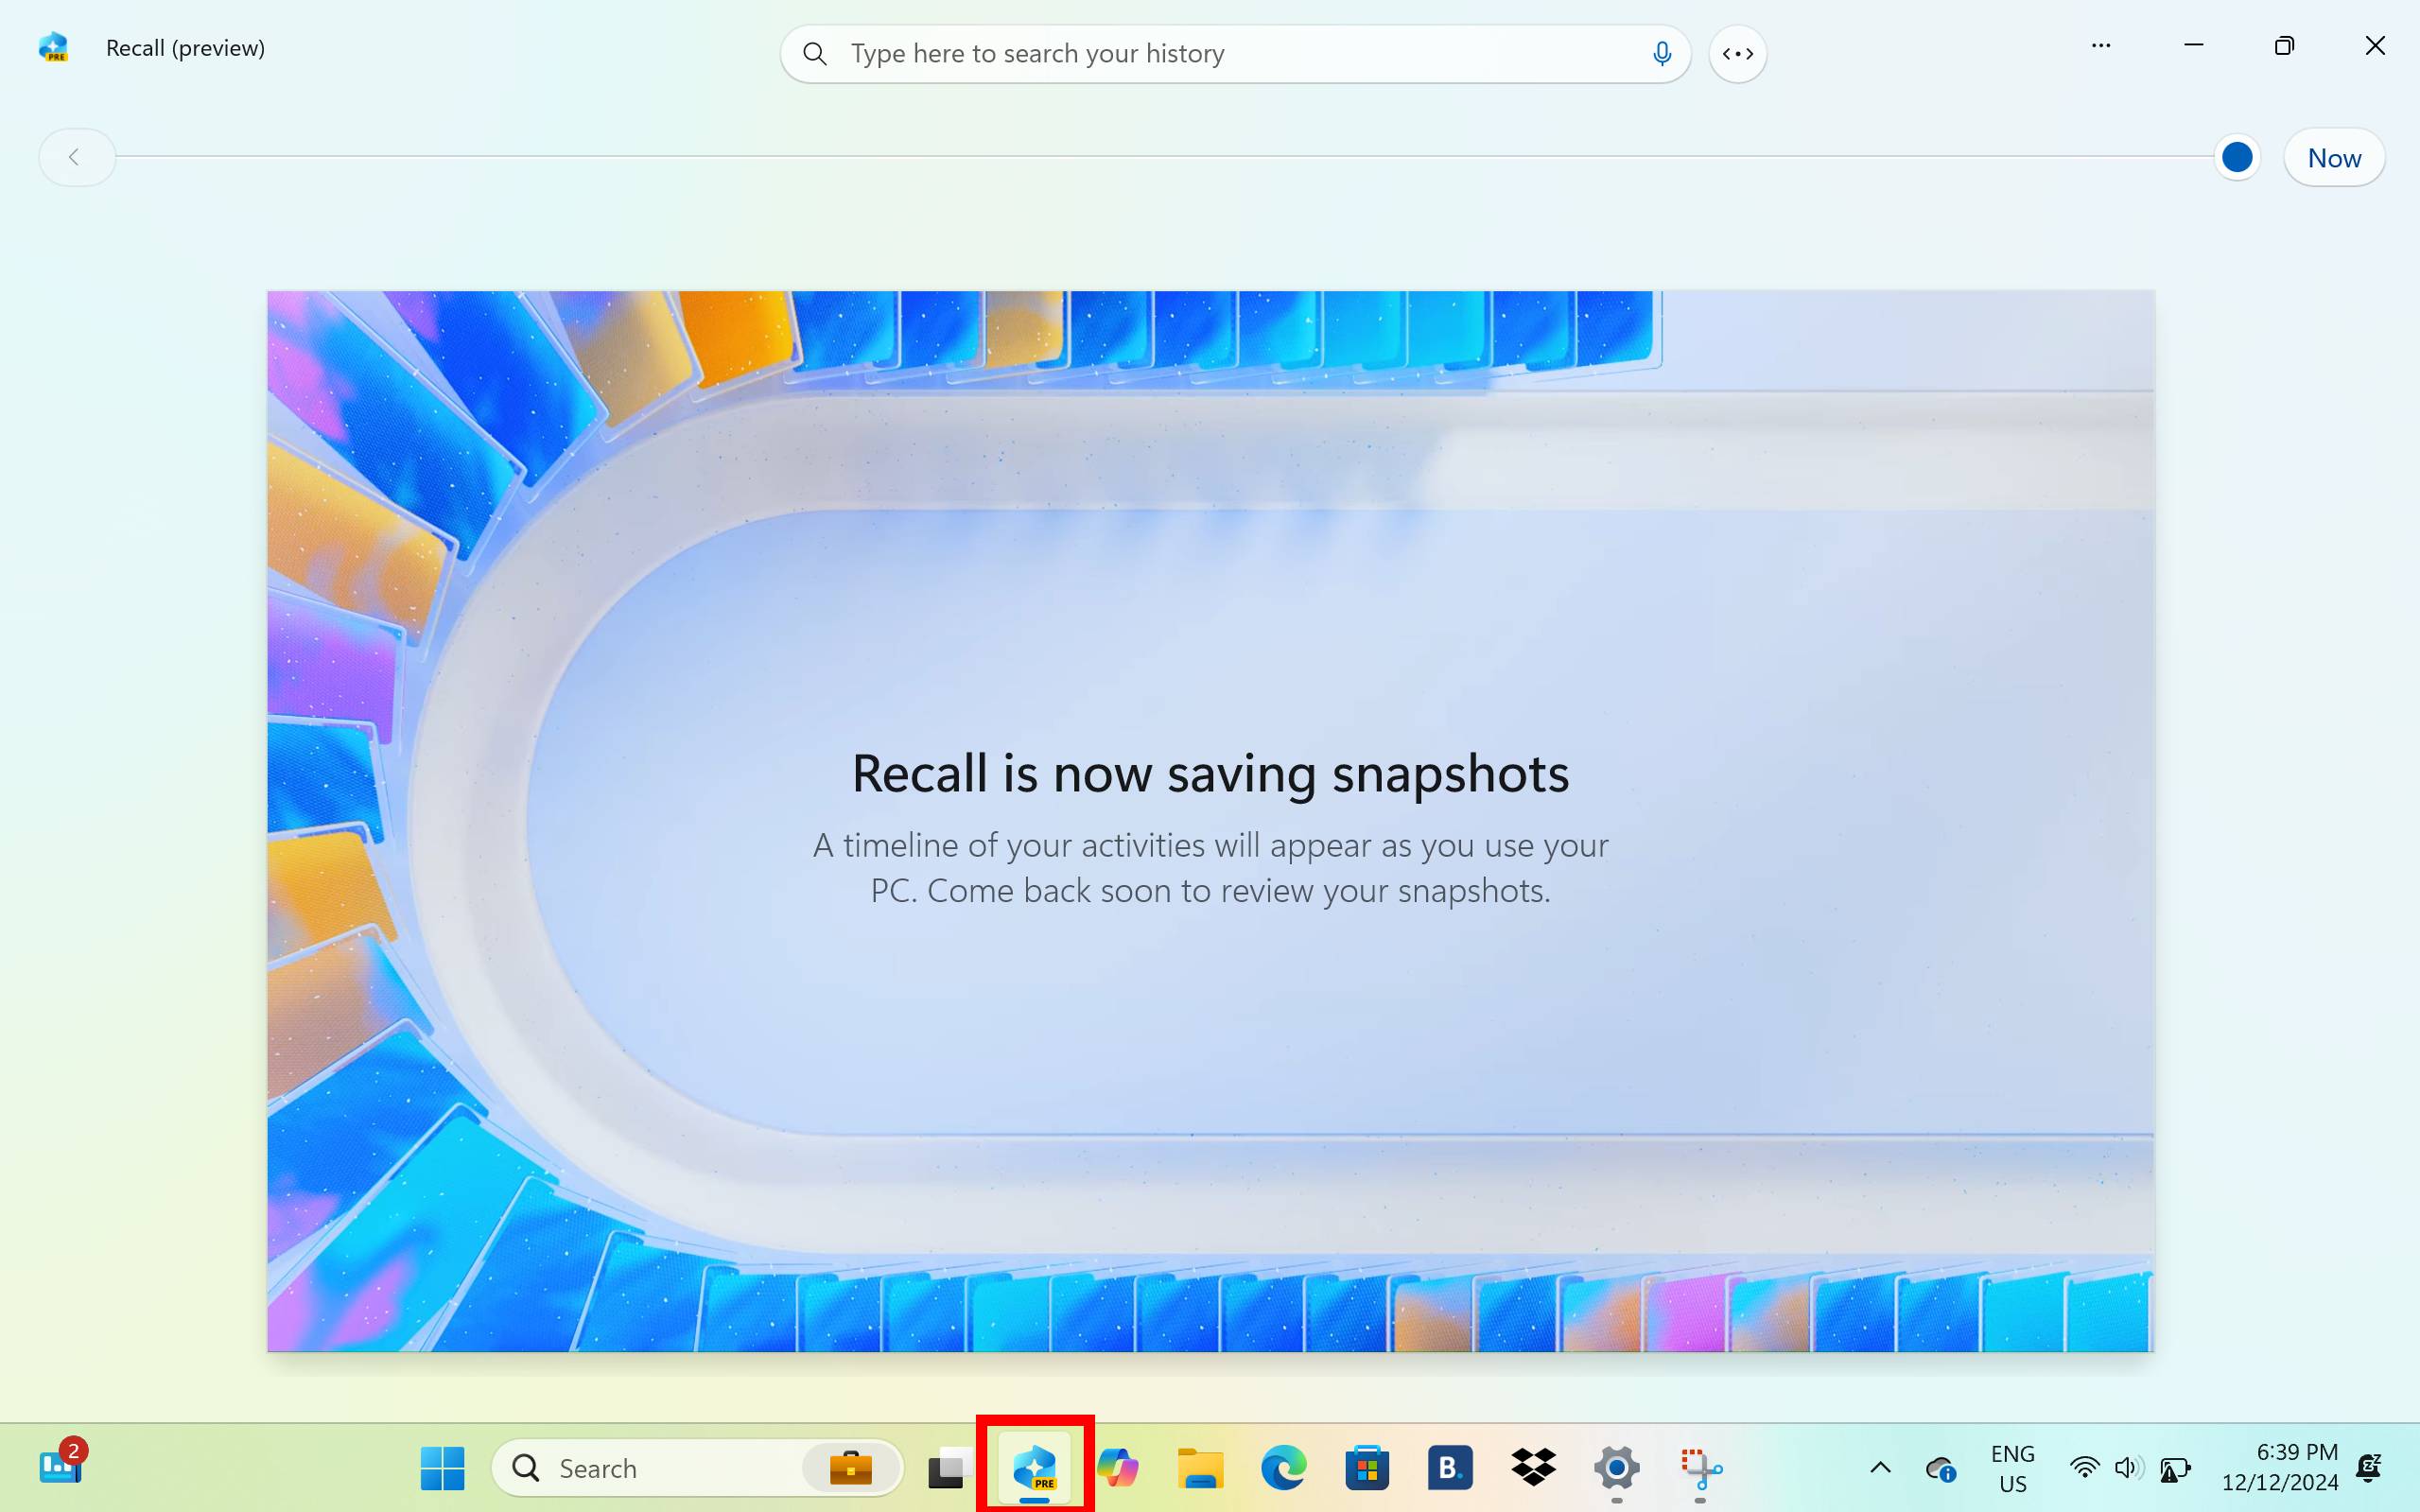
Now that it's switched on, you can click on the Recall icon along the taskbar to open the app.
5. Search with Recall

You can search for anything you remember doing on your PC that Windows Recall has taken snapshots of by typing in keywords or terms in the search box. The feature will then bring up snapshots that relate to the words searched, which can include websites you previously visited and more.
There you have it. Since Recall can take snapshots of everything you do, you'll be able to block or filter specific websites you don't want to be seen. Well, not everything, as we've recently seen Recall capturing credit card and Social Security numbers despite the sensitive information filter being switched on to block it out.
Microsoft has also confirmed that every time you open or use Recall, it will need to confirm your identity via Windows Hello. This can be done through your face, fingerprint, or PIN.
Sign up to get the BEST of Tom's Guide direct to your inbox.
Get instant access to breaking news, the hottest reviews, great deals and helpful tips.
While it can be a handy tool, especially if you close a window on unsaved work and the like, there are still privacy risks involved. The good news is you can easily turn off Recall but heading back into Settings and switching off snapshots.

Darragh is Tom’s Guide’s Computing Editor and is fascinated by all things bizarre in tech. His work can be seen in Laptop Mag, Mashable, Android Police, Shortlist Dubai, Proton, theBit.nz, ReviewsFire and more. When he's not checking out the latest devices and all things computing, he can be found going for dreaded long runs, watching terrible shark movies and trying to find time to game
