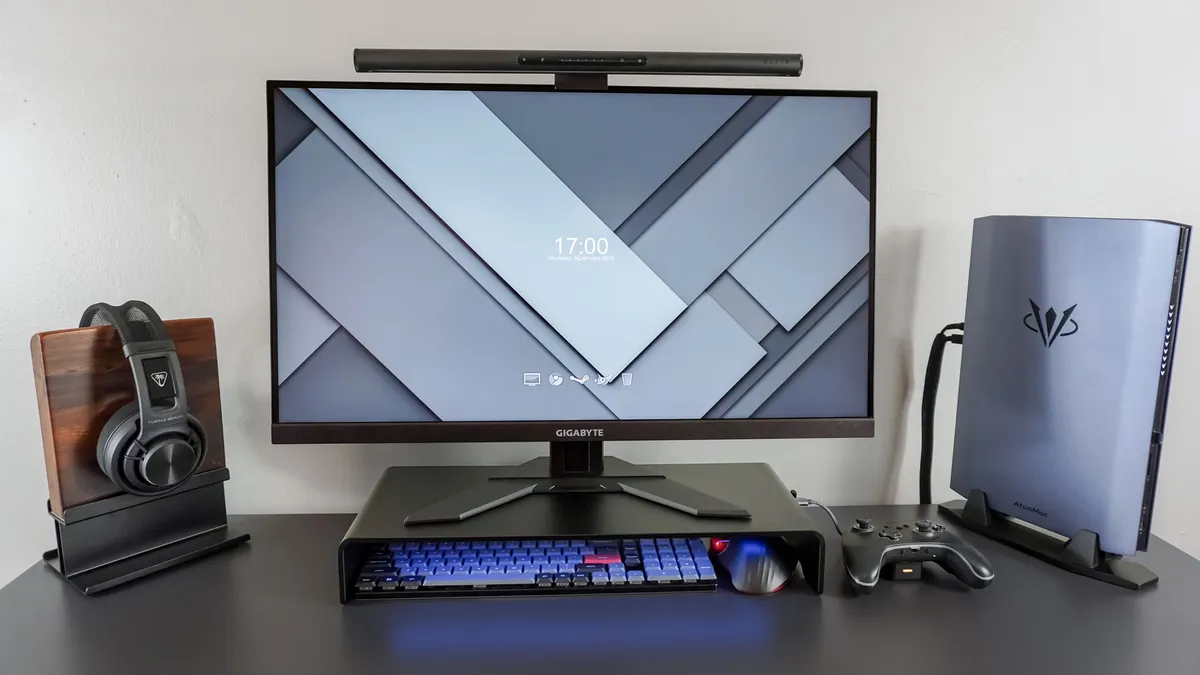
This sleek, all-black monitor stand features built-in RGB lighting as well as a 4-port USB-C hub. While it technically isn’t a docking station since it can’t charge your laptop, it does have an HDMI port at the back that you can connect to a monitor. The Razer Monitor Stand Chroma is a gorgeous desk accessory that can lift up your monitor, provide some extra storage space on your desk and there are a few easy to reach ports on the side.
For
- Remappable button
- Built-in RGB lighting
- Sleek, all-black unibody design
- Sturdy and can hold a lot of weight
Against
- No power delivery
- Limited port selection
This monitor stand has a built-in docking station and its 180W power supply has enough wattage to charge your laptop, smartphone and other devices. There’s a built-in Qi 2 wireless charger on the top along with a number of USB ports and card readers on the side. The Anker 675 is an all-in-one solution for docking your laptop, lifting up your monitor and keeping your desk more organized.
For
- Built-in cable management
- Integrated wireless charger
- Lots of USB ports and card readers
- Enough power to charge your laptop and other devices
Against
- Plastic feet
- Can’t hold a lot of weight
If you’re looking for a monitor stand with some extra functionality, the Razer Monitor Stand Chroma and the Anker 675 USB-C Docking Station are both great choices for improving your desk setup.
Unlike a desk shelf which lets you lift one of the best monitors up to eye level for better ergonomics while also giving you some additional storage space underneath it, both of these monitor stands can do this too but they also allow you to connect your laptop or even one of the best mini PCs to your monitor over USB-C.
You can’t go wrong with either desk accessory but there are some key differences between the Razer Monitor Stand Chroma and the Anker 675. From their design to their port selection to extra features like wireless charging and built-in RGB lighting, here’s everything you need to know before choosing which one is the best fit for your desk setup.
Razer Monitor Stand Chroma vs Anker 675: Specs
| Header Cell - Column 0 | Razer Monitor Stand Chroma | Anker 675 USB-C Docking Station |
|---|---|---|
| Price | $199 | $249 |
| Power | N/A | 180W power supply |
| Video output | 4K at 60Hz, 1080p @ 144Hz | 4K at 60Hz |
| Exterior ports and buttons | 1 x USB-C (5 GBps), 2 x USB-A (5 GBps), 1 x Chroma RGB Button (remappable) | 2 x USB-C (10 GBps, shared 45W), 1 x USB-A (10 GBps, BC 1.2, 7.5W), 1 x USB-A (10 GBps x 4.5W), SD card reader, microSD card reader, 3.5mm audio jack, 1 x power button |
| Interior ports | 1 x USB-C (10 GBps), 1 x HDMI 2.0 | 1 x USB-C (100W host port), 1 x DC-IN (180W), 1 x USB-A (10 GBps, 4.5W), 1 x gigabit Ethernet, 1 x HDMI 2.0 |
| Wireless charging | N/A | Qi 2 wireless charging pad (Android 10W, iPhone 7.5W) |
| RGB lighting | Integrated Chroma lightstrip | N/A |
| Material | Anodized aluminum | Aluminum (shelf), hard plastic (legs) |
| Max weight load | 44 pounds | 22 pounds |
| Dimensions | 19.7 x 8.27 x 3.09 inches | 21.26 x 8.66 x 3.54 inches |
| Weight | 5.51 pounds | 3.65 pounds |
Razer Monitor Stand Chroma vs Anker 675: Design

At 21.26 x 8.66 x 3.54 inches, the Anker 675 is slightly wider, taller and deeper than the Razer Monitor Stand Chroma at 19.7 x 8.27 x 3.09 inches. This makes sense though, as the former has an integrated wireless charger on the right side.
Both monitor stands will look great in any desk setup. The Anker 675 features an aluminum top with hard plastic legs while the Razer Monitor Stand Chroma is made entirely from anodized aluminum. The only splash of color on Razer’s monitor stand can be found on its exterior USB ports which instead of your typical blue, use a splash of green. Meanwhile, the Anker 675 has a two-tone design with a dark grey top and silver on the sides.
If you have a particularly heavy monitor, the Razer Monitor Stand is the better choice as it can support up to 44 pounds thanks to its all-aluminum design, though this also makes it a bit heavier overall at just slightly over five and a half pounds. The Anker 675 can support up to 22 pounds and weighs just over 3.5 pounds.
For those using a standard 27-inch or even a larger 32-inch monitor, either monitor stand will be fine as they weigh on average, 7 to 15 pounds or 10 to 20 pounds respectively. It’s worth noting that neither is suitable for a multi-monitor setup as you only have one HDMI port for sending video from your laptop to your display.
Razer Monitor Stand Chroma vs Anker 675: Ports

As you can see in the picture above, the number of ports you get varies greatly between these two monitor stands. While Razer went with a ‘less is more’ approach, Anker decided to give you every port you could possibly need.
The Razer Monitor Stand Chroma and the Anker 675 also do things differently when it comes to the orientation of their ports. With Razer’s monitor stand, they’re on the right side while with Anker’s, they’re on the left side. Both orientations work well but you might prefer one over the other, so it’s still something to keep in mind.

With the Razer Monitor Stand Chroma, you only get three ports on the right side of the monitor stand: one USB-C and two USB-A ports. They’re all capable of data transfer speeds of 5 gigabits per second (GBps) though, which should be enough for quickly moving files off one of the best USB flash drives. Likewise, they also make a good fit for any 2.4 GHz dongles you might be using with your wireless keyboard or mouse.
The button on the far left is used to switch between Chroma lighting profiles to control the Razer Monitor Stand Chroma’s integrated RGB lightstrip. However, it can also be remapped to launch apps and websites but more on that later.

The Anker 675 goes all out with its port selection. You get two USB-C ports with a data transfer rate of 10 GBps that can also deliver up to 45W of power each, two USB-A ports also with 10 GBps speeds and charging capabilities (1 x 7.5W, 1 x 10W), an SD and a microSD card reader and finally, an audio jack. The button on the end is used to turn on or turn off the Anker 675 when you’re not using it while the Razer Monitor Stand Chroma is powered entirely by your laptop or whatever device you currently have connected to it.

When it comes to the interior ports of these two monitor stands, things are quite a bit different too. The Razer Monitor Stand Chroma continues its minimalistic approach with a single USB-C input port and an HDMI 2.0 port for video out. The Anker 675 gives you quite a few more options here with a USB-C input port, a USB-A port, an Ethernet port, HDMI 2.0 and a barrel port connector for its massive 180W power supply.

Another neat built-in feature with the Anker 675 is its built-in cable management system that allows you to wrap any excess cable around it. This really comes in handy as all of its input ports are on the left underside of the monitor stand. With the Razer Monitor Stand Chroma, you only have two cables to connect underneath it and their ports are located closer to the stand’s rear edge.
Razer Monitor Stand Chroma vs Anker 675: Charging

With its massive 180W external power supply, the Anker 675 has more than enough charging power for all of your devices. You can get up to 57W of power just from the ports on its left side alone. Meanwhile, the USB-C input port on the bottom delivers 100W of power to your laptop when it’s connected.

As the Anker 675 is an all-in-one solution, it has a Qi 2 wireless charger on the top right side of the monitor stand. If you have one of the best Android phones on top, it can deliver up to 10W wirelessly and with one of the best iPhones, its wireless charging speed drops down slightly to 7.5W.

Since the Razer Monitor Stand Chroma doesn’t have its own external power supply, its USB ports are powered from your laptop or other connected device. As such, Razer doesn’t list their wattage but given that these are USB 3.2 Type-A ports, they’re limited to the standard USB power output which is usually around 5W. This makes them better suited for charging smaller devices like your headphones or a controller instead of a smartphone or one of the best tablets.
Razer Monitor Stand Chroma vs Anker 675: Software

Just like the rest of Razer’s products, its new monitor stand can be controlled and customized using Razer Synapse. With this software installed on your computer, you can adjust the monitor stand’s lighting but you can also reprogram the button on the side.
While it switches between various Chroma lighting effects by default, you can remap it to open any app on your computer or even any website you want. For instance, I changed it to open Steam’s Big Picture Mode to give my gaming PC a more console-like experience.

If you aren’t happy with the Razer Monitor Stand Chroma’s basic lighting effects, you can download and install the Razer Chroma app to create your own. These advanced Chroma effects not only work with the company’s monitor stand, you can also add your other Razer devices and control all of their lighting effects at the same time.

The Anker 675 is a plug-and-play device without any software to tweak its settings, or at least that’s what I thought back when I reviewed it. As it turns out, Anker does have software for updating the firmware and settings of its various laptop docking stations. I downloaded and tried it with the Anker 675 USB-C Docking Station but I couldn’t get it to work.

While a number of different Anker devices are supported in the Anker Dock Manager app, the company’s monitor stand/docking station hybrid isn’t. This isn’t a deal breaker though as this app is just for downloading and installing firmware updates and troubleshooting common issues. It would have been nice to have though and maybe the Anker 675 will be supported eventually.
Which is best for your desk setup?
Deciding between the Razer Monitor Stand Chroma and the Anker 675 really comes down to personal preference and what you mainly use your desk for. Likewise, you also need to consider how many extra ports you need along with whether or not an audio jack for wired headphones or having both an SD and a microSD card will be useful.
After trying out the Razer Monitor Stand Chroma, I was very impressed by its build quality and just how solid it feels on my desk. This monitor stand isn’t going anywhere and I like that it can support heavier monitors even if most monitors now weigh less than 20 pounds.
I was a bit confused as to why Razer didn’t include a power supply with its monitor stand but then it dawned on me: the Razer Monitor Stand Chroma is designed to be used with one of the best gaming laptops which require a lot more power. For instance, the Razer Blade 16 I reviewed last year ships with a 330W power adapter and the 180W power supply that comes with the Anker 675 wouldn’t allow you to use it to its full potential.
If you’re going for a very minimalistic, all-black aesthetic or you already have other Razer gear you can sync up with it via Synapse, the Razer Monitor Stand Chroma is a great choice. It is on the expensive side but you can tell this monitor stand is built to last.

Now if you want a more all-around solution that will work with any of the best laptops, the Anker 675 might be a better fit. For instance if you have a MacBook, a newer Dell XPS 13 or any other ultraslim laptop without full-sized ports, this monitor stand could save you from having to plug in a dongle every time you need to connect an older device or get photos off your camera.
I also really like how the Anker 675 becomes a hub for all your devices thanks to its built-in wireless charger and the fact that the USB-C and USB-A ports on the left side deliver enough power to fast charge your devices. The integrated cable management system really helps keep your desk clutter-free too.
The Anker 675 may not be able to bear as much weight as the Razer Monitor Stand Chroma but that won’t really make a difference with today’s lighter monitors. It does have a somewhat plastic feel to it thanks to its legs and the plastic used on the underside. The Anker 675’s aluminum top does help offset this though.
At the end of the day, the choice is yours. If you need all those extra ports and want a one-cable solution to dock your laptop and lift up your monitor, get the Anker 675. If you prefer form over function, want that clean, all-black look and don’t mind using your laptop charger alongside it, get the Razer Monitor Stand Chroma instead. Either way, these are both great monitor stands with some extra functionality that add storage space and can help improve any desk setup.

As for which one I would get with my own money, I'd pick the Razer Monitor Stand Chroma for its design and sturdier build quality. The Anker 675 does offer more functionality but it doesn't look nearly as slick on my desk. I also love the customizable button on the side of Razer's monitor stand and could see myself coming up with all sorts of interesting uses for it. As for its lack of a power adapter, I mainly use a mini PC at home and my laptop while traveling, so I don't need to worry about charging.
More from Tom's Guide