I added Razer’s new monitor stand to my desk setup — and this underrated feature is a game changer
Lift up your monitor, declutter your desk and so much more
Whether you’re putting together a desk setup for work or a battlestation for playing games, it’s easy to get lost in the big ticket items and neglect the smaller though equally important accessories.
Maybe you splurged on one of the best monitors but forgot to see whether or not it was height adjustable until after the return window closed. Or perhaps you might have spent so much time building an impressive gaming PC that it wasn’t until your build was done that you realized you no longer had room on your desk for anything else.
This is where a desk shelf, or in this case, a monitor stand could really come in handy. In addition to lifting your display up to eye level for better ergonomics, they both also provide you with extra storage space. At the same time, some even come with USB ports that are easier to reach or a built-in docking station so you can connect all your other devices.
I’ve spent the past few months checking out various desk shelves and monitor stands but I didn’t expect to see one from Razer at CES this year. Even with the new and improved Razer Blade 16 just feet away from me in their suite, it was the Razer Monitor Stand Chroma that immediately caught my eye.
After two weeks trying it out for myself, I can easily say it’s a worthwhile upgrade for any desk setup or battlestation, especially if your desk is on the smaller side. However, it has one surprising feature that sets it apart from the other desk accessories I’ve tested.
Razer Monitor Stand Chroma: $199 @ Amazon
This sleek, all-black monitor stand is made entirely out of anodized aluminum and can support up to 44 pounds. Alongside an integrated Chroma RGB lightstrip on its underside, it also has a built-in 4-port hub that allows you to connect a laptop to your monitor over USB-C with two USB-A ports and another USB-C port on the side for your other devices.
More than just a stand
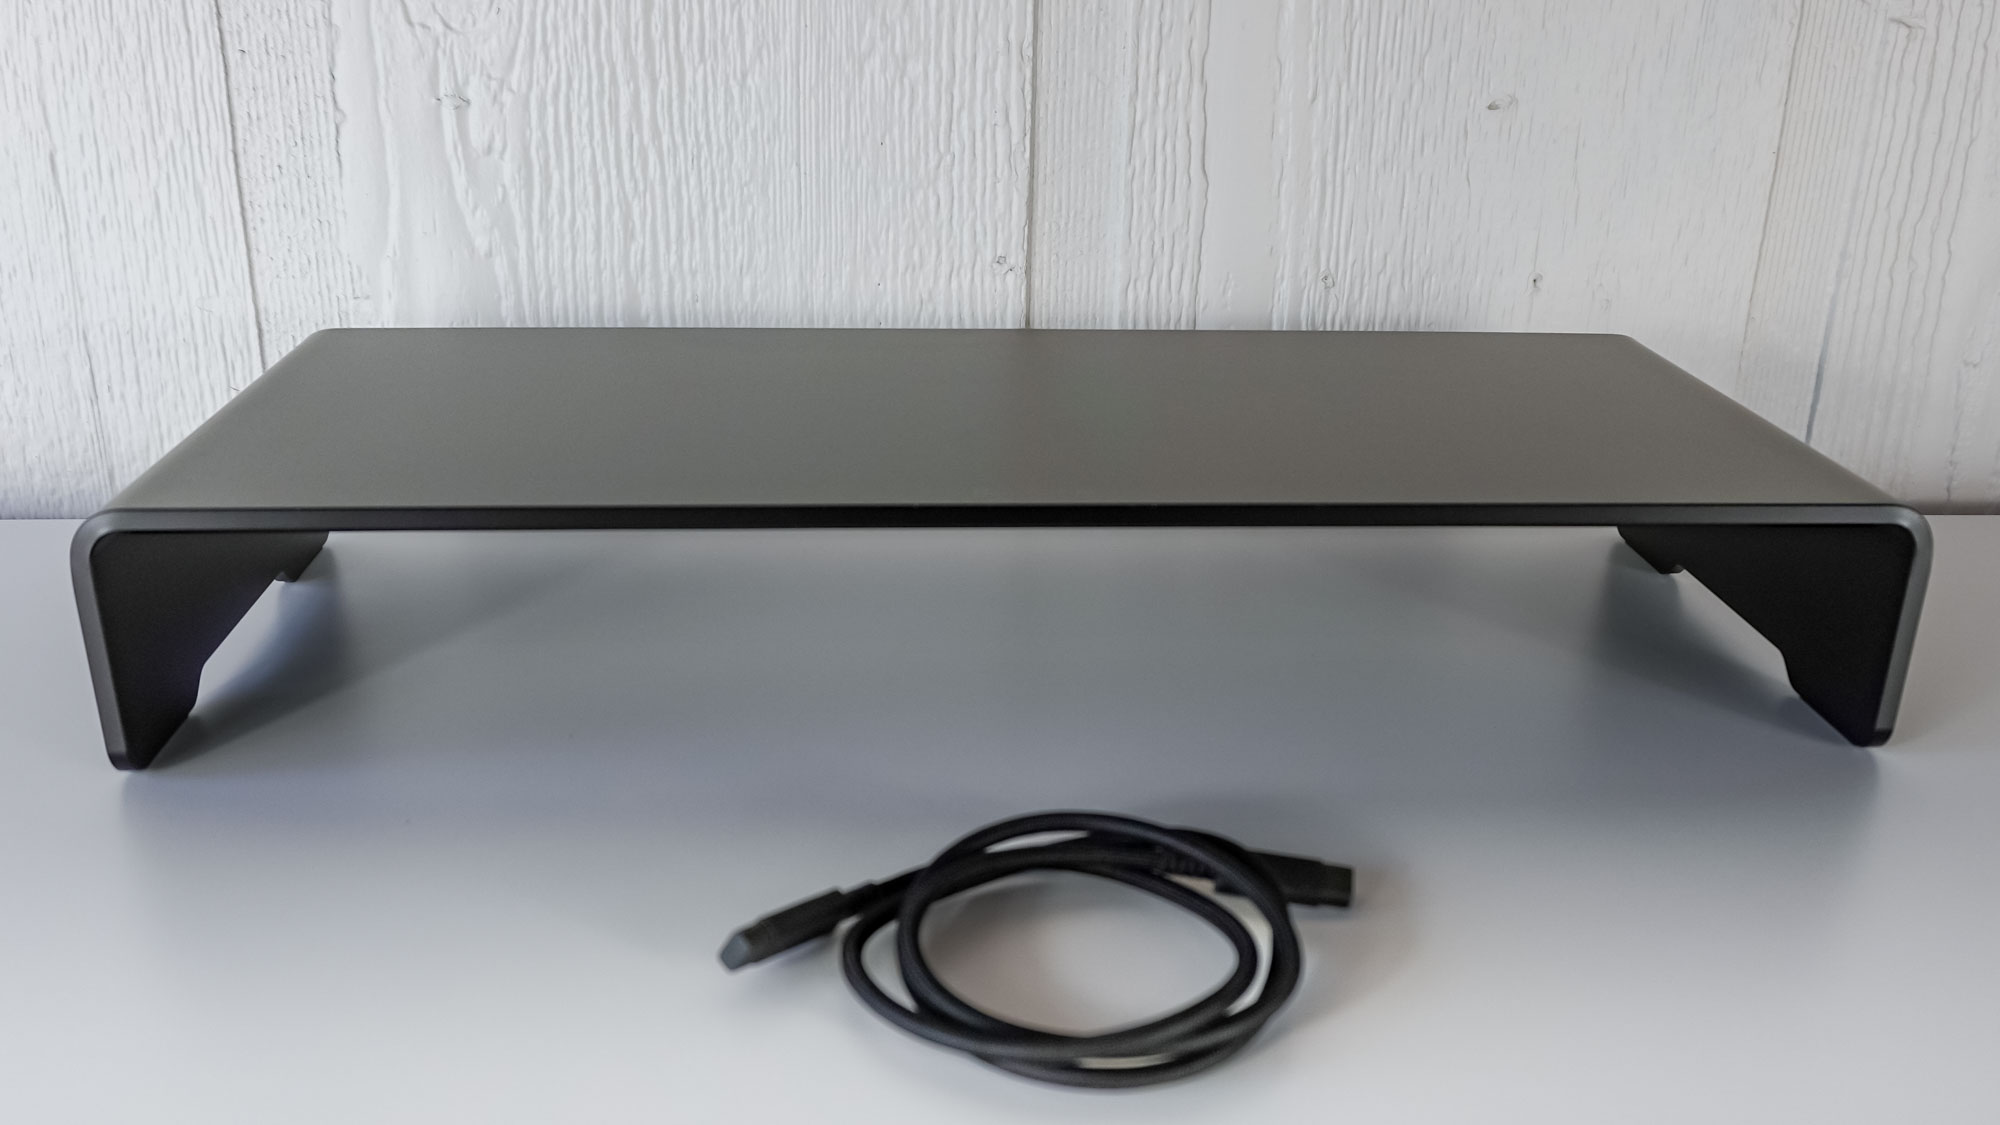
At 19.7 x 8.27 x 3.09 inches, the Razer Monitor Stand Chroma won’t take over your entire desk and you still have plenty of room for a pair of the best computer speakers on either side of it. This stand isn’t flimsy at all either as it’s made from anodized aluminum, weighs 5.51 pounds and can hold up to 44 pounds, enough to bear the weight of the massive Samsung Neo Odyssey G9. You’ll probably want to pair the Razer Monitor Stand Chroma with a smaller display though as its smaller size isn’t suited for the larger stands that ship with super ultrawide monitors.
In the box, you get the Razer Monitor Stand Chroma and a braided USB-C to USB-C cable for video out from one of the best laptops. However, you don’t get a power adapter to charge your laptop which is why this is a monitor stand with a built-in USB-C hub as opposed to one with a full-on docking station like the Anker 675 USB-C Docking Station I reviewed last year. Still, video out is a great feature to have in a monitor stand, even if you have to use your laptop’s power adapter with it.
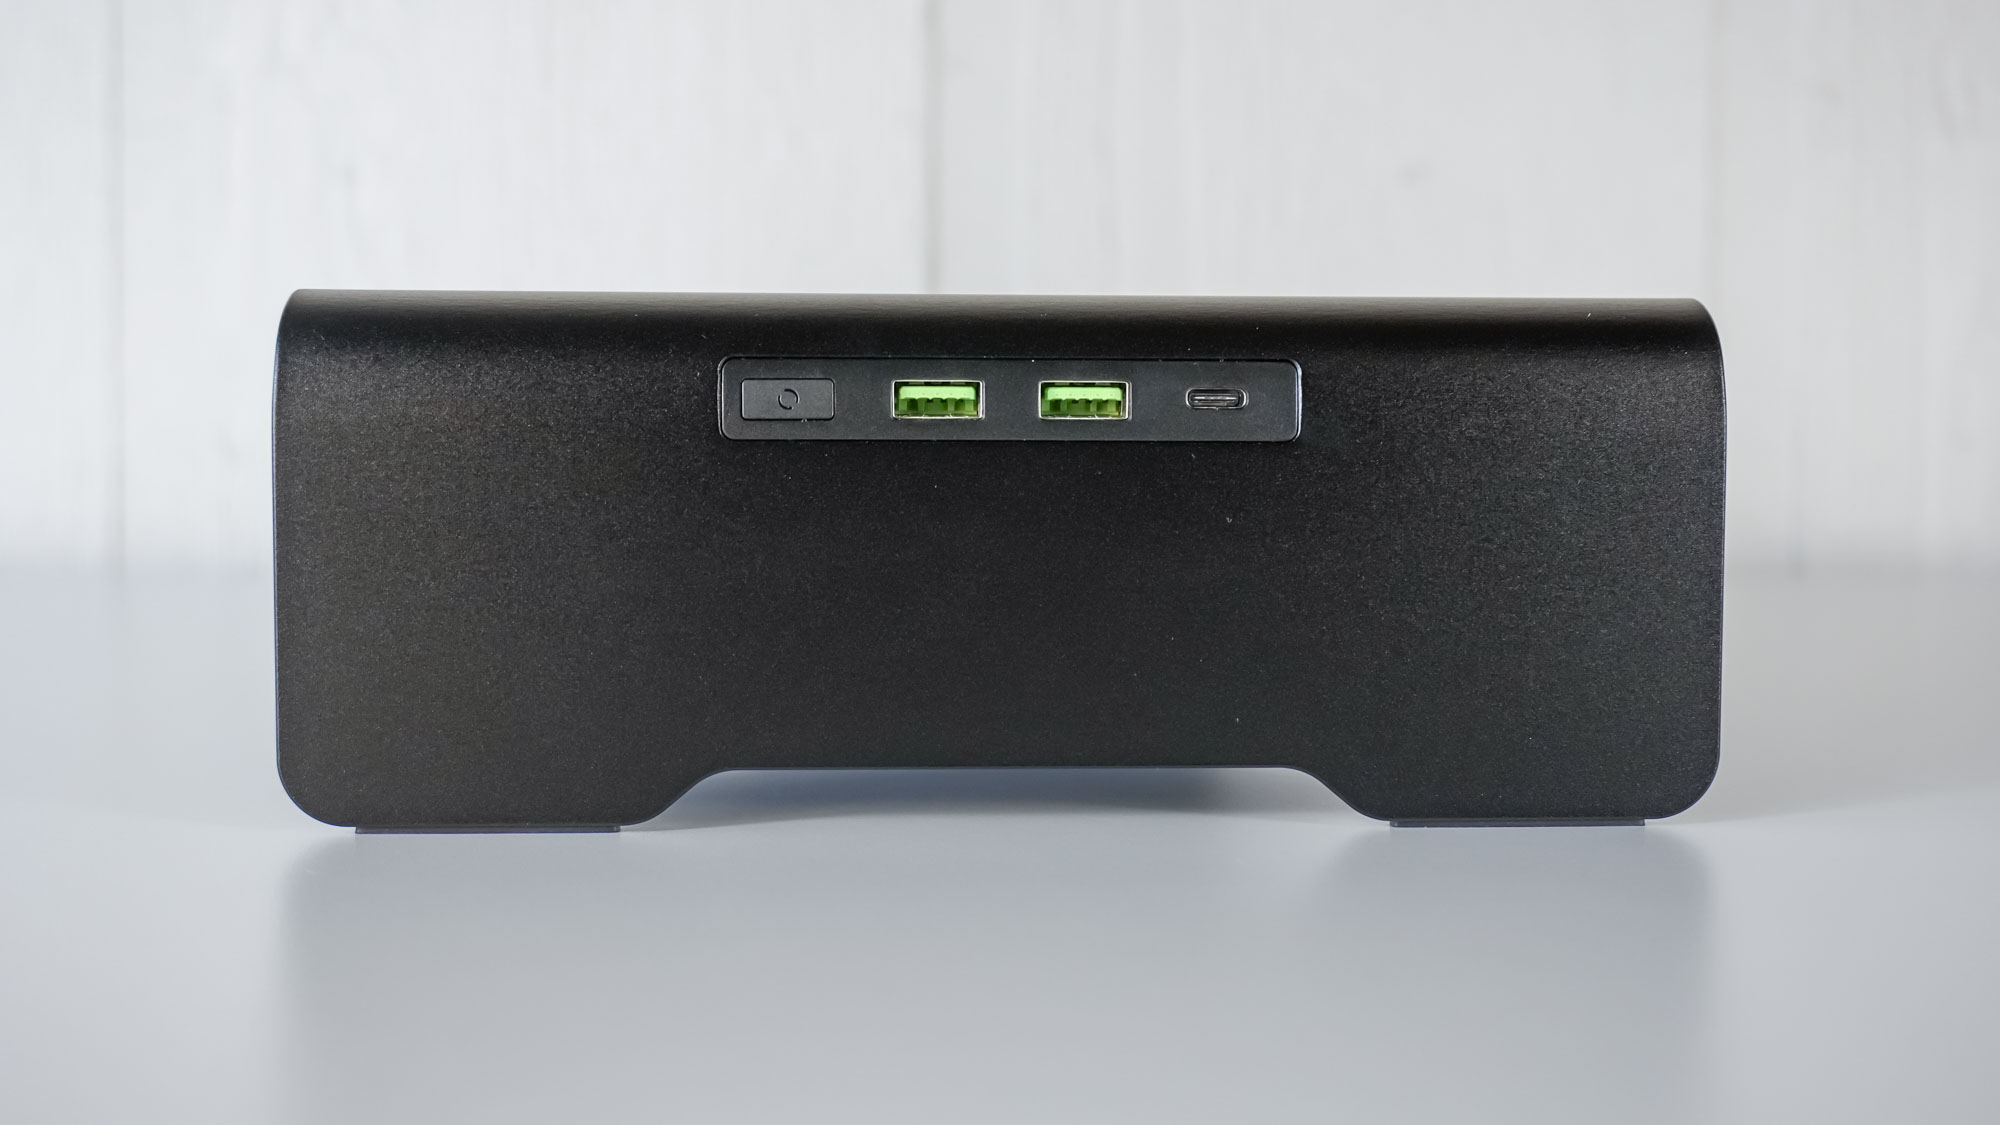
On the left side of the Razer Monitor Stand Chroma, there’s a USB-C port, two USB-A ports and a button for controlling its built-in RGB lighting. Once connected to your laptop over USB-C, you can then use these ports to connect your other devices. If you prefer using a 2.4 GHz USB dongle over Bluetooth for your peripherals like I do, you can easily switch between devices and still use the same wireless keyboard and mouse.
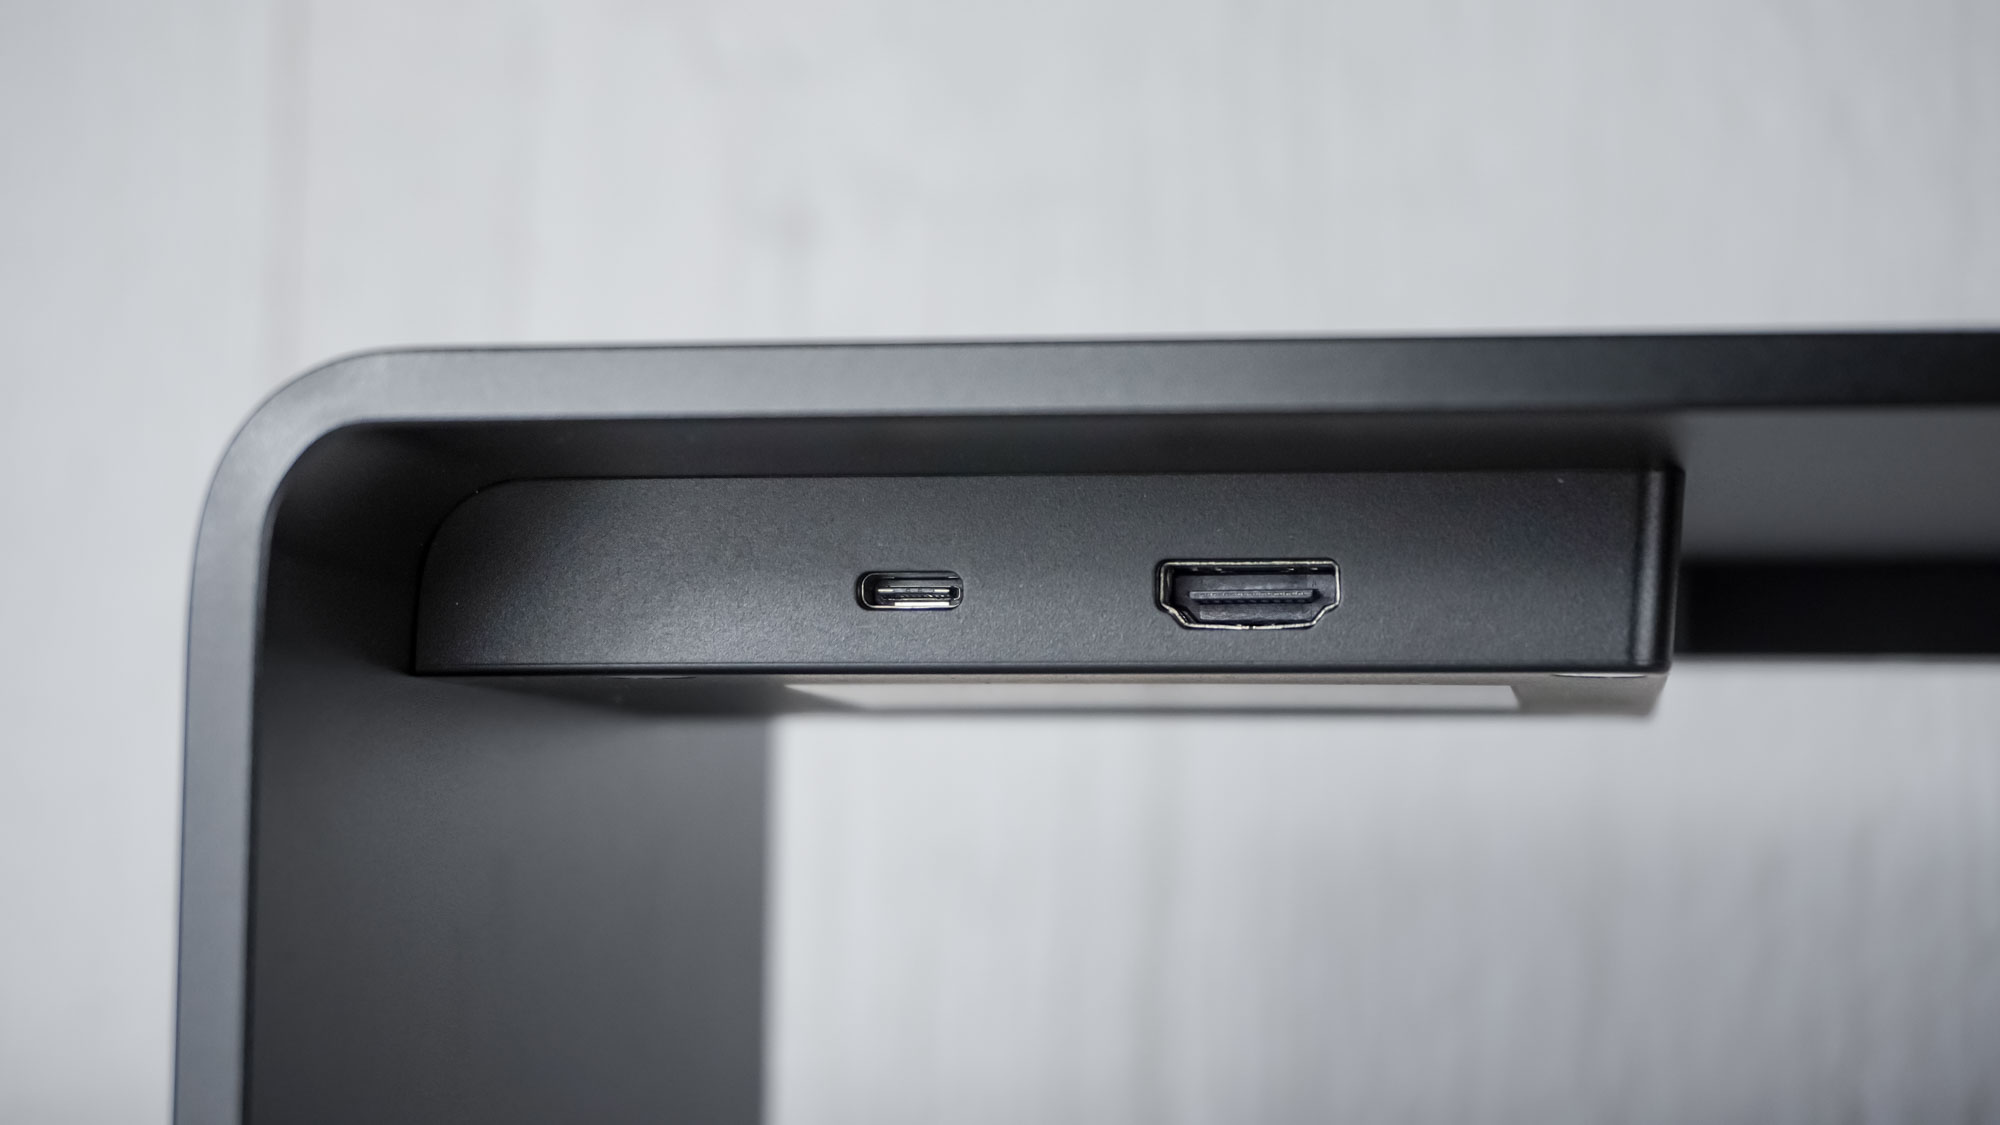
On the backside, there’s a USB-C input port for connecting your laptop as well as an HDMI 2.0 port for your monitor. I have to admit HDMI 2.1 would have been nice but since we’re dealing with gaming PCs and not consoles, you can still reach a refresh rate of up to 144Hz with either a 1080p or 1440p gaming monitor. Who knows, we might see HDMI 2.1 or even a DisplayPort 1.4 along with some extra USB ports in a slightly wider Razer Monitor Stand Chroma Pro one day.
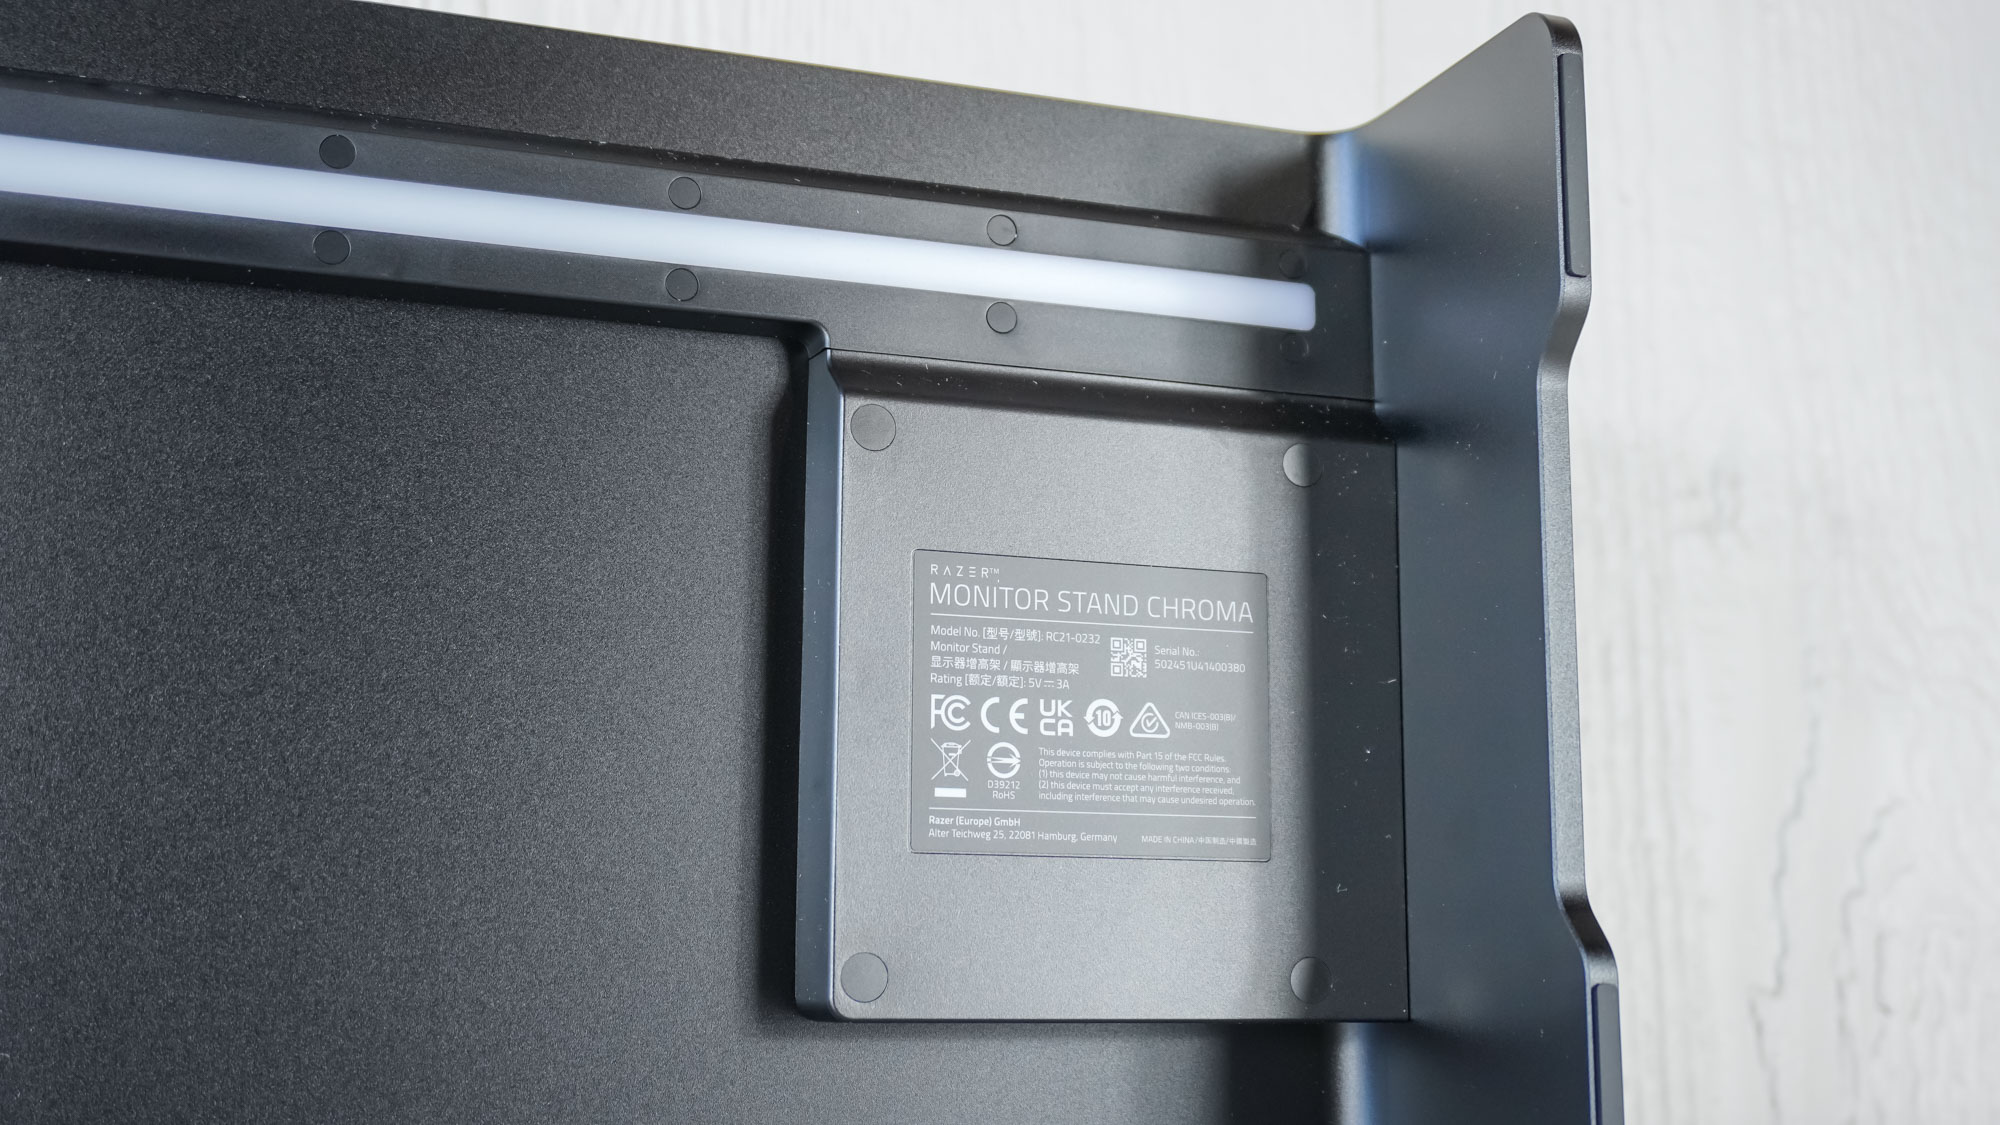
Since this is a Razer product aimed at gamers after all, there’s an integrated Chroma RGB lightstrip that runs along the bottom side of this monitor stand at the front. You can cycle between Chroma lighting presets using the button on the side but that’s not all it does, more on that later.
Leveling up my desk setup
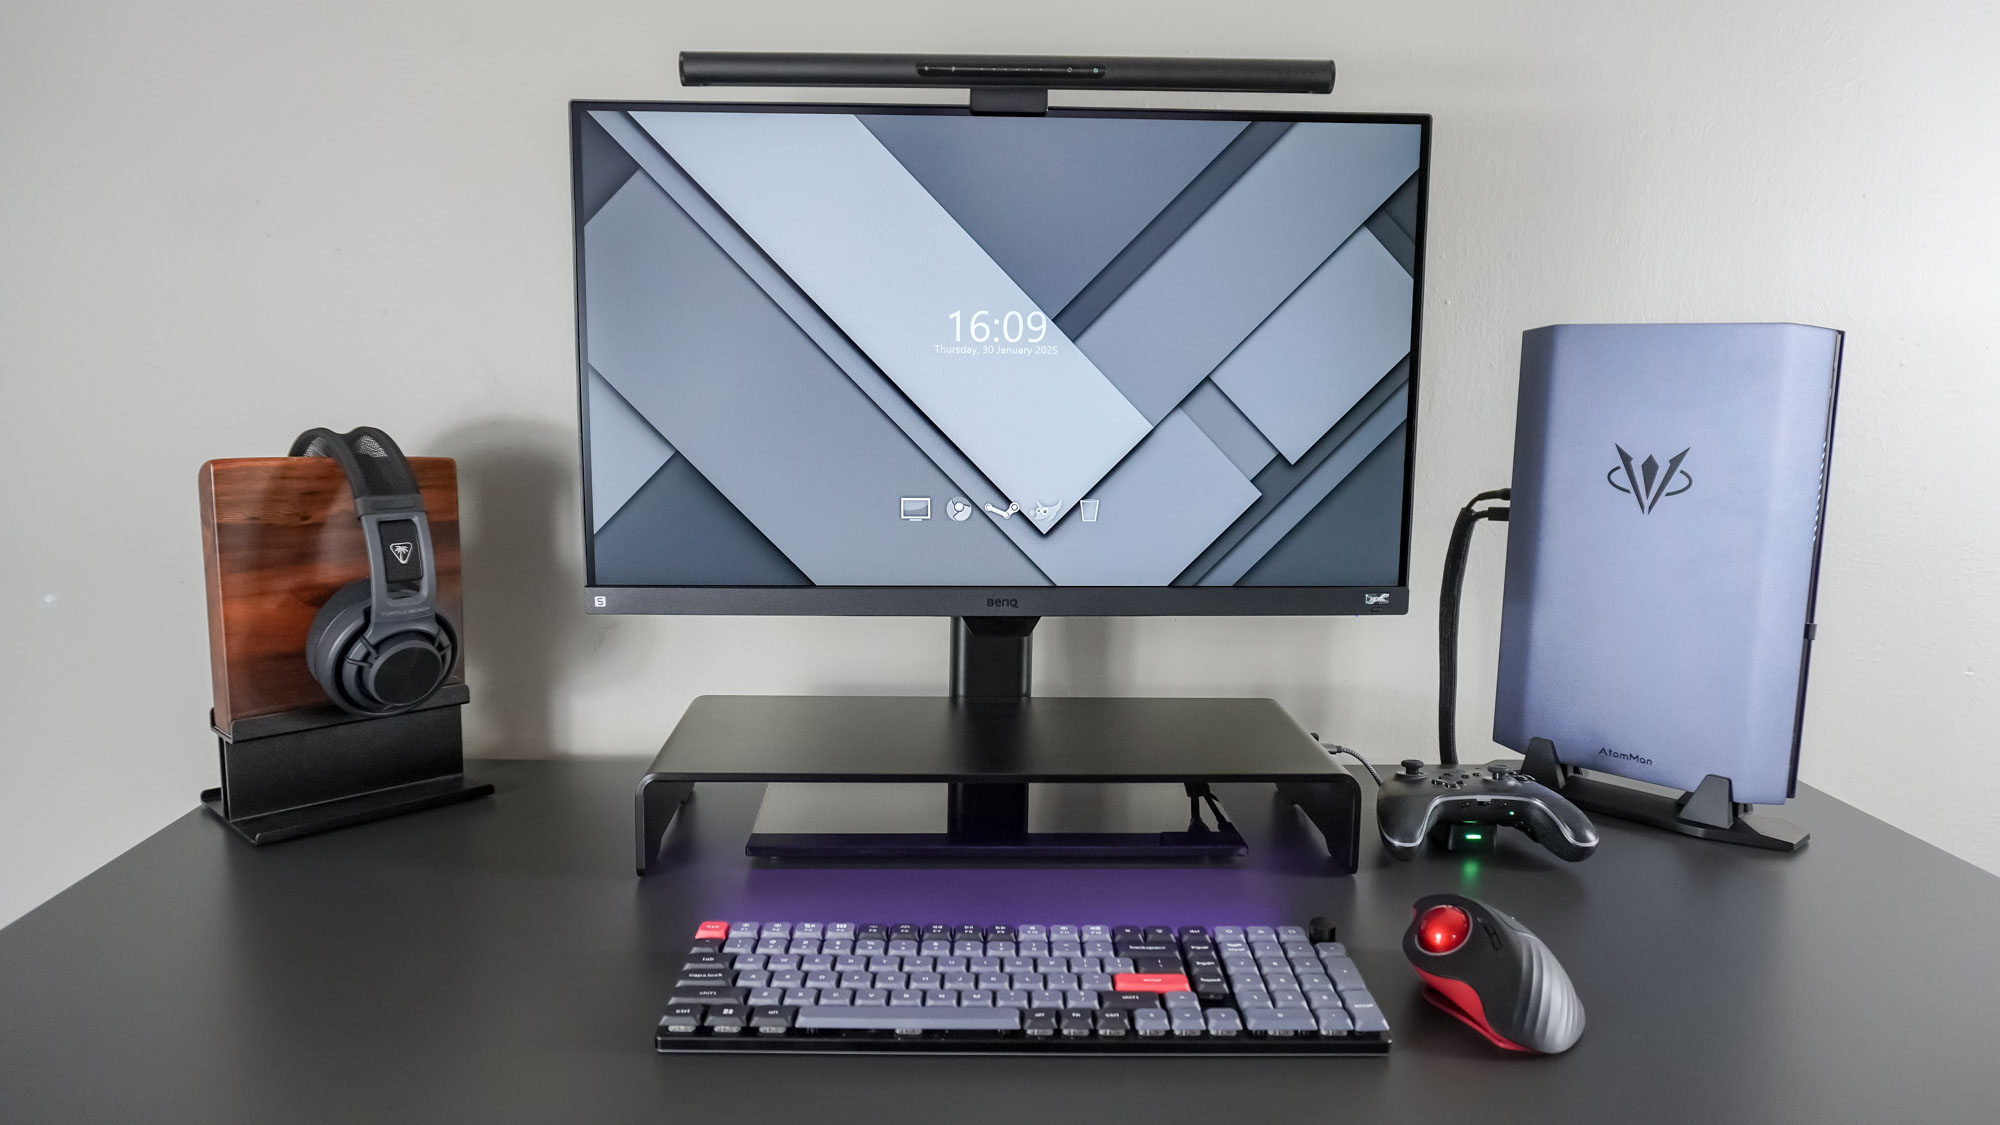
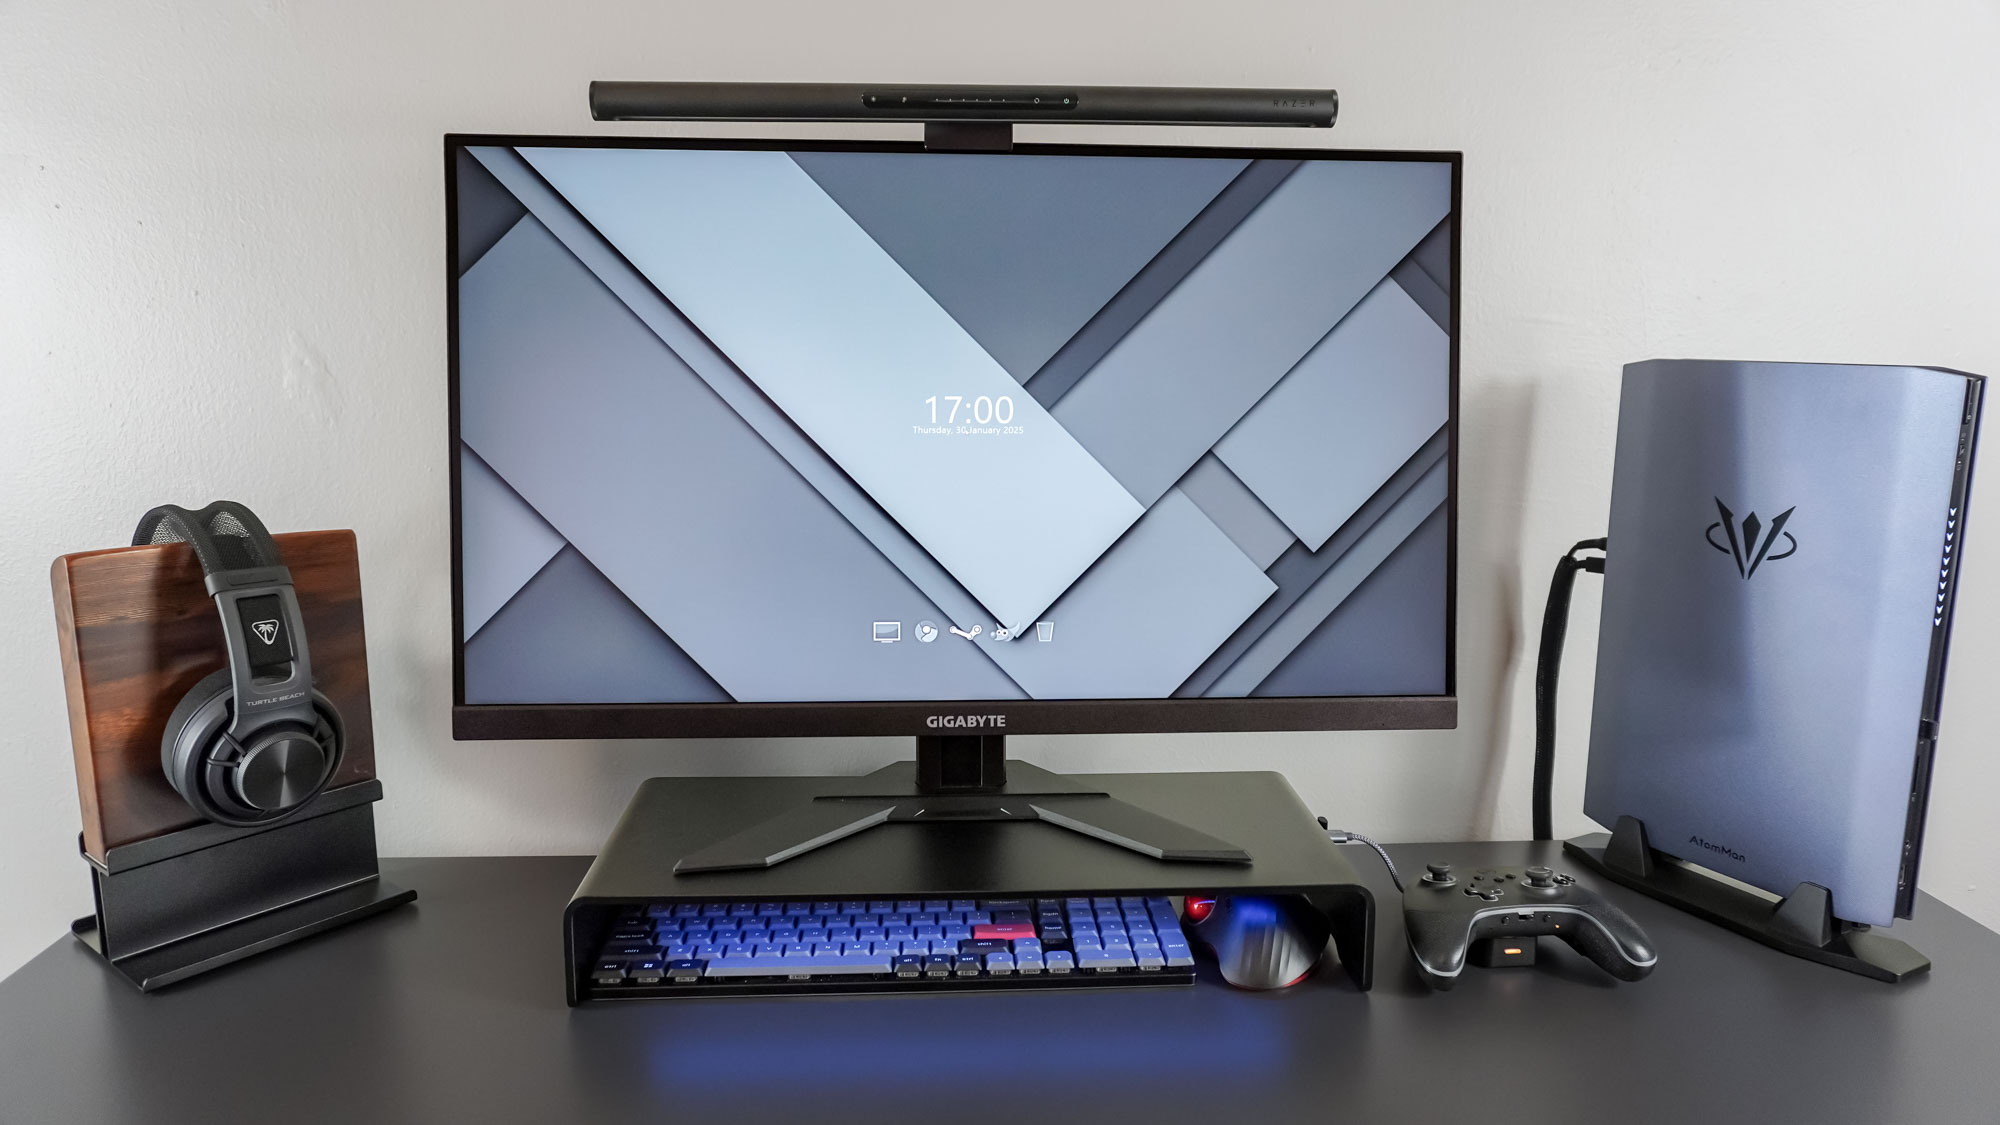
After unboxing the Razer Monitor Stand Chroma, I decided I wanted to try adding it to my existing desk setup first without changing anything. Since my main laptop is a ThinkPad for work, I tested it with the AtomMan G7 Ti because unlike most desktop computers, many of the best mini PCs feature USB-C for video out.
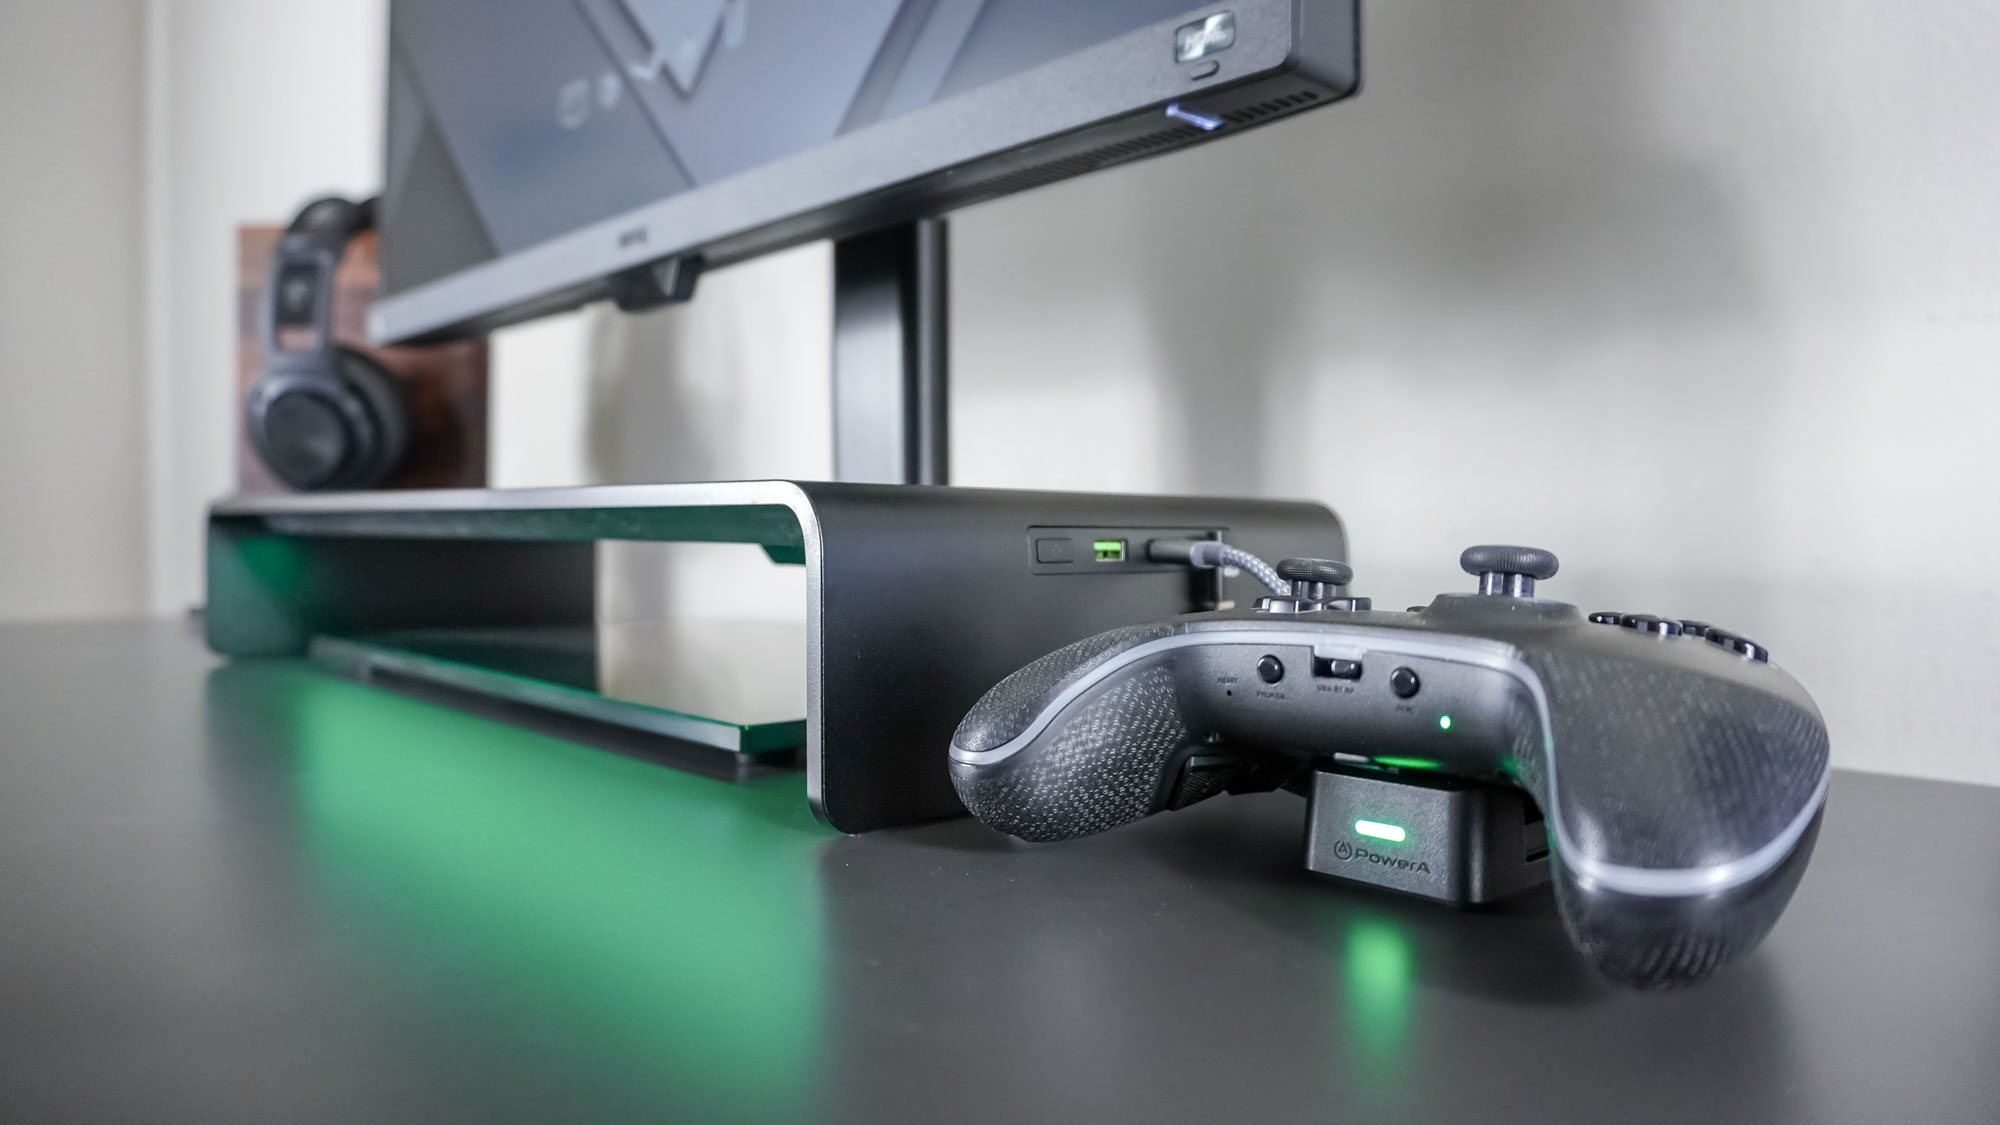
As I’m already using a height adjustable monitor stand with this display, I decided to put the Razer Monitor Stand Chroma on top of it. If you already have a monitor stand or a monitor arm you like, Razer’s still makes for a sleek desk shelf for some extra storage space. In addition to a place to plug in your 2.4 GHz USB dongles, its built-in USB hub also comes in handy for quickly getting files off a flash drive or a microSD card reader. In the picture above, I’m using it to charge as well as connect the PowerA OPS v3 Pro controller to my computer.
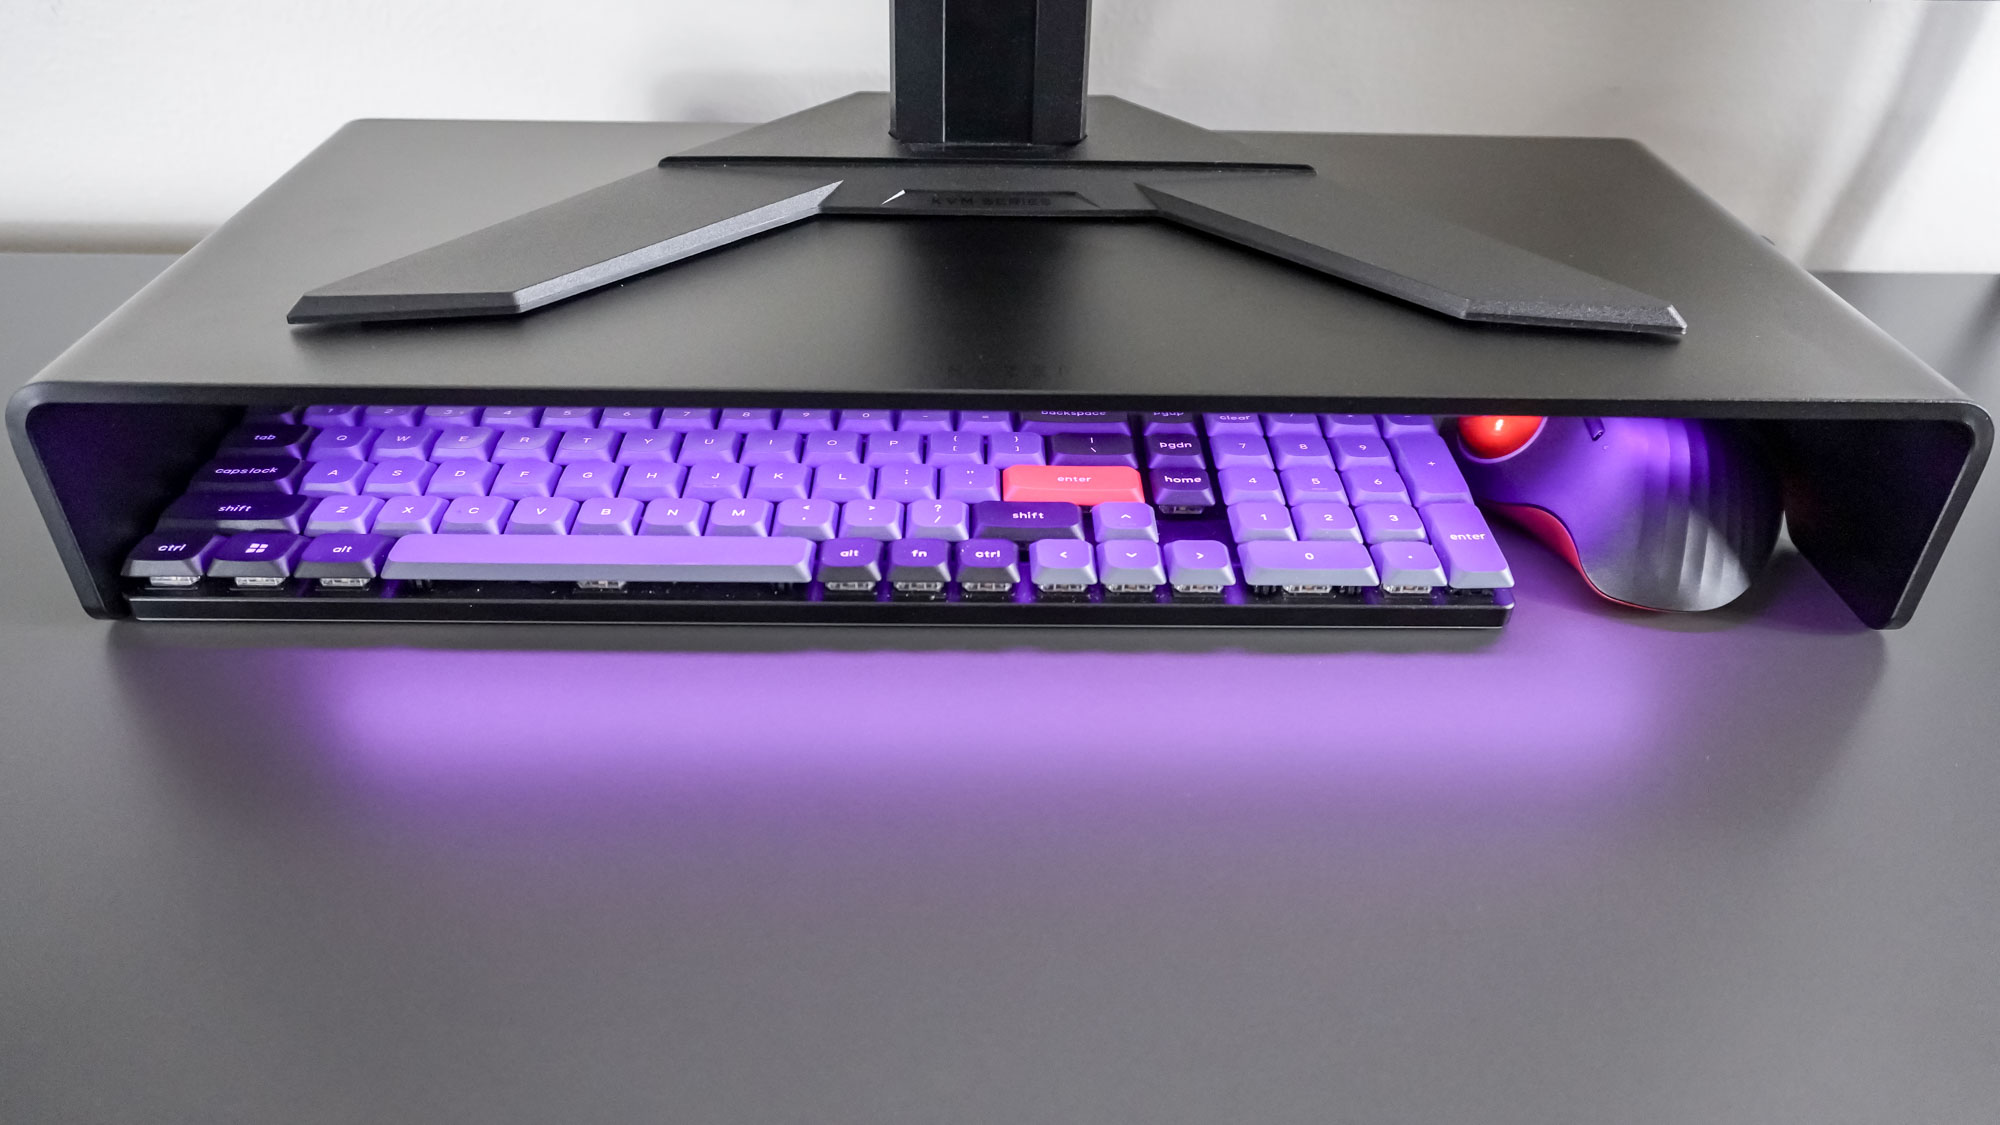
After my initial tests, I decided to swap out my previous monitor with the Gigabyte M28U I bought last year as it still has its original stand. As you can see above, it’s a perfect fit for the Razer Monitor Stand Chroma and there’s even a little extra space at the front. With my monitor now on top of the stand, I had a lot more room underneath it and managed to stow the Keychron K17 Pro (nearly a full-size keyboard) as well as the GameBall Thumb trackball mouse underneath it.
At just over eight inches deep, there’s more than enough room for one of the best gaming laptops underneath the Razer Monitor Stand Chroma. A word of warning though, with a larger 16-inch laptop, your device may protrude slightly if you have your desk right up against the wall. The Razer Monitor Stand Chroma’s USB-C input port is located in the back right corner and this is how this particular stand is meant to be used.
Not just for RGB
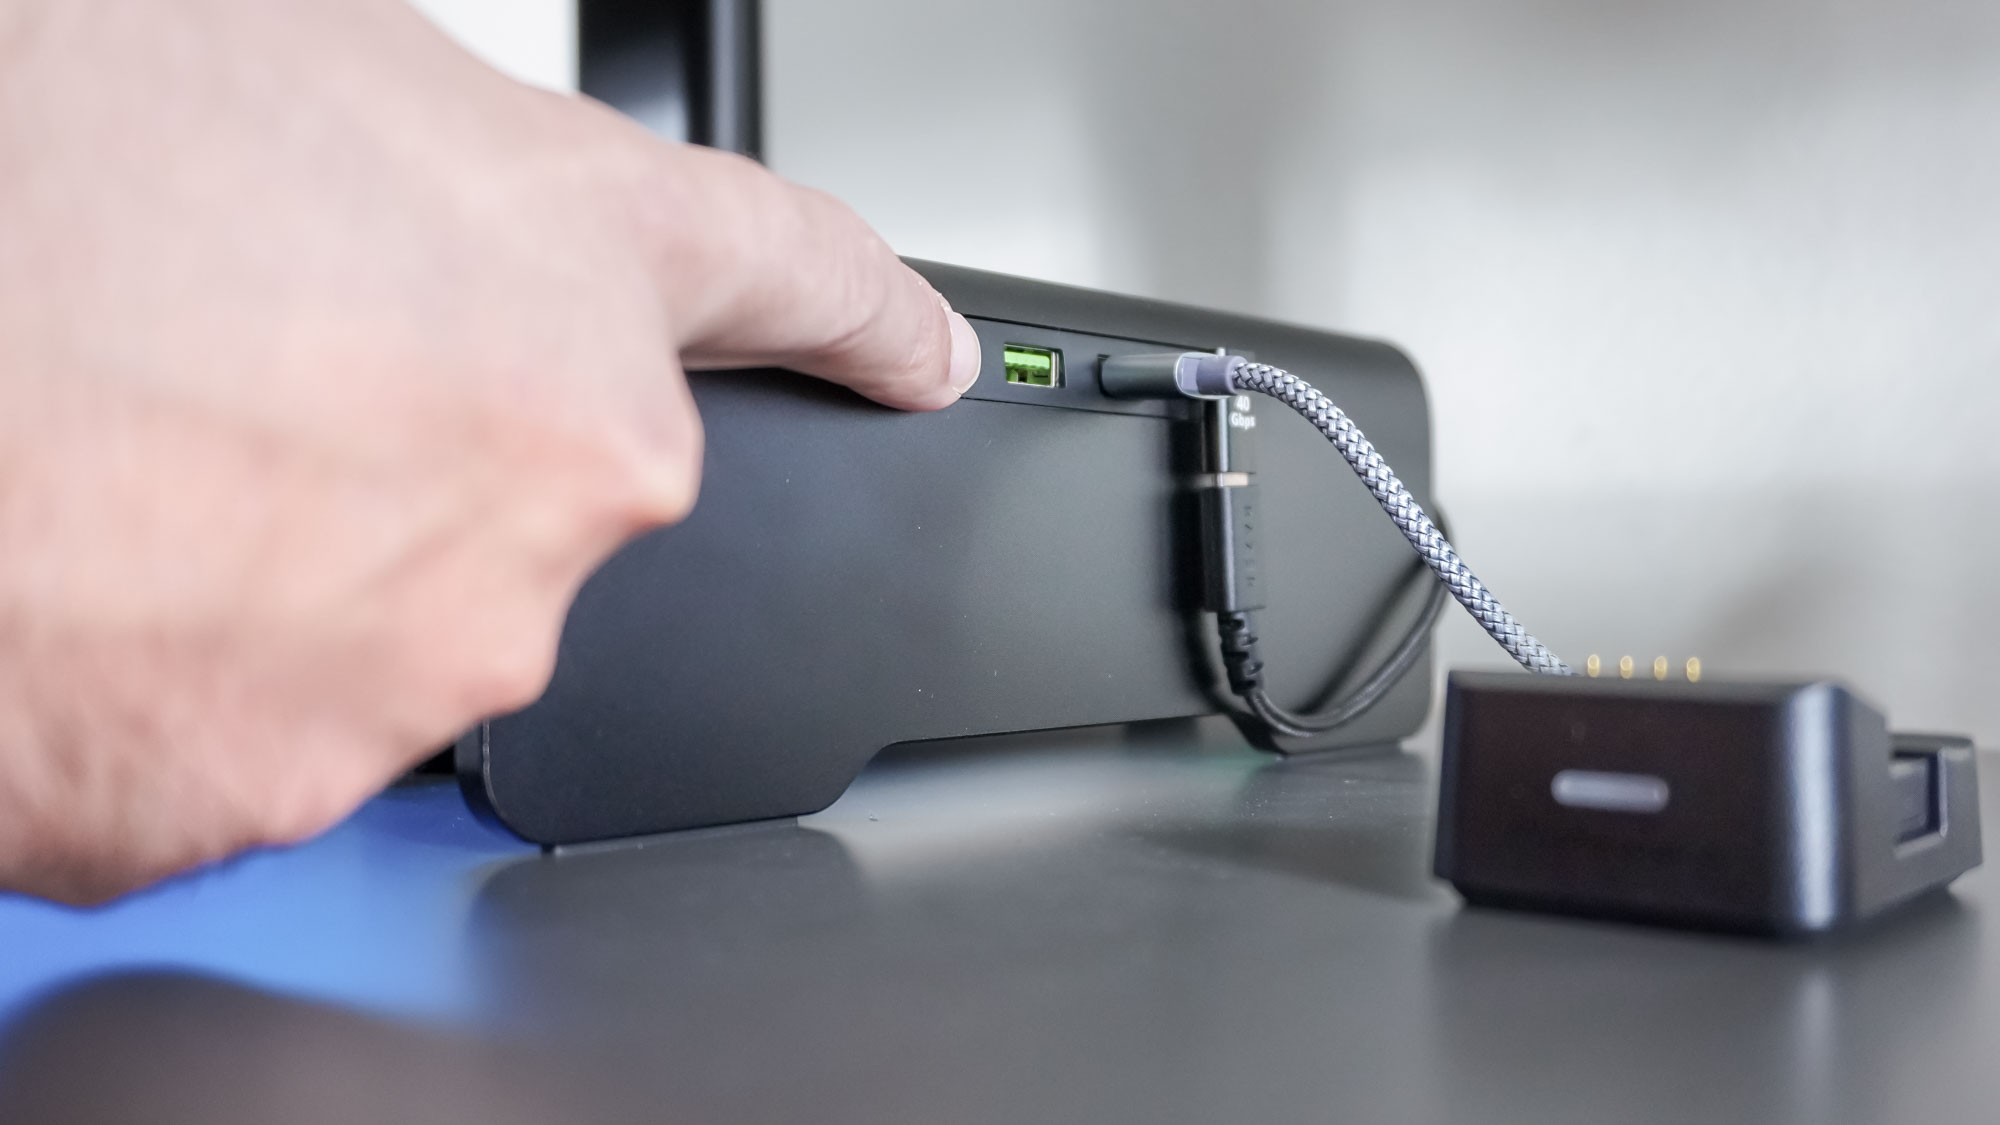
After trying out two different monitors, it was time to get into the software side of the Razer Monitor Stand Chroma. Like other Razer devices, you can add it to Razer Synapse and this software allows you to customize and control it. There’s also an integration with the Razer Chroma RGB app which you’ll also need to download to control the stand’s integrated lightstrip.
There are a ton of different pre-configured lighting effects in the Chroma RGB app for Razer’s monitor stand. From cycling through the various colors to having it react to your computer’s sounds, there’s quite a lot you can do just with these presets alone. You also have the option to build your own lighting effects in Chroma Studio.
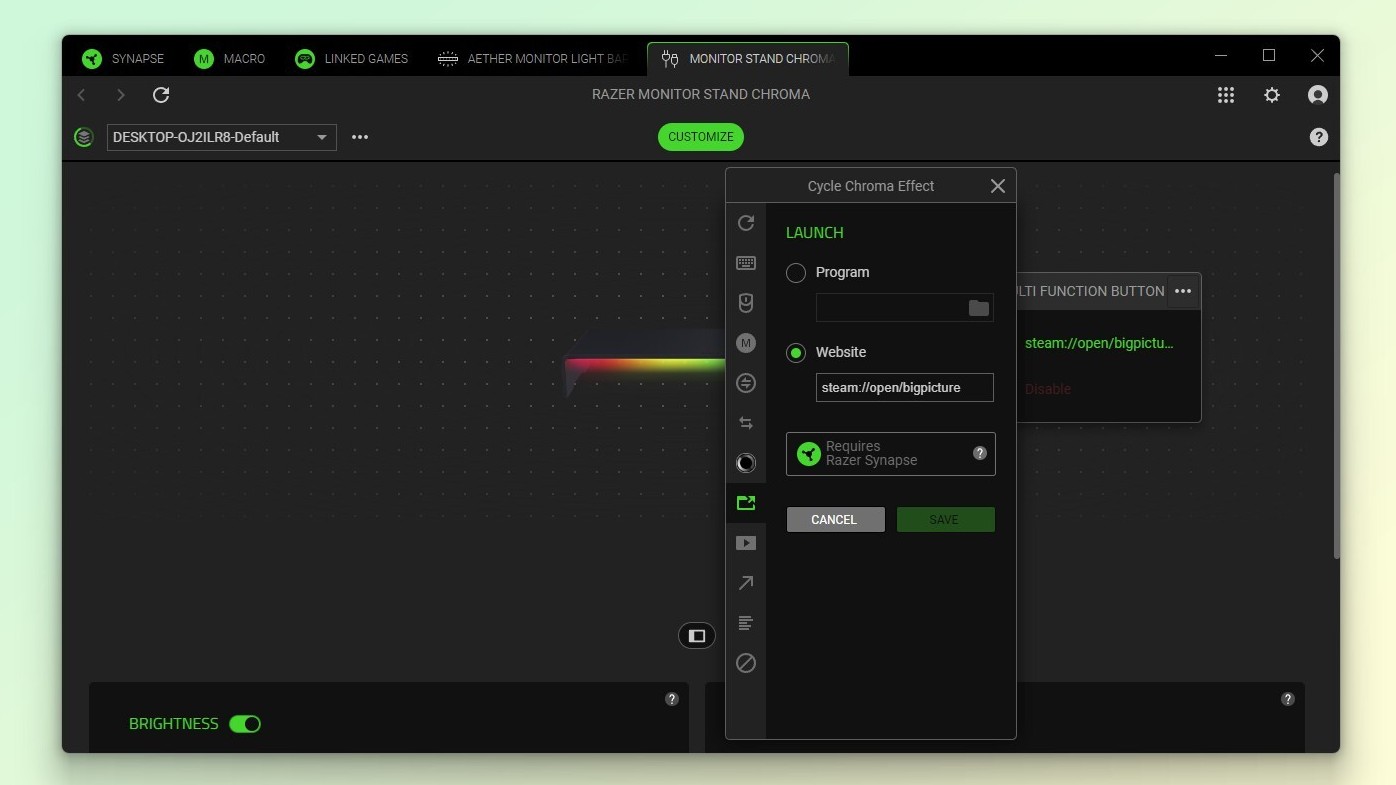
After messing around with the Chroma RGB app for a bit, I went back into Synapse as there was something else I wanted to try with the Razer Monitor Stand Chroma. By default, the button on the side cycles through Chroma lighting presets but it’s also remappable. In Synapse, not only could I program it to open any of the apps or games installed on my computer but you can also have it open a website — like Tom’s Guide for instance — with the push of a button.
Since I prefer Google Gemini over Microsoft Copilot, I first set the Razer Monitor Stand Chroma’s button to open a new Gemini instance in Chrome. If you’re familiar with Copilot+ PCs, you know they have a dedicated Copilot key that unfortunately, can’t be easily reprogrammed. This was my way of creating something similar on desktop but with my preferred AI chatbot.
Calling up my favorite AI chatbot with the push of a button was cool enough but it got me thinking. What if I could quickly bring up all of my favorite games in the same way? Sure, you can assign the Razer Monitor Stand Chroma’s button to open your preferred PC game launcher, but I wanted to get right into the action quickly.
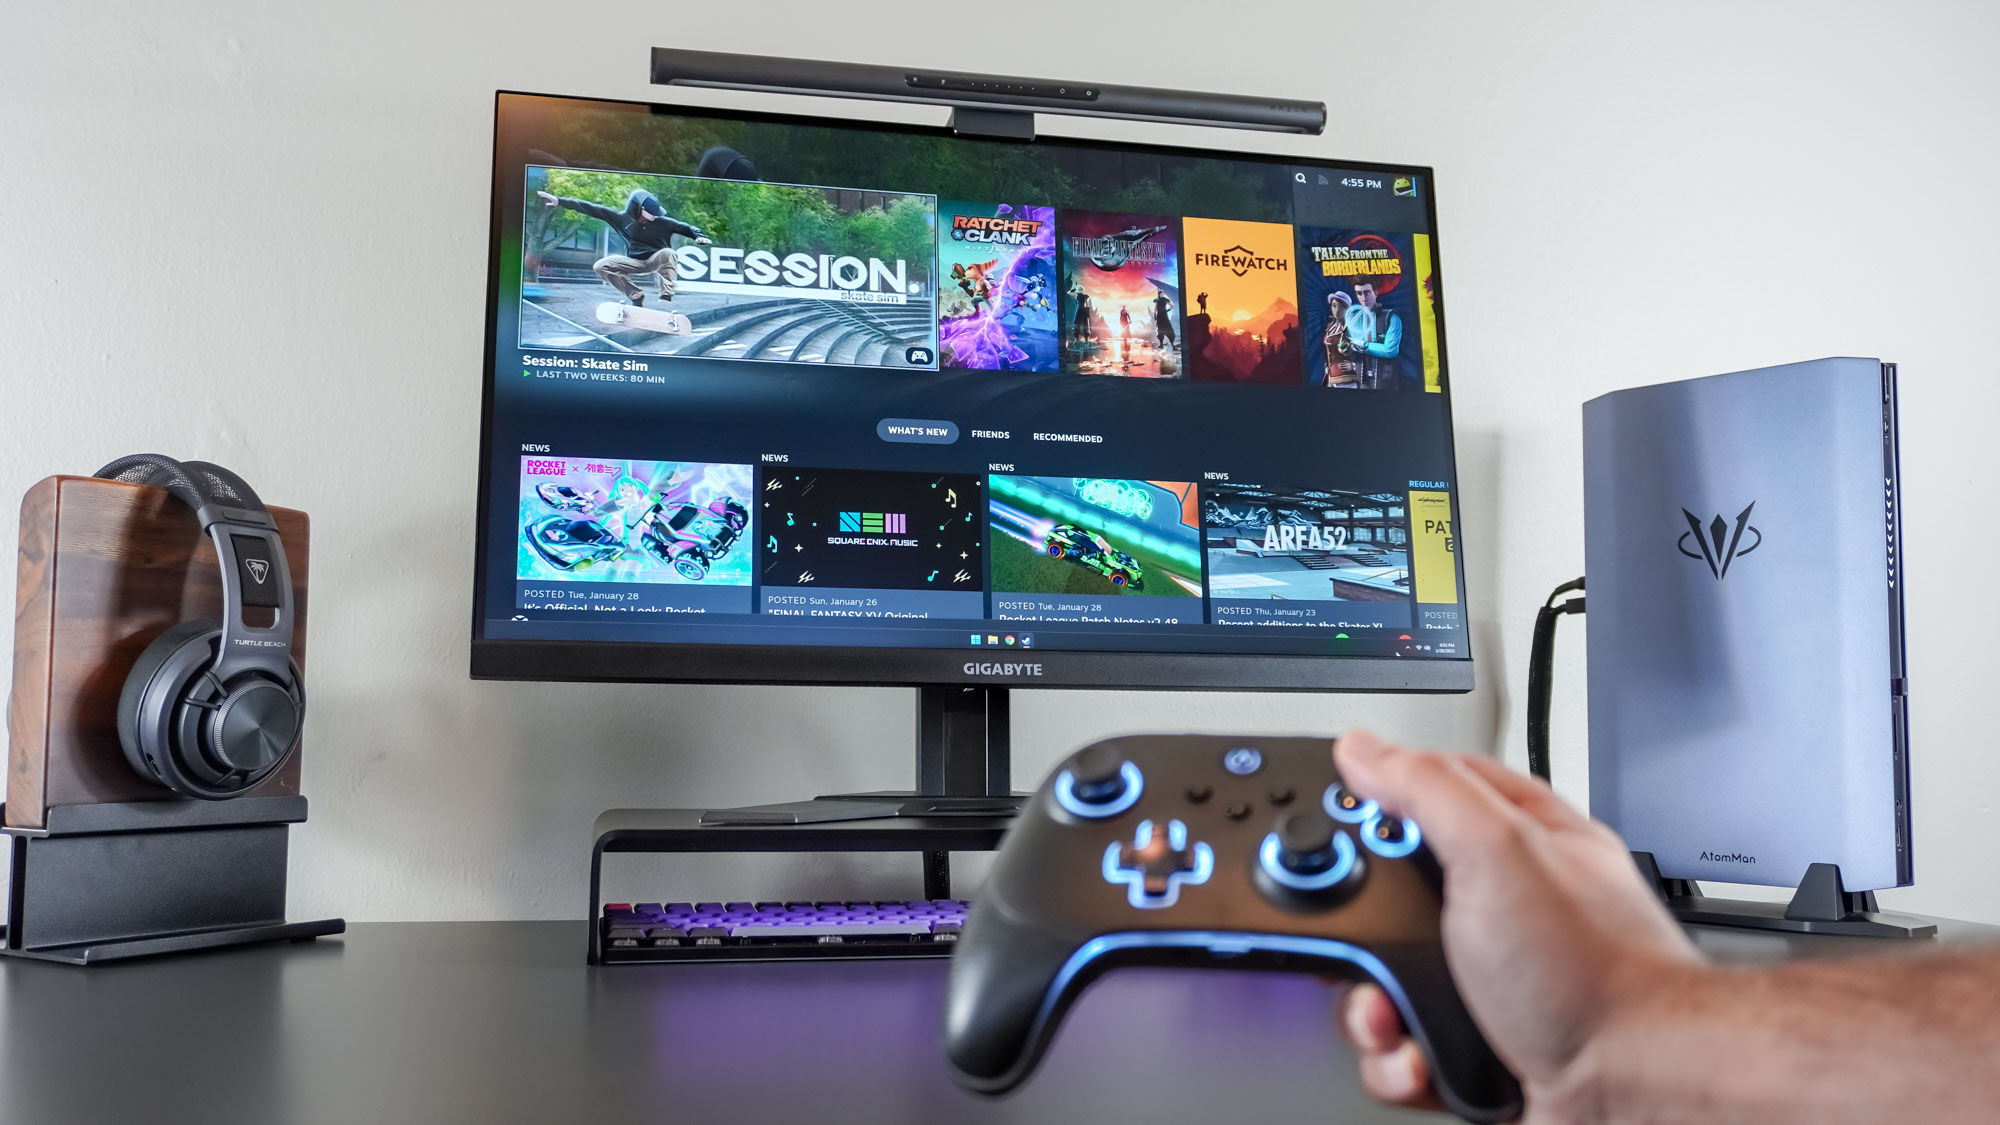
Steam’s Big Picture feature gives you a console-like experience on PC but to enter it, you need to click on a separate button within the app. Fortunately, I found a helpful Reddit thread with exactly what I was looking for, a website-style shortcut for opening it directly. By putting “steam://open/bigpicture” into the website field in Synapse’s settings for the Razer Monitor Stand Chroma, I could push the button and start Big Picture mode even if Steam was already open on my computer.
With the ability to launch an app or a website, the customization possibilities are really endless here and I’m sure I’ll come up with some other useful ideas as I mess around with this feature on the Razer Monitor Stand Chroma.
And trust me, I know that you can open Big Picture mode by long pressing on your controller’s home button. In this case though, the OPS V3 Pro takes a bit to turn on, so I press the monitor stand’s remappable button, power on the controller and then, when I’m back snuggly in my seat, it’s game time.
A sleek yet practical upgrade for any desk setup
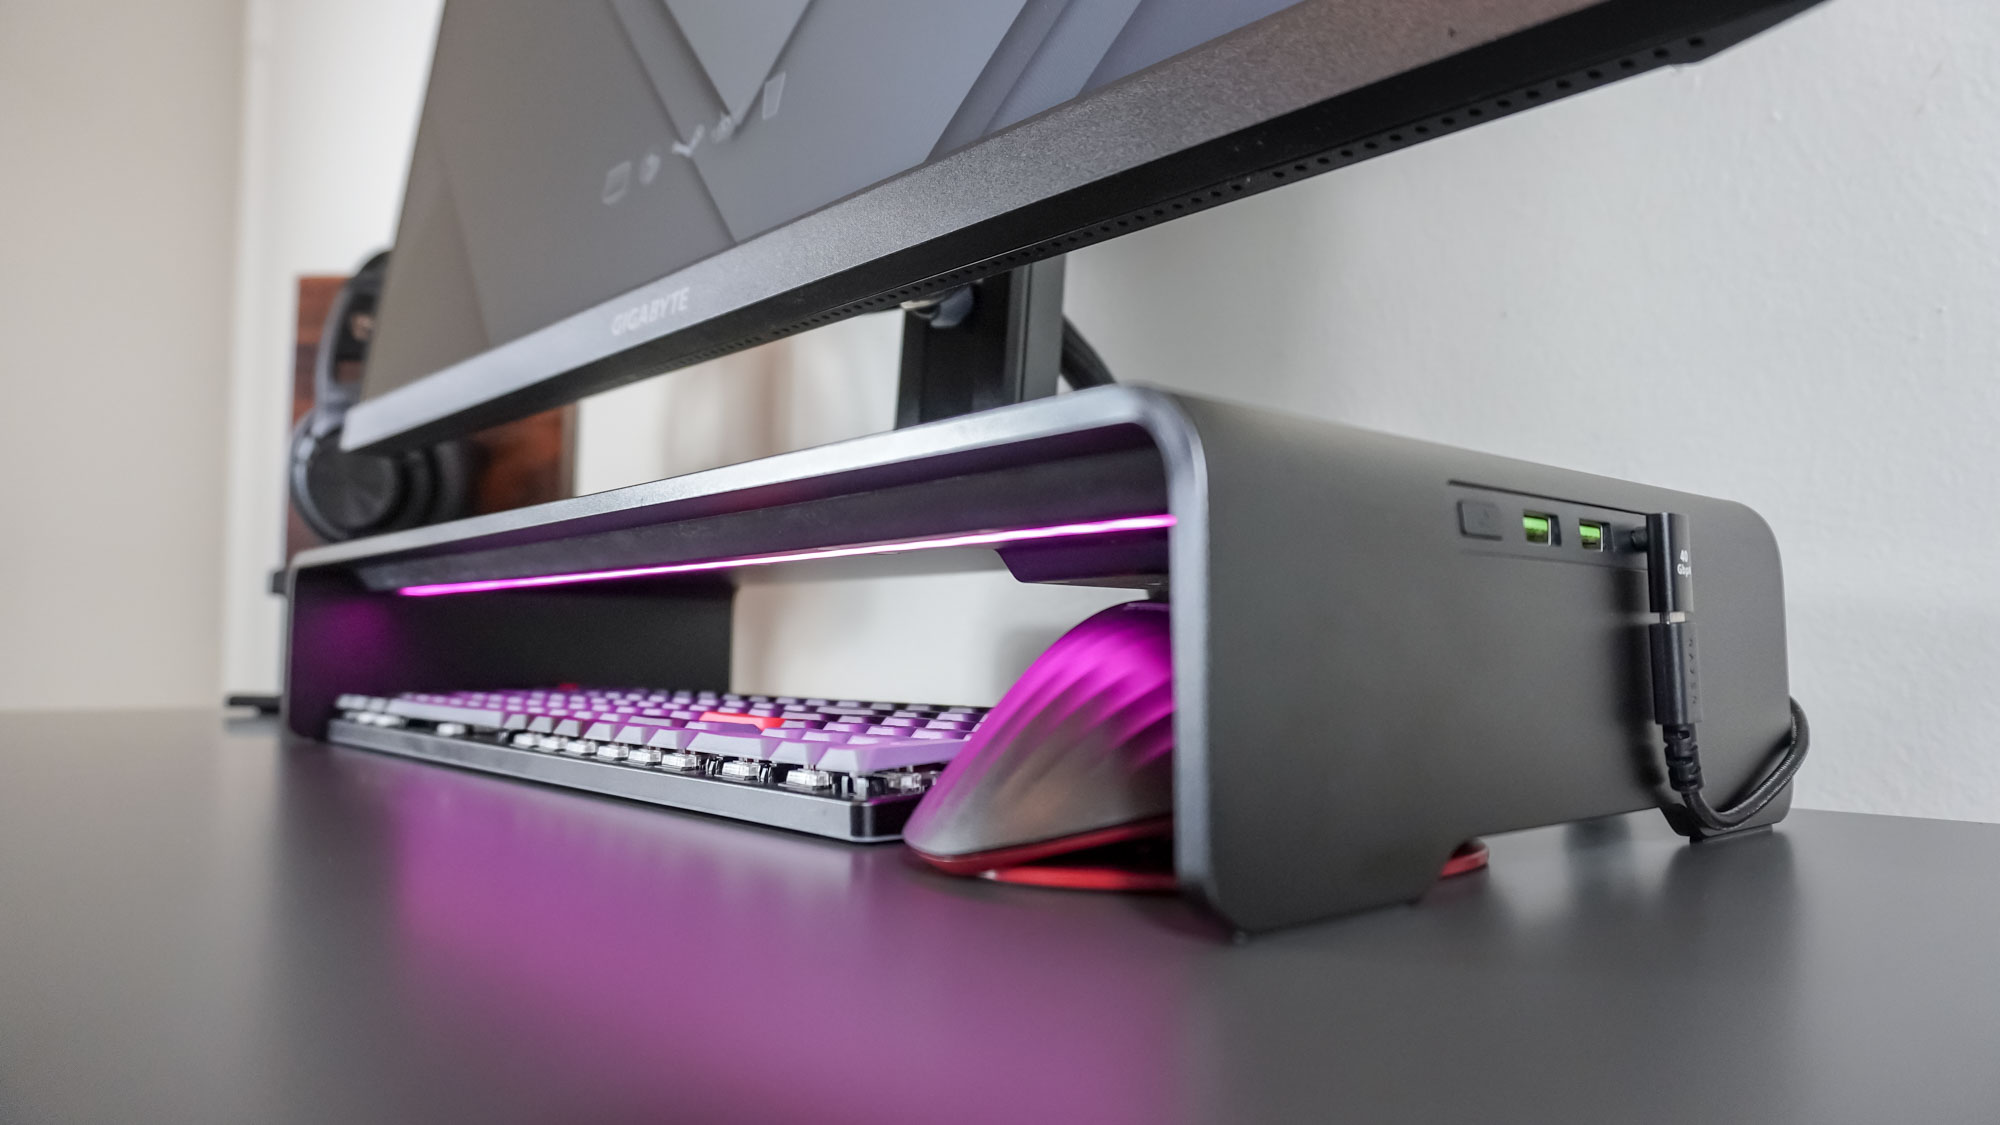
At $200, the Razer Monitor Stand Chroma isn’t an impulse buy but rather an investment in your desk setup or battlestation. Yes there are cheaper monitor stands and some, like the Anker 675, have more ports and can charge your laptop and other devices. However, there’s something to be said for just how slick this new one from Razer looks on my desk.
If you’ve been looking for that final puzzle piece for your own desk setup or battlestation and want something that stands out and will definitely stand the test of time (and the weight of a hefty monitor), the Razer Monitor Stand Chroma is certainly worth considering. As for me, I’m off to brainstorm more clever ways to make use of its remappable button.
More from Tom's Guide
- I put 3 stacked monitor setups to the test and this is the one I’m sticking with
- Monitor stand vs monitor arm: how to pick the right one for your display
- I tried this new mechanical keyboard with my Mac and it puts Apple’s Magic Keyboard to shame
Sign up to get the BEST of Tom's Guide direct to your inbox.
Get instant access to breaking news, the hottest reviews, great deals and helpful tips.

Anthony Spadafora is the managing editor for security and home office furniture at Tom’s Guide where he covers everything from data breaches to password managers and the best way to cover your whole home or business with Wi-Fi. He also reviews standing desks, office chairs and other home office accessories with a penchant for building desk setups. Before joining the team, Anthony wrote for ITProPortal while living in Korea and later for TechRadar Pro after moving back to the US. Based in Houston, Texas, when he’s not writing Anthony can be found tinkering with PCs and game consoles, managing cables and upgrading his smart home.

