I just tried the best new feature in macOS Sequoia — this will make your life so much easier
The new macOS makes organizing apps a lot simpler

There's a slew of cool new features coming to your Mac in macOS Sequoia, many of which are powered or enhanced by the AI-like capabilities of Apple Intelligence.
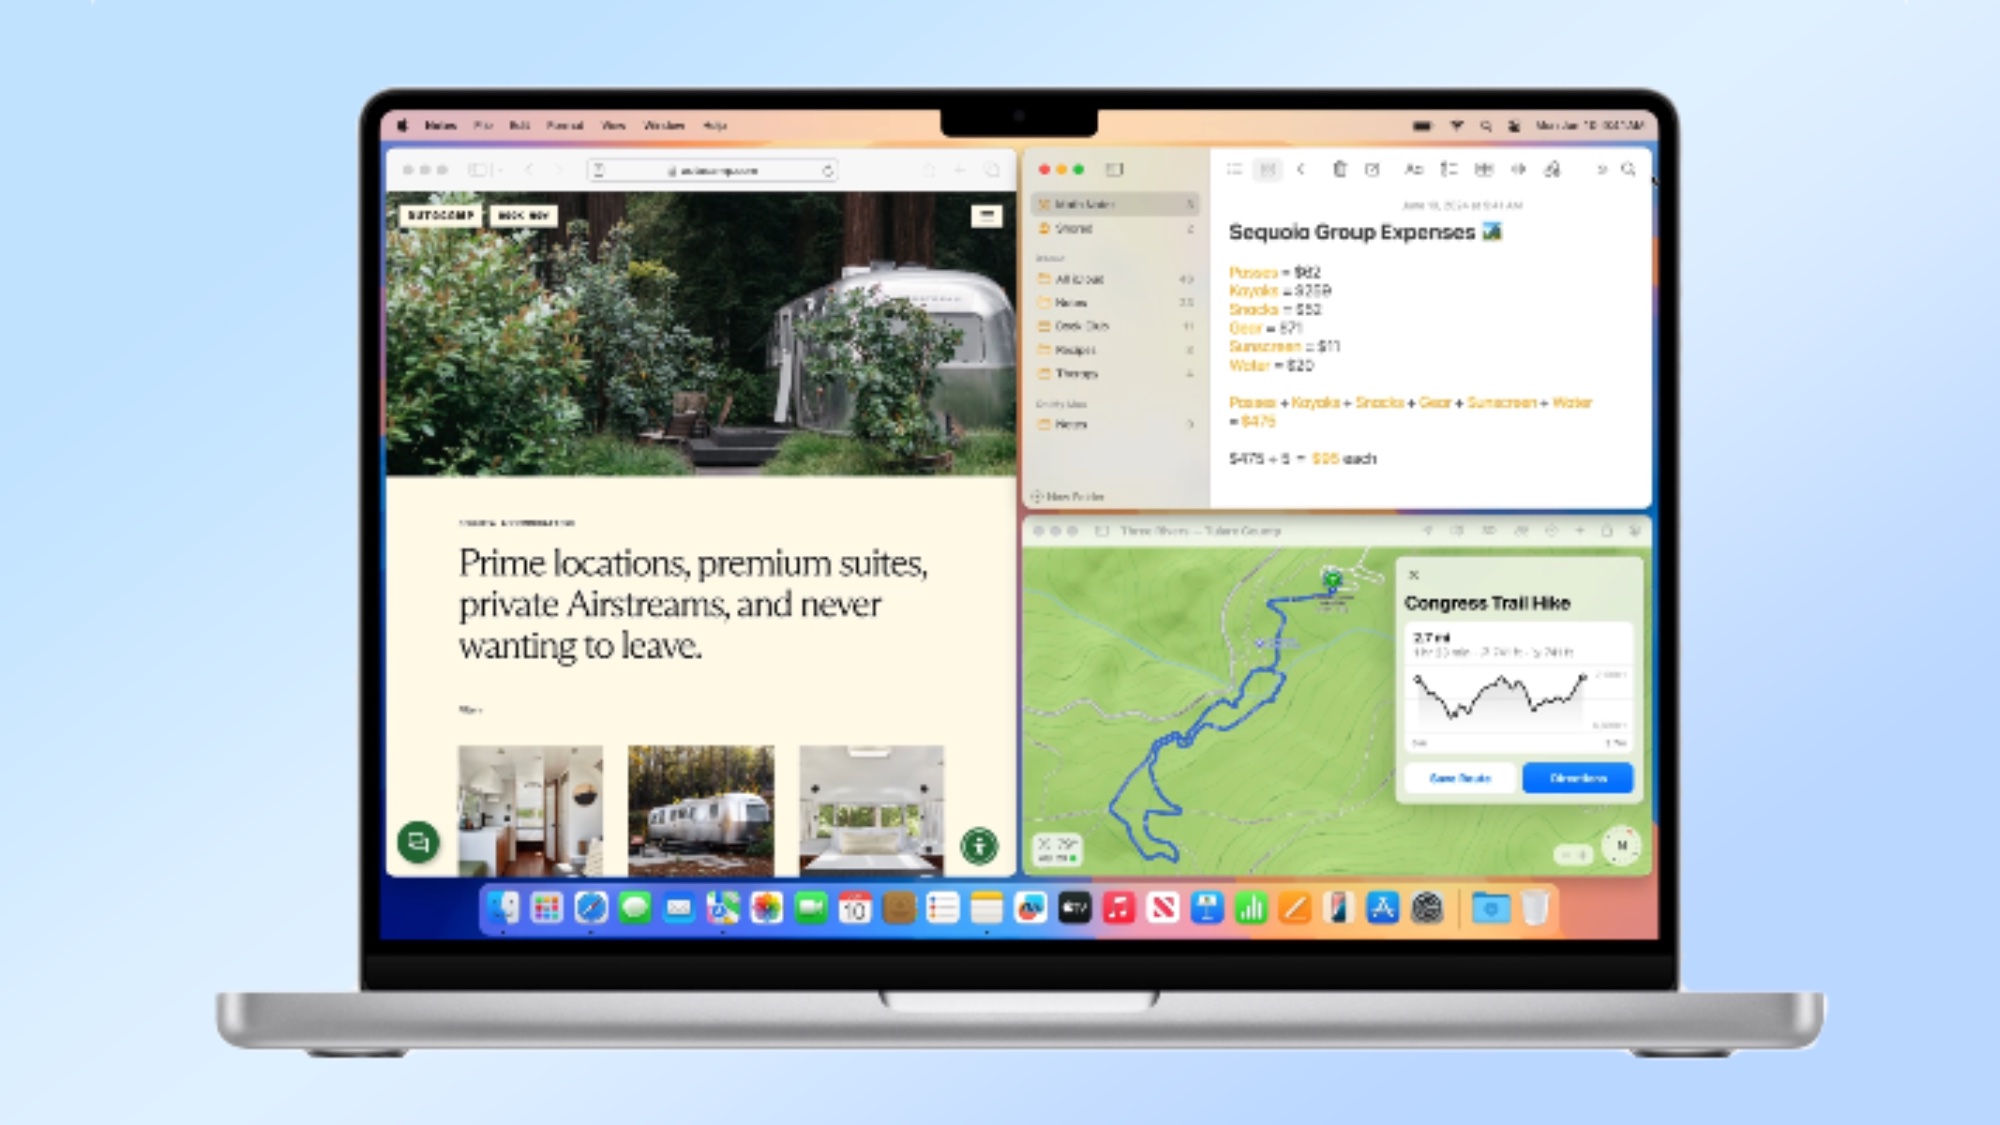
But one of the most subtle and useful new upgrades is improved window tiling, as Apple has quietly implemented a streamlined system for quickly organizing your open apps into quadrants of your macOS Sequoia desktop.
It's not a flashy upgrade, but it can do wonders for your productivity and peace of mind. I know because I've been using macOS Sequoia since it first entered public beta testing, and the option to quickly slide a window into half or a quarter of the screen makes getting things done on my MacBook Pro 16-inch (M3 Max) so much easier.
There are multiple ways to go about it, but they aren't immediately obvious. To help you get to grips with this new feature, I put together this brief step-by-step guide to how to use window tiling in macOS Sequoia.
How to use window tiling in macOS Sequoia
- Click and hold the green button in the top-left corner
- Select where you'd like to place your window
OR - Click and drag the window into a corner or side of your display
Please note that you must have macOS Sequoia installed on your Mac to use window tiling this way.
The full version launches in the fall of 2024, so if you want to try this out before then you need to download the beta version. It's easy to do, and you can follow our guide to how to download the macOS Sequoia beta for step-by-step instructions.
1. Click and hold the green button in the top-left corner

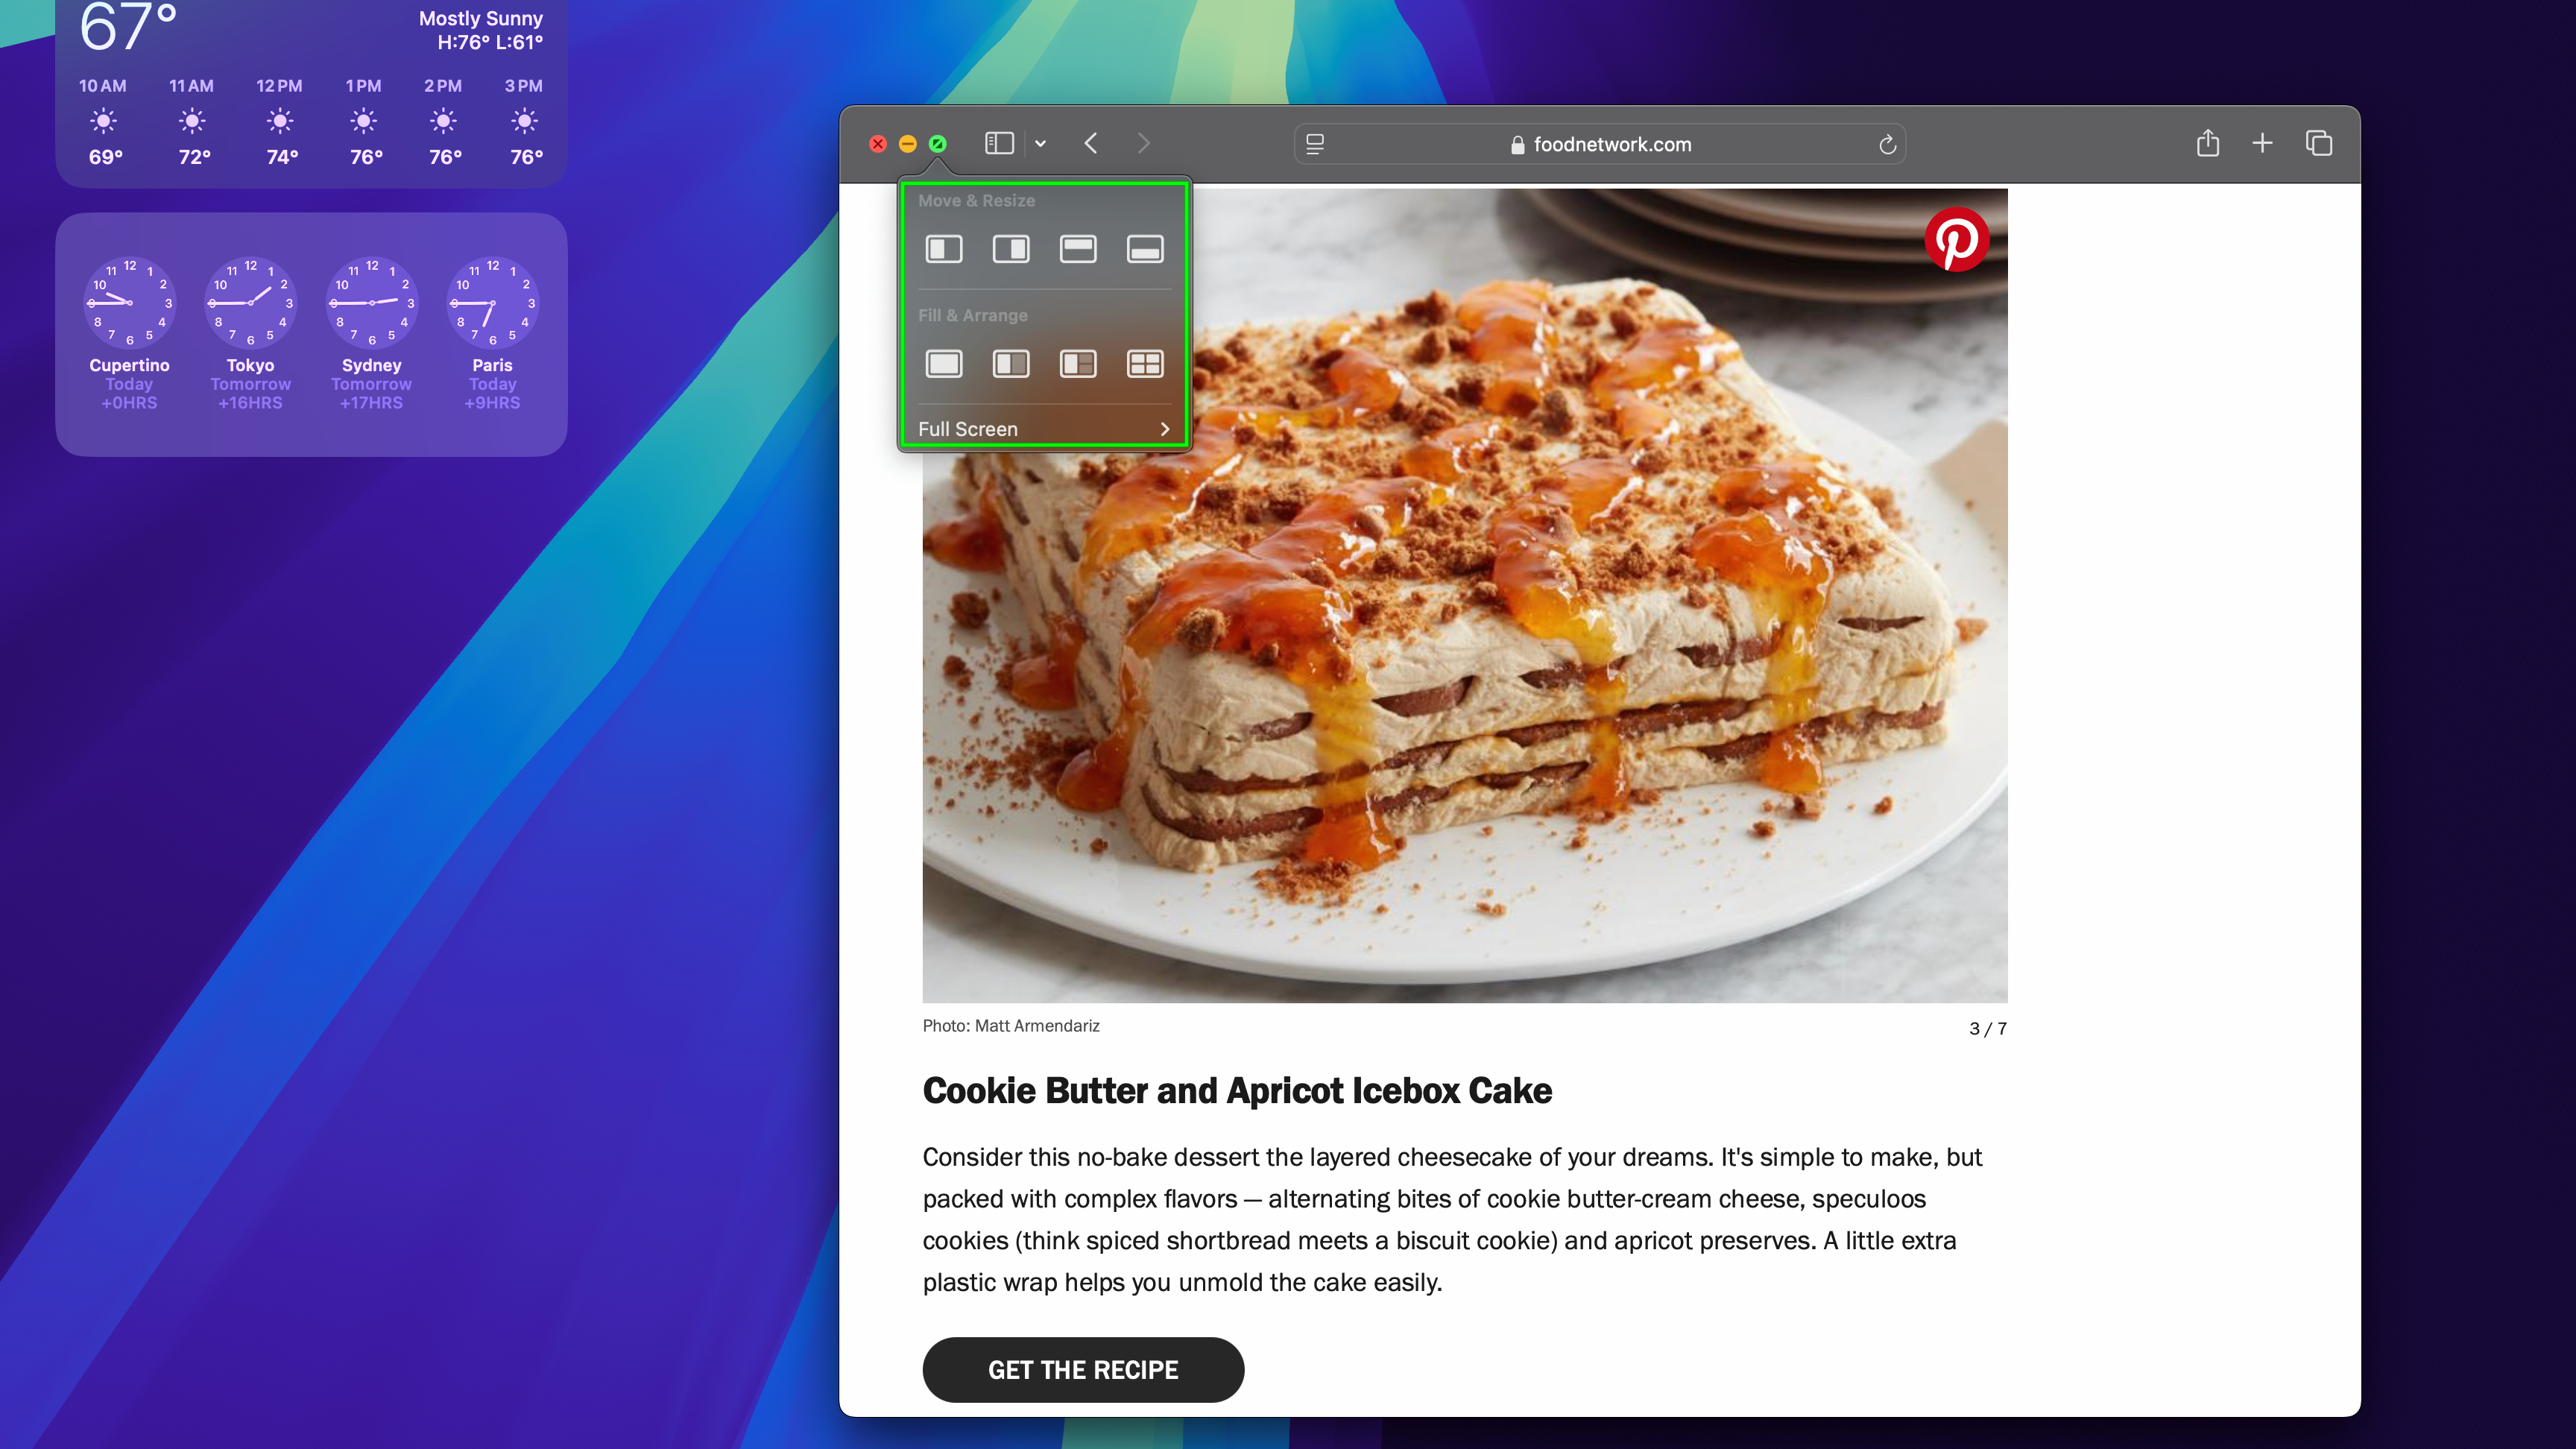
To take full advantage of the new window tiling feature in macOS Sequoia, click and hold the green button in the top-left corner of the app or window you wish to place.
(Note that if the app or window is full-screen, you'll first need to take it out of full-screen mode. To do so, press Esc or click the green button.)
2. Select where you'd like to place your window

After clicking and holding the green button, a menu should pop up showing you graphical representations of the window in different locations around the edge of your screen.
Simply drag your mouse to the configuration you want and your app or window should snap into place at the edge of your screen. You can also drag your mouse down and highlight Full Screen to put the app into full-screen mode.
3. Click and drag the window into a corner or side of your display

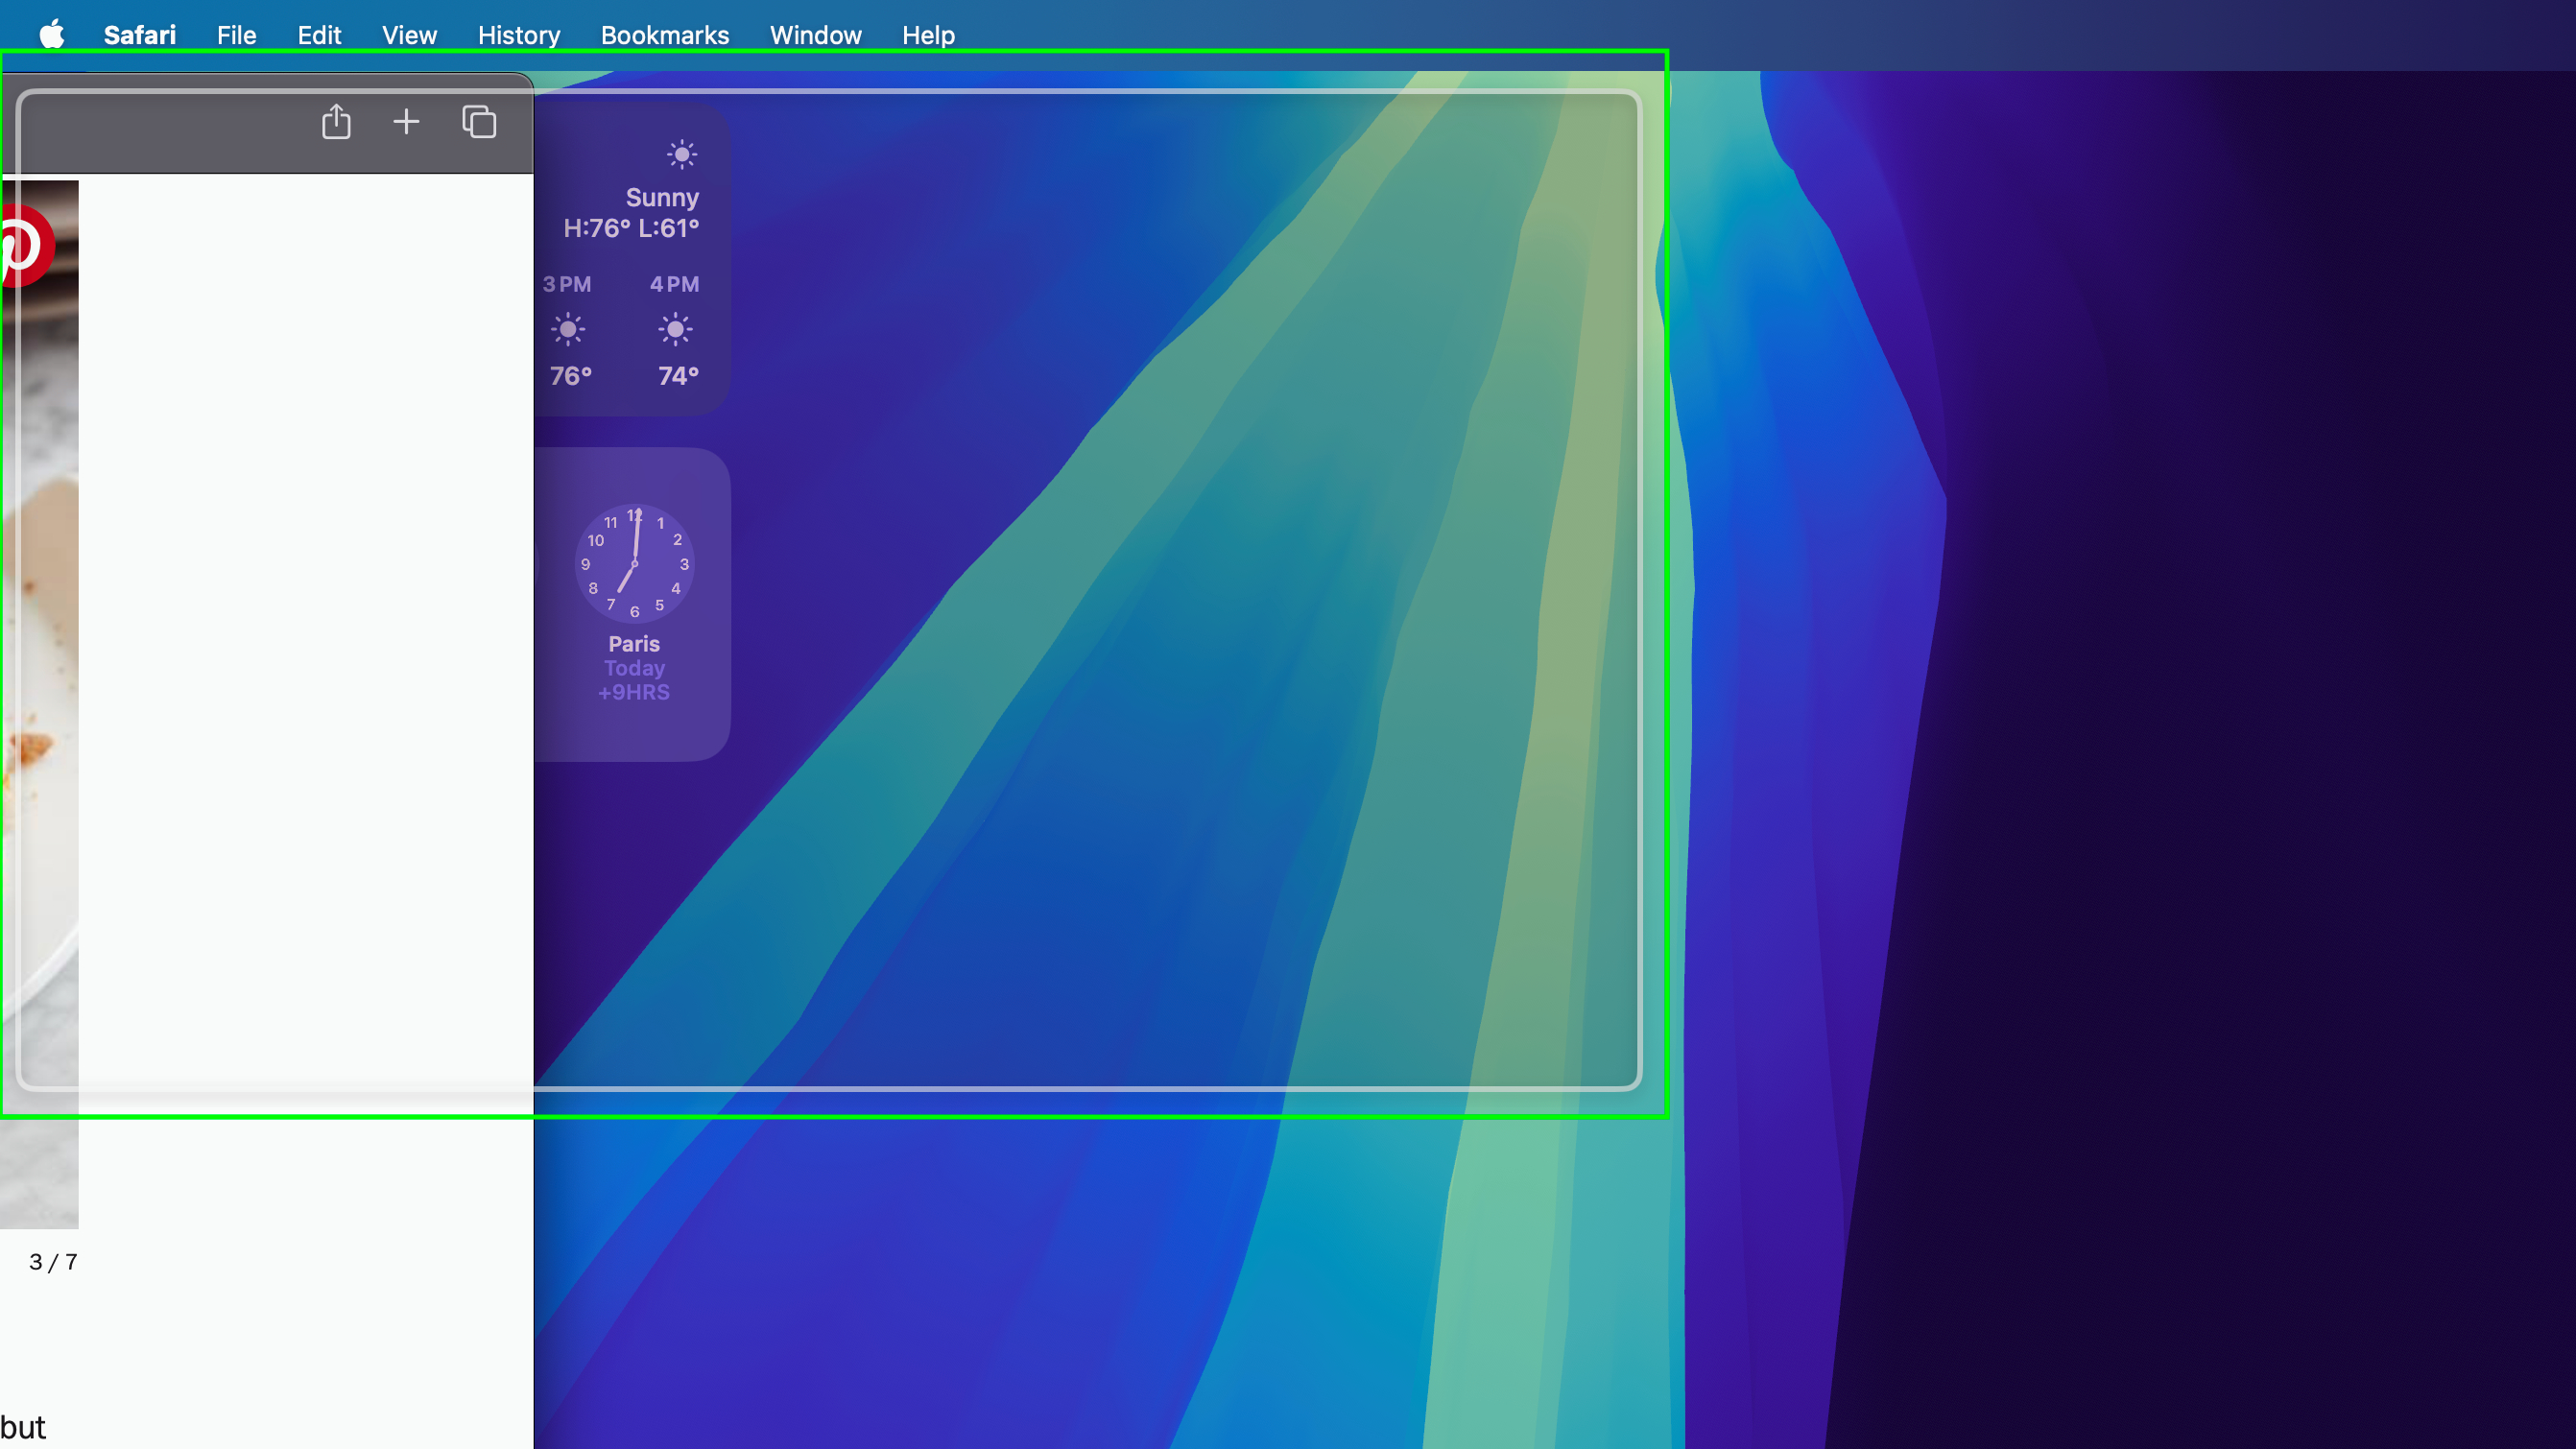
Alternatively, you can use window tiling in a more intuitive way: click and drag the window into the side or corner of your Mac desktop, then release the mouse button when you see the white outline appear in the correct location. This will cause the app to snap into the side or corner immediately.
That's all there is to it! While testing this out I've found that it can sometimes be hard to click and drag your mouse into the right spot for macOS Sequoia to register you want to put a window into a corner vs. a side of the display, but it's easy enough once you get the hang of it.
Sign up to get the BEST of Tom's Guide direct to your inbox.
Get instant access to breaking news, the hottest reviews, great deals and helpful tips.
So take some time to get to grips with this new way of organizing windows, which makes macOS Sequoia even more competitive with Windows 11. For more tips on how to get more done with your Mac, check out our step-by-step guides to how to select multiple files on Mac and how to rename multiple files on Mac, or how to clear cache on Mac if things are feeling a little sluggish on your MacBook.

Alex Wawro is a lifelong tech and games enthusiast with more than a decade of experience covering both for outlets like Game Developer, Black Hat, and PC World magazine. A lifelong PC builder, he currently serves as a senior editor at Tom's Guide covering all things computing, from laptops and desktops to keyboards and mice.
