I upgraded my Framework Laptop CPU to Meteor Lake in an hour: here’s 3 things I learned
Swapping out laptop CPUs is easier than it sounds — if you own the right laptop
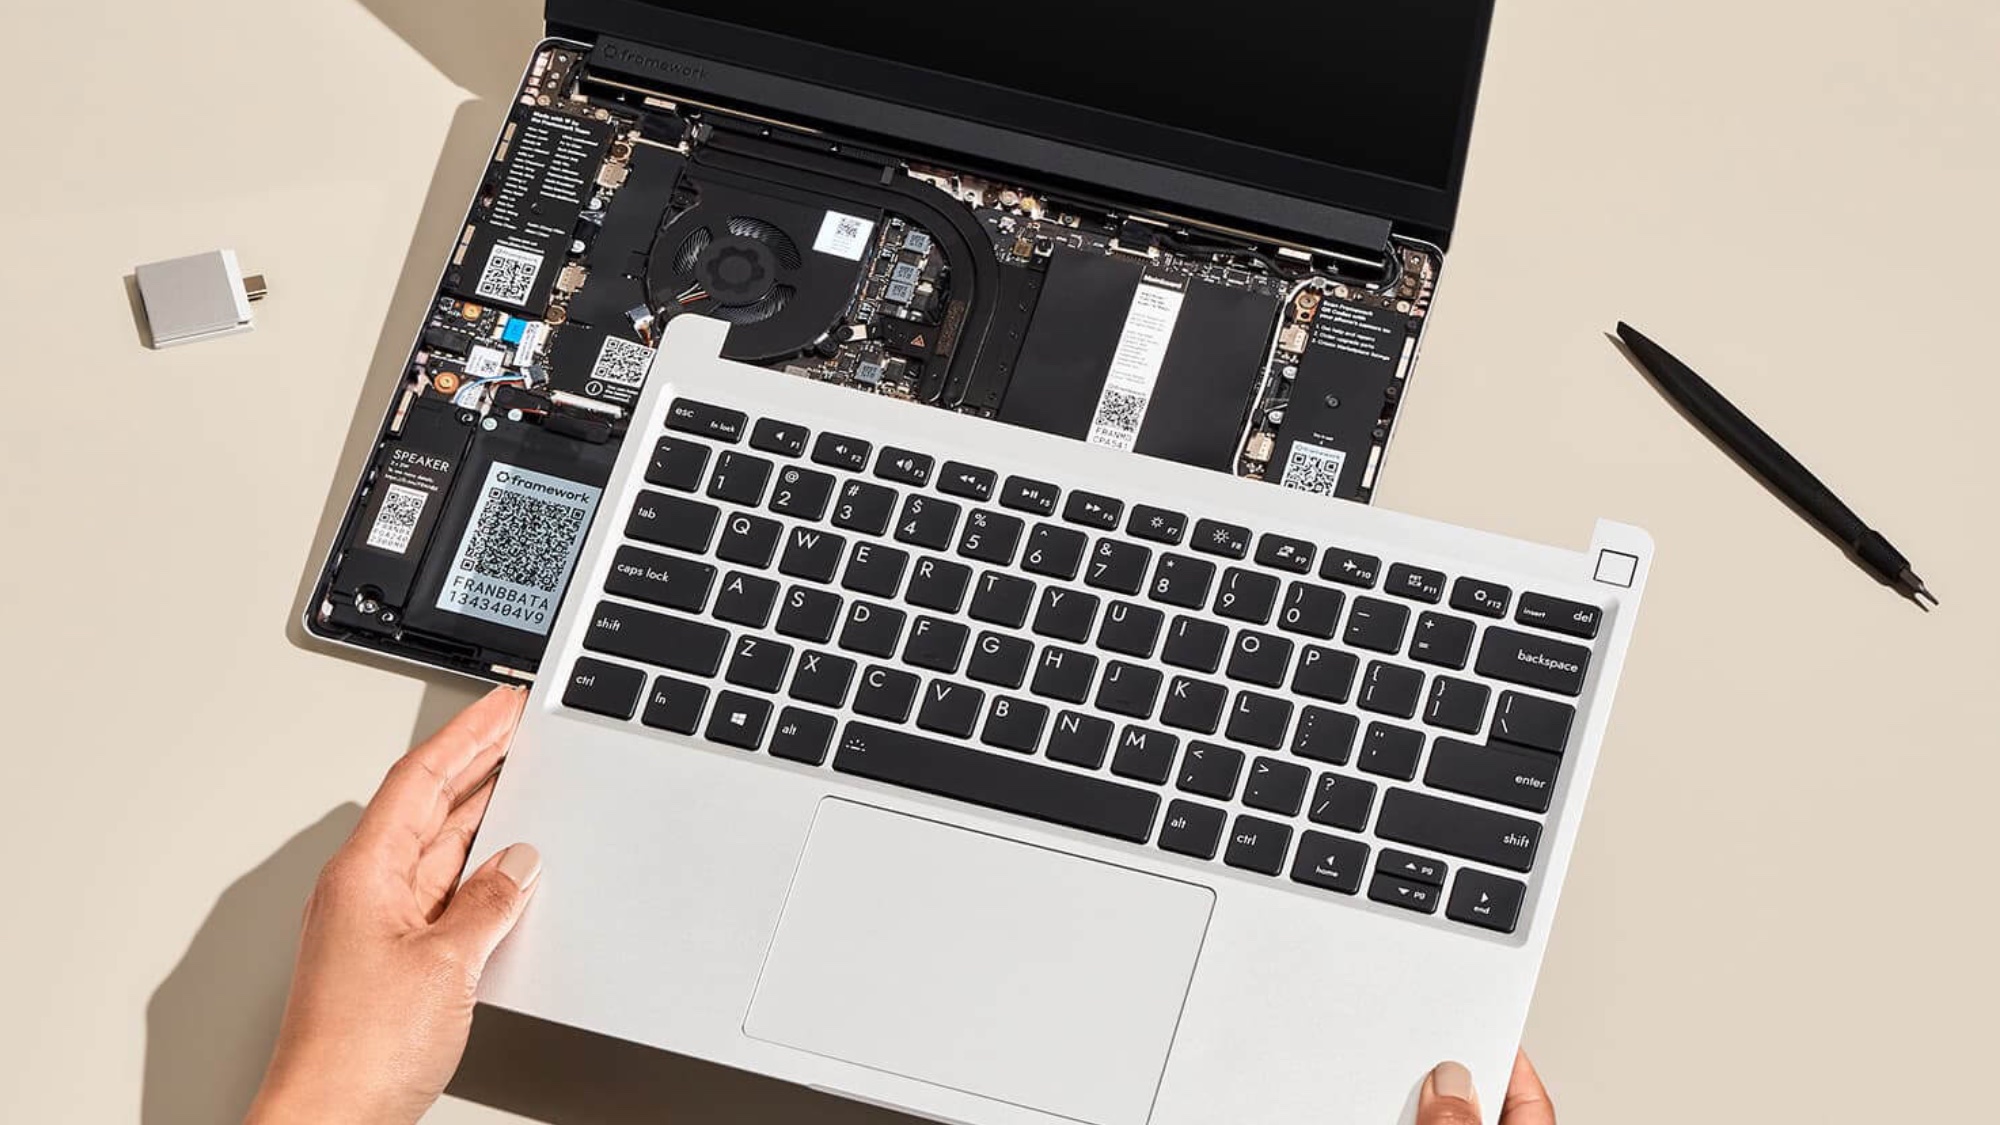
The Framework Laptop has been one of my personal favorites ever since it debuted in 2021.
I love how Framework managed to deliver the most upgradable, repairable laptop I’ve ever used at a price that makes it competitive with the best laptops from the likes of Apple, Microsoft and the rest. We think highly enough of Framework's commitment to sustainable PCs that we awarded the company our Sustainability in Tech Award in the 2024 Tom's Guide Hero Awards.
But as much as I admire the ultra-accessible design of Framework’s laptops, I’ve not had a lot of opportunities to put it to the test–until now.
That’s because I just haven’t had much reason to upgrade a laptop in the three years since Framework launched. But in the wake of Apple supercharging the best MacBooks with M-series chips that deliver industry-leading performance and battery life, there's been some serious advancement in laptop chips over the last few years.
And while Qualcomm's Snapdragon X Plus and Snapdragon X Elite chips are currently taking Windows 11 laptops to new heights of battery life (according to our in-house tests), the new Intel Meteor Lake laptop CPUs are nothing to sneeze at. These chips are Intel's first stab at a "chiplet" design, and while they haven't set the industry on fire they're still better than even the relatively recent Intel Core i7-1370P that was driving my Framework Laptop 13.
So when Framework kindly sent us one of their new Intel Core Ultra mainboard upgrade kits for the Framework Laptop 13, I decided to bite the bullet and upgrade the CPU on my laptop. I've been upgrading CPUs in desktop PCs for decades, I reckoned, so how much harder could it be on a laptop? Especially one expressly designed to make it easy?
The answer, good reader, is harder than I expected — but still remarkably simple and straightforward.
Sign up to get the BEST of Tom's Guide direct to your inbox.
Get instant access to breaking news, the hottest reviews, great deals and helpful tips.
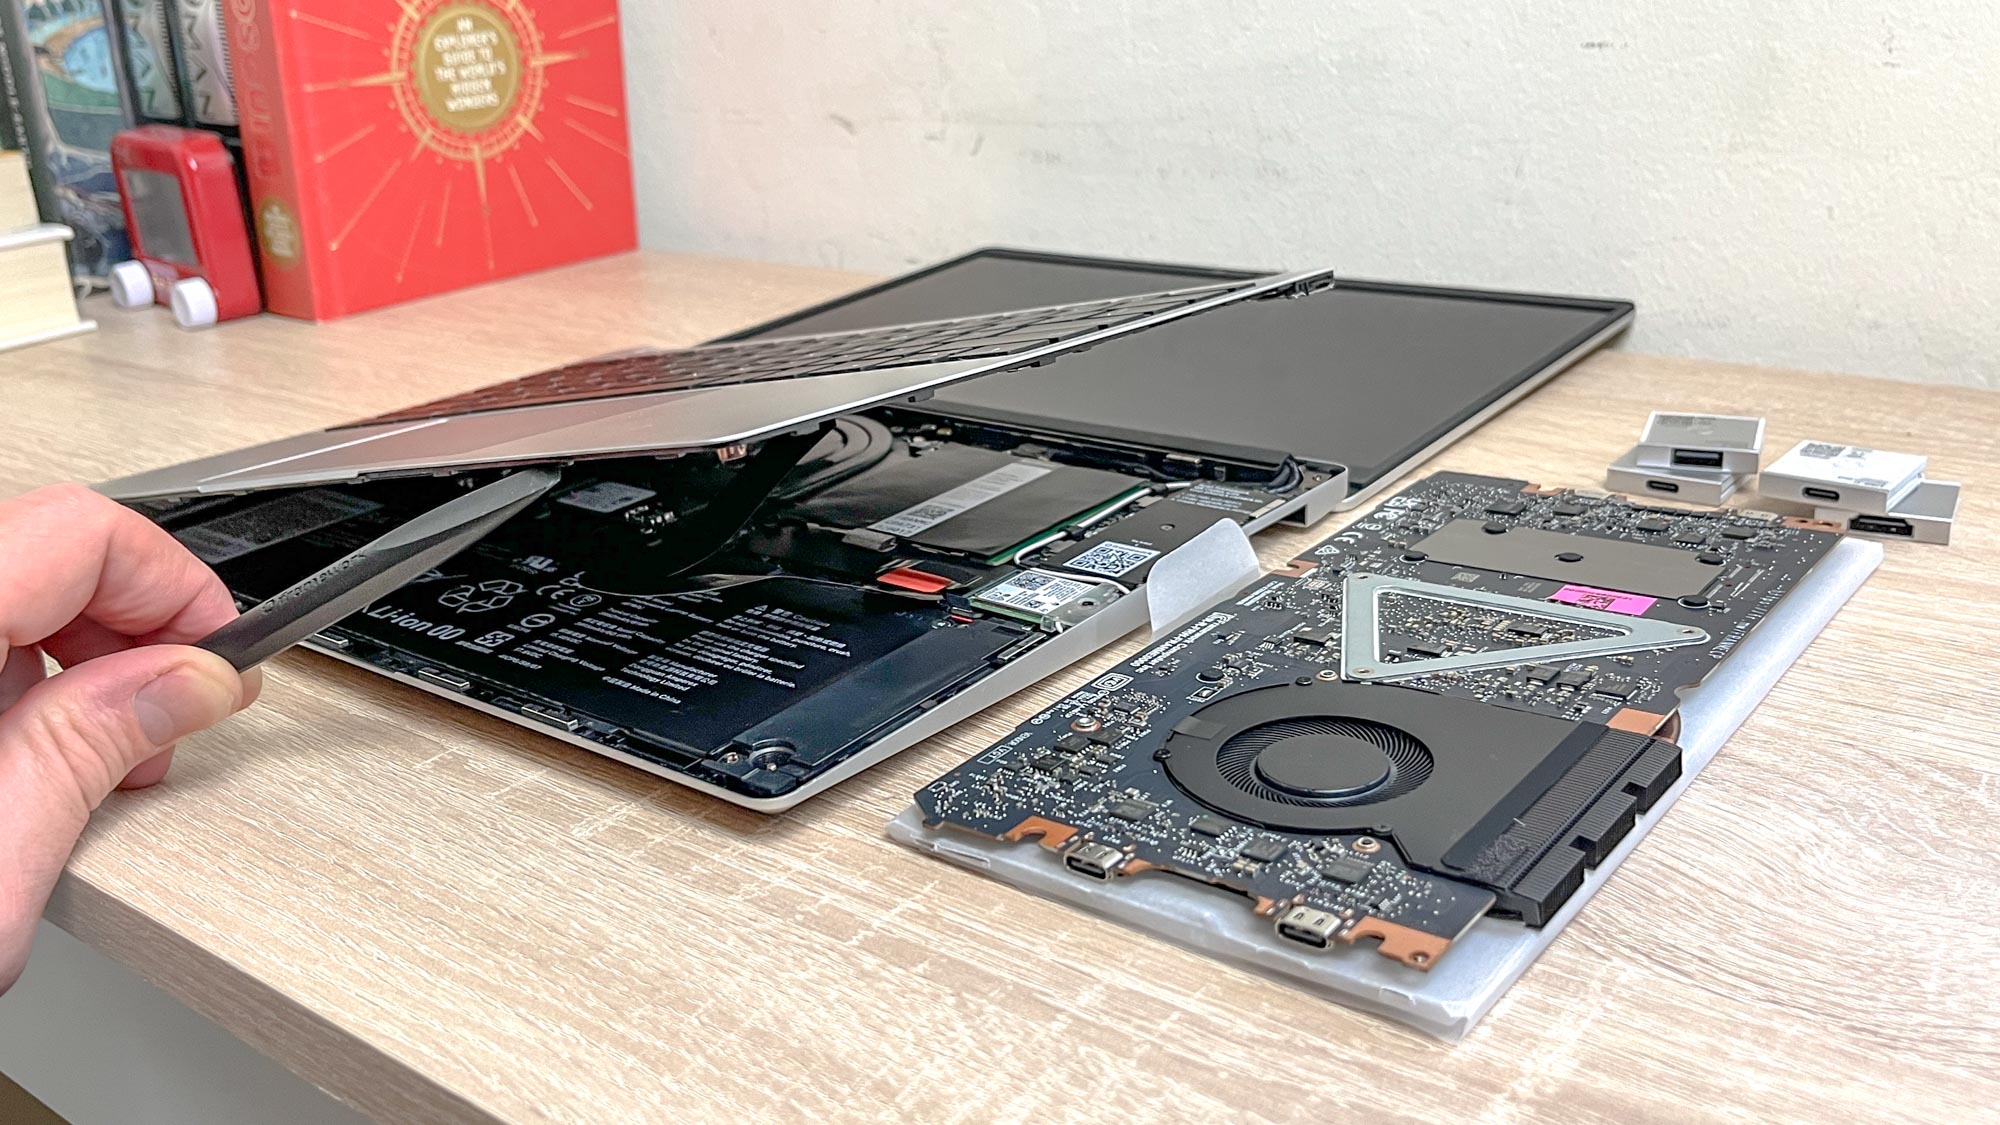
I could walk you through the process step-by-step, but I don't have to because Framework has already published a mainboard replacement guide that's clear, concise and even has time estimates and step-by-step instructions with images. I know it's high-quality and up to date because I followed it earlier this week, and everything I saw in my laptop was exactly as it was represented in Framework's guide.
Framework Laptop 13: from $899 @ Framework
You can order a Framework Laptop 13 or Framework Laptop 16 direct from Framework's website, and the cheapest 13-inch DIY model with an Intel Core Ultra CPU starts at $899 (you can also get AMD chips if you prefer). We recommend most people buy a pre-built model (starting at $1,099) since the DIY models require you to provide your own operating system, storage, memory and more.
This is a key marketable feature of Framework laptops that no other manufacturer can match, at least in terms of accessibility and ease of use, so it's nice to report that even a few years after launch Framework's most challenging upgrade is well-documented and easy (enough) to do—if you're brave enough to attempt it.
But as it turns out, there are still a few things I wish I'd known before taking the spudger tool which came with the Framework and cracking open its case.
Don't be scared
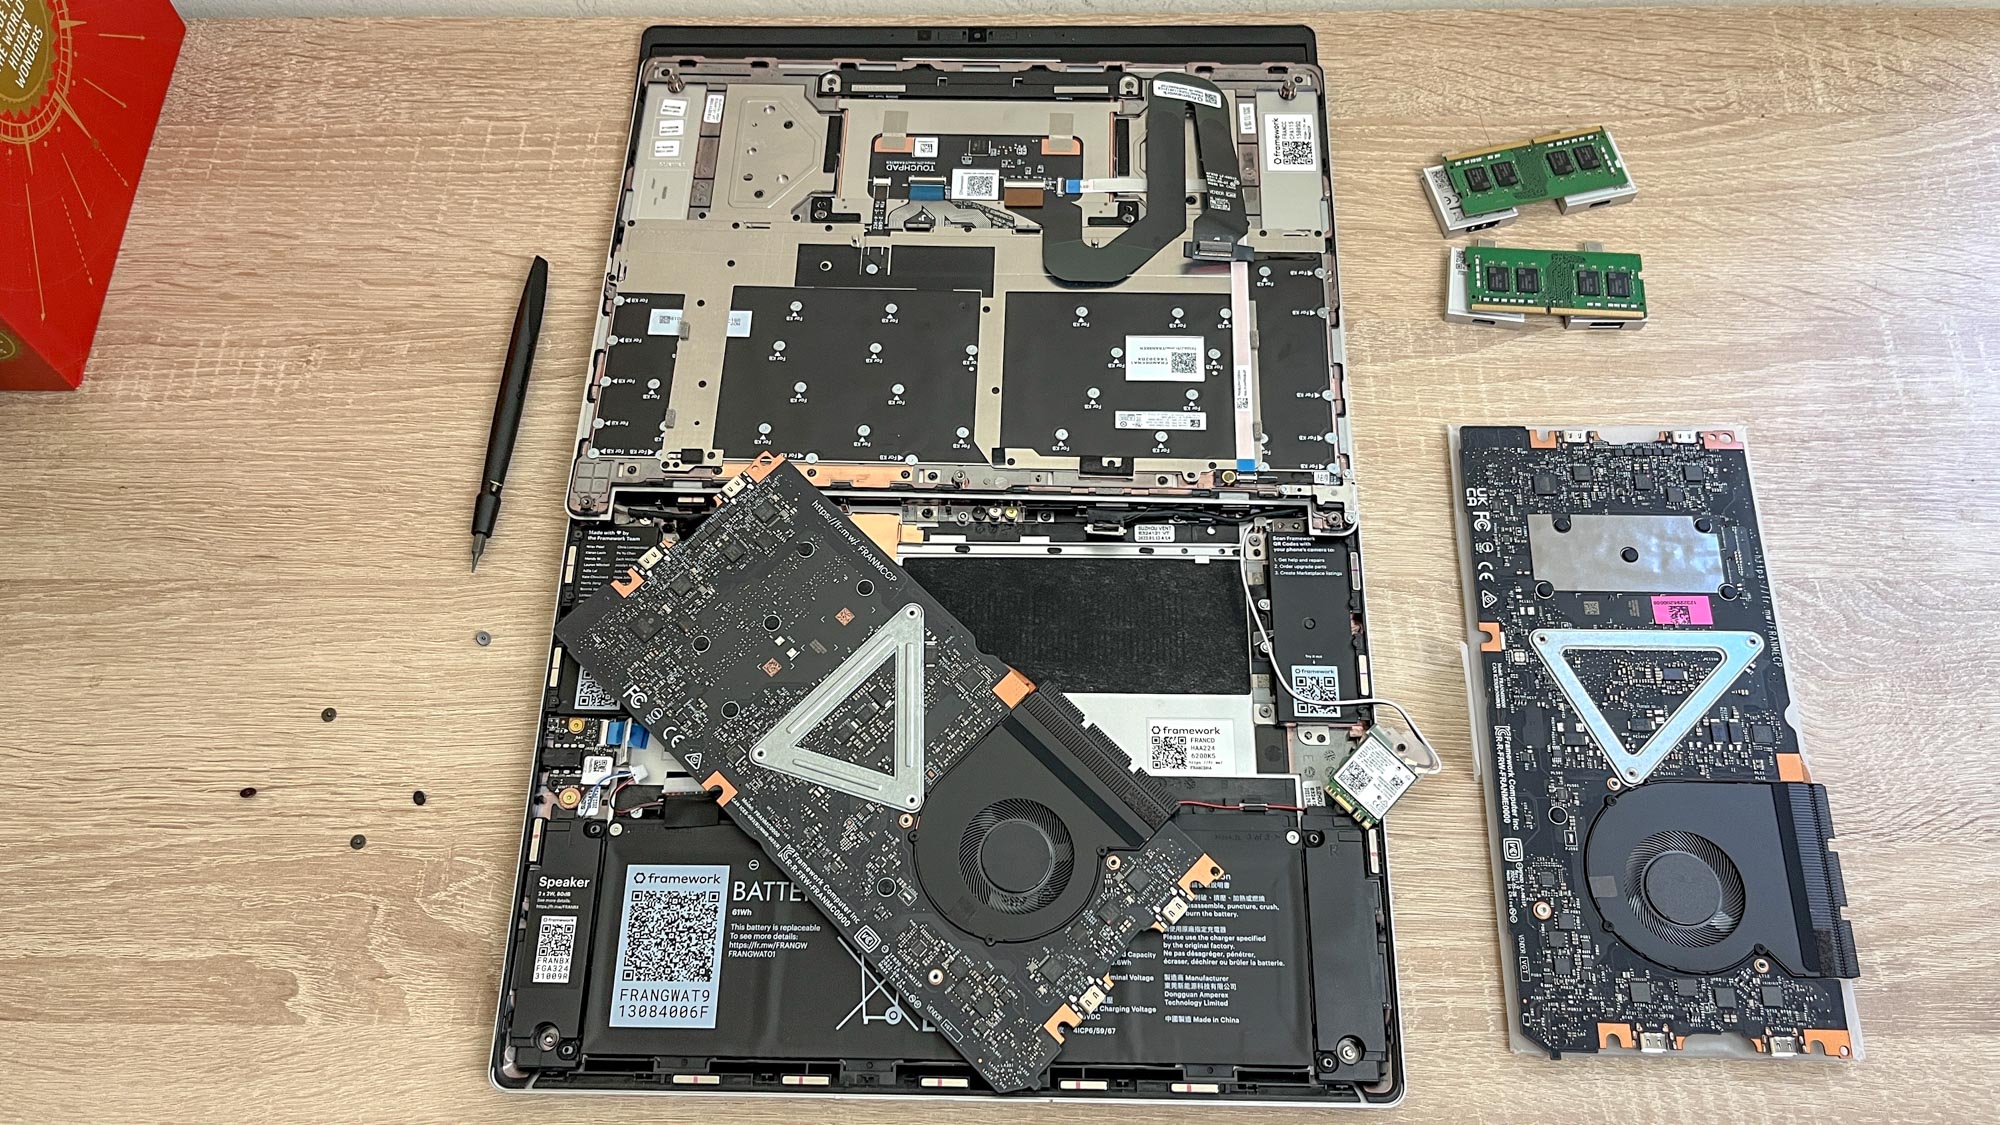
The number one thing I had to deal with when cracking open my laptop was fear: fear I would push too hard, fear I wouldn't push hard enough, fear I would somehow scrape or scratch a key component and ruin my laptop for good.
And let me reassure you, these are all reasonable fears! It's scary to open up a complicated computer and start poking around, even when the components are as clearly labelled as they are inside a Framework. It is absolutely possible to ruin a key piece of the PC by accident, so being careful and cautious is wise.
That said, I have to admit I was a little too fearful at the outset to really be effective. That's why I'm so full of praise for Framework's guide — without such clear images and instructions, I'm not sure I'd be brave enough to attempt this. Even with the step-by-step guide, I was often a little confused as to which cable was which, or fearful that I was fiddling with the wrong one.
But in the end, the fear slowed me down and didn't seem to help much. The healthy sense of skepticism I've developed from decades of skimming Google and outdated forum posts for answers to tech issues was of little help here, and in the end every time I questioned myself or the Framework guide, it was my hesitation that was the issue.
That leads me into my next recommendation: don't be afraid to push or pull hard on even the tiny cables and components inside your laptop.
Push and pull harder than you think
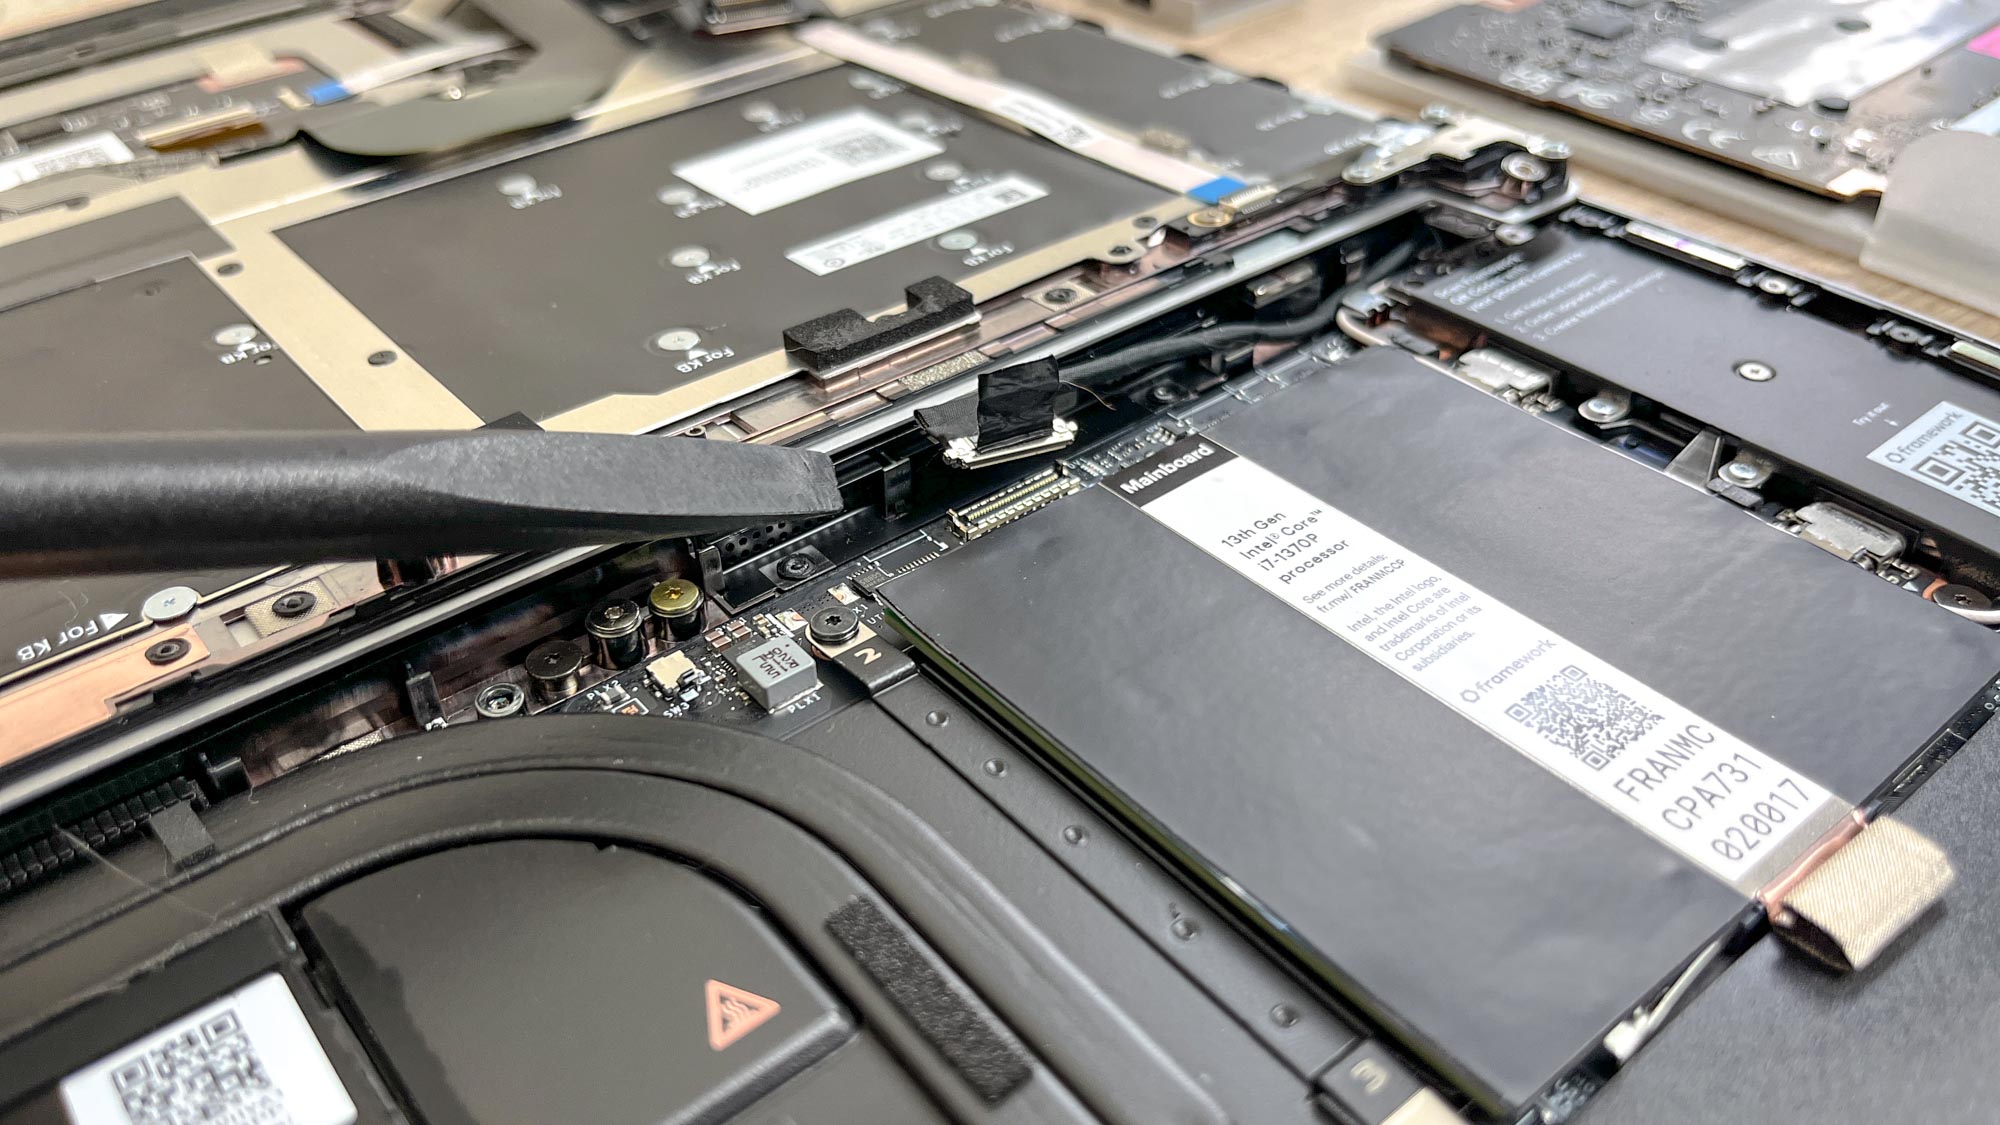
The wonderful thing about Framework's laptop designs is that inside, every component that can be replaced is designed to be easy to swap out. That means even the mainboard can be removed by just detaching a few cables (to the display, speakers, storage, webcam etc) and pulling it out.
Framework makes it so easy that I was able to do it an hour — and if I can do it, believe me, you can do it too.
But it can be scary to push and pull on these delicate components because one sudden twist and bam, some pins on your power connector get bent out of shape and you've got a dead laptop on your hands.
Problem is, I found that a lot of these connectors required more force than I felt comfortable using to disconnect or reconnect them. So while I definitely encourage you to be cautious and start out using very little force, I also wish I'd known before going into this that it was okay to pull hard on tiny components like the audio board and speaker cables.
The same goes for slotting in memory and storage. If you've ever upgraded these components on a desktop PC before you know they can sometimes require a bit more force than you'd expect in order to slot them into position, and the same is true on the Framework laptop.
Personally, I had a hard time working up the gumption to push hard enough that I could properly seat the RAM and storage drive on the Framework's mainboard. So if you get frustrated that a component isn't budging during the upgrade process, don't be afraid to apply a bit more force. Just do it gradually and carefully, so you minimize your odds of accidentally bending or breaking something.
You might want some extra tools
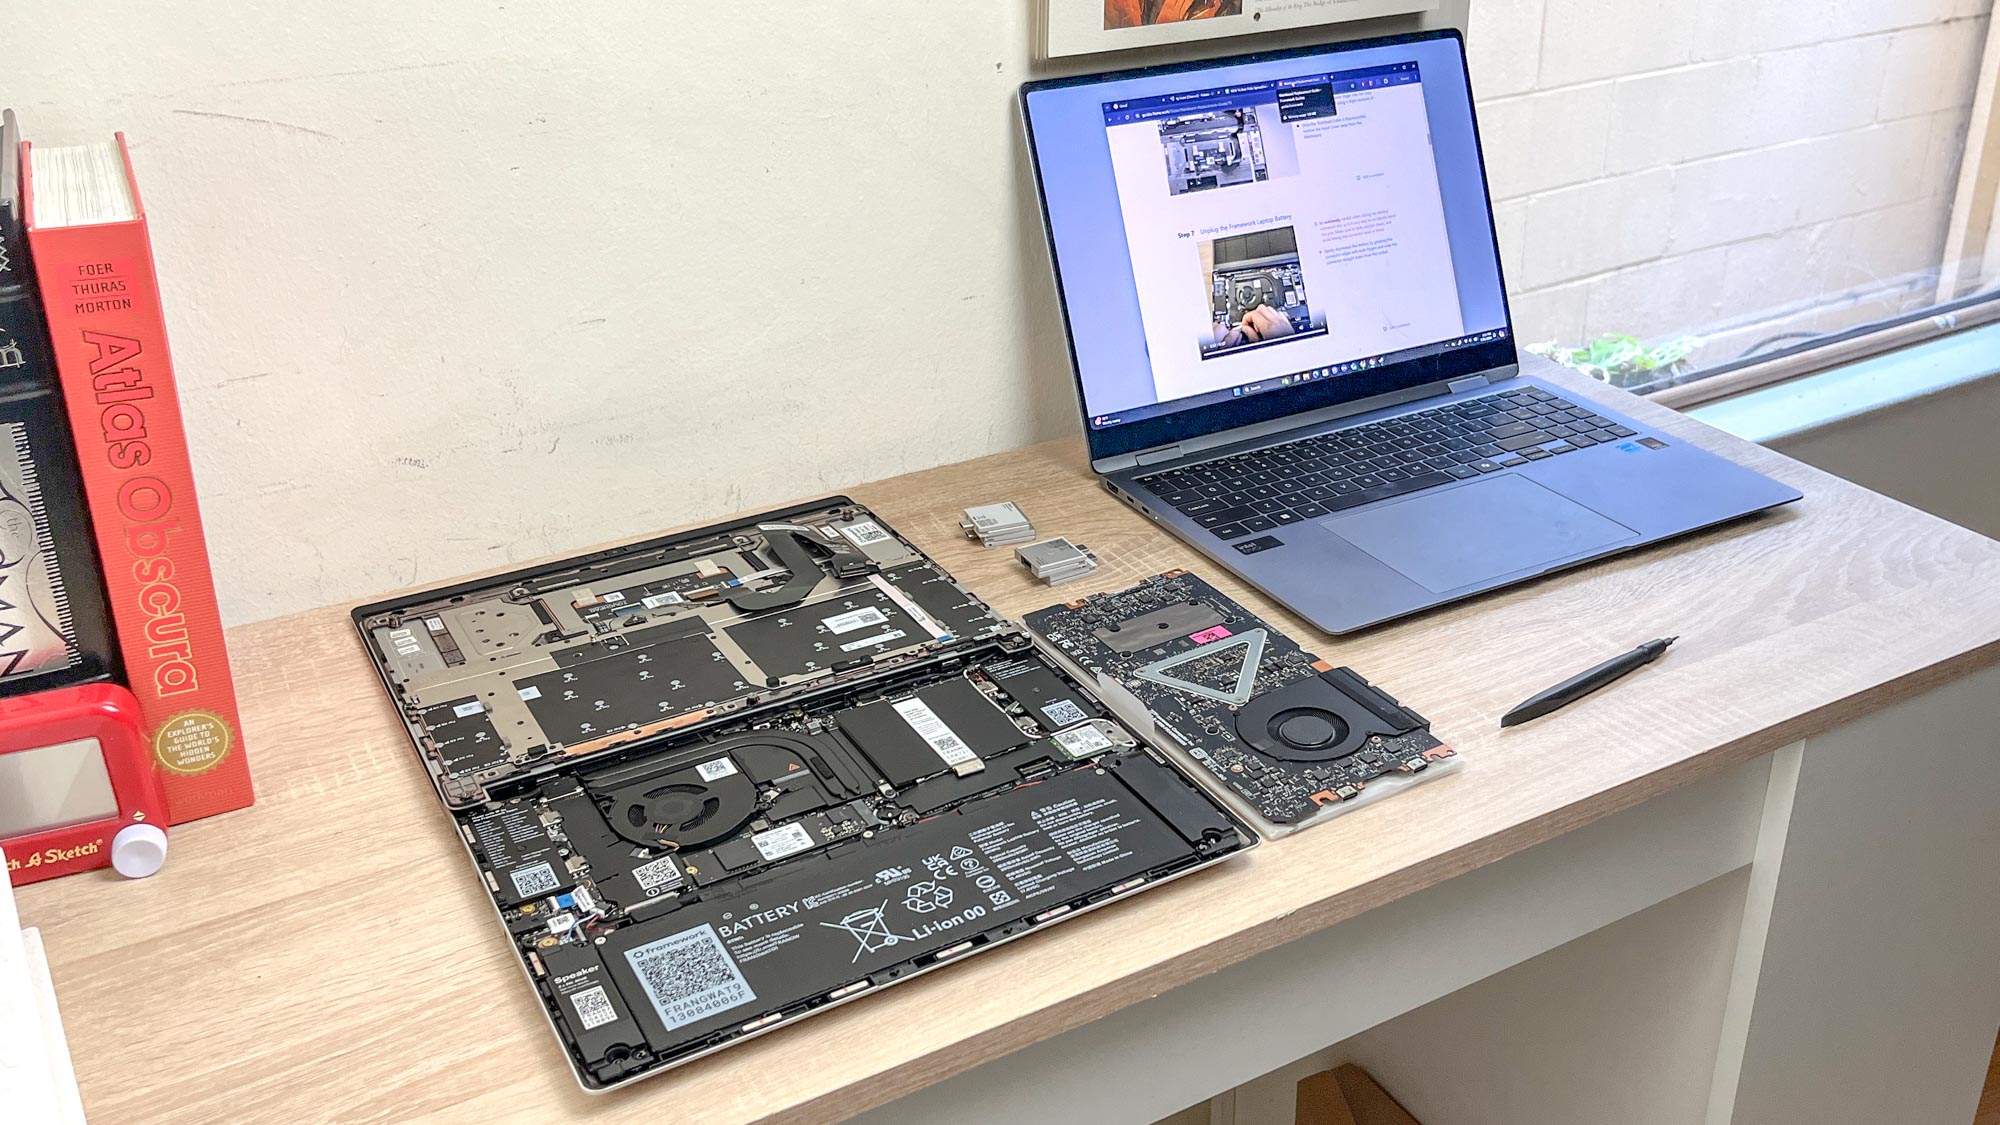
To Framework's credit, everything in the laptop can be upgraded or replaced using just the screwdriver/spudger combo tool that comes packaged with every Framework Laptop.
I know because I used that tool to successfully upgrade the mainboard and RAM on a Framework Laptop, and it worked out just fine. But there were a few other tools that I reached for which made the process easier, and you might like to know about them ahead of time.
First and foremost, having a second PC with an Internet connection is a huge luxury when doing an upgrade like this. I started out reading Framework's guide on my phone, but quickly found it a lot more comfortable and efficient to grab a laptop and set it up on my workbench. A second PC is great not just for studying Framework's guides but also for researching any hardware questions or software issues you run into during the upgrade process.
Second, I also appreciated having a tool on hand for delicately maneuvering components inside the laptop that were too small for my big fingers to easily grasp. Disconnecting the speakers from the mainboard was terrifying, for example, because you have to carefully pull the cable out with more force than I expected, but the plastic housing around the cable is so small I could barely grasp it without pain.
So while Framework recommends you use your fingers to carefully maneuver small components around in the laptop, I ended up using a pair of tweezers to disconnect at least two cables that were too small for my fingers to comfortably grab. Please note that I do not recommend you use metal tools of any kind inside your laptop! I very carefully used metal tweezers inside a Framework that was powered down and not connected to power, and only to remove the speaker cable by grasping its plastic housing while being ultra-careful not to scrape or touch any of the laptop's components with the metal tweezers.
If I were to do this again, I would be just as careful but also invest in a good pair of ceramic needle-nose pliers or some other non-conductive grasping implement that's unlikely to scratch or damage a component.
Finally, make sure you have a good light on hand when working inside your laptop. I did this in broad daylight and still turned my overhead lights on, but the whole time I was secretly wishing I had a nice desk lamp so I could evenly and clearly light the whole workspace.
Bottom line
So if you decide to attempt a similar upgrade, I hope you find these tips useful. At the very least, I hope this demystifies the process of cracking open and upgrading a laptop somewhat.
For a long time this was the domain of tech savants and repair technicians, and until now I'd never have felt brave enough to upgrade a laptop myself. But Framework makes it so easy that I was able to do it an hour — and if I can do it, believe me, you can do it too.
More from Tom's Guide
- Deal alert! Save $350 on Samsung's epic Galaxy Book 4 Edge Copilot+ laptop
- Microsoft Copilot+ PCs are a confusing mess — 3 things you need to know before you buy
- Google Chrome is getting a big AI upgrade for millions — what you can do now

Alex Wawro is a lifelong tech and games enthusiast with more than a decade of experience covering both for outlets like Game Developer, Black Hat, and PC World magazine. A lifelong PC builder, he currently serves as a senior editor at Tom's Guide covering all things computing, from laptops and desktops to keyboards and mice.


