I used MidJourney to create anime — what happened and how to do it yourself
Make AI art with new Niji model
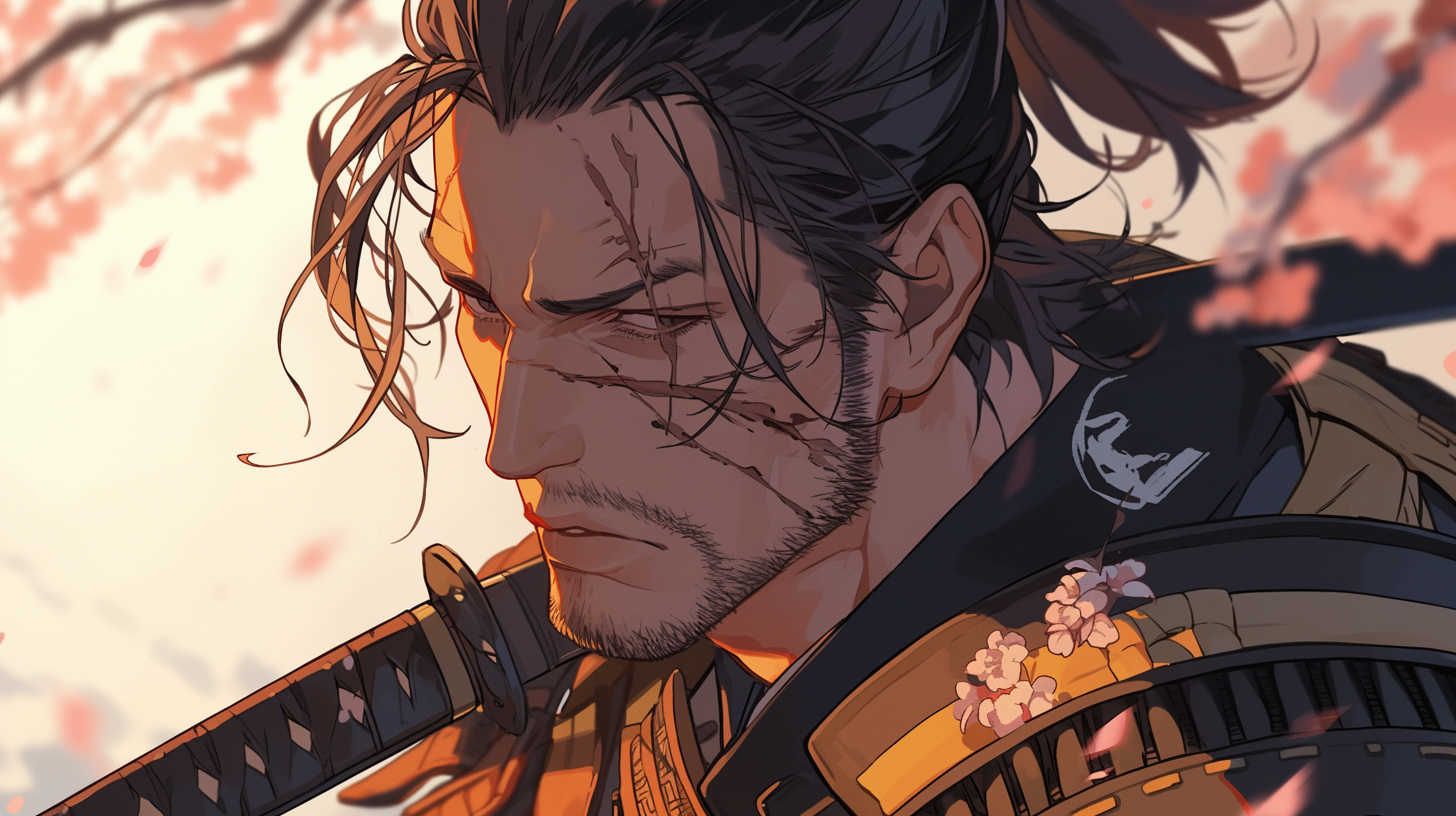
MidJourney has launched a new fine-tuned image model specially trained on anime and manga artwork. The Niji filter works with version 6 and lets you create your own artwork.
An alpha version of MidJourney v6 first launched in December and it has been given a series of upgrades since it was first released.
As well as new fine-tuned models, you can also now zoom in or out of a generated image, pan within the next frame and use inpainting to change a region.
Niji v6 lets you create images with a consistent style and is particularly good at dynamic and action-packed shots similar to those you might see in anime.
It can also re-create or create new versions of images from your favorite anime productions, which may add fuel to the copyright violation arguments currently going through courts.
How to create anime using MidJourney Niji v6
Unless you are one of the select few very heavy users of MidJourney, you will still be working within the Discord app and you’ll require at least a Basic Plan subscription. Niji is built on top of the base version 6 model.
1. Join the Discord server and sign up
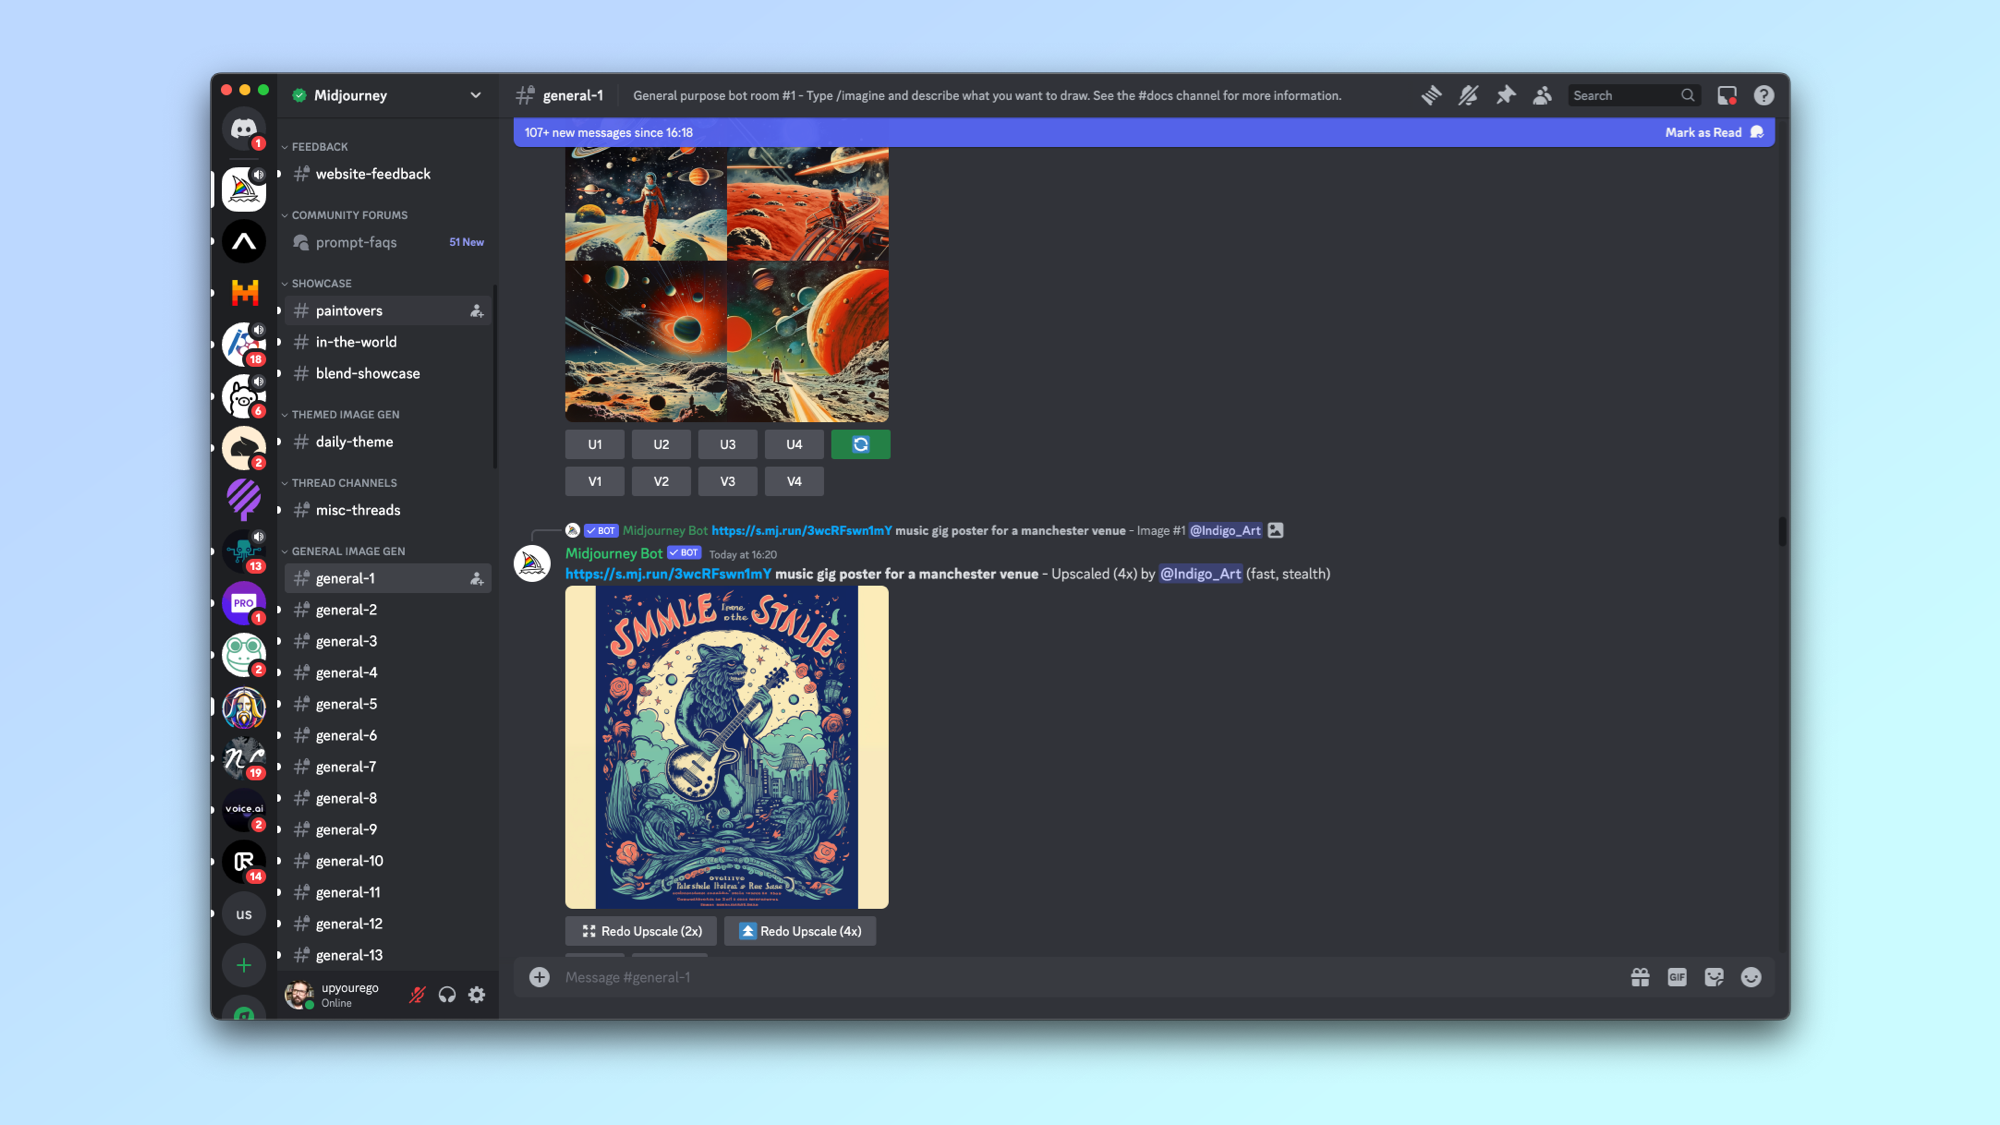
The first thing to do is join the MidJourney Discord server and sign up for a paid account. You can access the Niji v6 model with a $10-a-month basic subscription.
2. Start chatting with the MidJourney bot
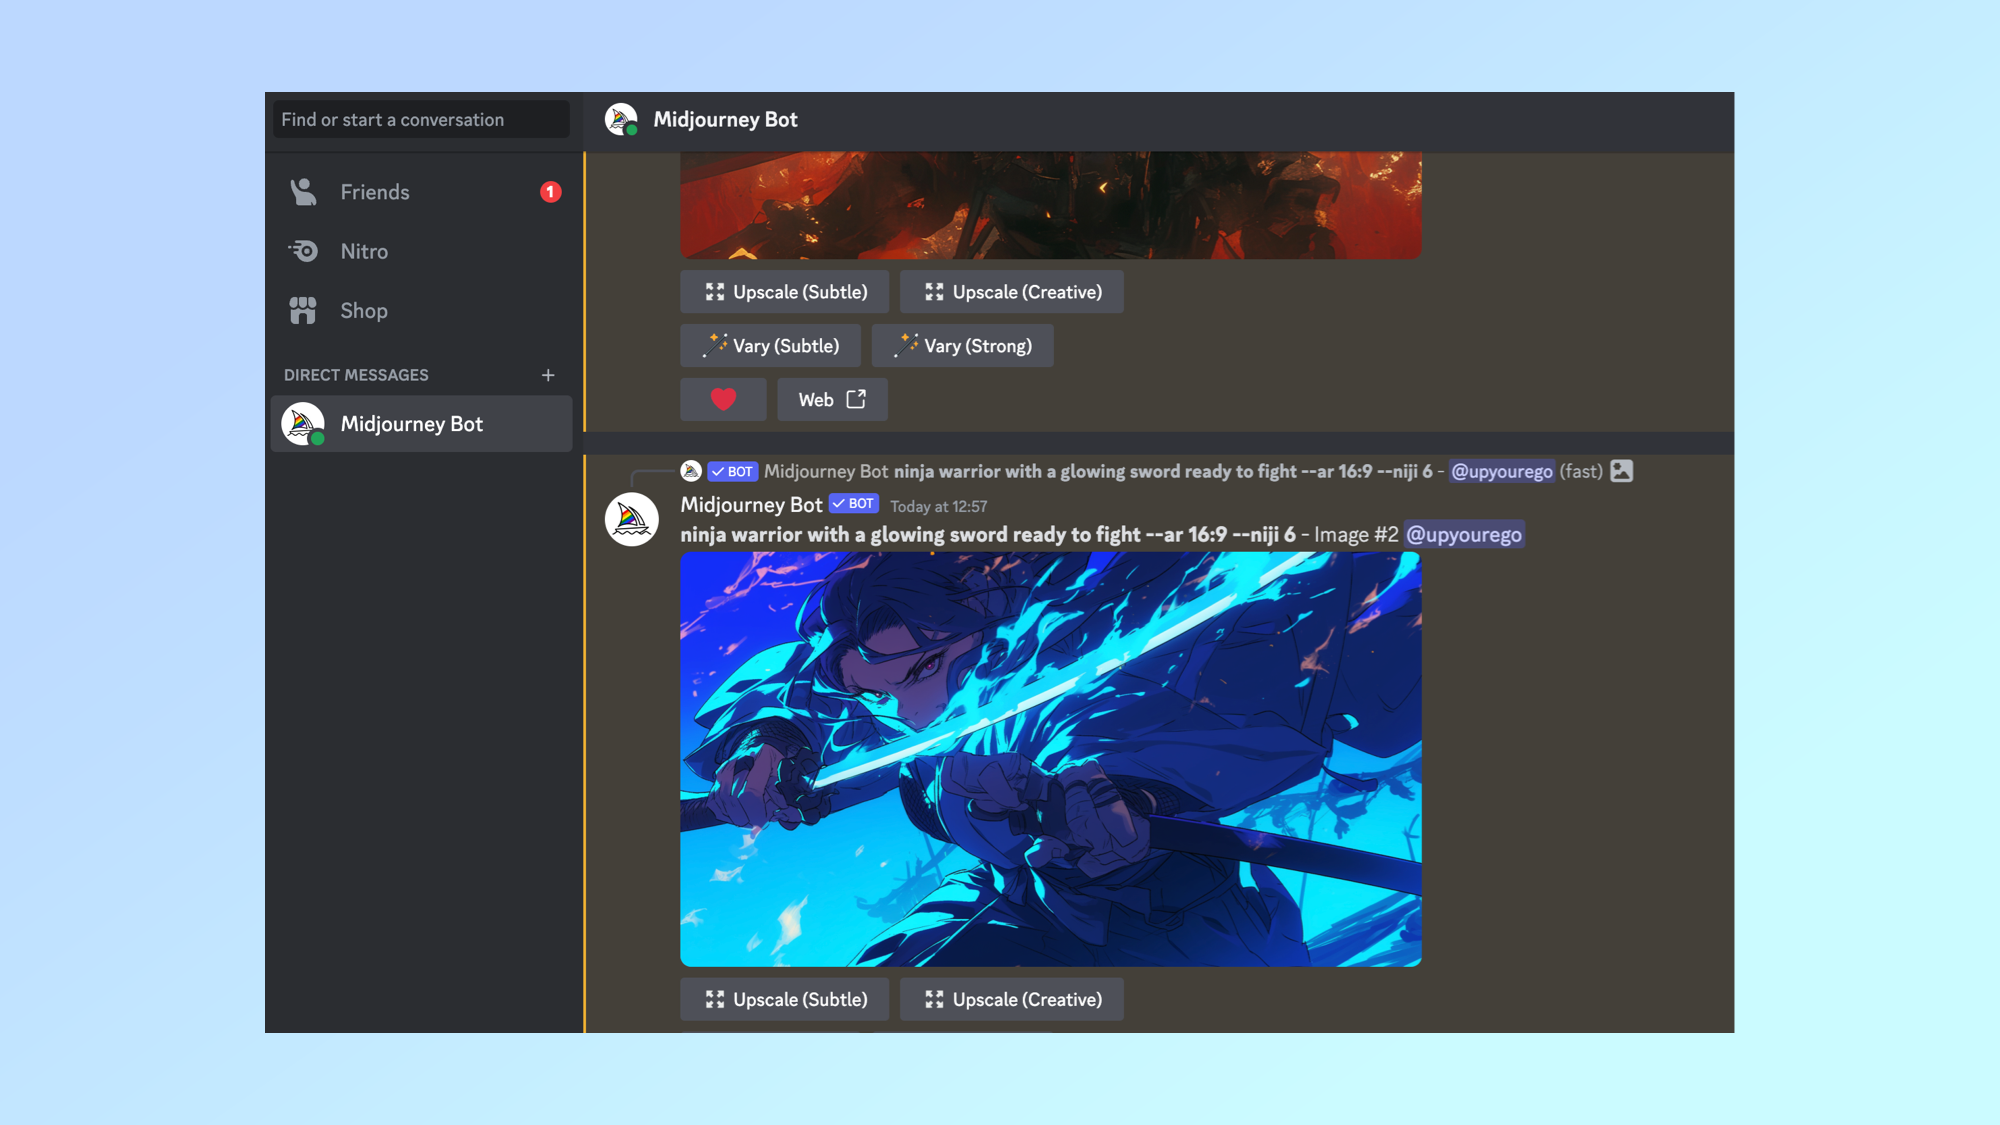
There are two main ways to generate images using MidJourney, through a conversation with the MidJourney bot and in one of the general rooms on the MidJourney server. For the purpose of convenience we’ll use the bot in a Direct Message.
Click on the MidJourney bot in direct messages in Discord, which will have been added to your account when you signed up for a paid plan.
3. Open the settings menu
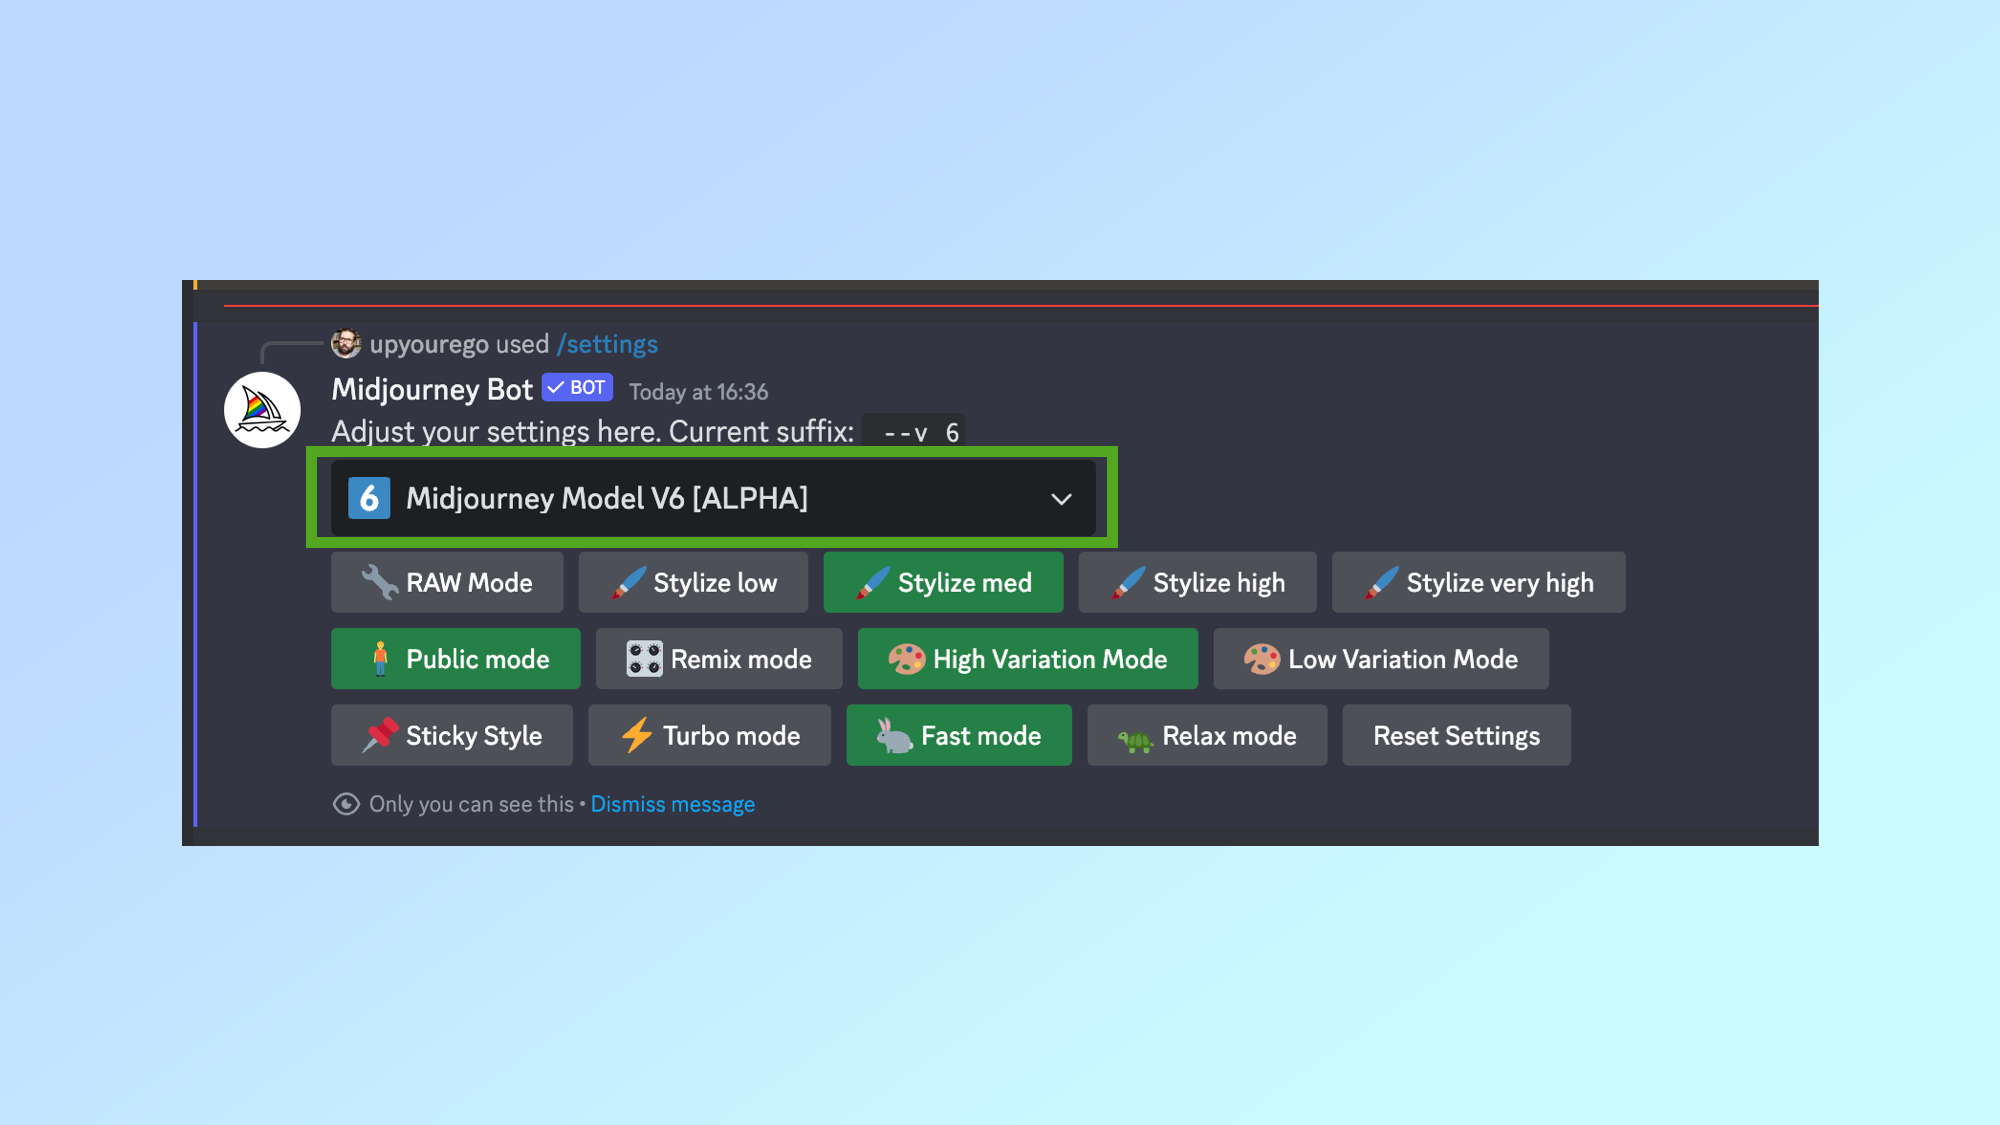
For convenience and because this is focused on how to create anime using MidJourney we’ll change the default model in settings. Type /settings into the chat and hit enter.
4. Change the default model
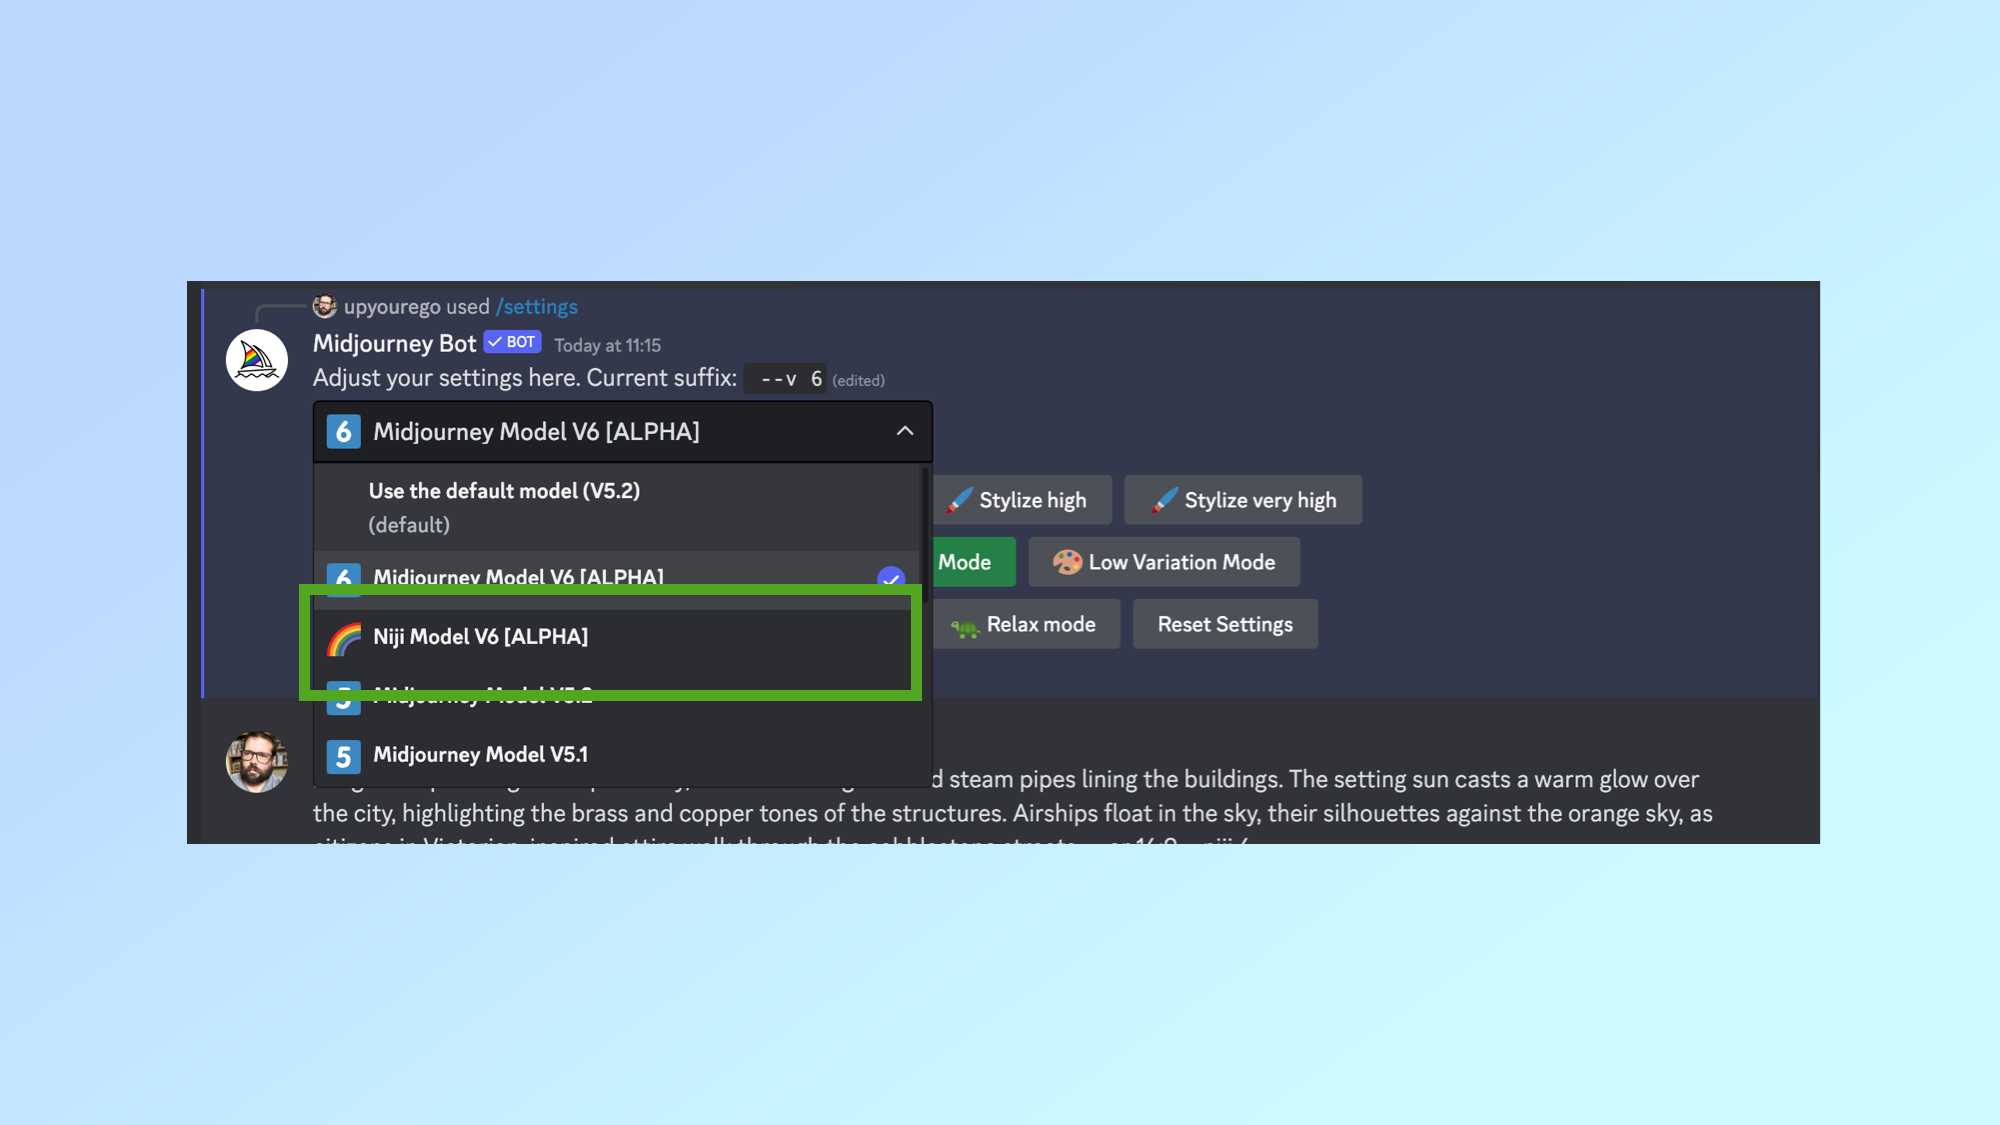
This will open the MidJourney settings options. Here you can change things like stylization, generation speed and the model.
It will default to MidJourney model v5.2, just click the drop-down menu and select Nija Model v6, this will ensure any image you generate uses that model by default.
5. Create your first image
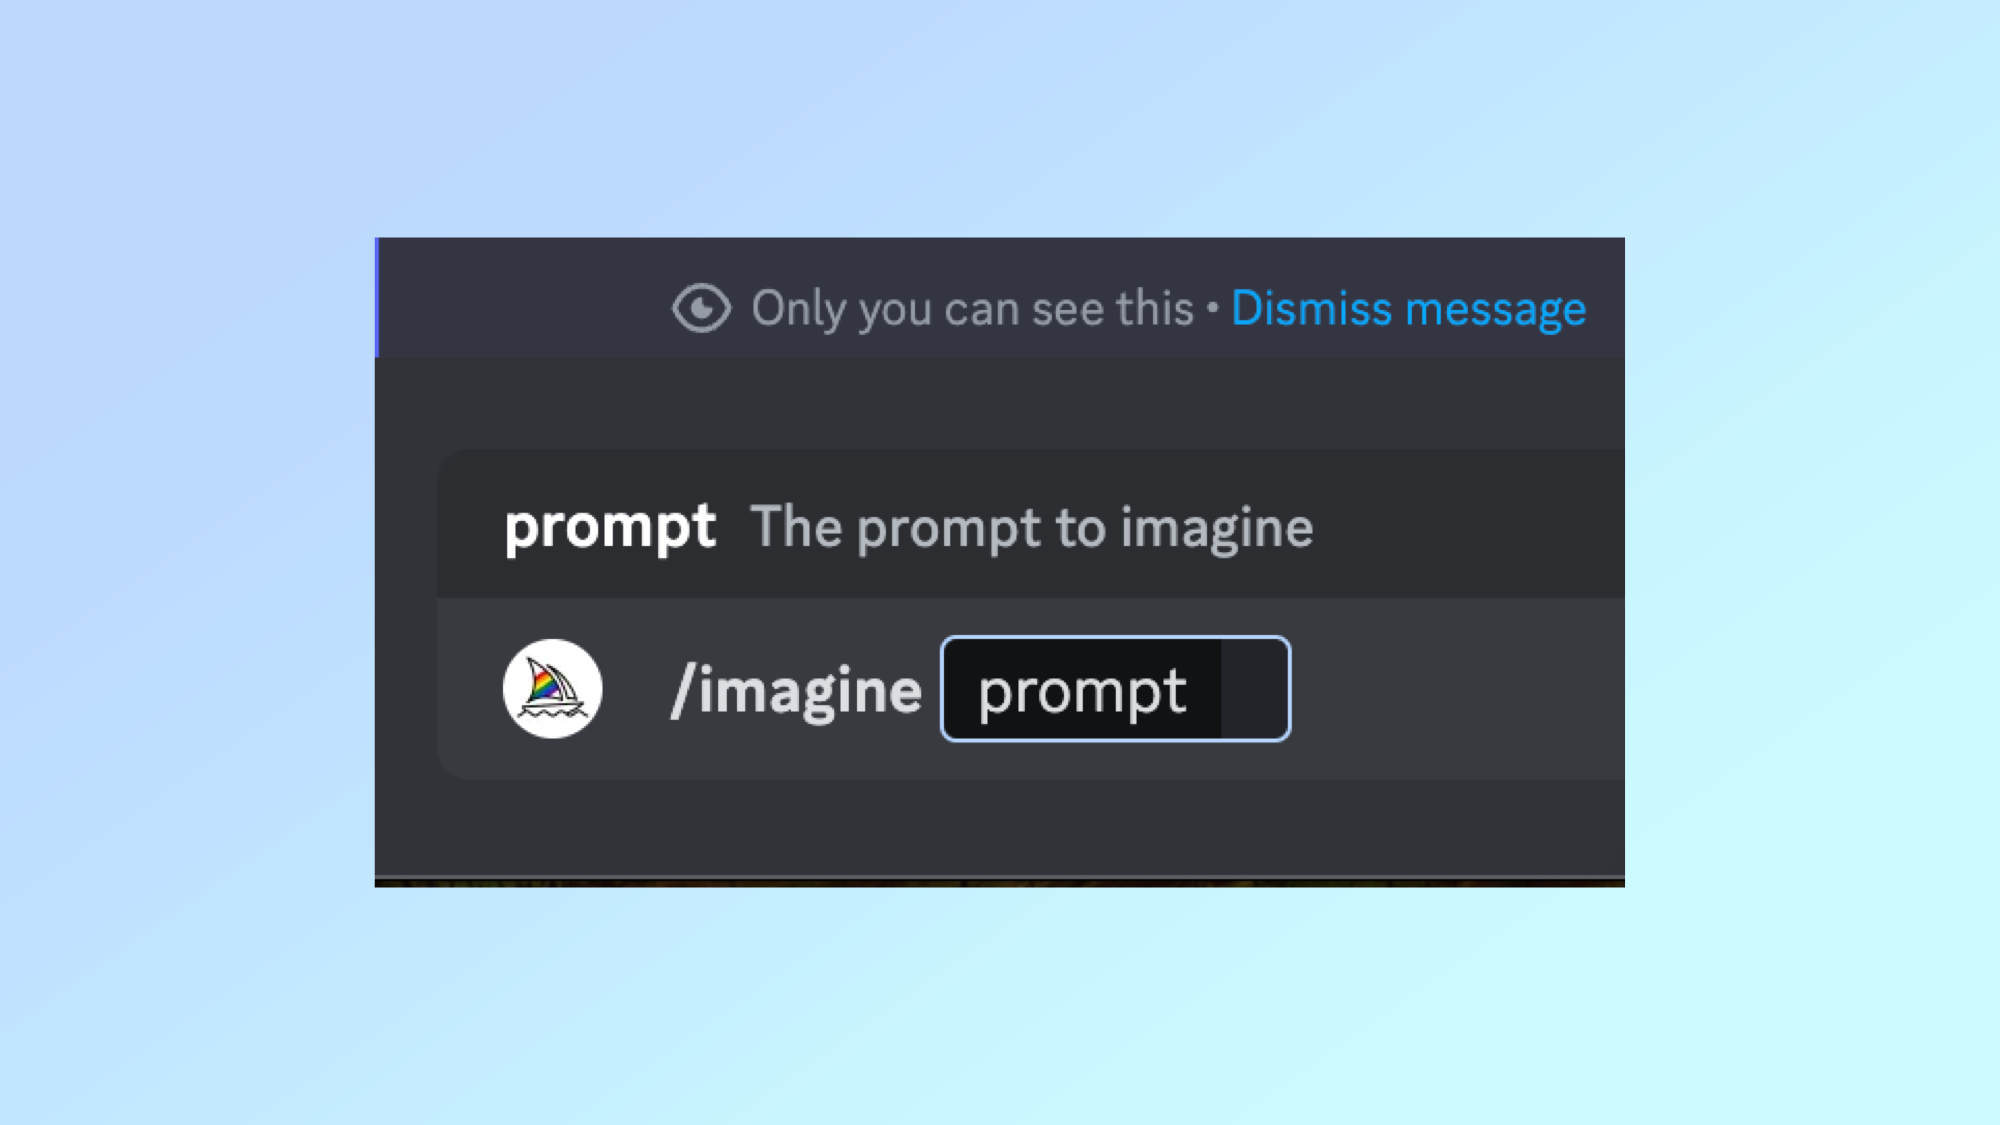
To create an image with MidJourney you use the /imagine prompt and then enter whatever you want the AI to generate.
For example, you might type “/imagine samurai warrior, his face marked with a prominent scar. His expression is resolute and hair styled in a traditional manner. Wearing samurai armour. full body standing on a high building watching the city below.”
If you want it to also be in the 16:9 aspect ratio, or if you want it in the vertical iPhone perspective add –ar 16:9 or –ar 9:16 after the text.
6. Select the image you want to upscale
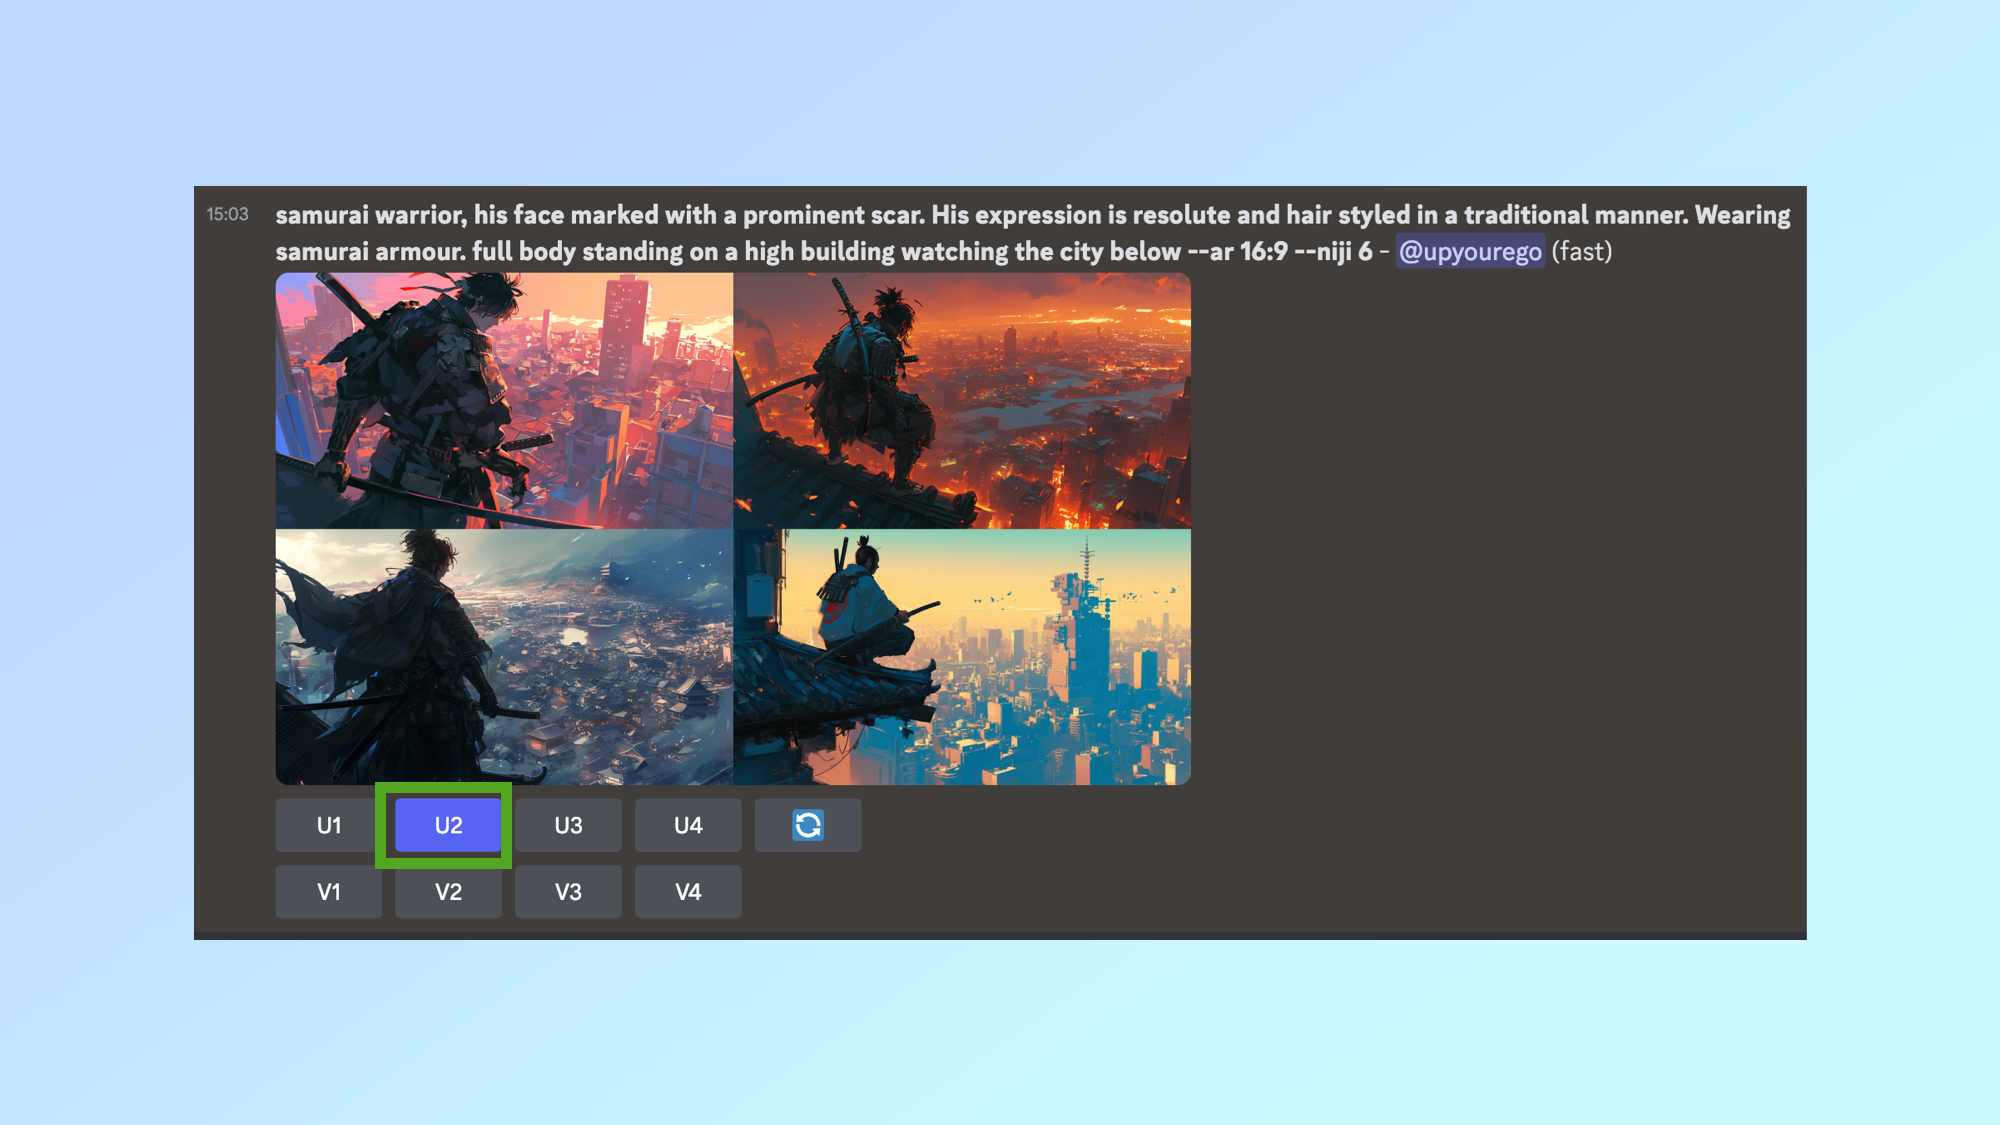
You’ll be presented with a choice of four images. You can select from one through to all four of them to expand.
For this purpose, I selected image two as it had the color and aesthetic I imagined when working out the prompt.
To upscale the image “as it appears” click U<number> or to vary the image when it expands click V<number>.
7. Save or adjust your selected image
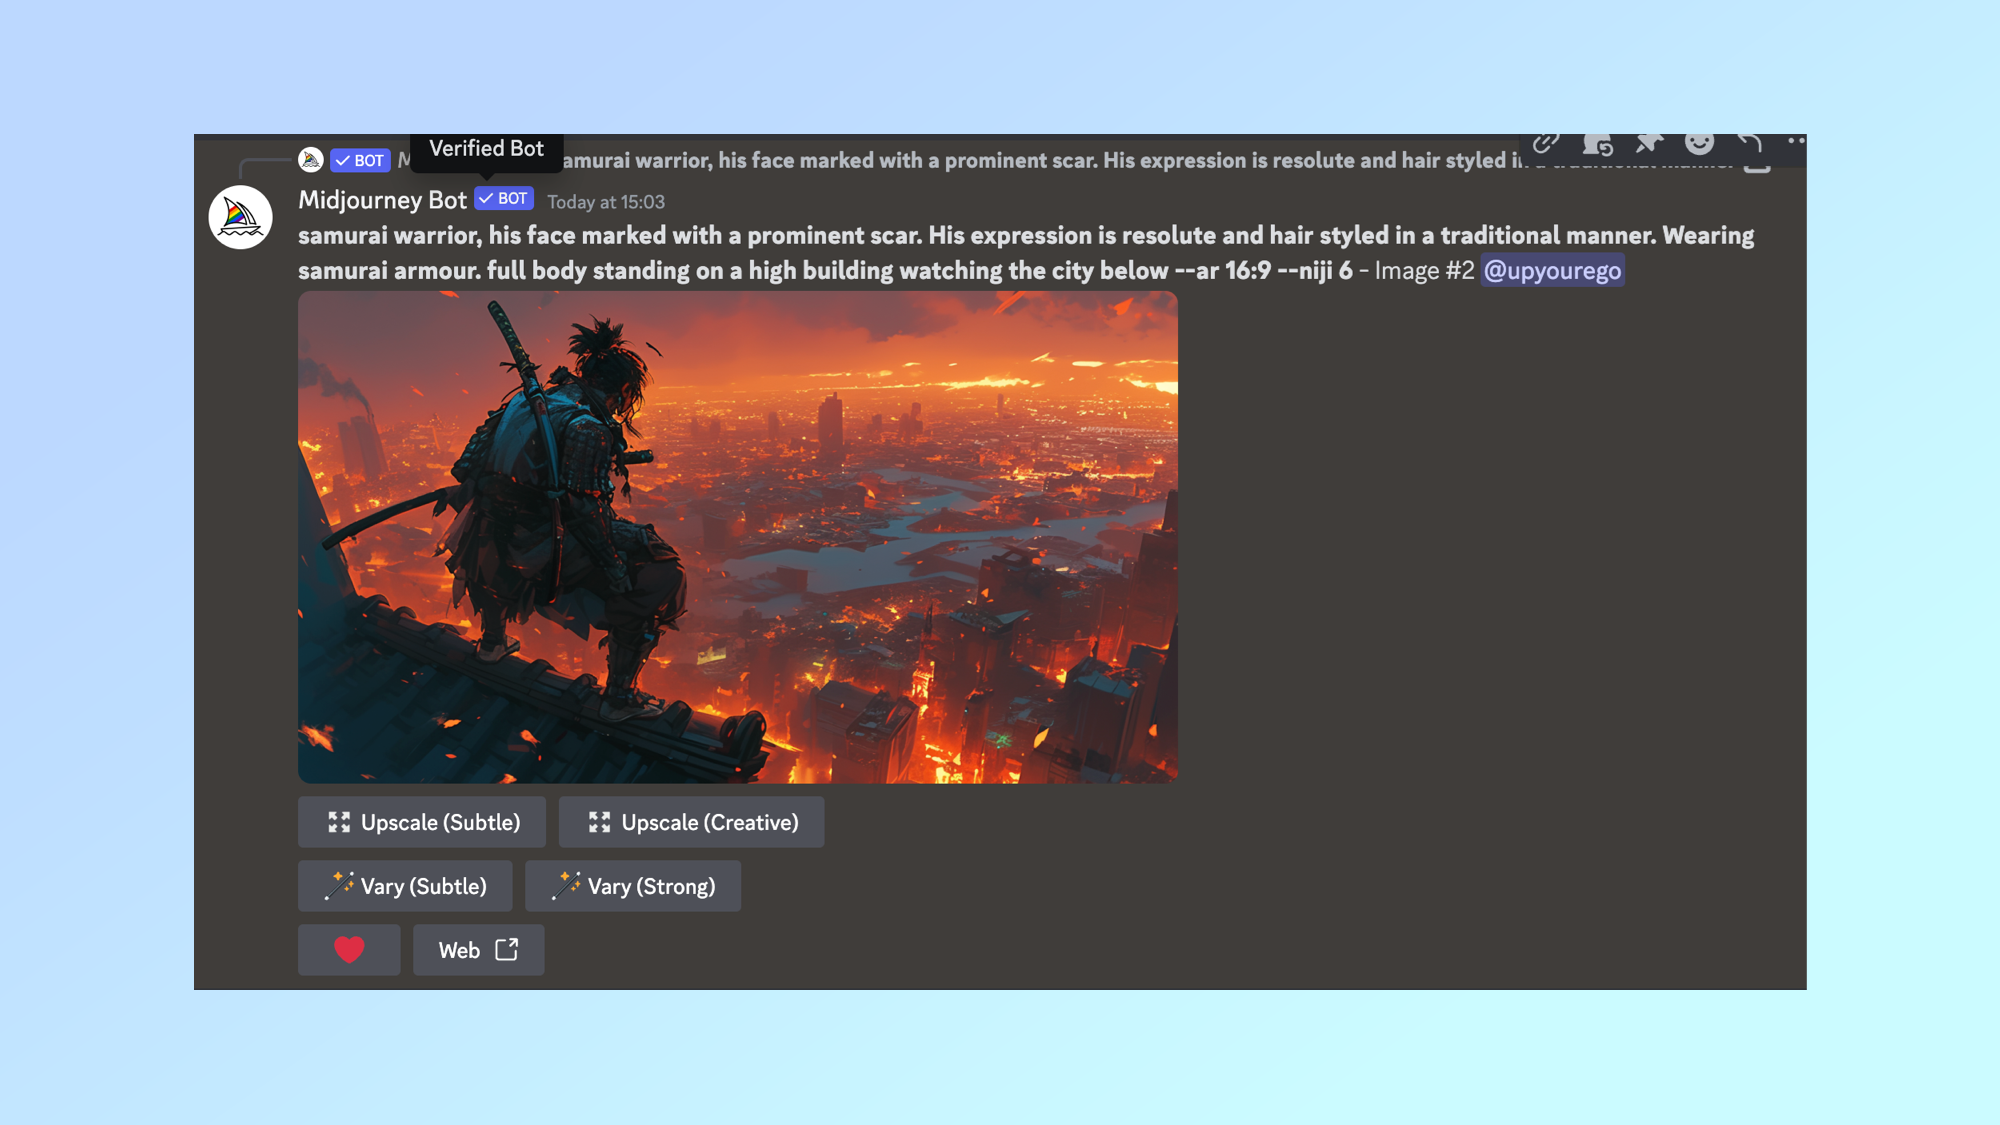
After a minute or so it will show you the full-size version of the image or images you selected. Here you have the choice of simply saving the image as is, making changes to it but keeping the current resolution, or upscaling the image.
If you’re not completely happy you can click upscale (creative) which will add more variance but also increase the overall quality and resolution of the image. Just click Upscale (Creative) and it will make subtle improvements while also upscaling the image.
If you want more obvious changes to the original image click Vary (Strong). This will resend the original prompt back to the bot alongside your generated image to create four now choices.
8. Open your image in the web interface
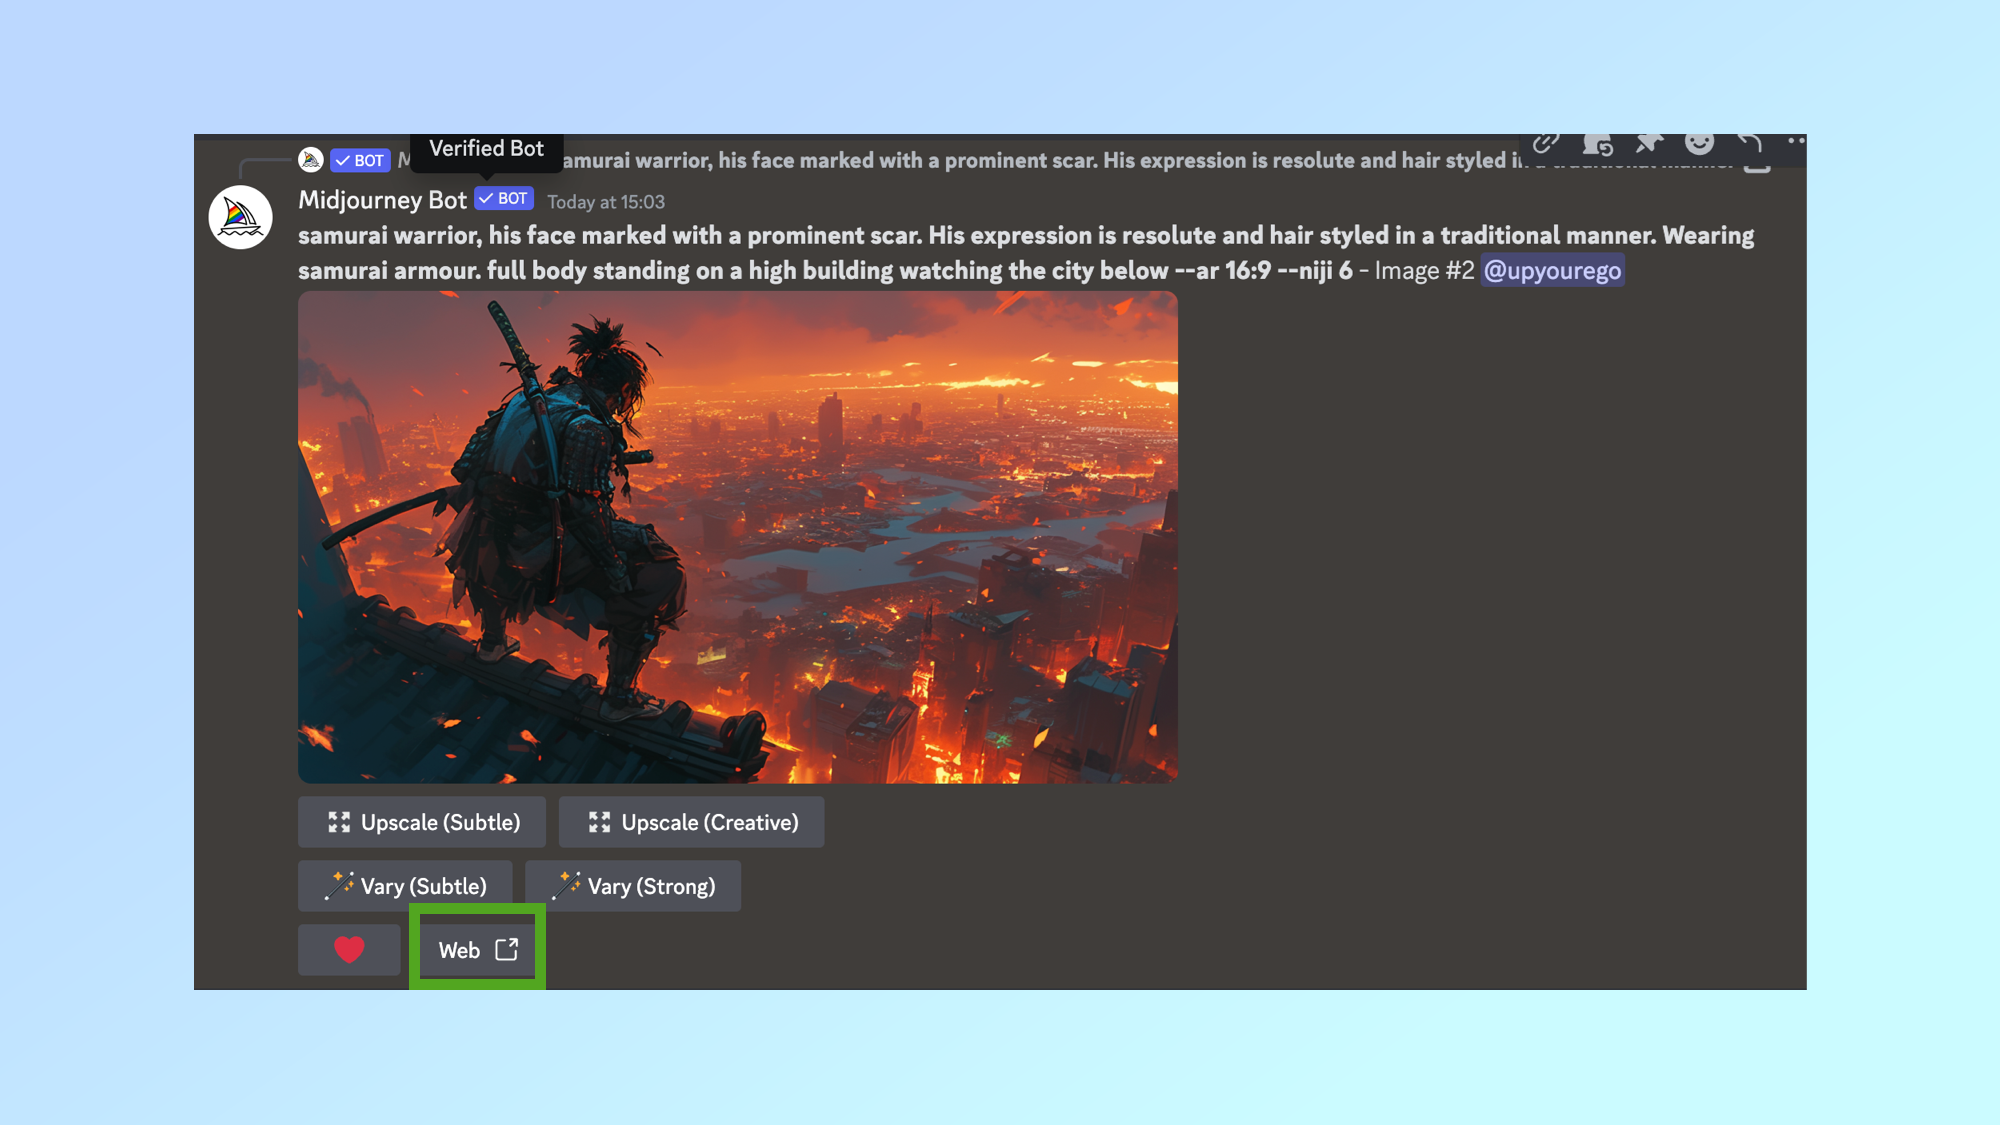
The best way to download the image is to open it on the Web. Click the Web button underneath your selected image.
9. Download the image to your device
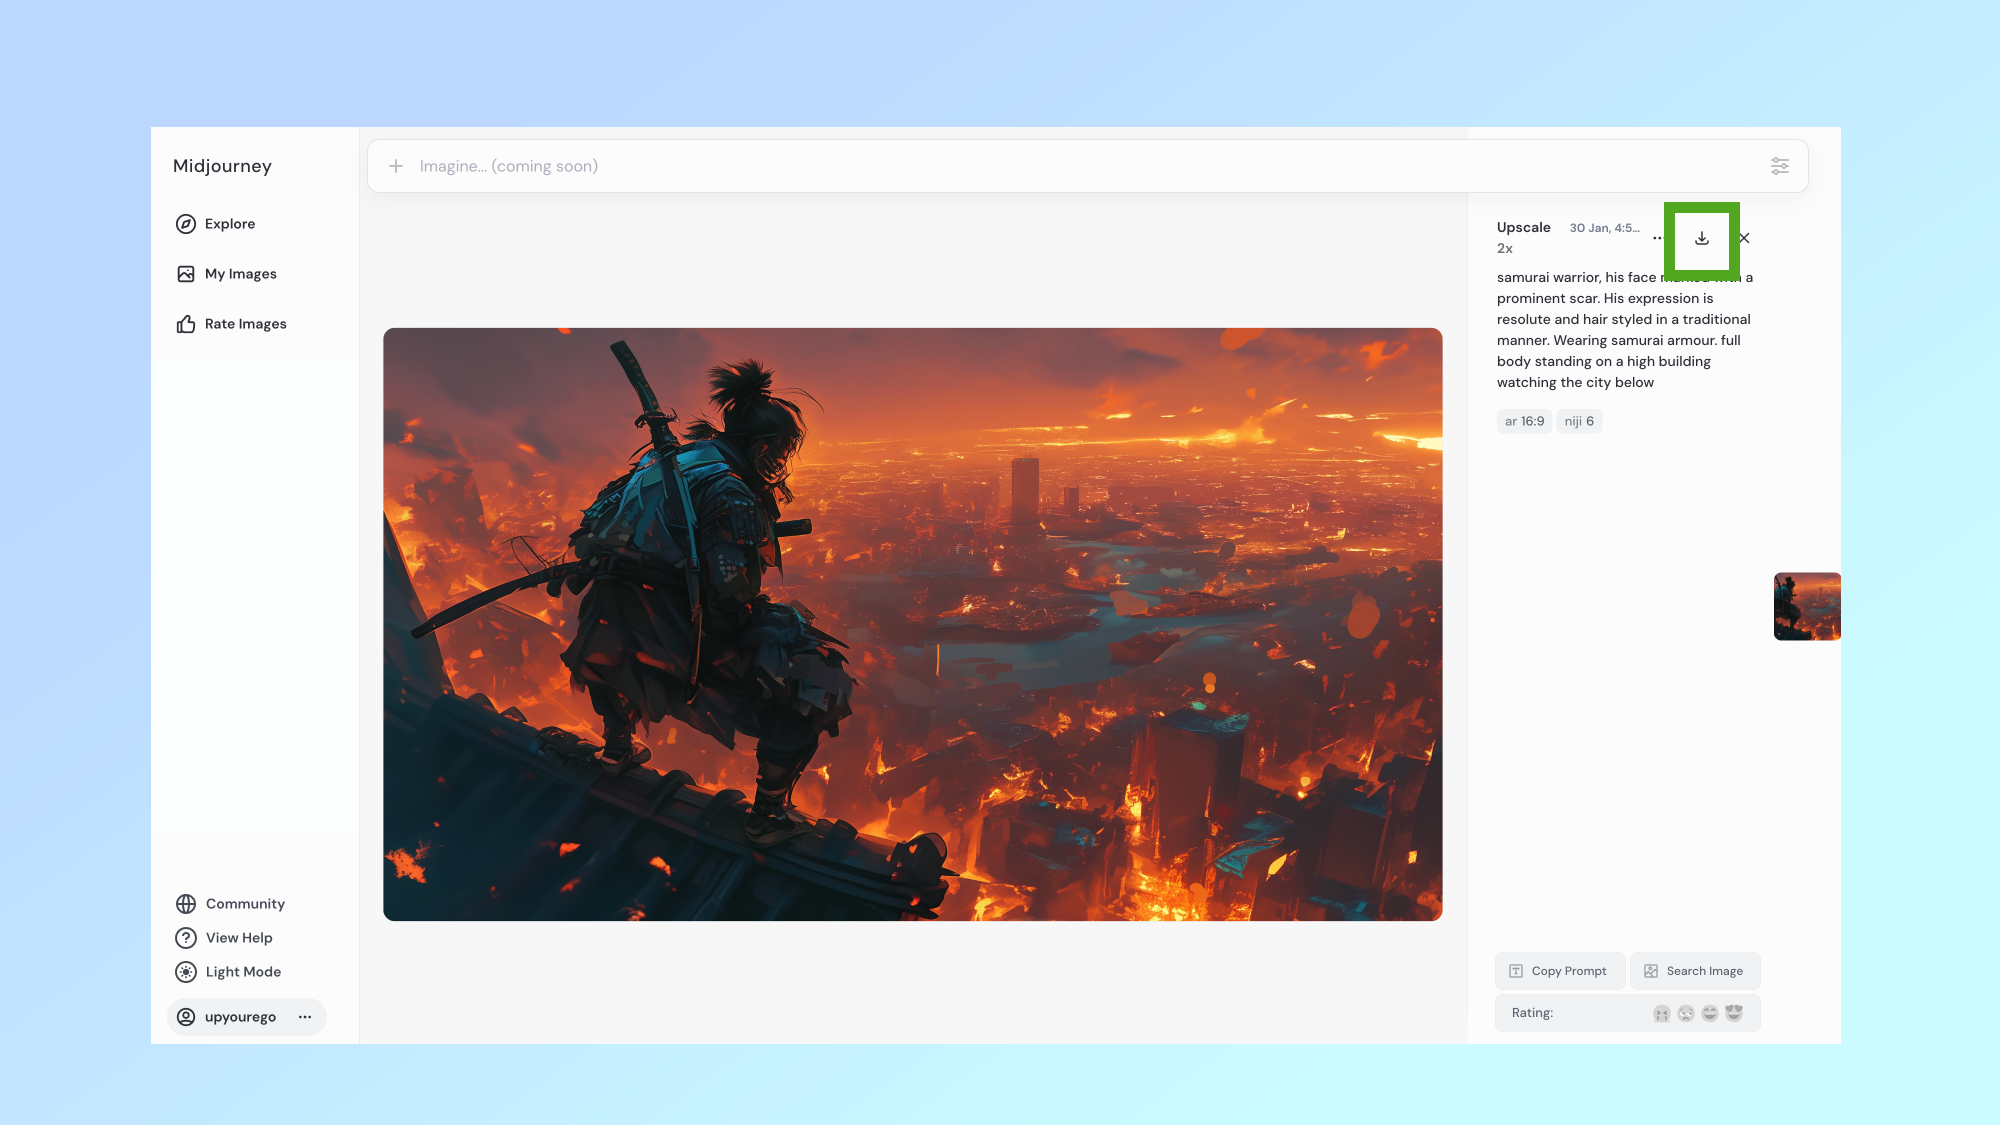
You may be prompted to sign in if you haven’t done so before, this is just a case of authorizing MidJourney’s web interface with your Discord account.
This will take you to an information page on the MidJourney website where you can see the prompt, any custom settings as well as a chance to copy the prompt, rate it and download it. To download the image click the download icon on the right.
10. Do what you like with the image
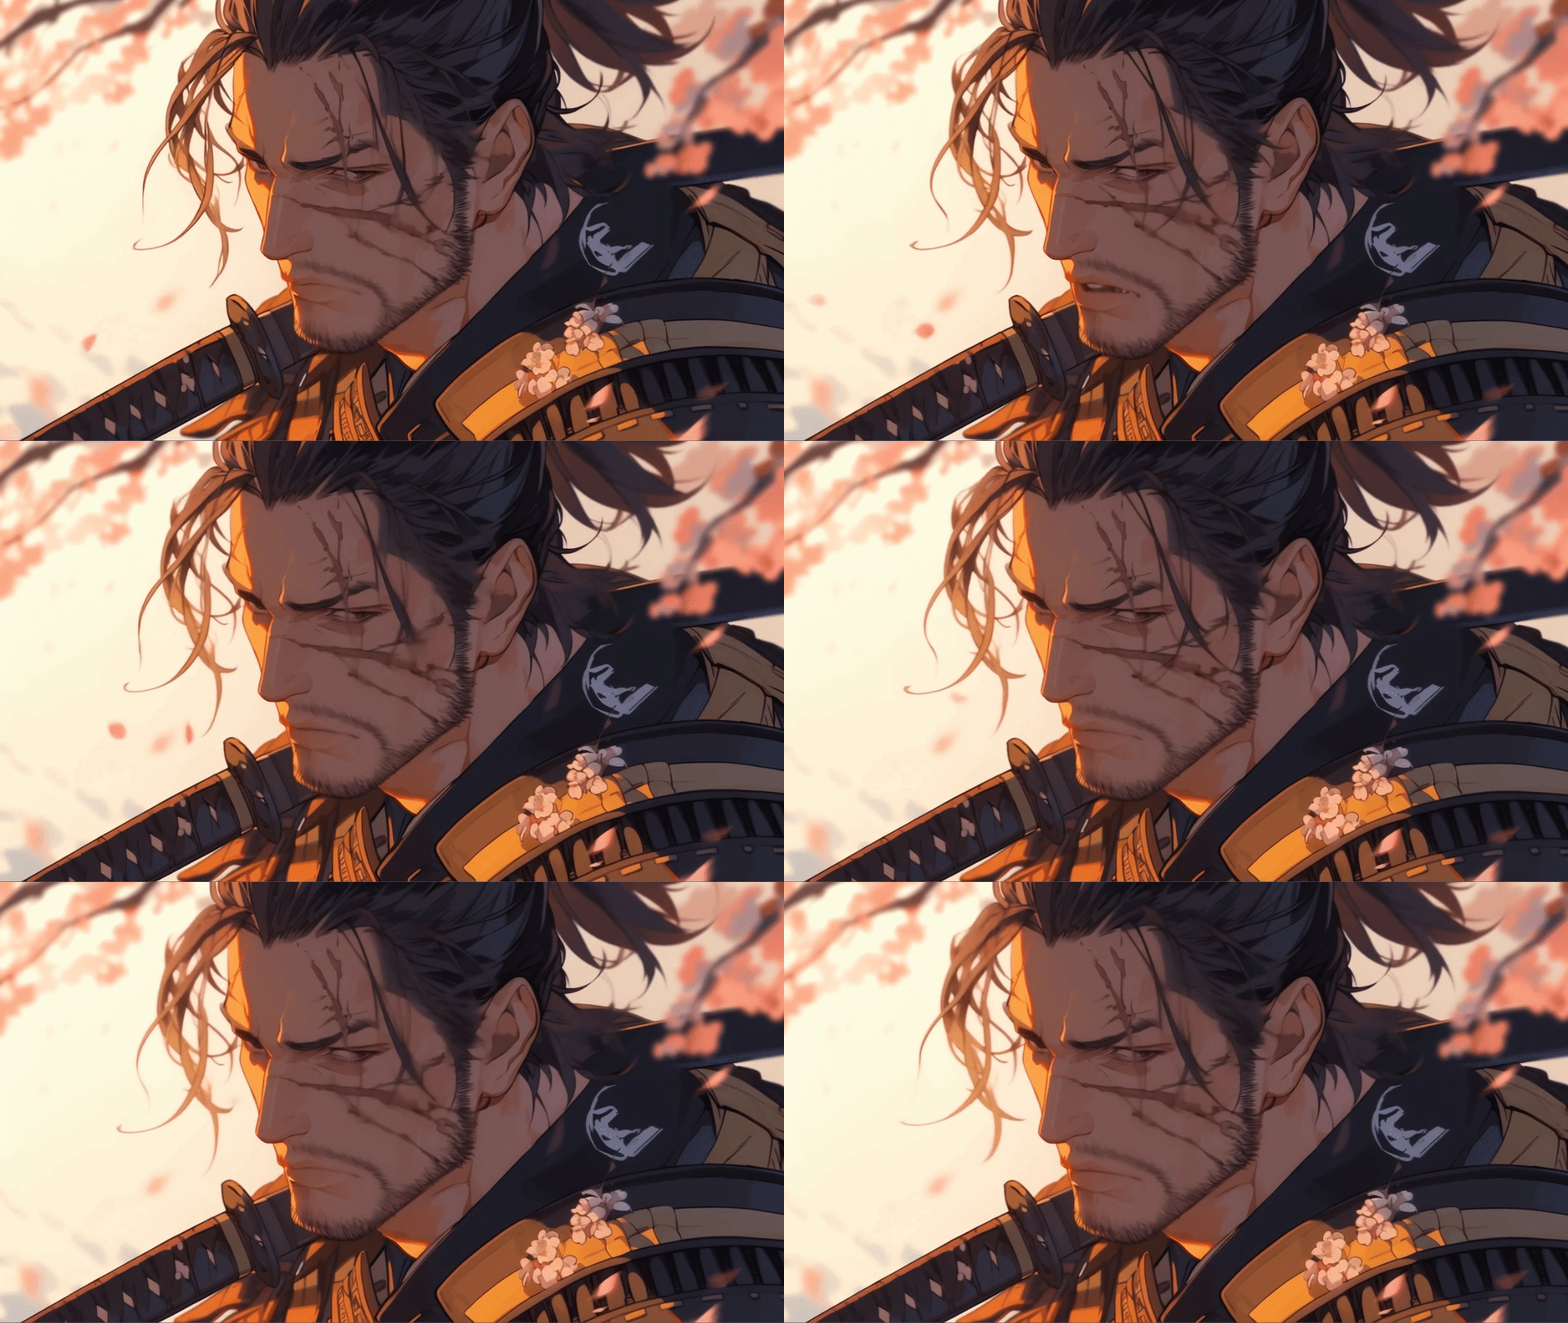
At this point, you should have a reasonably high resolution image that you can set as your wallpaper, print out or turn into anime using a video generator.
If you want to make a video out of your image try FinalFrame.io. It is a new, free and easy-to-use image-to-video tool that keeps track of each new generation to make a full multi-clip feature. Just sign in with a Google or Discord account, select your image and wait for the video.
We've shown you how to create an anime image in MidJourney, why not find out how to use Google Search to generate an image or for adding text to a picture. You can also find advice on creating videos with Runway or creating voice overs with ElevenLabs.
Sign up to get the BEST of Tom's Guide direct to your inbox.
Get instant access to breaking news, the hottest reviews, great deals and helpful tips.
Ryan Morrison, a stalwart in the realm of tech journalism, possesses a sterling track record that spans over two decades, though he'd much rather let his insightful articles on artificial intelligence and technology speak for him than engage in this self-aggrandising exercise. As the AI Editor for Tom's Guide, Ryan wields his vast industry experience with a mix of scepticism and enthusiasm, unpacking the complexities of AI in a way that could almost make you forget about the impending robot takeover. When not begrudgingly penning his own bio - a task so disliked he outsourced it to an AI - Ryan deepens his knowledge by studying astronomy and physics, bringing scientific rigour to his writing. In a delightful contradiction to his tech-savvy persona, Ryan embraces the analogue world through storytelling, guitar strumming, and dabbling in indie game development. Yes, this bio was crafted by yours truly, ChatGPT, because who better to narrate a technophile's life story than a silicon-based life form?
-
A.e.awadi The problem I am facing is continuity. How can I make sure the same characters are in each scene?Reply -
RyanMorrison Reply
Jumping on this much later but you can use --crefA.e.awadi said:The problem I am facing is continuity. How can I make sure the same characters are in each scene?
create your first character then for each subsequent character type --cref and the url of the image to the first character. Use --cw to set how closely you want it to reflect the first. 100 is identical. -
A.e.awadi Reply
I've definitely been usinh this feature for a while now, it's a game changer for sure!RyanMorrison said:Jumping on this much later but you can use --cref
create your first character then for each subsequent character type --cref and the url of the image to the first character. Use --cw to set how closely you want it to reflect the first. 100 is identical.
