How to use AI to upscale your images for free
Transform your low-res images into hi-res with the open source Upscayl app
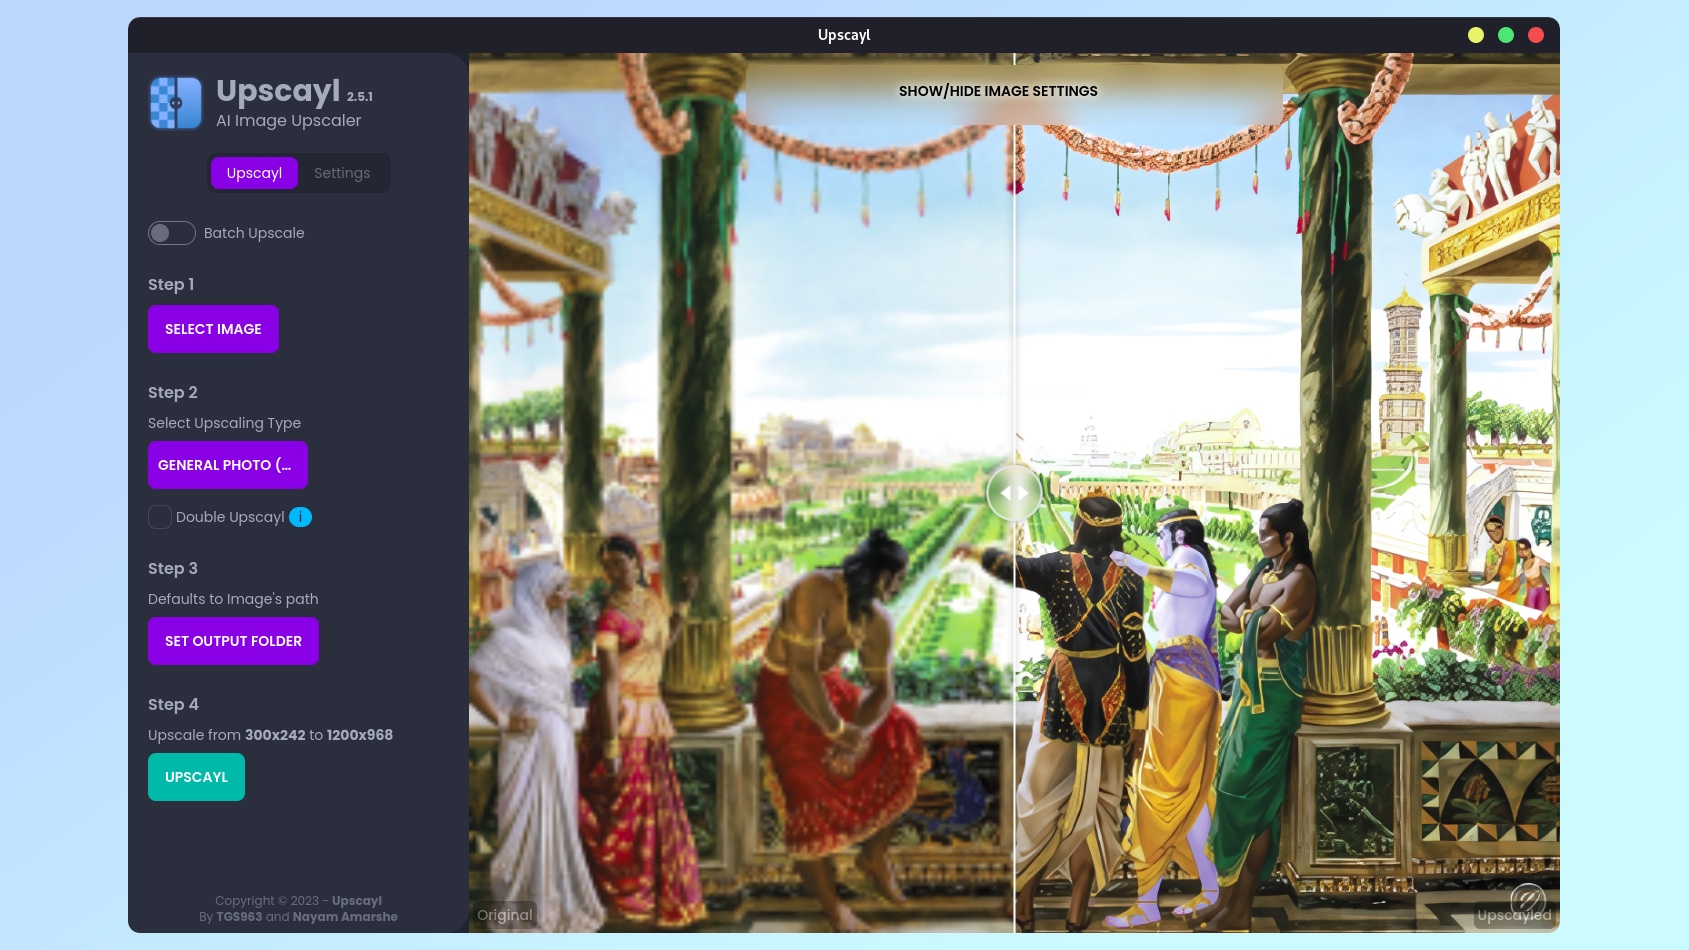
Learning how to use AI to upscale your images for free can turn those annoying low-res images into a high-res masterpiece — to some degree, anyway. While Upscayl (the app we’ve used for this task) does require a little bit of fiddling around with the different models, you should at least be able to convert your images into something more pleasing on the eye.
Upscayl is a work-in-progress but it’s updated regularly and there’s lots of documentation available on its GitHub site. You will need to download it to your computer, though — a cloud version is on the way, but currently this AI image upscaler has to be used offline. That’s no biggie, assuming you have the drive space but be aware the resulting images can be large.
One thing’s for sure: Upscayl is easy-to-use and its feature set continues to grow making it an app to keep an eye on. So download it for MacOS, Linux and Windows via its website or via the developer’s GitHub. We've found the very latest versions are placed on GitHub.
1. Select an image
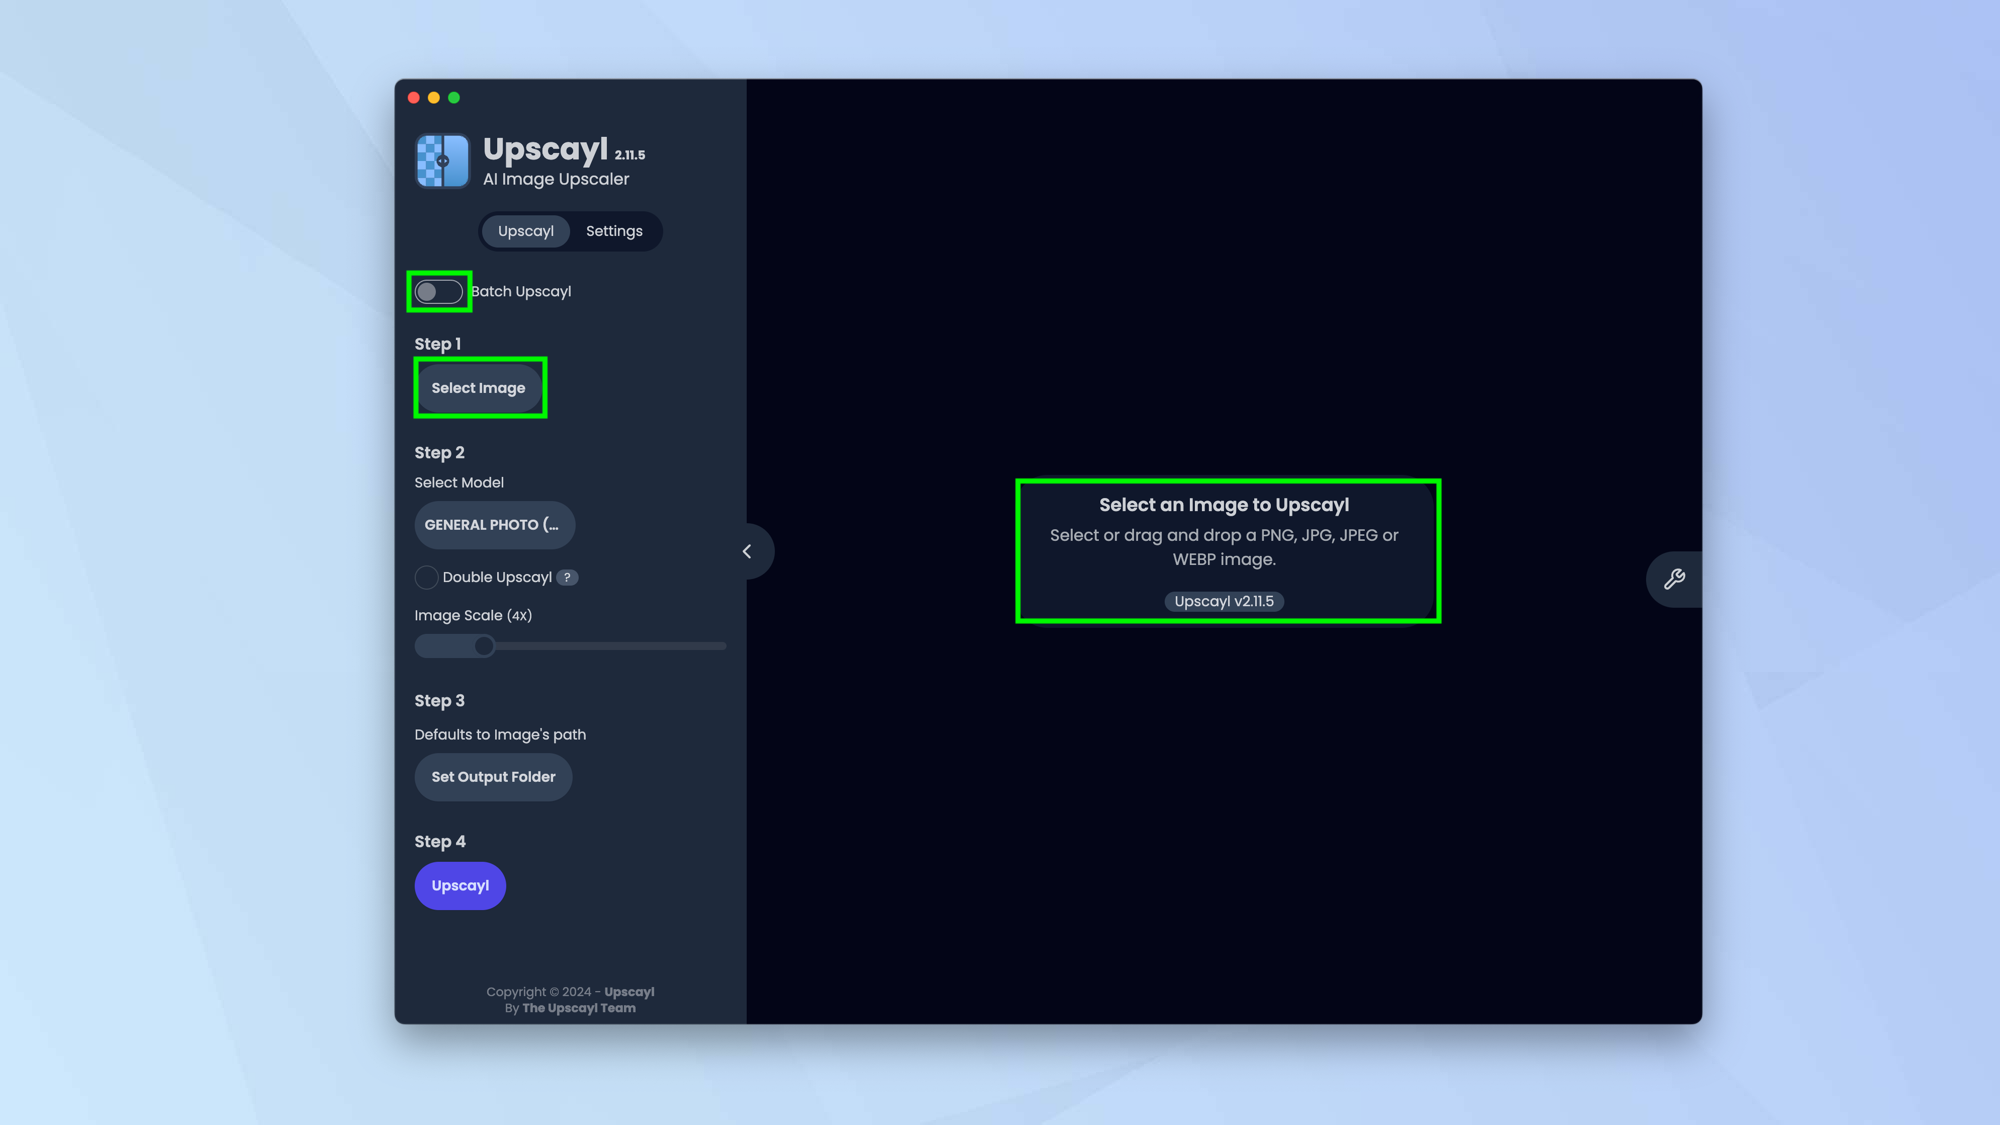
If you turn on Batch Upscale, you will be able to select multiple images. Keeping it off means you will be upscaling individual images, one at a time.
To get started, either click Select Image and choose a PNG, JPG, JPED or WEBP image you want to upscale from your computer’s drive or drag your image to the window.
If you want to upload more than one image, you should turn on Batch Upscale – this will allow you to click Select Folder instead.
2. Choose an unscaling method
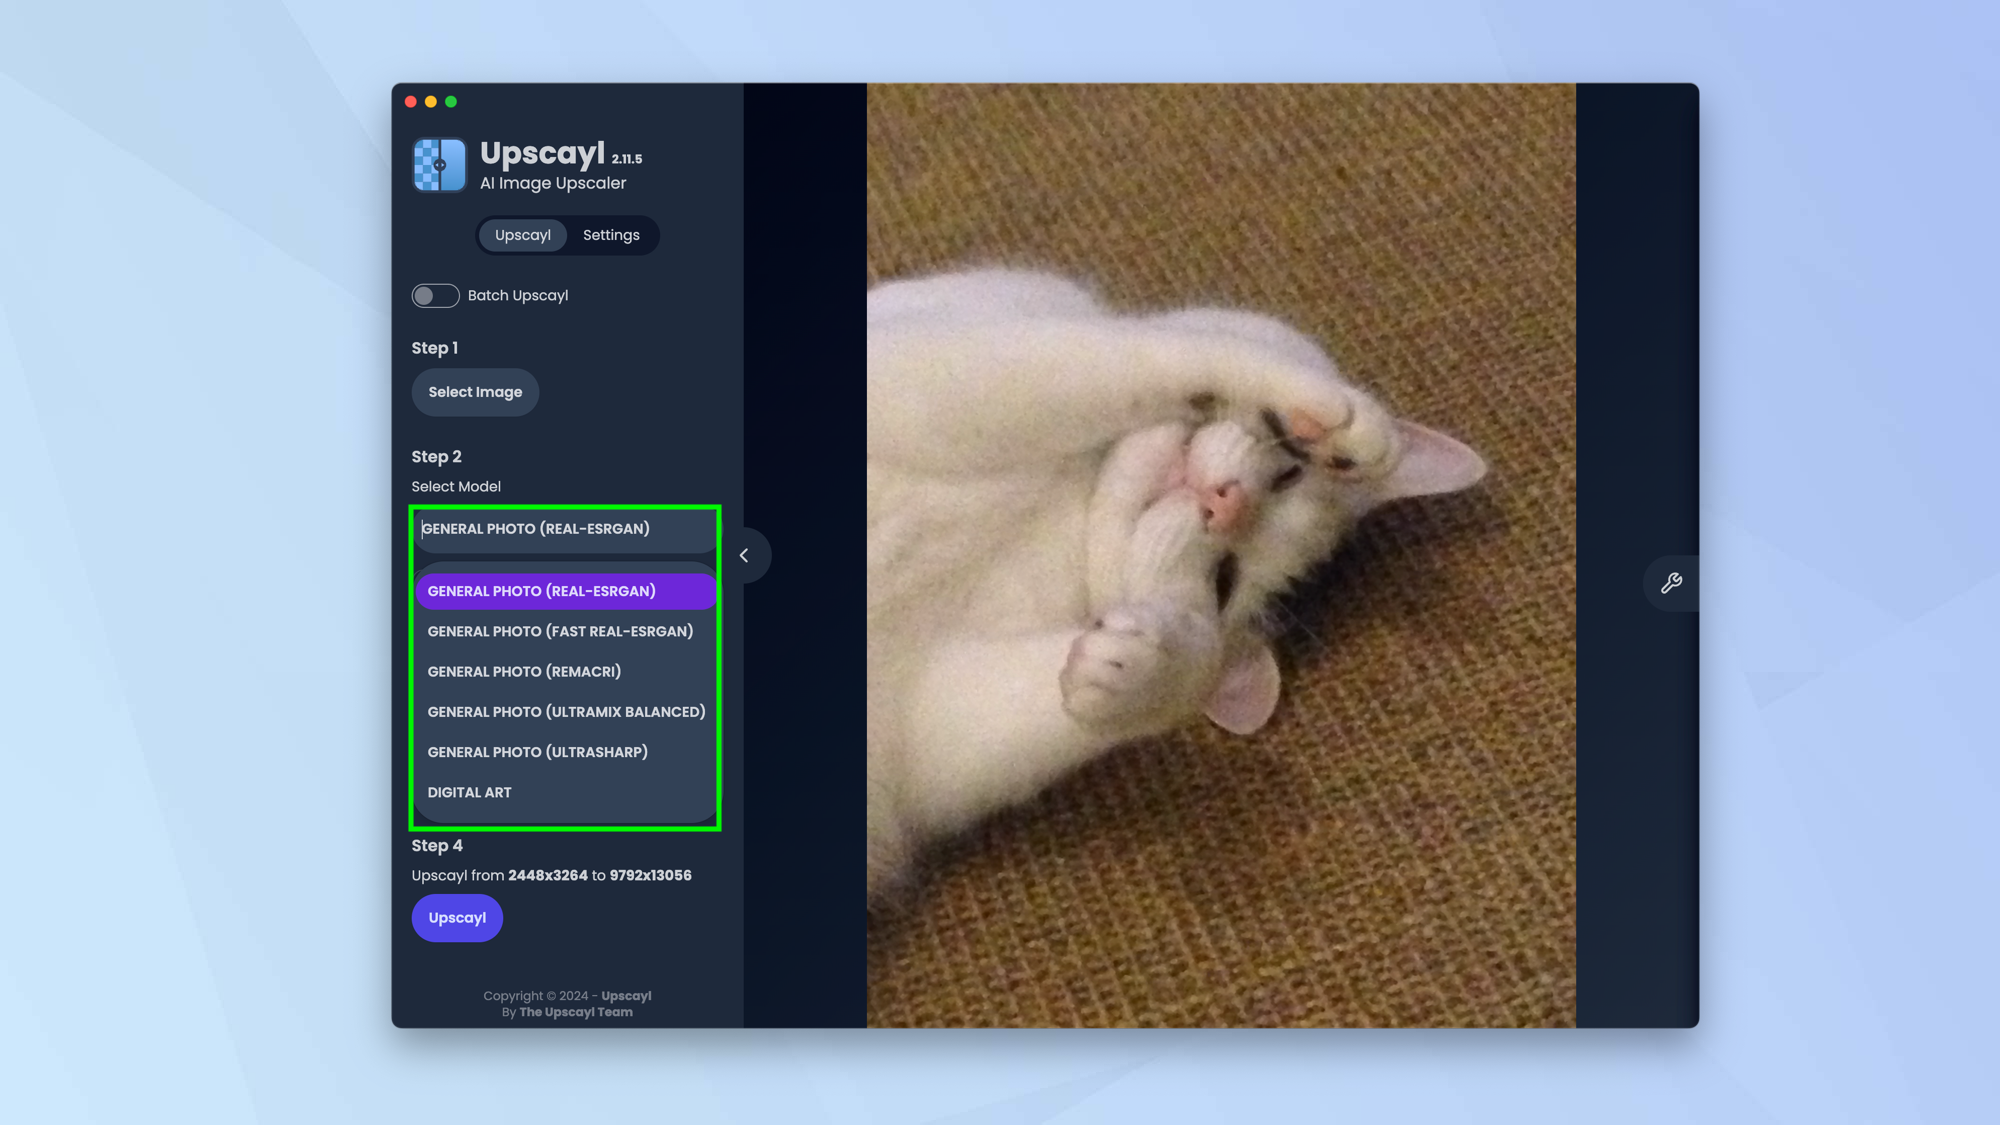
With your image(s) uploaded, you can click the button beneath Select Model. There are six different models to choose from, and we’d advise experimenting with each one. They range from real to ultra sharp and digital art.
3. Decide how you want to scale
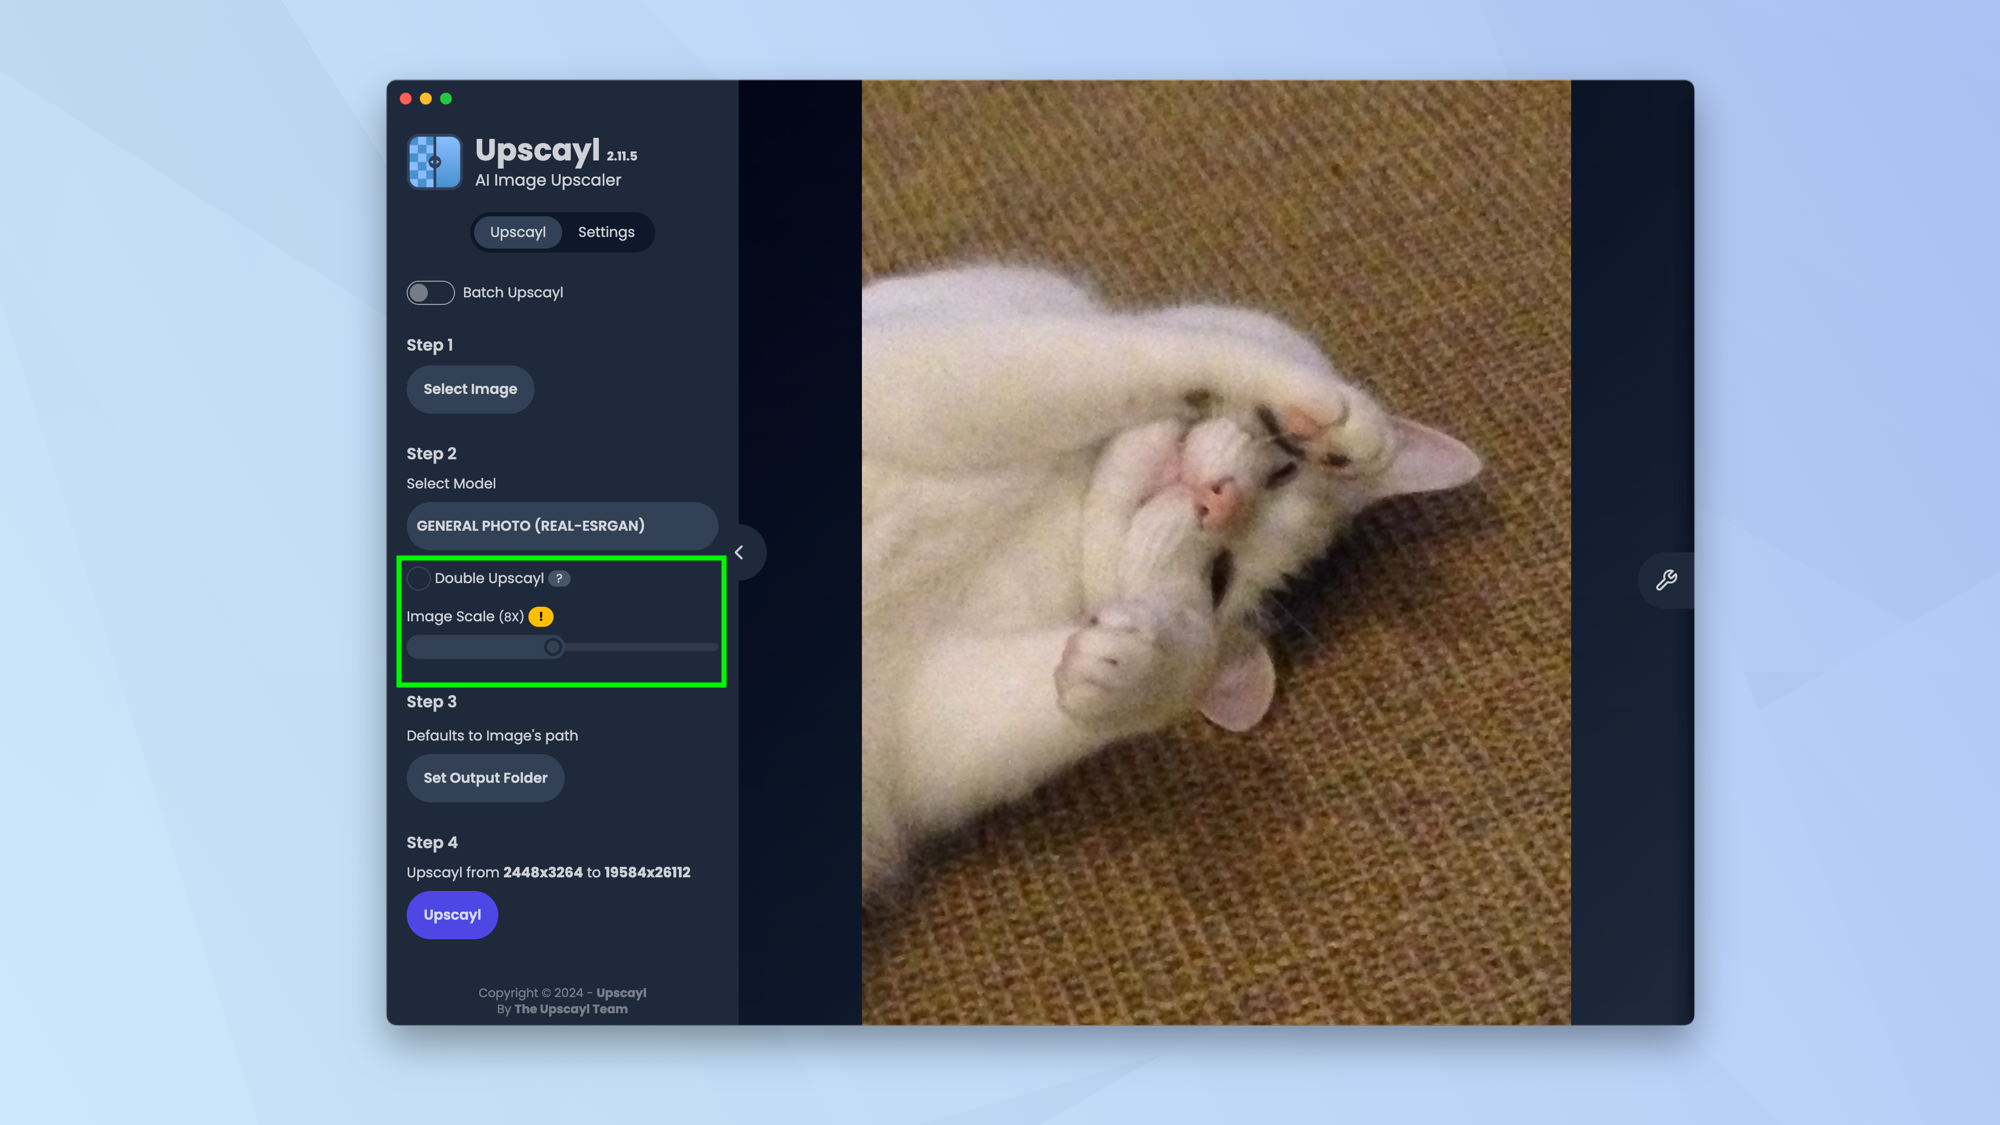
There are two options available to you if you’re uploading individual images. The first is the ability to click “double Upscayl” which gets AI to upscale the image twice but be aware this can put pressure on your computer’s processor.
The second option is the ability to move the Image Scale slider to determine how large a resolution you want your resulting image to be but be aware that anything over 4X (except 16X Double Upscayl) will only resize the image. It won’t use AI upscaling.
If you are batch uploading, you can only make use of the slider.
4. Set an output folder
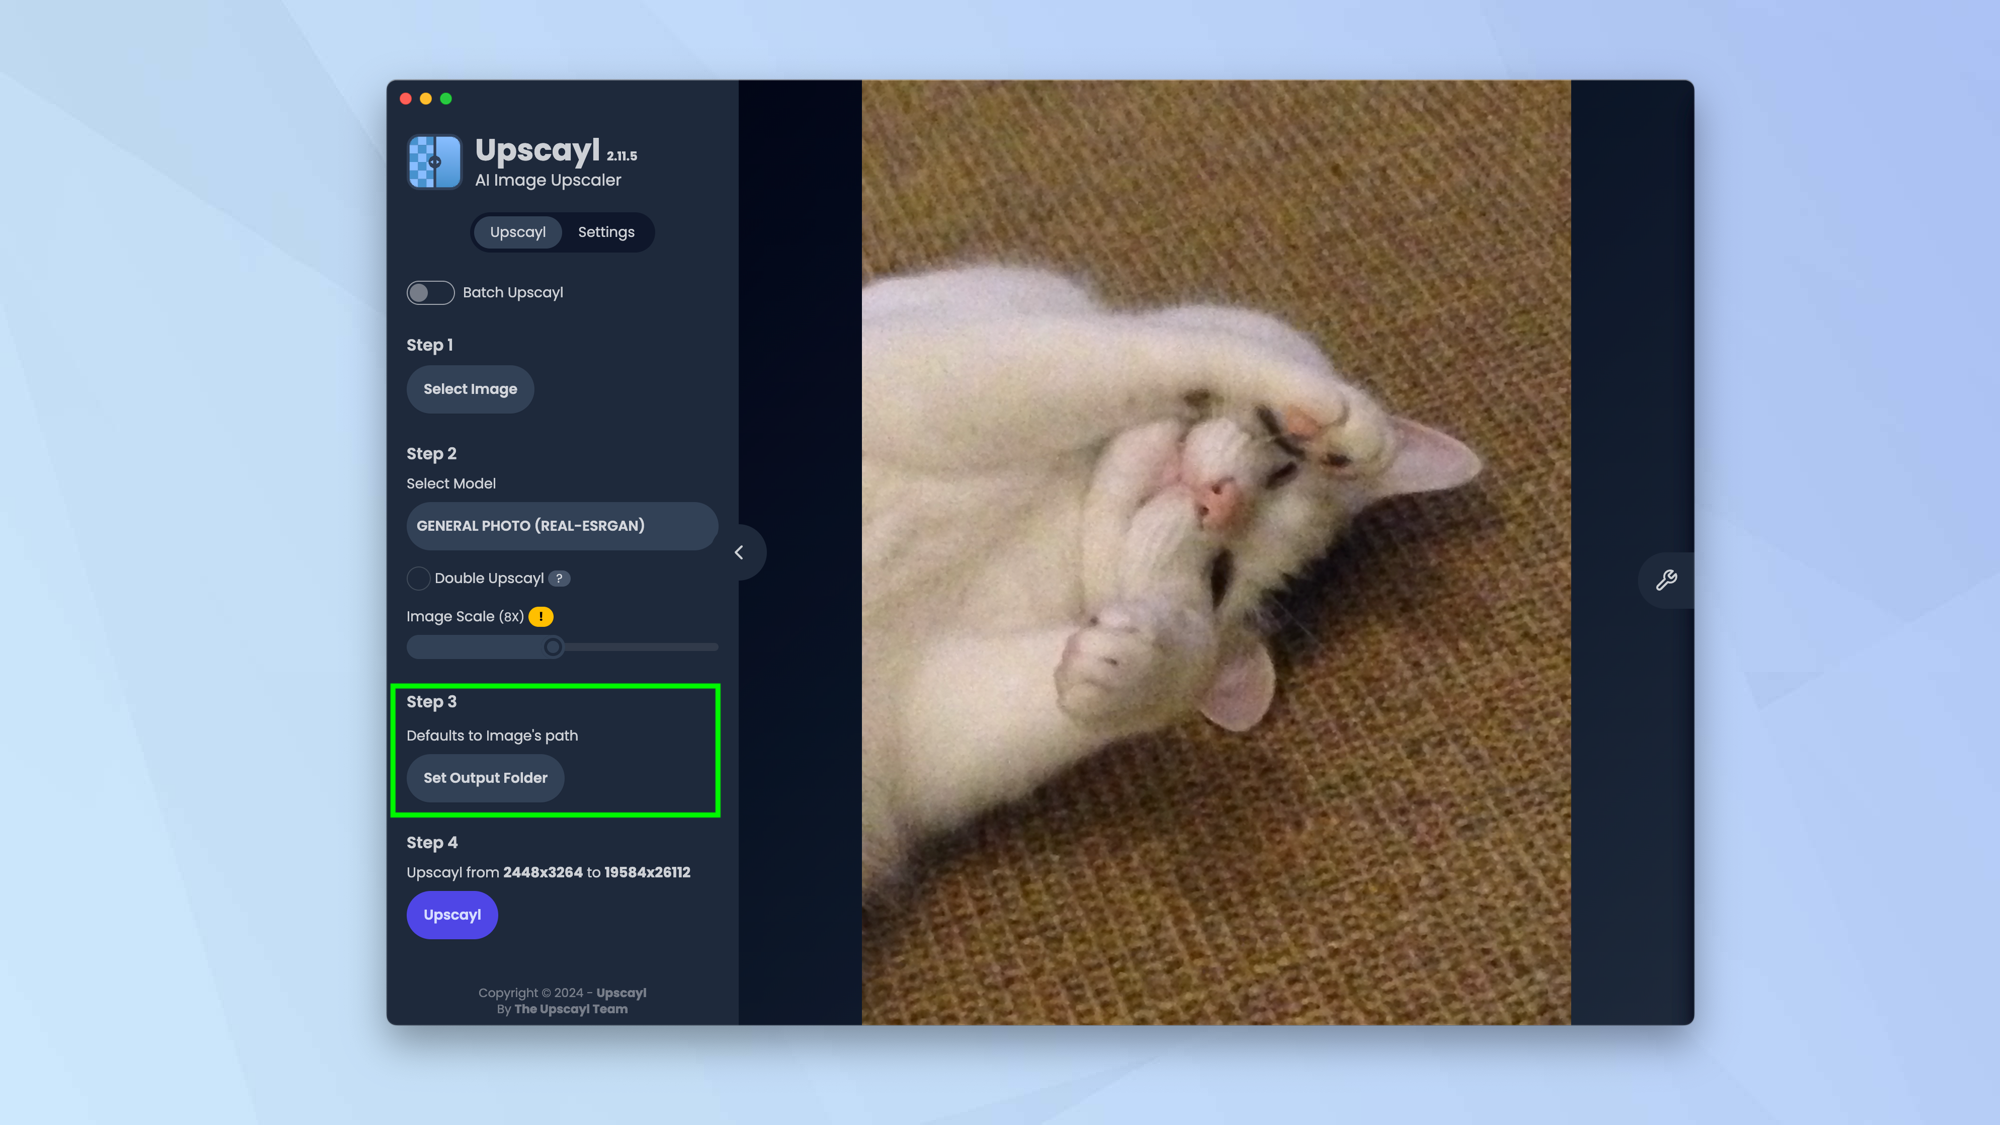
Now click Set Output Folder and choose a folder to save your upscaled images to.
5. Choose a file format
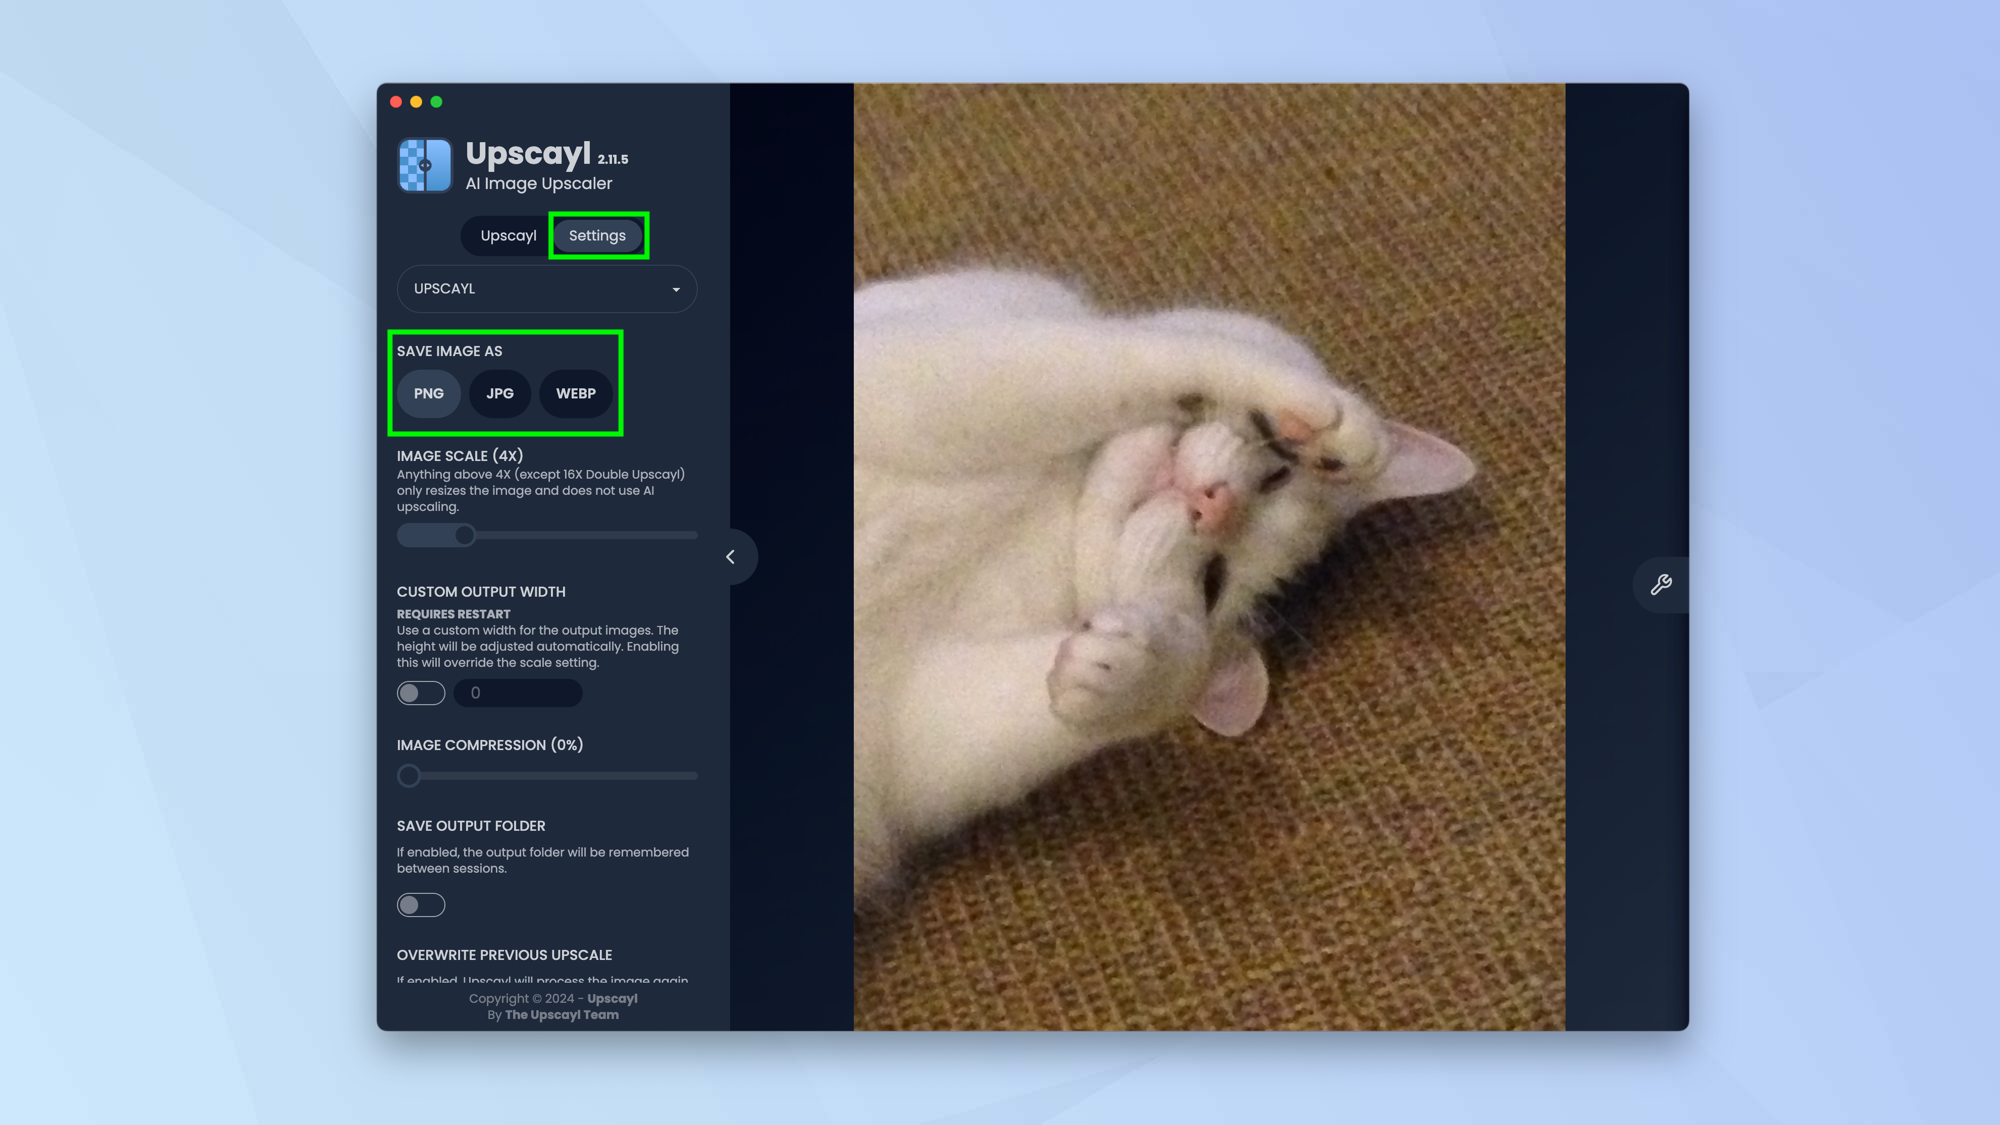
Select the Settings tab at the top of the screen and decide the file format you want to save your image as. You can choose from PNG, JPG and WEBP.
Explore the other settings if you want, but click the Upscayl tab to go back to the task in hand.
6. Click Upscayl
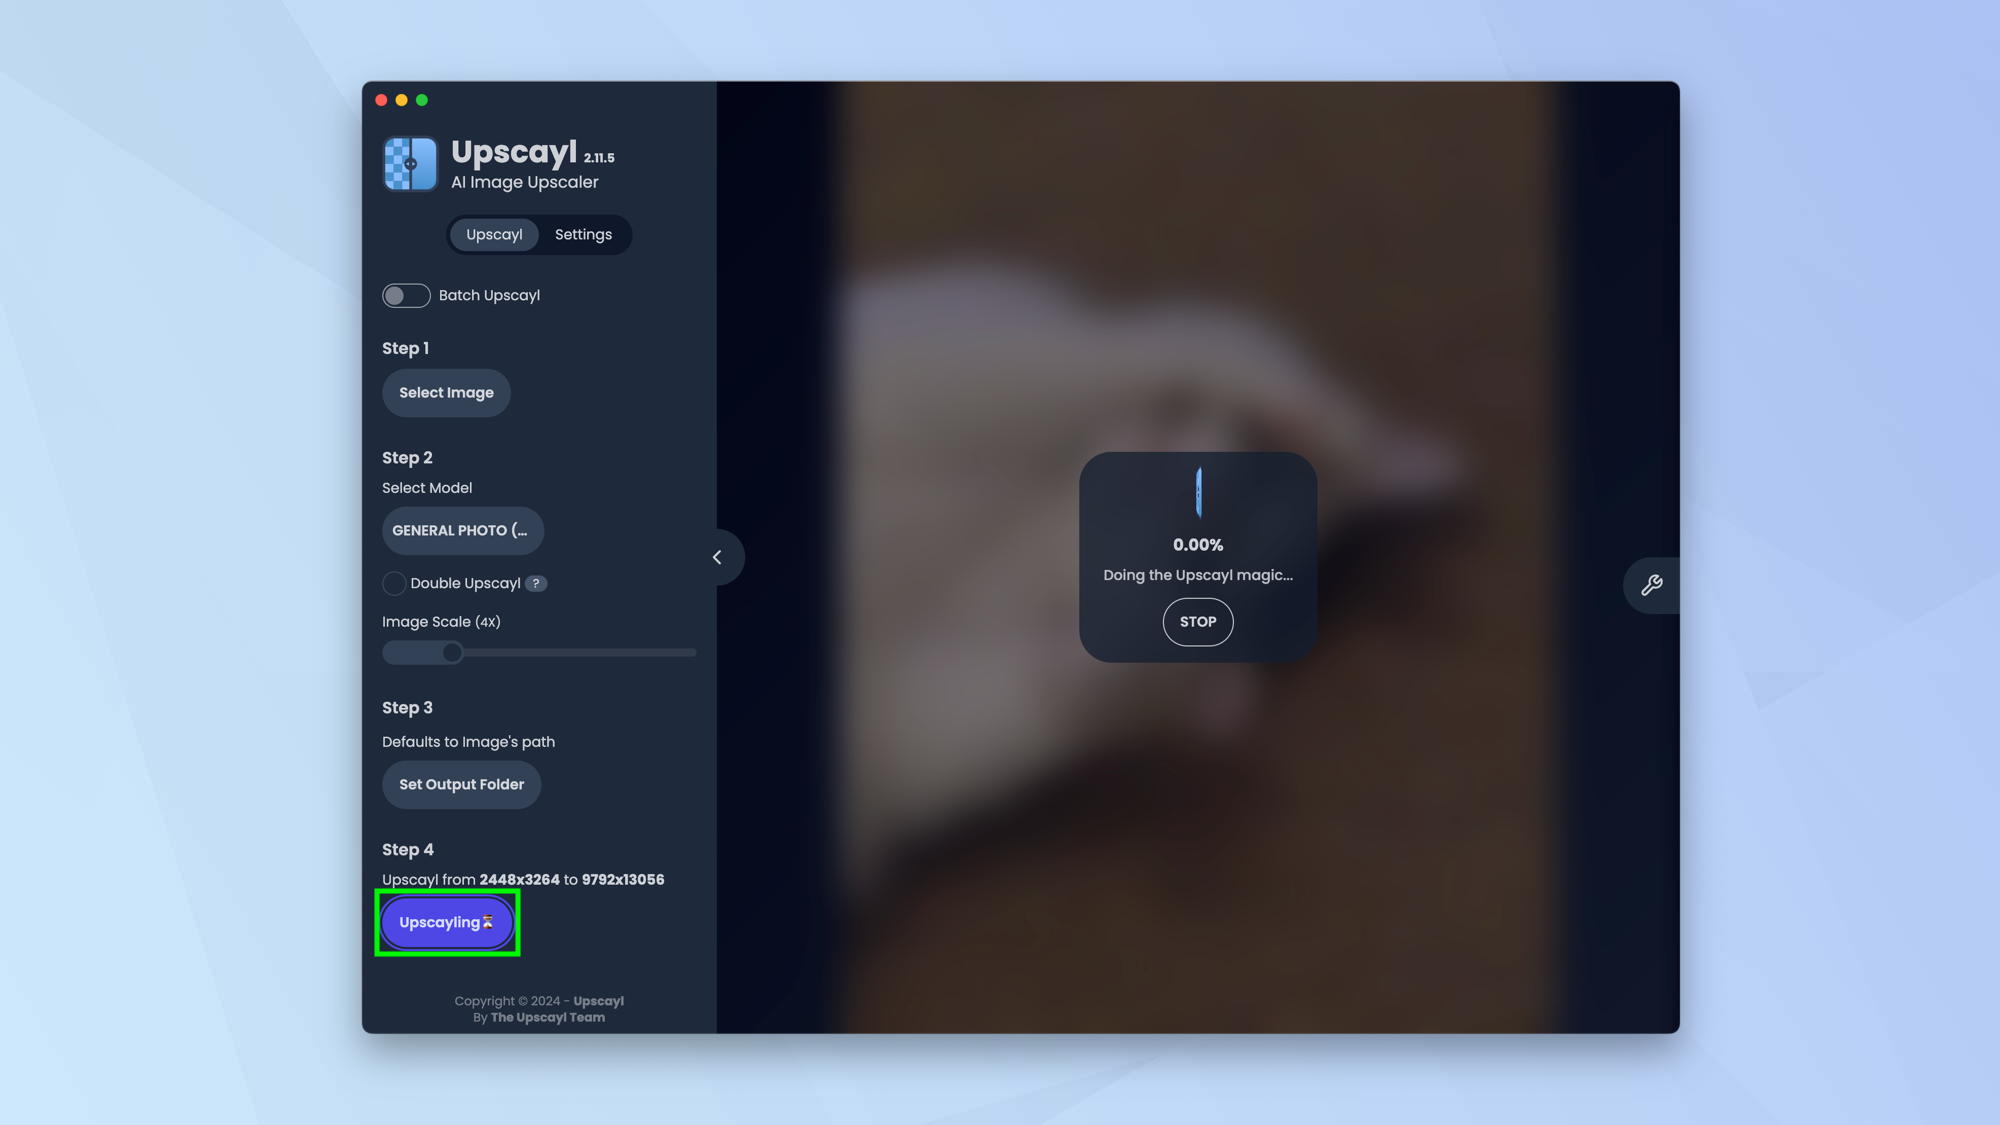
When you are ready, double-check the extent to which the resolution will change and click Upscayl to allow the app to work its magic. The process can take a little while.
7. Compare the results
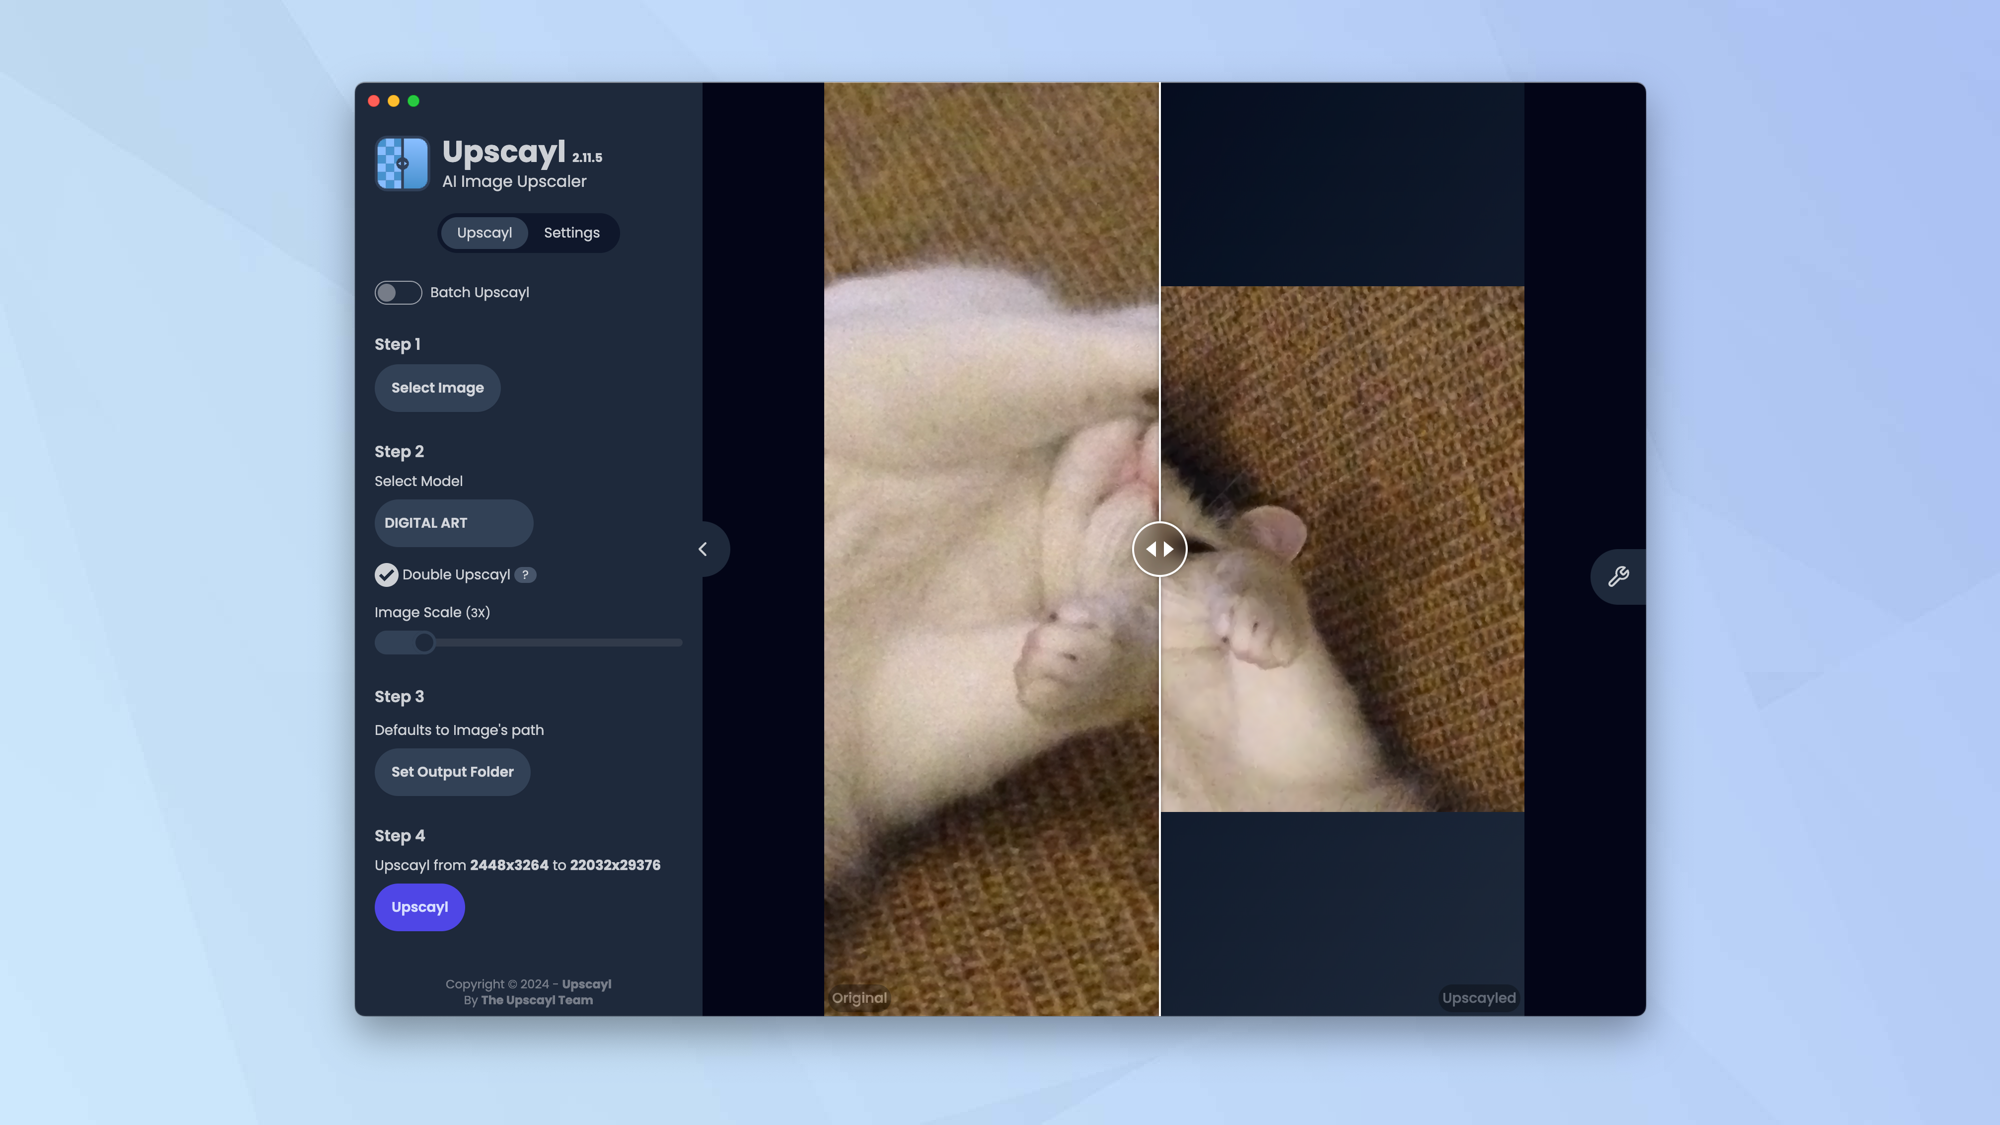
You will hopefully be happy with the results. Move the slider to see the before and after images for comparison.
Upscayl isn’t the only AI image editor around. You may want to learn how to use Midjourney’s new AI image editor, for example or check out how Grok can images using Flux. It’s also worth discovering how to use the Google Pixel 9 Reimagine AI feature for stunning photo edits.
Sign up to get the BEST of Tom's Guide direct to your inbox.
Get instant access to breaking news, the hottest reviews, great deals and helpful tips.

David Crookes is a freelance writer, reporter, editor and author. He has written for technology and gaming magazines including Retro Gamer, Web User, Micro Mart, MagPi, Android, iCreate, Total PC Gaming, T3 and Macworld. He has also covered crime, history, politics, education, health, sport, film, music and more, and been a producer for BBC Radio 5 Live.
